background image

FAST & FLUID MANAGEMENT 

A Unit of Idex Corporation


 Galileo 


12

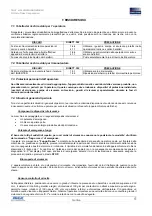
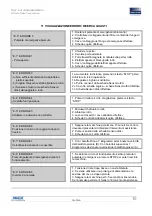
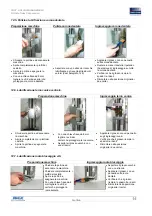
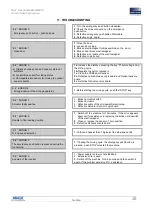
partire la macchina.


 Prima che il ciclo finisca, 

premere il tasto di 
emergenza rosso. 

 La rotazione deve 

arrestarsi mentre il display 
indica errore E-0.


  Il cestello si ferma in 

posizione casuale con i 
piatti chiusi e nessun tasto 
deve funzionare 

  Riarmare il tasto di 

emergenza ruotandolo in 
senso orario.


  Verificare che la portina 

venga sbloccata.


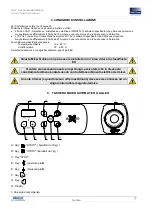
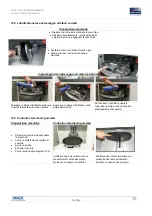
CONTROLLO VELOCITA’ (A macchina funzionante). 


Inserire un barattolo vuoto di altezza superiore ai 230 mm e richiudere la portina. 


Premere il tasto di start velocità alta. 


Dopo la chiusura piatti il display deve visualizzare errore E-7 


La macchina deve automaticamente iniziare il ciclo in velocità bassa. 


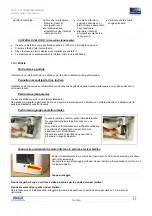
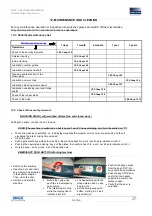
12.3. Pulizia 


Parti esterne e portina 


Utilizzare un normale prodotto non abrasivo per la pulizia domestica di superfici lavabili. 


Pannello comandi (parte blu), tastiera 


Utilizzare un panno umido eventualmente con del sapone neutro asciugando senza risciacquare con un panno asciutto o 
carta assorbente. 


Parti interne (carrozzeria). 


In caso di perdite di vernici, pulire immediatamente ! 
Se necessario togliere le parti secche con una spatola e succsivamente utilizzare un normale prodotto non abrasivo per la 
pulizia domestica di superfici lavabili. 


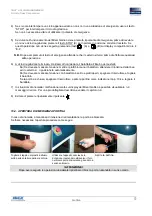
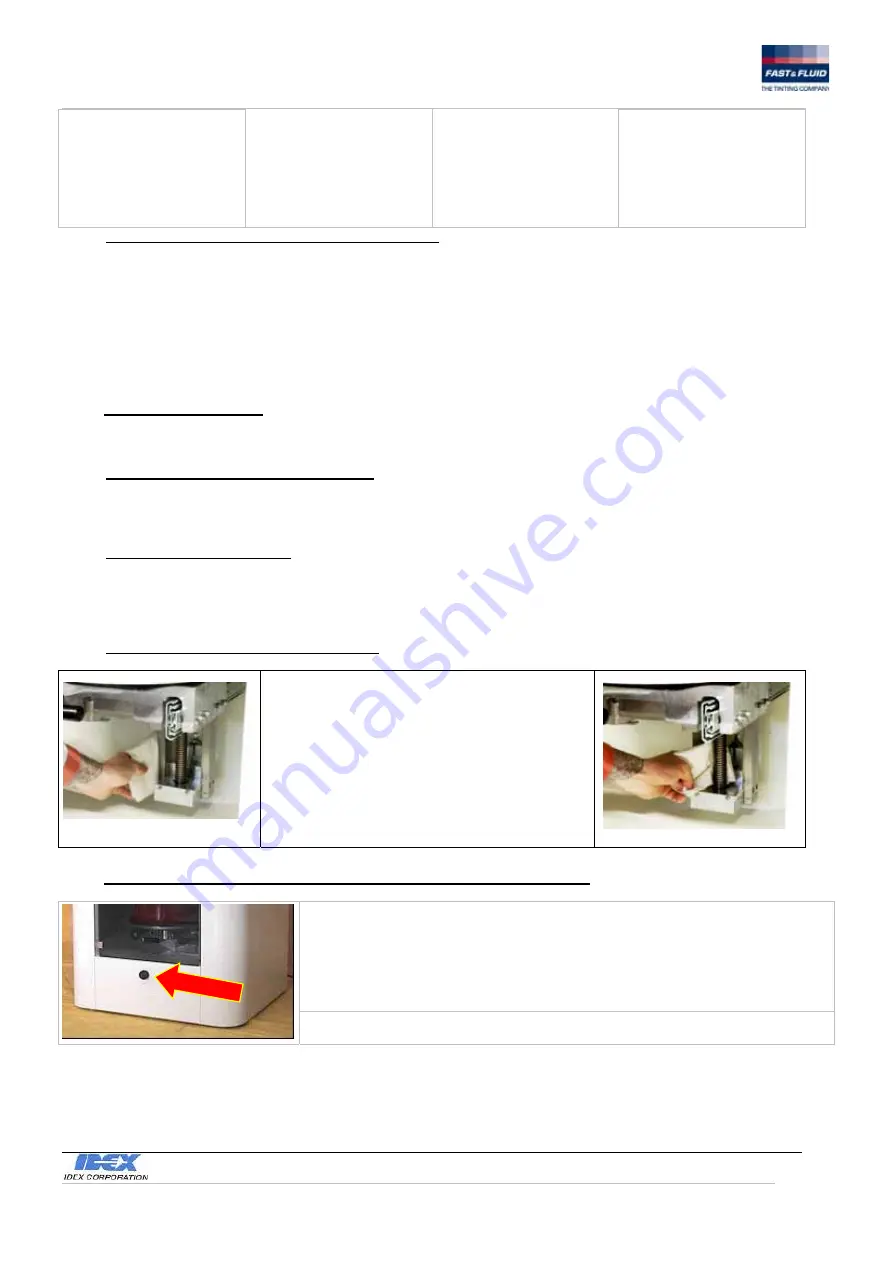
Parti interne (gruppo cestello rotante). 


In caso di perdite di vernici, pulire immediatamente! 
Se necessario togliere le parti secche con una 
spatola. 
Per pulire le parti lubrificate sarà sufficiente utilizzare 
uno straccio che asporterà i residui di vernice 
assieme al velo di lubrificante. 
Ripristinare subito la lubrificazione secondo le 
procedure in seguito illustrate. 


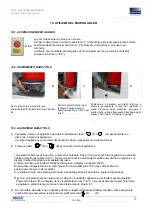
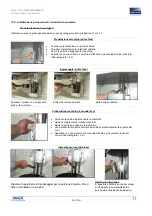
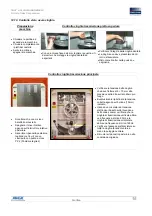
Fuoriuscite accidentali di vernici interne e/o esterne al mixer Galileo 


Pulire immediatamente la macchina ed il pavimento nella “Zona operatore” per evitare 
rischi di scivolamento. 
Svuotare la vasca di drenaggio svitando il tappo indicato e raccogliendo la vernice in un 
contenitore basso. 


Tappo drenaggio 


Non usare getti d’acqua o pulitrice ad alta pressione per la pulizia del mixer Galileo! 


Non usare solventi per pulire il mixer Galileo! 

Se ciò fosse proprio indispensabile, arieggiare la macchina spenta con la portina aperta per almeno  1 ora prima di 
riutilizzarla 

Содержание FAST & FLUID Galileo

Страница 1: ...riginali USER MANUAL Translation BEDIENUNGSANLEITUNG bersetzung MANUEL OP RATIONNEL Traduction BRUGERVEJLEDNING Oversatting FAST FLUID MANAGEMENT A Unit of IDEX Corporation Hub van Doorneweg 31 2171KZ...

Страница 2: ...9 2 Erkl rung des intellektuellen Eigentumsanspruchs 34 2 D claration de droits la propri t intellectuelle 49 3 Technische Eigenschaften 34 3 Sp cifications techniques 49 4 Garantiebestimmungen 35 4 C...

Страница 3: ...archiviata anche su computer in qualsiasi forma o con qualunque mezzo senza la preventiva autorizzazione scritta di un funzionario FAST FLUID MANAGEMENT 3 SPECIFICHE TECNICHE UNI EN ISO 12100 1 2005 S...

Страница 4: ...manutenzione o mancato rispetto delle istruzioni contemplate in questo manuale Le presenti condizioni trovano applicazione in assenza di altre condizioni espressamente pattuite 5 DESCRIZIONE GENERALE...

Страница 5: ...e l ambiente dove la macchina installata sia conforme alle Norme vigenti necessario un permesso emesso dai vigili del fuoco o dalle autorit competenti e evitare una concentrazione pericolosa di baratt...

Страница 6: ...uazioni d incendio apparecchiature elettriche Componenti e dispositivi di sicurezza La macchina equipaggiata con i seguenti dispositivi di sicurezza Un pulsante d emergenza Un blocco apertura porta Un...

Страница 7: ...e una rete di messa a terra secondo le Normative Le condizioni ambientali devono essere Temperatura ambiente 10 a 40 C Umidit relativa 30 a 90 Durante l installazione consigliabile utilizzare i guanti...

Страница 8: ...r aumentare o diminuire il tempo di agitazione Il tempo di agitazione resta memorizzato anche dopo lo spegnimento della macchina 2 Premere i tasti A o B per avviare il ciclo di agitazione I due piatti...

Страница 9: ...l barattolo attendere il ripristino della linea ed il cestello si riposizioner automaticamente 6b Se dovesse mancare tensione con barattolo inserito e piatti aperti spegnere l interruttore e togliere...

Страница 10: ...4 Cestello fuori posizione 1 Prima di iniziare il ciclo di agitazione premere il tasto STOP E 5 ERRORE 5 Attuatore in posizione non corretta 1 Microswitch attuatore rotto 2 Attuatore rotto 3 cavo micr...

Страница 11: ...Cap 12 10 12 2 Controllo elementi di sicurezza BLOCCOPORTA A macchina spenta e portina chiusa Tirando la maniglia la portina non deve aprirsi PORTINA A macchina in tensione ma non funzionante Spina in...

Страница 12: ...ta assorbente Parti interne carrozzeria In caso di perdite di vernici pulire immediatamente Se necessario togliere le parti secche con una spatola e succsivamente utilizzare un normale prodotto non ab...

Страница 13: ...ima fase Applicare il grasso con un pennello sulle guide verticali Sulle viti di comando piatti Sulla barra scanalata Preparazione macchina seconda fase Chiudere la portina ed accendere la macchina Ap...

Страница 14: ...entrale Preparazione macchina Ingrassaggio terna conica Chiudere la portina ed accendere la macchina Aprire completamente i piatti del cestello Aprire la portina e spegnere la macchina Con una chiave...

Страница 15: ...zione macchina Controllo stato dischi gommati Chiudere la portina ed accendere la macchina Aprire completamente i piatti del cestello Aprire la portina Estrarre il carrello Pulire i piatti vedi paragr...

Страница 16: ...ella cinghia che deve flettere di 5 10 mm alla pressione delle dita sul lato libero pi lungo Eventualmente ripristinare la tensione corretta agendo sul bullone 13 mm indicato Usando un misuratore di t...

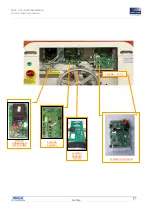
Страница 17: ...FAST FLUID MANAGEMENT A Unit of Idex Corporation Galileo 17 SCHEDA CONTROLLO ATTUATORE SCHEDA LOGICA SCHEDA SENSORI OTTICI SCHEDA INVERTER FILTRO CAVO...

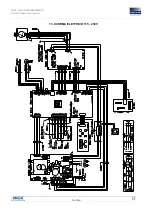
Страница 18: ...FAST FLUID MANAGEMENT A Unit of Idex Corporation Galileo 18 13 SCHEMA ELETTRICO 115 230V...

Страница 19: ...TARY NOTICE The information contained in this manual is property of FAST FLUID MANAGEMENT This manual has been prepared expressly for the purpose of assisting in the use and general maintenance of thi...

Страница 20: ...ixer without written approval and or by unauthorized personnel in case of non fulfillment of the maintenance operation or other instructions like e g reflected in this manual The above conditions are...

Страница 21: ...Mixer after maintenance 5 Check that the environment where the machine is installed conforms to local regulations a permit issued by the fire marshall or by local autority may be necessary and avoid d...

Страница 22: ...ry to have a powder extinguisher for possible fire situations electrical equipments Security components and devices The machine is equipped with the following security devices An emergency push button...

Страница 23: ...mic protection of 25 Amp and a ground net following the rules Environmental conditions should be within the following limits Ambient air temperature 10 to 40 C Relative humidity 30 to 90 During the in...

Страница 24: ...mains memorized between cycles 2 Push the keys A and B to start the stirring cycle The two mobile plates move untill the can is pressed After about 2 seconds the mixing cycle begins at slow velocity t...

Страница 25: ...If the power supply is absent when the plates block the can wait for the setting of the line and the basket will position automatically 6 b If the power supply is absent with the can inside switch off...

Страница 26: ...tical sensors board 3c Defective Optical sensors board E 4 ERROR 4 Wrong position of the mixing apparatus 1 Before starting the mixing cycle push the STOP key E 5 ERROR 5 Actuator faulty position 1 Br...

Страница 27: ...open DOOR The machine is switched on but it doesn t work Connected plug and turn the switch on I When the machine is switched on the display visualizes the program version for some seconds and then it...

Страница 28: ...eaning of washable domestic surfaces Inside parts turning basket group If there are paint leakages clean immediately If necessary take away the dried part using a paddle To clean the lubricated parts...

Страница 29: ...ates command screws Grease the shaft Preparation of the machine second phase Close the door and switch on the machine Open completely the basket plates Open the door and switch off the machine Now it...

Страница 30: ...ear group Preparation of the machine Greasing of the triple gear group Close the door and switch on the machine Open completely the basket plates Open the door and switch off the machine By using an 8...

Страница 31: ...bber disks Preparation of the machine Check of the rubber disks Close the door and switch on the machine Open completely the basket plates Open the door Take out the trolley Clean the plates see parag...

Страница 32: ...make sure that frequency of the vertical transmission belt is about 90Hz and that frequency of horizontal transmission belt is about 125Hz Verify that the belt hasn t any grindings while turning manu...

Страница 33: ...FAST FLUID MANAGEMENT A Unit of Idex Corporation Galileo 33 13 ELECTRICAL DIAGRAM 115 230V...

Страница 34: ...diesen Betriebsanweisungen enthaltene Information basiert auf Daten die intellektuelles Eigentum der FAST FLUID MANAGEMENT sind Diese Betriebsanweisungen werden eigens als Hilfe zum Gebrauch und zur...

Страница 35: ...iger Ausf hrung der Wartungsarbeiten oder bei Nichtbeachten der in diesen Betriebsanweisungen enthaltenen Anleitungen Die vorliegenden Bedingungen findet Verwendung in Ermangelung anderen ausdr cklich...

Страница 36: ...estigt sein 2 Schutzvorrichtungen Kontrollsystem und T rsperre nicht au er Betrieb setzen 3 Vor jeder Inspektions und Wartungsarbeit am Mixer Galileo muss das Netzkabel zur Stromversorgung unterbroche...

Страница 37: ...r ffnungssperre Sensor f r nicht geeignete Drehgeschwindigkeit Pilzf rmiger Not Ausschalter Es ist empfehlenswert dass das gesamte Abteilungspersonal aus klar ersichtlichen Sicherheitsgr nden die Posi...

Страница 38: ...n Erdungsanlage garantieren UMGEBUNGSBEDINGUNGEN Raumtemperatur 10 bis 40 C Relative Luftfeuchtigkeit 30 bis 90 Bei der Installation sollten Schutzhandschuhe verwendet werden Dieser Mixer Galileo darf...

Страница 39: ...instellen durch die Tasten F und G Sch ttelzeit verl ngern oder verk rzen Die Sch ttelzeit bleibt auch nach Ausschalten der Maschine gespeichert 2 Tasten A und B dr cken um Sch ttelvorgang zu starten...

Страница 40: ...ehmen 6a Bei Stromausfall w hrend die Scheiben die Dose blockieren abwarten bis die Leitung wieder hergestellt ist der Korb kehrt automatisch in seine Position zur ck 6b Bei Stromausfall mit eingestel...

Страница 41: ...optischen Sensoren ist defekt E 4 FEHLER 4 falsche Korbeinstellung 1 Vor Beginn des Sch ttelvorgangs STOP Taste dr cken E 5 FEHLER 5 Antrieb in falscher Position 1 Antrieb Microswitch ist kaputt 2 Ant...

Страница 42: ...Stecker angeschlossen und Schalter auf I Sobald die Maschine eingestellt wird erscheint auf der ANZEIGE einige Sekunden lang die Version des Programms danach wird die letzte eingestellte Mischzeit an...

Страница 43: ...nicht kratzendes Hausreinigungsmittel f r waschbare Oberfl chen verwenden Innenteile Drehkorbgruppe Im Fall von Lackaustritt sofort reinigen Falls notwendig trockene Teile mit einem Spachtel entfernen...

Страница 44: ...etten erster Schritt Fett mit einem Pinsel auf die senkrechten F hrungen auf Schrauben und flache Tasten auf Riffelstange auftragen Vorbereitung der Maschine zweiter Schritt T rchen schlie en und Masc...

Страница 45: ...aschine Einfetten der konischen Dreiergruppe T rchen schlie en und Maschine einstellen Scheiben des Korbs vollkommen ffnen T rchen ffnen und Maschine ausschalten Mit einem festen Schraubenschl ssel 8m...

Страница 46: ...en Vorbereitung der Maschine Kontrolle Zustand gummierte Scheiben T rchen schlie en und Maschine einstellen Scheiben des Korbs vollkommen ffnen T rchen ffnen Wagen herausziehen Scheiben reinigen siehe...

Страница 47: ...wenden um zu kontrollieren dass der senkrechte Triebriemen eine Frequenz von 90Hz besitzt und der waagerechte Triebriemen eine Frequenz von ca 125 Hz Pr fen dass der Triebriemen keine ausgefransten St...

Страница 48: ...FAST FLUID MANAGEMENT A Unit of Idex Corporation Galileo 48 13 ELEKTROSCHALTPLAN 115 230V...

Страница 49: ...ELLE D claration de droits la propri t intellectuelle Les renseignements contenus dans ce manuel sont bas s sur des donn es qui constituent la propriet intellectuelle de FAST FLUID MANAGEMENT Ce manue...

Страница 50: ...l non autoris en cas de non d roulement complet des op rations d entretien ou en cas de manqu respect des instructions crites dans ce manuel Les conditions pr sentes peuvent tre appliqu es en absence...

Страница 51: ...s ret pendant l usage 1 Pour pr venir des accidents tous les panneaux de la carrosserie doivent tre mont s sur le Mixer Galileo et d ment fix s 2 Ne pas violer les protections du syst me de contr le...

Страница 52: ...CAUTION Blessures ou crasements pendant des op rations de charge et d charge des bo tes 1 6 4 4 1 1 Utiliser les gants et les chaussures de s ret protectrices dans les op rations de charge et d charg...

Страница 53: ...t des r gimes de rotation de 100 g m pour les r cipients avec hauteurs sup rieures ce seuil au contraire il permet des rotations de 100 ou 200 g m avec hauteurs inf rieurs discr tion de l op rateur Ce...

Страница 54: ...gence 10 USAGE DU MIXER GALILEO 10 1 MISE SOUS TENSION DU MIXER GALILEO Photo A Quand la machine est teinte la porte ne s ouvre pas Pour allumer le mixer on doit tourner l interrupteur principal en po...

Страница 55: ...Apr s la phase de d c l ration la machine s arr te en visualisant P 0 phase d arr t avec positionnement z ro de le panier Quand le panier est ferm les deux plateaux s ouvrent et on peut extraire la bo...

Страница 56: ...n cas d anomalie mauvais fonctionnement le display du Mixer Galileo peut visualiser n 9 messages d erreur Pour une description plus d taill e voir le chapitre n 9 8 viter de presser plusieurs fois le...

Страница 57: ...e 3 c Platine Senseurs optiques d fectueuse E 4 ERREUR 4 Panier hors de position 1 Avant de commencer le cycle d agitation appuyer le bouton STOP E 5 ERREUR 5 Actionneur en position non correct 1 Micr...

Страница 58: ...ier d blocage et arbres chariot OUI Chap 12 8 Contr le tat disques gomm s OUI Chap 12 9 Contr le tat usure courroies OUI Chap 12 10 12 2 Contr le l ments de s ret BLOCAGE PORTE Quand la machine est te...

Страница 59: ...e haut sup rieure aux 230 mm et fermer la petite porte Appuyer le bouton start haute vitesse Apr s la fermeture des plats le display doit visualiser erreur E 7 La machine doit commencer le cycle basse...

Страница 60: ...et arbre rain Produits lubrifiants conseill s Utiliser une graisse jaune g n rique adh sive pour les engrenages d couverts gradation N G L I 2 Pr paration de la machine premi re phase Allumer la machi...

Страница 61: ...aissage de la couronne dent e Fermer la porte et allumer la machine Ouvrir compl tement les plats du panier Ouvrir la porte et teindre la machine Enlever les vis des deux carter qui prot gent la couro...

Страница 62: ...ne 12 7 Graissage de la roue de blocage des vis Pr paration de la machine Graissage roue de blocage Fermer la porte et allumer la machine Fermer les plats du panier Ouvrir la porte et teindre la machi...

Страница 63: ...s plats du panier Ouvrir la porte Extraire le chariot Nettoyer les plats voir paragraphe 12 3 V rifier que le disque inf rieur ne pr sente pas cannelures excessivement profondes ou consommations qui n...

Страница 64: ...smission verticale ait une fr quence dans 90 HZ et que la courroie de transmission horizontale ait une fr quence dans 125 HZ V rifier l absence des effilochages sur toute la courroie en tournant la ma...

Страница 65: ...FAST FLUID MANAGEMENT A Unit of Idex Corporation Galileo 65 13 SCH MA LECTRIQUE 115...

Страница 66: ...2 Ophavsrettigheder Den information der er anf rt i denne manual tilh rer FAST FLUID MANAGEMENT Denne manual er udarbejdet udelukkende med det form l at give vejledning i brug og almindelig vedligehol...

Страница 67: ...ion forandringer af Galileo Blander udf rt uden skriftlig accept af uautoriseret personel I tilf lde af manglende opfyldelses af vedligeholds brugs eller andre anvisninger der er angivet i denne manua...

Страница 68: ...ighed kan v re n dvendig og undg farlig koncentration af malerb tter rundt om maskinen Det er forbudt at opbevarer brandfarlige materialer eller andre produkter indeni maskinen Det er forbudt at anven...

Страница 69: ...oner Der best r ikke nogen generelle faresituationer F eks brand udsr mning spredning af farlige stoffer men i alle tilf lde er det n dvendigt at have en pulverslukker til r dighed for mulig brand ele...

Страница 70: ...to 40 C Relativ fugtighed 30 to 90 Under installationer er det tilr deligt at bruge beskyttelseshandsker for at undg personskade Denne blander m ikke installeres i omr der der er klassificeret som EX...

Страница 71: ...o D Luk d ren 10 3 MIXING AF SPANDE 1 V lg den nskede blandetid ved at trykke p tasterne og for at ge elle mindske tiden Maskine husker den indstillede tid 2 Tryk p knapperne A eller B for at starte b...

Страница 72: ...stoppet 6 N r blandecyklus er slut s husk at tage spanden ud af maskinen med det samme 6 a Hvis str mforsyning afbrydes mens en spand er fastsp ndt i maskinen s vent til forsyningen kommer tilbage og...

Страница 73: ...nsorkort og Logikkort 3c Optisk sensorkort Defekt E 4 FEJL 4 Forkert position af blandeenhed 1 F r start af blandecyklus tryk p STOP tasten E 5 FEJL 5 Starter i fejl position 1 Defekt kontakt til Star...

Страница 74: ...maskinen slukket og d r lukket Ved tr k i d rh ndtaget m d ren ikke kunne bnes D R Makinen er t ndt men arbejder ikke Stikprop isat og hovedafbryder bag p maskinen er t ndt I N r maskine t ndes viser...

Страница 75: ...er er spildt maling rens af med det samme Hvis det er n dvendigt fjern t rret maling med en spartel For at reng re smurte dele vil det v re tilstr kkeligt at bruge en klud til at fjerne resterende mal...

Страница 76: ...pensel Sm r spindler der betjener sp ndeplade Sm r akslen Klarg ring af maskine anden fase Luk d ren og t nd maskine K r sp ndepladerne helt fra hinanden ben d ren og sluk maskinen Nu er der adgang t...

Страница 77: ...midterste koniske tandhjul Klarg ring af maskinen Greasing of the triple gear group Luk d ren og t nd maskine K r sp ndepladerne helt fra hinanden ben d ren og sluk maskinen Brug en 8mm fastn gle til...

Страница 78: ...et 12 9 Kontrol af gummiplader Klarg ring af maskine Kontrol af gummiplader Luk d r og t nd maskinen K r sp ndepladerne helt fra hinanden ben d ren Tr k sp ndeplade ud Reng r pladen se paragraf 12 3 K...

Страница 79: ...ultralyd V r sikker p at frekvensen p den lodrette transmissions rem er omkring 90 Hz og at frekvensen p den horisontale transmissions rem er omkring 125 Hz Kontroller at remmene ikke har skader eller...

Страница 80: ...FAST FLUID MANAGEMENT A Unit of Idex Corporation Galileo 80 13 EI DIAGRAM 115 V 230 V...

Страница 81: ...the right Waste Collection Centres Abusive removal is forbidden by law Bezug Rechtsverordnung Nr 151 vom 25 Juli 2005 Durchf hrung der Richtlinien 2002 95 EG 2002 96 EG und 2003 108 EG in Bezug auf d...

Страница 82: ...edrijven worden toevertrouwd Illegale afvalverwerking is bij wet verboden Con referencia a la Ley 25 de julio de 2205 n 151 Actuaci n de la Directiva 2002 95 CE 2002 96 CE y 2003 108 CE relativas a la...

Отзывы: