50
Installation and Servicing
SECTION 3 - SERVICING
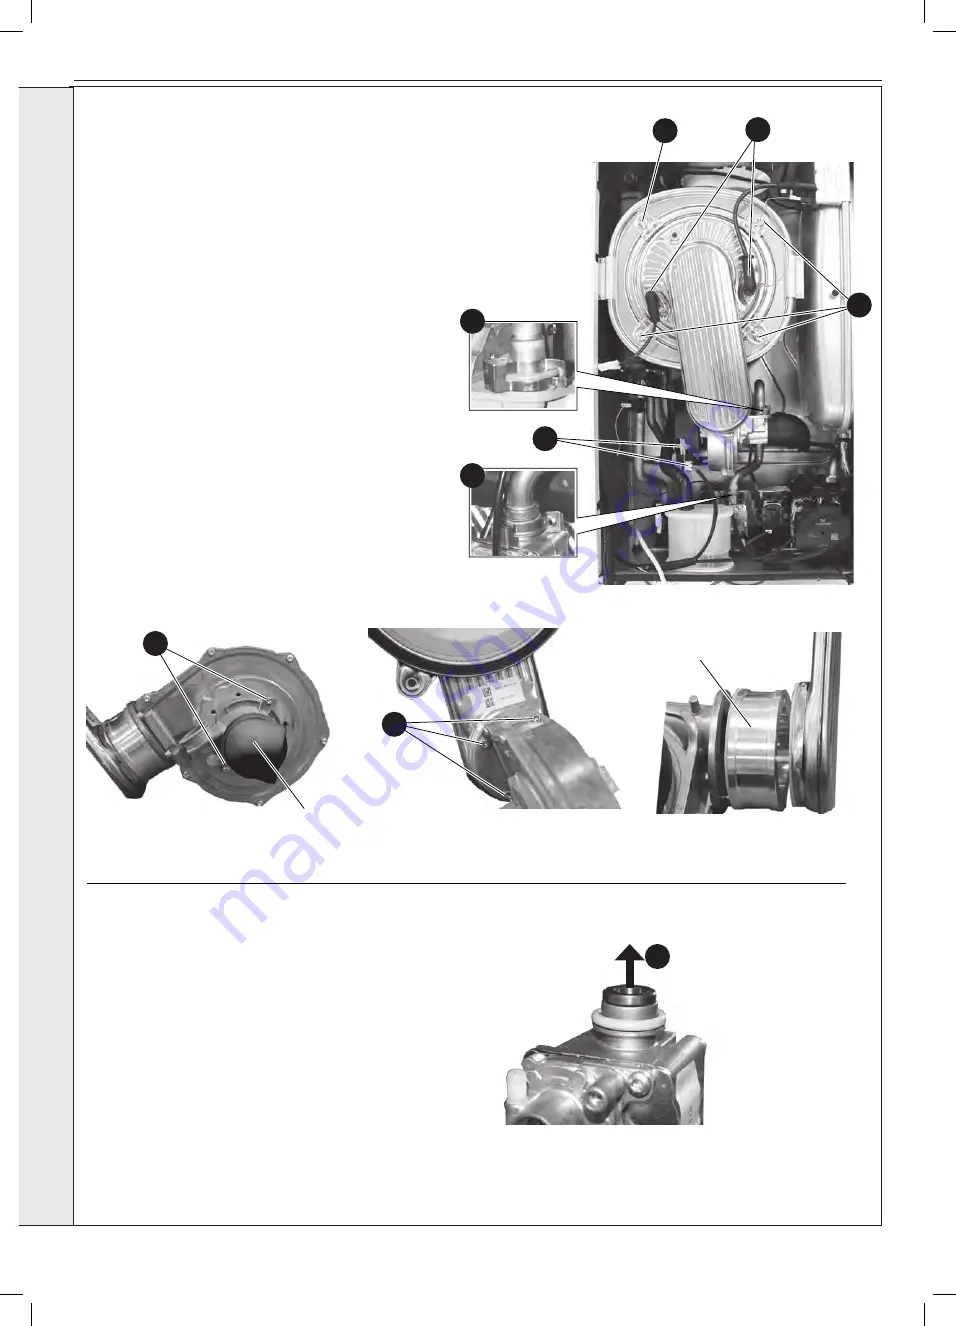
3.4 FAN AND VENTURI ASSEMBLY REMOVAL AND CLEANING
1. Refer to Sections 3.2 & 3.3.
2. Remove the ignition, detection and earth leads.
3. Remove the 2 clips securing the gas inlet pipe
and remove the pipe.
4. Remove the fan low voltage and mains connections.
5. Remove the 4 securing nuts retaining the burner/
fan assembly.
6. Remove the assembly from the heat exchanger.
7. To remove the venturi release the 2 securing
screws to gain access for cleaning.
8. When replacing check the sealing gasket is
undamaged or replace as necessary, and secure
with the 2 screws.
*Note a noise damper is fitted to the venturi inlet
on 32 & 40 kW models.
9. To remove the fan, first remove the venturi as
above and release the 3 screws securing the fan
to the burner. (
Note a mounting spacer is fitted to
the fan outlet on 40 model only)
10. Remove the fan from the burner assembly. When
replacing check the sealing gasket is undamaged
or replace as necessary, and secure with the 3
screws.
3.5 REMOVAL OF INJECTOR
1. Refer to Sections 3.2 & 3.3.
2. Remove the 2 clips securing the gas inlet pipe and
remove the pipe, refer to Section 3.4.
3. Carefully ease the injector out of the gas valve.
4. Examine or clean as necessary.
5. Re-fit in reverse order ensuring the sealing o ring is in
good condition or replace if necessary.
6. Refit the gas pipe ensuring the seals are in good
condition and correctly located & secure with clips.
2
3
3
4
7
Noise Damper
Fitted only to 40kW & 32kW
models
Mounting Spacer
Fitted only to 40kW
Model
9
3
5
5
SER
VICING
Содержание VOGUE MAX COMBI 26
Страница 4: ...4 Installation and Servicing...
Страница 6: ...6 Installation and Servicing...
Страница 74: ......


