11
• All quick releases must be firmly
closed before you ride off.
• Make sure that all quick releases are
properly in place even if the bike was only left
unattended for a short period of time.
• The quick release lever must be close to the
frame, fork or seat post when it is closed!
• The tip of the quick release lever must al-
ways point towards the back when it is
closed. This ensures that it cannot open due
to contact during the ride.
Please lock down wheels and other
parts that are attached with quick re-
leases when you park your bicycle.
Quick-release axles
The current chassis are either equipped with
quick-release fasteners, screw connectors or
quick-release axles that basically work in the
same way as quick-release fasteners:
The axle is screwed into the dropout on the
side opposite the drive and then presses the two
parts of the fork against the hub located between
them. The hub and the axle are fastened with a
quick-release lever.
The following instructions refer particularly to
the quick-release axle of the Rockshox forks, but
are also generally applicable to other forks.
Inappropriately installed wheels may
shift while you are driving or detach
from the vehicle. This may damage
the vehicle and expose the driver to severe
and life-threatening injuries. It is therefore im-
portant to take note of the following instruc-
tions:
• Ensure that the axle dropout and quick-re-
lease mechanisms are clean and free of dirt
and impurities.
• Let your dealer explain in detail how your
front wheel is correctly fastened using the
quick-release system installed.
• Appropriately fasten the front wheel.
• Never use the bicycle unless you are sure
that the wheel has been properly secured
and cannot come loose.
Mounting
Place your wheel into the dropout below the fork
leg. The hub must be firmly attached in the drop-
out. Disc brakes: Ensure that the brake disk is
properly inserted into the brake caliper. Ensure
that neither the brake disk nor the hub or the
brake disk fastening screws knock against the
lower parts of the fork. If you do not know how to
adjust disk brakes, please read the instructions
provided by your disk manufacturer.
Inserting and fastening
1. Turn the quick-release lever to the open posi-
tion. Ensure that the lever grips the appropriate
slot in the axle.
2. Push the axle from the right side into the hub
until it connects to the thread of the left drop-
out.
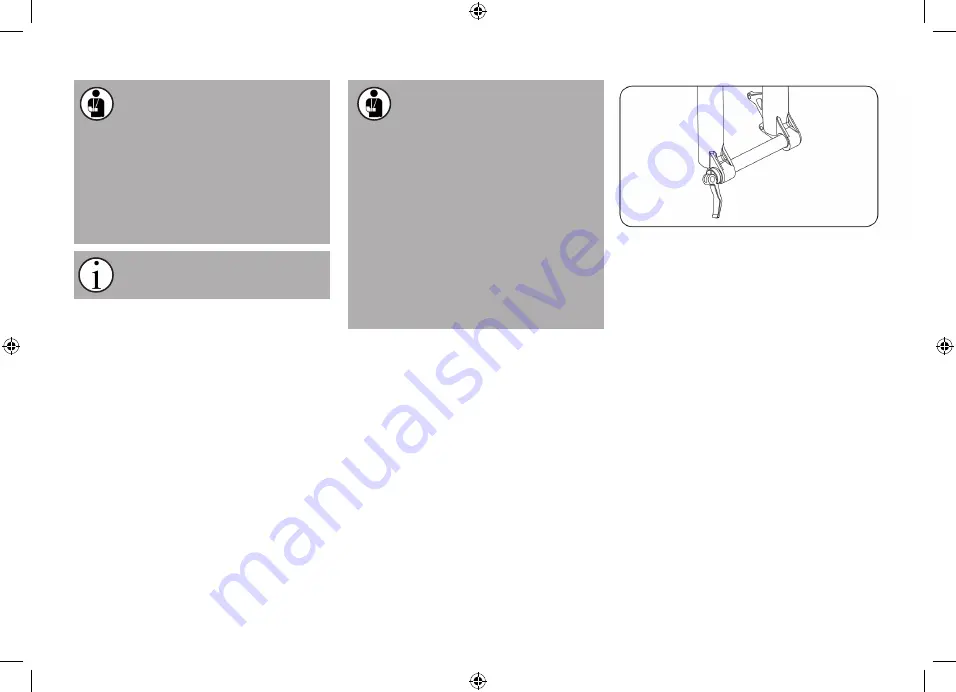
Quick-release axle in the fork dropouts, without hub,
Rock Shox
®
fork
3. Fasten the axle in the dropout by placing the
fast-release lever into the axle flange and fas-
tening the axle in a clockwise direction until it
is hand-tight. Close the quick-release lever by
folding it over.
During the closing movement, you should feel
tension when the quick-release lever is in the
horizontal position (90 degrees to the lower part
of the fork/axle extension).
The quick-release lever should leave a clear im-
print on your palm.
In case you do not feel resistance in the 90-de-
gree position and the lever does not leave a clear
imprint on your hand, the tension is not sufficient.
Increase the tension as follows: Open the fast-re-
lease lever and slowly tighten the quick-release
fastening screw until the correct tension has
been achieved. In order to increase the tension,
open the fast release leaver and insert a 2.5 mm.
Allen key into the tension adjuster in the middle
of the lever tappet.
* see page 37
IDEAL MANUAL 2016_eng.indd 11
6/27/16 11:39


