background image


60

NOTE: When only one unit of the DVR is connected with a computer or LAN, you can freely assign 

an IP address for the DVR. For example, there is a range of DVR IP addresses from 

192.168.0.1 to 192.168.0.255. You can pick one for use from the range of IP. It’s not necessary 

to set MASK and GATEWAY; leave the settings as default. 


When a DVR is connected to a WAN, you must acquire a unique, permanent IP address and 

correctly configure the MASK and GATEWAY settings according to your network architecture. 

If you have any questions regarding those settings, please contact a qualified MIS 

professional or your ISP.   


NOTE: When connecting with a network, each connected DVR must be assigned a unique IP, which 

must be in the same class type as your network address. IP addresses are written as four 

sets of numbers separated by periods; for example, 314.278.74.8. Therefore, if the connected 

network is identified as Class C, for example, the first three sets’ numbers of the DVR IP 

address must be the same as the network address. If the connected network is identified as 

Class B, the first two sets’ numbers of the DVR IP address must be the same as the network 

address. If you have any questions regarding those settings, please contact a qualified MIS 

professional or your ISP. 


3  TCP/IP Communication Software 


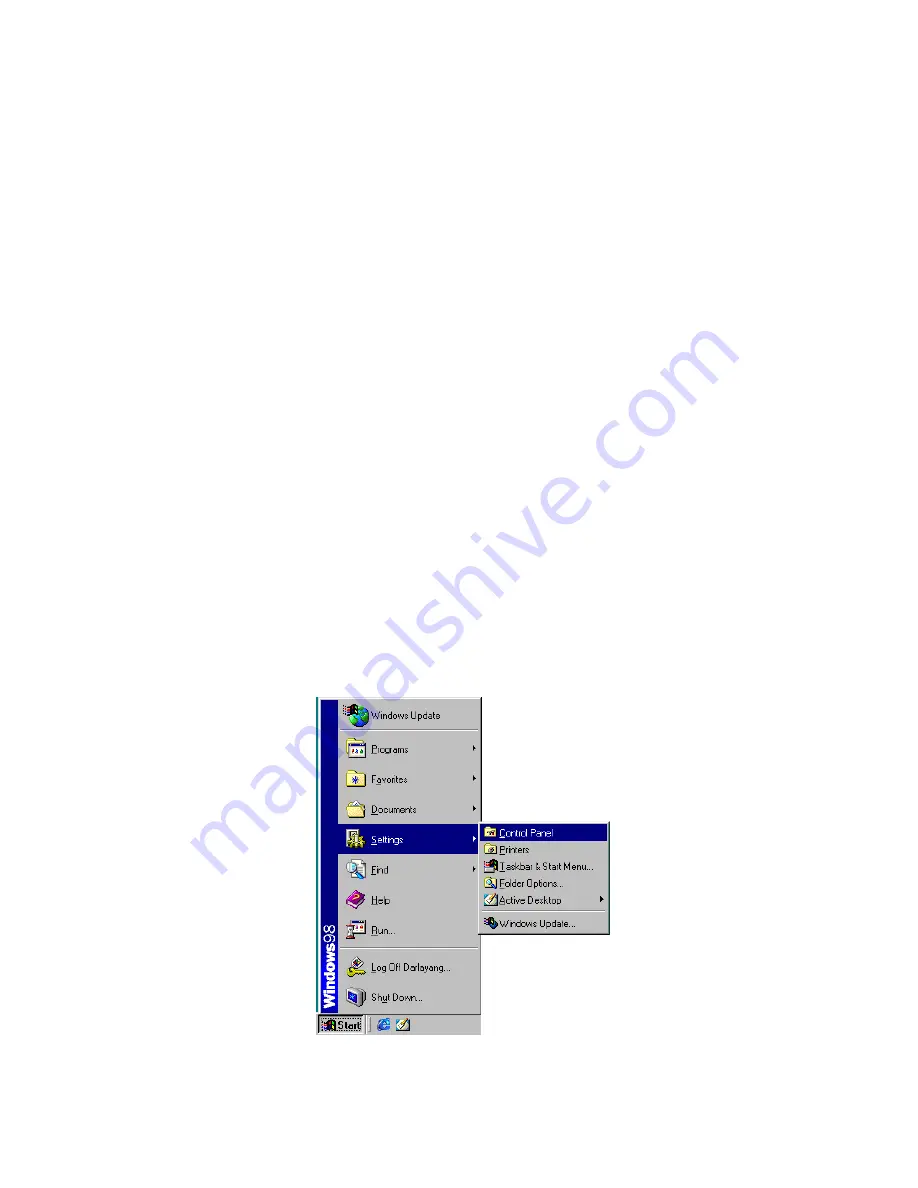
Follow the instructions below to install the TCP/IP communication program into your computer. 


Click the 

Start 

Menu from your computer, and point to the 

Settings/Control panel. 


Содержание IV-100CD

Страница 1: ...DIGITAL VIDEO RECORDER IV 100CD Installation Operating Manual Before trying to connect or operate this product please read this manual complete...

Страница 2: ......

Страница 3: ...NSTALLATION 9 3 1 Basic Connection 9 3 2 Hard Disk Drive Installation 11 3 3 System Information 12 3 4 Updating System Software 13 4 BASIC OPERATIONS 14 4 1 Configuring Recording Settings 14 4 2 Recor...

Страница 4: ...ATIONS 37 APPENDIX 1 RS 232 Protocol 38 APPENDIX 2 IDE Hard Disk Installation 41 APPENDIX 3 System Default 43 APPENDIX 4 O S D Message 45 APPENDIX 5 Network Viewer Image Viewer and Image Convert progr...

Страница 5: ...hing on top of the unit that might spill or fall into it Do not attempt to service this unit yourself as opening or removing covers may expose you to dangerous voltage or other hazards Please refer al...

Страница 6: ...itute for Time lapse VCR 1 2 Product Features Stores video in hard disk drives instead of VCR tapes Maximum 3 hard disk drive capability One removable Hard disk drive hot swapping capability Pre alarm...

Страница 7: ...n place Unlock this compartment before you remove the hard disk from the slot without turning off the device SETUP button Press this to enter the setup menu Press again to exit the setup mode DISPLAY...

Страница 8: ...ton light is off it indicates the unit is displaying encoded video The picture is switching swiftly Right Left buttons Press these two buttons to highlight desired items in the menu setup mode For Key...

Страница 9: ...the DVR Terminal Block There are 9 exposure contacts on this terminal block including SW Out GND ALM OUT FULL REC ALM RST GND and ALM IN for connecting with external devices Please refer to the next...

Страница 10: ...This terminal connects an external switch to turn the recording function of the DVR on off Active low 5V 5 GND Ground Contact 6 FULL OUTPUT This terminal sends out the full disk signal Active low 5V 7...

Страница 11: ...MUX MAIN MONITOR POWER ON OFF AC 100 240V Monitor Camera IN CONNECTING WITH A MULTIPLEXER To match the multiplexer s recording speed please set the MULTIPLEXER option to ON on the REC Setting page in...

Страница 12: ...fer to APPENDIX 5 Network Function Lamp Alarm Alarm Reset Normally Open Normally Open 9 8 7 6 5 4 3 2 1 ALM OUT GND ALM RST REC GND FULL GND SW OUT ALM IN This device complies with part 15 of the FCC...

Страница 13: ...n Jumper IDE 1 Compartment HD 1 Master Default IDE 1 Compartment HD 2 Slave IDE 2 Compartment HD 3 Master Table 3 2 B Compatible hard disk drives Manufacturer Model Capacity Rotation Diamond Max D540X...

Страница 14: ...Date System Time Press the DISPLAY button once the DVR will display the following sample message plus the default display Press the DISPLAY button again the unit will not display any OSD message Press...

Страница 15: ...DVR is updating the system software which will take approximately 90 seconds to process 5 Restart the unit when the device sounds a tone twice and displays the message PLEASE RESTART The process is co...

Страница 16: ...k drive Set up the REC Time Mode when a multiplexer is connected If a multiplexer is connected for optimum image recording and playback the record speed of the multiplexer must be correctly adjusted t...

Страница 17: ...5 4 55 6 25 2 38 3 13 1 22 1 56 0 70 0 89 0 25 0 31 0 17 0 21 0 12 0 16 REC Time Mode 3 hr 6 hr 12 hr 24 hr 48 hr 96 hr 168 hr 480 hr 720 hr 960 hr NOTE Recording times on the tables above are estimat...

Страница 18: ...g is completed press the ENTER SAVE ENTER SAVE button and set OK to save the setting or select CANCEL to leave the page without saving the settings 7 To activate the programmed recording schedule set...

Страница 19: ...EC ENABLE TIMER SET MAIN PAGE SET REC TIMER REC SCHEDULE START END START END S 00 00 00 00 00 00 00 00 M 00 00 00 00 00 00 00 00 T 00 00 00 00 00 00 00 00 W 00 00 00 00 00 00 00 00 T 00 00 00 00 00 00...

Страница 20: ...cording is required set PRE ALARM to ON 4 To activate the alarm recording set ALM OPERATION to ON To deactivate it set ALM OPERATION to OFF 4 2 4 Externally triggered Recording By connecting the REC e...

Страница 21: ...or Externally Triggered Recording Alarm Takes Place Actual Recording Speed Normal Alarm Normal Timer Recording Actual Recording Speed Alarm Takes Place Timer Recording Actual Recording Speed Alarm Tak...

Страница 22: ...e ending message Search again or rewind to replay the file if required Stop Play Play the file from the stop position C Play Back From The Oldest Data Stop Press the STOP button for three seconds Play...

Страница 23: ...by picture mode 2 Press the PAUSE STEP button to display one frame field of a picture at a time in the forward direction When playing back recorded video recorded by a multiplexer each sequential pres...

Страница 24: ...3 Highlight the specific recorded video of your requirement and press the ENTER SAVE ENTER SAVE button to display the selected video Key Operation Press Up Down buttons to select a video Press Right...

Страница 25: ...If no video is found please return to the time setting page and repeat steps 3 and 4 again for another search 4 5 Data Backup 4 5 1 Backup Operations There are three ways available to duplicate the r...

Страница 26: ...2 to HD3 Stay on the DISK SETTING page Use the Up Down buttons to highlight BACKUP select SELECT and then press the ENTER SAVE ENTER SAVE button to list all the recorded video Press the Up Down button...

Страница 27: ...o the multiplexing mode under this mode that the light of MUX DVR button is off and the pictures is switching swiftly 3 Press the PAUSE STEP button to freeze the desired pictures 4 Press the ENTER SAV...

Страница 28: ...disabling the entire front panel control Simultaneously press these two and buttons as shown below for at least 3 seconds to lock the unit to release Key Lock simultaneously press these two buttons ag...

Страница 29: ...of various buttons within the menu setup mode are described in the paragraphs below KEY FUNCTIONS SETUP button Press to enter the setup menu Press again to exit the setup mode RETURN button Press to e...

Страница 30: ...title onto images while recording OFF Disables the stamping function TITLE SETTING This entry allows users to assign a title to be stamped onto the images NOTE If you wish to have system time on an ar...

Страница 31: ...ay that the DVR will start and stop recording There are two time periods each day available for scheduling The time is displayed in a 24 hour clock format If there is a time overlapping showing betwee...

Страница 32: ...images in the compressed format and allows the image quality to be altered by the image size There are 3 levels of image quality you can select from HIGH STANDARD and BASIC Selecting the HIGH image f...

Страница 33: ...12 5F S 6 25F S and REMAIN If you select REMAIN for use the device will record images at the same speed as set on the REC page REC QUALITY This option determines the image quality to be recorded when...

Страница 34: ...m deactivated Duration Alarm recording Duration PRE ALARM This option determines that images prior to an alarm occurs will be recorded into the hard disk drive If the alarm recording rate is set to 60...

Страница 35: ...controlled by an external device please select this entry for use MASTER Enables the RS 232 communication port to send out a signal only NET ENABLE This option is to select enable or disable the Ether...

Страница 36: ...D 3 BACKUP HD Clears out all the data stored in HD 3 which is set to backup purpose only This function has to be proceeded when the HD 3 USAGE option is set to BACKUP HD3 USAGE This option determines...

Страница 37: ...evolving basis because of a limit in memory space When the log is full the newly registered record of an operation will replace the existing records from the oldest one MENU BACKGND This option allows...

Страница 38: ...es place Disk is full Load factory default Buzzer set to ON Enable disable key lock function Power on off mobile rack HDD Backup operation complete Timer activate deactivate Recording switching betwee...

Страница 39: ...4x 8x 16x 30x Slow Forward Reverse 1 2x 1 4x 1 8x 1 16x Picture By Picture Playback Access To Recording Full List Search Time Search and Event Search Title 12 Characters On Screen Display Setup Title...

Страница 40: ...TS CTS RX TX GND RTS CTS 1 2 Set the RS 232 option to MASTER in the COMMUNICATION page of the setup menu 1 3 Set communication parameters 9600 bps No Parity 8 Data Bits 1 Stop Bit 2 Communication Prot...

Страница 41: ...Y_UP 13 KEY_DOWN 14 KEY_LEFT 15 KEY_RIGHT 16 KEY_SCAN_F 19 KEY_SCAN_R 20 KEY_RETURN 21 KEY_MONITOR 36 2 2 COMMAND Types 2 2 0 Command Main Category 0x02 2 2 1 Handshake Second Category 0x01 PC Request...

Страница 42: ...f System State STATE_STOP 0 STATE_REC 1 STATE_PREREC 2 STATE_PLAY 3 STATE_MENU 4 STATE_PLAYIDLE 5 STATE_SETUP 6 16 STATE_SEARCH 7 11 STATE_BACKUP 13 15 STATE_ALARMLIST 17 STATE_LOGLIST 18 STATE_RESTAR...

Страница 43: ...urer Model Capacity Rotation Diamond Max D540X 4D 4D040H2 40GB 5400 RPM Diamond Max D540X 4D 4D060H3 60GB 5400 RPM Diamond Max D540X 4D 4D080H4 80GB 5400 RPM Diamond Max VL40 34098H4 40GB 5400 RPM Dia...

Страница 44: ...efer to the instructions on the drives to configure it Configure the drive as a slave which is located on the upper rack and the drive as a master which is located on the lower rack 4 Secure the drive...

Страница 45: ...GOTO TIMER PAGE RECORD TIMER REC ENABLE OFF TIMER SET MAIN PAGE TIMER REC ENABLE MAIN MENU TIME TITLE RECORD TIMER RECORD ALARM COMMUNICATION DISK SYSTEM GOTO REC PAGE REC SETTING REC RATE 60 F S REC...

Страница 46: ...TITLE RECORD TIMER RECORD ALARM COMMUNICATION DISK SYSTEM GOTO DISK PAGE DISK SETTING REFORMAT HD 1 HD 3 USAGE REC PLAY BACKUP FULL MAIN PAGE DISK REFORMAT CLEAR MAIN MENU TIME TITLE RECORD TIMER RECO...

Страница 47: ...item in setup menu was set to STOP 16 EMPTY User press PLAY key or use SEARCH function but no video could be play 17 SET TO NTSC PLS RESTART System has be set to NTSC please reboot PAL is similar 18 S...

Страница 48: ...k Viewer The Network Viewer allows you to possibly access 16 units of the DVR from a remote desktop or a laptop over a TCP IP networking environment It can perform the following functions View live im...

Страница 49: ...puter point to Programs Picture Viewer to open up the program selection page as shown below Click the Network Viewer tag to start the Network Viewer program Install the Network Viewer for the ZIP file...

Страница 50: ...n right after the device IP address otherwise an OK appears To add more connections or units of the DVR please repeat the above instructions Functions Description Channel Assign a display location whe...

Страница 51: ...to display the connected device in a multi format screen 1 2x2 3x3 and 4x4 Press to enter the selected device Single device display mode Select a device from the DEVICE LIST box to enable this button...

Страница 52: ...the desired device from the DEVICE LIST box on the Multi device Mode The button will enable Click the button to view the image of the selected device and have access to certain functional operations o...

Страница 53: ...e Viewer will display cameras in thumbnail format Sequentially displaying images one after another in the adjacent display window Recorded video list box This box allows you to access all recorded vid...

Страница 54: ...ple screen as above A 2 Set the ALRM SETTING to ON to enable the drop down list in the ALARM SETTING area 3 Select a desired recording rate and Quality from the respective drop down list 4 Click the O...

Страница 55: ...n the live or playback mode 2 Select a folder on the computer for copying images in 3 Enter the number of images into the NUMBER OF SAVING box you wish to save 4 Click the SAVE tag the program will au...

Страница 56: ...floppy disk or a HDD 1 Pop up the START menu from your computer and point to Programs Picture Viewer to open up the program selection page Click the Image Viewer tag to start the Image Viewer program...

Страница 57: ...the Programs Picture Viewer to open up the program selection page Click the Convert Image tag to start the Convert Image program The Image Viewer is shown as a sample screen below 2 Click the tag to s...

Страница 58: ...n 2015 And the next oldest data should be kept under the index of the oldest data For any new recorded data this approach will be applied until the disk becomes full HD1 HD1 1 2002 02 01 12 20 1 2002...

Страница 59: ...llowing two conditions 1 This device may not cause 2 this device must accept may cause undesired operation harmful interference And any interference received including interference that S VIDEO OUT VI...

Страница 60: ...th part 15 of the FCC Rules Operation is subject to the following two conditions 1 This device may not cause 2 this device must accept may cause undesired operation harmful interference And any interf...

Страница 61: ...E ENTER SAVE button to enter the NET SETTING page Set IP MASK and GATEWAY Then press the ENTER SAVE ENTER SAVE button to proceed Press the RETURN button to return to the MAIN MENU The following is a s...

Страница 62: ...a network each connected DVR must be assigned a unique IP which must be in the same class type as your network address IP addresses are written as four sets of numbers separated by periods for exampl...

Страница 63: ...r the NETWORK setting windows Click on the Configuration tag check if the TCP IC is included among the network components list If the TCP IP is included please process step 5 If it is not included ple...

Страница 64: ...After installation the PC will be restarted 5 TCP IP Configuration setting Click Start Settings Control Panel Network Select TCP IP and then click Properties Before processing the DVR installation in...

Страница 65: ...ess must be different from the DVR IP but in the same class type NOTE The IP address of a DVR in a network must be unique to other chosen PCs but in the same class type 6 Connection Testing With the p...

Страница 66: ...established Please re check all the hardware and software installation by repeating steps 1 to 5 If you still can t establish the connection after rechecking please contact your dealer If you receive...

Отзывы: