background image


86


9.1.3.


Set Coin Channels   

Executive only


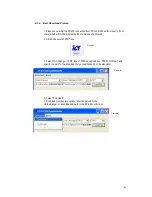
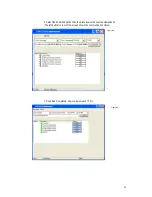
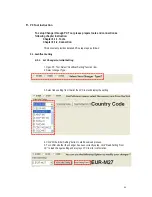
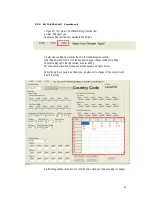
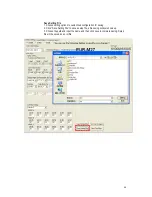
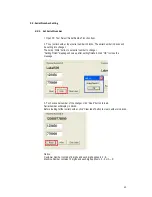
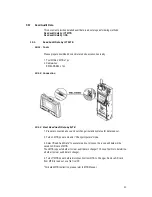
1. Open PC Tool. Select “Cashfloat Setting” function item. 
2. Select Changer Type.   

Channel setting function only applies to 6100E type. 


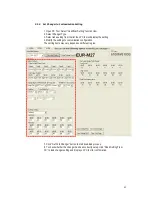
3. Select tube setting from the list then PC tool will display the setting. 

Click “Read Setting From CC” to load current changer channel setting for editing. 

Channel setting list in the right bottom area for editing.   

For price channel position, please see listed sequence as figure below. 


Notice! Every block need to be filled price in before set to changer. If channel price is 0, 
input 0 to blocks. 


4. After filling channel price into list, click “Set Coin Changer” to save setting to changer. 


1  

 2 

 3 

 4 

 7 

 8 

 9 

10 

11 

 12 

 … 

Содержание cc6000

Страница 1: ...1...

Страница 2: ...signment for MDB interface 53 4 5 Wire Harness Pin Assignment for Executive MDB Interface 57 4 6 Wire Harness Pin Assignment for Download Box 59 5 I O Circuit 60 6 Maintenance 63 7 Troubleshooting 65...

Страница 3: ...T All trademarks service marks and trade names are proprietary to ICT ICT reserves the right at all times to disclose or to modify any information as ICT deems necessary to satisfy any applicable law...

Страница 4: ...LCM display shows current coin changer status z Optional portable programmer to update coin changers installed on vending machines z Modular design for cheap and easy maintenance z Modular tubes for...

Страница 5: ...p mode Temperature Range 15 C 60 C Storage Temperature 30 C 70 C Temperature Change Max 0 2 C minute Relative Humidity Up to 85 no condensation Serial Interface MDB connector Minifit 6 pin JPSTD Execu...

Страница 6: ...in use TUBE Coin Diameter mm A B C D E F 26 0 28 0 v v 26 0 26 5 V V V V 24 0 26 0 v v v V v v 22 0 24 0 v V v v v v 20 0 22 0 V V v v v v 18 0 20 0 V V v v v v 16 0 18 0 v v v v Supports Escrow Funct...

Страница 7: ...7 1 3 Dimensions Unit mm Mounting position Vertical max deviation 3 Mark of conformity CE FCC...

Страница 8: ...shown in figure below Coin Return Lever After a coin is inserted press the coin return button to return the coin LCM Panel As shown in figure below To open the LCM panel press the latch to open Coin...

Страница 9: ...9 Coin Tubes Press the latch as shown below to remove the coin cassette...

Страница 10: ...not unscrew these completely Lift the coin changer to mount inside the vending machine 4 Tighten the screws and place the upper module back to the device 5 Plug flat cable back to upper module then c...

Страница 11: ...e coin recognition module Initialization Checklist While vending machine in an energized state please DO NOT plug unplug any wires on CC6100 Please ensure that there are no interferences between the c...

Страница 12: ...or Close to Coin Tubes 107 Configure Cash Float Set Cash Float Configuration for Various Coin Denominations Cash Float Mode only 108 Activate Cash Float Set Cash Float Type for Various Coin Denominati...

Страница 13: ...port Function 136 Payout Method Setting Payout Method Level 2 Executive Setting Functions Code LCM Display Function Description 200 Sell Mode Set Single Vend or Multi Vend Executive only 201 Price Dis...

Страница 14: ...reach one under minimum level If the minimum level has not been configured by the user the default minimum coin level would be applied Dispensing coins to low level in a specific tube Press tube key...

Страница 15: ...00 Press F to enter Positions Require amount Number disappears when tube reach cash float level LCM shows required amount of each denomination in sequence from low to high value as left figure positio...

Страница 16: ...Press Manual to exit Manual to exit Code LCM Display Function Description Accessibility 115 Clear Tube Count Clear Counting Memory of All Coin Tube Inventory Accessible without password Default Defin...

Страница 17: ...ssword Default Definition Depends on region User can select menu language English Deutsch Espa ol LCM Descriptions Press the Manual button Use A C to scroll to EZ code 129 Press F to enter LCM shows c...

Страница 18: ...Out Value Record Default Definition N A Reset bookkeeping data LCM Descriptions Press the Manual button Use A C to scroll to EZ code 102 Press F to enter Press F to confirm clearance of the memory LCM...

Страница 19: ...denomination Press F to change the setting Accept Reject Press Manuel to save Manual to exit Code LCM Display Function Description Accessibility 104 Tube Open Close Switch Set Open or Close to Coin T...

Страница 20: ...button Use A C to scroll to EZ code 107 Press F to enter B E to switch cash float type A B or C F to adjust selected cash float type LCM shows current setting B E to switch coin values F to adjust qu...

Страница 21: ...LCM Display Function Description Accessibility 109 Check Current Cash Float Check current cash float setting of various coin denominations Cash Float Mode only Default Definition Check current cash f...

Страница 22: ...110 Press F to enter Press F to change its current setting Highest Value Original Coin Value When finished press Manual button to exit Manual to exit Code LCM Display Function Description Accessibili...

Страница 23: ...escrow MDB MDB with escrow When finished press Manual button to exit Manual to exit Code LCM Display Function Description Accessibility 113 Default Setting Restore to Default Factory Settings Default...

Страница 24: ...utton to scroll through different selections Please ask your dealer or sales for the tube assignment availability Press F to confirm tube coin assignment Changer inquires automatically whether to set...

Страница 25: ...s per Transaction Set the Bill Acceptance Limitation for the BA ICT BA Only Default Definition 1 Configure limited number of bills accepted per transaction Only works on ICT Bill Acceptor connect dire...

Страница 26: ...el sensor and high level sensor Changer displays N L or H according to coin amount N Tube empty L Coins reach low level amount H Coins reach high level amount Some operational functions are unavailabl...

Страница 27: ...tains 12 digits and each digit applies to 0 9 or A Z LCM Descriptions Press the Manual button Use A C to scroll to EZ code 120 Press F to enter Use B E button to select Customer Number or Machine Numb...

Страница 28: ...to enter Changer displays current setting Press F to change setting Same Coin Value Total Coin Value When finished press Manual button to exit Manual to exit Code LCM Display Function Description Acc...

Страница 29: ...t Code LCM Display Function Description Accessibility 124 Reserved Coin Set Reserved Coin Function Default Definition ON Setup reserved coin function to ON or OFF Reserved Coin ON Changer will not pay...

Страница 30: ...essible under door closing Door OFF LCM accessible under door closing PW ON Require password to access all LCM function PW OFF Require no password to access all LCM function LCM Descriptions Press the...

Страница 31: ...ssette back then push Enter to finish refill procedure Please notice that changer do not count refilled coin amount user need to put exact coin amount as requirement The required coin amount may vary...

Страница 32: ...sidual credit vending sales adjusted by Changer Please notice that the function requires VMC support allow the residual credit to stay and further vend can be made LCM Descriptions Press the Manual bu...

Страница 33: ...or to delete To learn token use B E button to select token learn function Press F to learn Follow display instruction to insert token 3 to 10 tokens are required for learning When finished press Manua...

Страница 34: ...e LCM Display Function Description Accessibility 131 Acceptance limit For Changer Set Credit Acceptance Limit 6100M KRW only Default Definition 0 When the total credit of coins and bills exceeds the a...

Страница 35: ...single vend When inserted coins exceed the number of limitation the exceeded coins will be returned LCM Descriptions Press the Manual button Use A C to scroll to EZ code 132 Press F to enter LCM disp...

Страница 36: ...nder the decimal and scaling setting Decimal Point 0 2 Scaling Factor 1 255 LCM Descriptions Press the Manual button Use A C to scroll to EZ code 133 Press F to enter To setup Decimal use B E button t...

Страница 37: ...F to save Manual to exit Code LCM Display Function Description Accessibility 135 Error Report Setting Error Report Function Default Definition OFF ON Report error message to VMC OFF Not report error m...

Страница 38: ...e which VMC assign to payout is empty CC6100 will payout other value to complete payout command Regular When the coin value which VMC assign to payout is empty CC6100 will do nothing LCM Descriptions...

Страница 39: ...Manual button Use A C to scroll to EZ code 200 Press F to enter Changer displays current setting Press F to change setting Single or Multi When finished press Manual button to exit Manual to exit Code...

Страница 40: ...02 Press F to enter Use B E button to select channel Press F to configure channel LCM shows current price Press B E to plus minus number Press A C to shift configured digit When finished press F to sa...

Страница 41: ...press Manual button to exit Manual to exit Code LCM Display Function Description Accessibility 204 2nd Price For Cashless Set 2nd price for cashless function on or off Executive only Default Definiti...

Страница 42: ...ription Accessibility 206 Decimal Adjustment Decimal Setting Executive only Default Definition Depends on region Change the decimal point setting to display on VMC under executive interface Decimal di...

Страница 43: ...sibility 208 Acceptance Limit For Changer Set Credit Acceptance Limit Executive only Default Definition 30 When the total credit of coins and bills exceeds the acceptance limit over the limitation amo...

Страница 44: ...ill Accepter will be disabled And the LCM of Coin Changer will show Cashless Limit Reached When this option setting is 0 there is no limit LCM Descriptions Press the Manual button Use A C to scroll to...

Страница 45: ...ill into the cash box while the bill has been inserted otherwise the bill will hold in escrow Number 1 to 9 can be set Note 210 function only available when BA set Changer as host LCM Descriptions Pre...

Страница 46: ...l button to exit Manual to exit Code LCM Display Function Description Accessibility 212 Exchange Rate Setting Exchange Rate Executive only Default Definition Can be set through the LCM to the second c...

Страница 47: ...served OFF Calibration Mode ON Preset to OFF OFF Reserved Turn off the sleep mode ON Reserved Turn on the sleep mode OFF Note SW3 ON High anti counterfeiting CNY 1 RUB 5 TWD 50 SW4 ON High anti counte...

Страница 48: ...01 MDB MDB Peripheral 24V AC Power Data Comm 97cm WEL RCC72 Executive 24V AC Power Data Comm 97cm WEL RCC54 Download Box Cable Optional WEL RCC42 Warning Do not plug both MDB and Executive connecter t...

Страница 49: ...49 4 3 Wire Harness Pin Assignment for JPSTD interface Main wire harness...

Страница 50: ...50...

Страница 51: ...51 JPSTD wire harness for ICT Bill Acceptor...

Страница 52: ...52...

Страница 53: ...53 4 4 Wire Harness Pin Assignment for MDB interface Main wire harness...

Страница 54: ...54...

Страница 55: ...55 MDB wire harness for ICT Bill Acceptor...

Страница 56: ...56...

Страница 57: ...5 Wire Harness Pin Assignment for Executive MDB Interface Interface Used Voltage Harness Executive 24V AC WEL RCC54 Interface Peripheral Harness Executive MDB Peripheral WEL RCC72 MDB Peripheral WEL R...

Страница 58: ...e Harness MDB 10 45V DC WEL RCC72 MDB Interface Peripheral Harness MDB MDB Peripheral WEL RCC72 MDB Peripheral Warning Do not plug both MDB and Executive connector to VMC board simultaneously It may c...

Страница 59: ...59 4 6 Wire Harness Pin Assignment for Download Box...

Страница 60: ...60 5 I O Circuit JPSTD Interface...

Страница 61: ...61 MDB Interface...

Страница 62: ...62 Executive Interface...

Страница 63: ...maintenance steps are required ICT suggests cleaning every six month however under heavy usage conditions or locations the maintenance may need to be more frequent Warning Before removing the coin ch...

Страница 64: ...64...

Страница 65: ...the motor to stuck coins are stuck in the coin tube or the semicircle disk has derailed None E22 The second motor group cannot be positioned The second motor group might be damaged coin or foreign ob...

Страница 66: ...ure Close the LCM panel and verify that the latch is in place If the problem cannot be solved notify ICT personnel for support Checksum Error Code E11 LED Light Display Red light LCM Display As shown...

Страница 67: ...isplay 1 red LCM Display As shown in figure Cause 1 Two seconds after activation the SYSTEM did not wait for the READY signal from the DEVICE and jumped to the exception mode 2 Two seconds after a tra...

Страница 68: ...ure below Cause Coil 3 is damaged Corrective Measure Notify the ICT personnel Low Level LED Error Code E17 LED Light Display 3 red 5 red LCM Display As shown in figure below Cause Low level LED is dam...

Страница 69: ...Corrective Measure 1 Make sure that the reflective prism is not dirty or blocked by foreign objects If it is remove the foreign object and clean the reflective prism 2 Changer retries once a minute f...

Страница 70: ...e power 2 Retry once a minute for 10 times if the problem is not resolved then remove the LCM panel to leave this exception and notify ICT personnel for support Motor Error A B Code E20 LED Light Disp...

Страница 71: ...f yes remove the object and turn on the power again Use buttons A and B of the LCM to test and determine whether the semicircle disk can be returned to its normal position If it does then the machine...

Страница 72: ...en stuck by a coin If a tube has been stuck remove the stuck coin reassemble the coin tube and turn on the power again Use buttons A and B of the LCM to test whether tubes A and B can discharge coins...

Страница 73: ...ot then the second motor group is damaged Please notify the ICT personnel for support 3 Confirm whether the coin rod is stuck If it is then manually move the rod back to its position Turn on the power...

Страница 74: ...3 LED Light Display 5 red LCM Display As shown in figure Cause Parts malfunction or coin tubes have been incorrectly positioned Corrective Measure Ensure that the coin tubes are correctly positioned I...

Страница 75: ...ation area If yes then push aside the transparent latch for the coin guiding board remove the coin guiding board remove the stuck coins and then reinstall the coin guiding board Turn on the power agai...

Страница 76: ...below Cause Low Level empty Hi Level full Coin might be sorted to wrong tube Corrective Measure Changer retries every 2 seconds during the standby mode Remove the stuck coin then restart changer to s...

Страница 77: ...below Cause Low Level empty Hi Level full Coin might be sorted to wrong tube Corrective Measure Changer retries every 2 seconds during the standby mode Remove the stuck coin then restart changer to s...

Страница 78: ...continue to work despite the Barcode Reader error Coin Size LED Error Code E32 LED Light Display None LCM Display As shown in figure The machine will continue to work Cause The three sets of LEDs used...

Страница 79: ...re below Cause Recosnition Module Damage Corrective Measure Notify the ICT personnel Inhibit By VMC Code None LED Light Display 2 red LCM Display As shown in figure below Cause The Inhibit signal tran...

Страница 80: ...o the original records of legal writings and intellectual properties including subsequent modifications of the figures and updates of the texts This Document is only Applicable to the Corresponding Co...

Страница 81: ...s been activated 2 Click and execute FP4DT exe Figure 64 3 Select Coin Changer STM8 type of FP004 download box RS232 COM port and specify the path for file download only accept files with s19 extensio...

Страница 82: ...Select the download option then the process would execute automatically The left bottom corner of the screen shows the communication status Figure 68 7 Download Completed all procedures reach 100 Figu...

Страница 83: ...essories ready 1 PDA supports IrDA download 8 2 2 Connection Please keep distance between changer and PDA within 5 cm angle deviation less than 5 degree 8 2 3 Start Download Process 1 Turn on power an...

Страница 84: ...lows 9 1 Cashfloat Setting 9 1 1 Set Changer to Initial Setting 1 Open PC Tool Select Cashfloat Setting function item 2 Select changer Type 3 Select tube setting from the list then PC tool will displa...

Страница 85: ...ist then PC tool will display the setting 4 Modify the settings to customization configuration The setting items may vary depends on different region 5 Click Set Coin Changer button to start download...

Страница 86: ...tting Click Read Setting From CC to load current changer channel setting for editing Channel setting list in the right bottom area for editing For price channel position please see listed sequence as...

Страница 87: ...ck Import Setting File to load setup file a file selection window shows up 2 Choose setup file in ini format and click open to load 3 PC Tool displays setting of the imported file User can then click...

Страница 88: ...tions to customized configuration for saving 2 Click Save Setting File to save a setup file a file saving window shows up 3 Choose file path and input file name and then click save to complete saving...

Страница 89: ...serial number to changer Setting Finish message shows up after setting finished Click OK to close the message 3 To check serial number of the changer click Read button to load Serial number will displ...

Страница 90: ...ead Audit Data by MTB 1 Prepare connection above and set changer in standby status for data read out 2 Turn on MTB power and enter Changer Operate mode 3 Select Read Audit Data to execute read out pro...

Страница 91: ...ection 1 Prepare connection above and set changer in standby status for data read out 2 Use PDA IrDA component to point directly to the IrDA of changer 3 Start audit data transmission A file format in...

Страница 92: ...ization leaver until the fixed axis is fully exposed 2 Pull and rotate the upper half of the module forward 3 After the upper half of the module is pulled out unplug the soft gray cable and then lift...

Страница 93: ...pper half of the module towards the back and ensure that the two fix points of the modules are flipped to the two sides 2 Pull out the recognition module 3 Unplug the wire connecting to the identifica...

Страница 94: ...assembling 1 Remove the two screws on the sides of the coin discharge module 2 Rotate the coin discharge module downward 90 degrees 3 Unplug the wire connecting to the coin discharge module 4 Pull and...

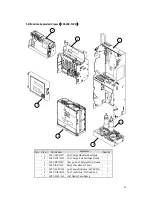
Страница 95: ...hine Module 1 2 3RCC POK19000 Coin Changer Coin Discharge Module 1 3 3RCC MOT02001 Changer Coin Discharge Motor Module 1 4 3RCC IDE11002 Recognition Module 2 5mm 1 5 3RCC SOR11006 Coin Separation Modu...

Страница 96: ...hnologies Corporation No 28 Lane 15 Sec 6 Minquan E Rd Neihu Dist Taipei City 114 Taiwan R O C Tel 886 2 2793 1236 Fax 886 2 2793 6125 sales ictgroup com tw For Sales rma ictgroup com tw For Customer...

Страница 97: ...97 www ictgroup com tw 2017 International Currency Technologies Corporation V 1 9 Part Number Beta 2017 08 24...

Отзывы: