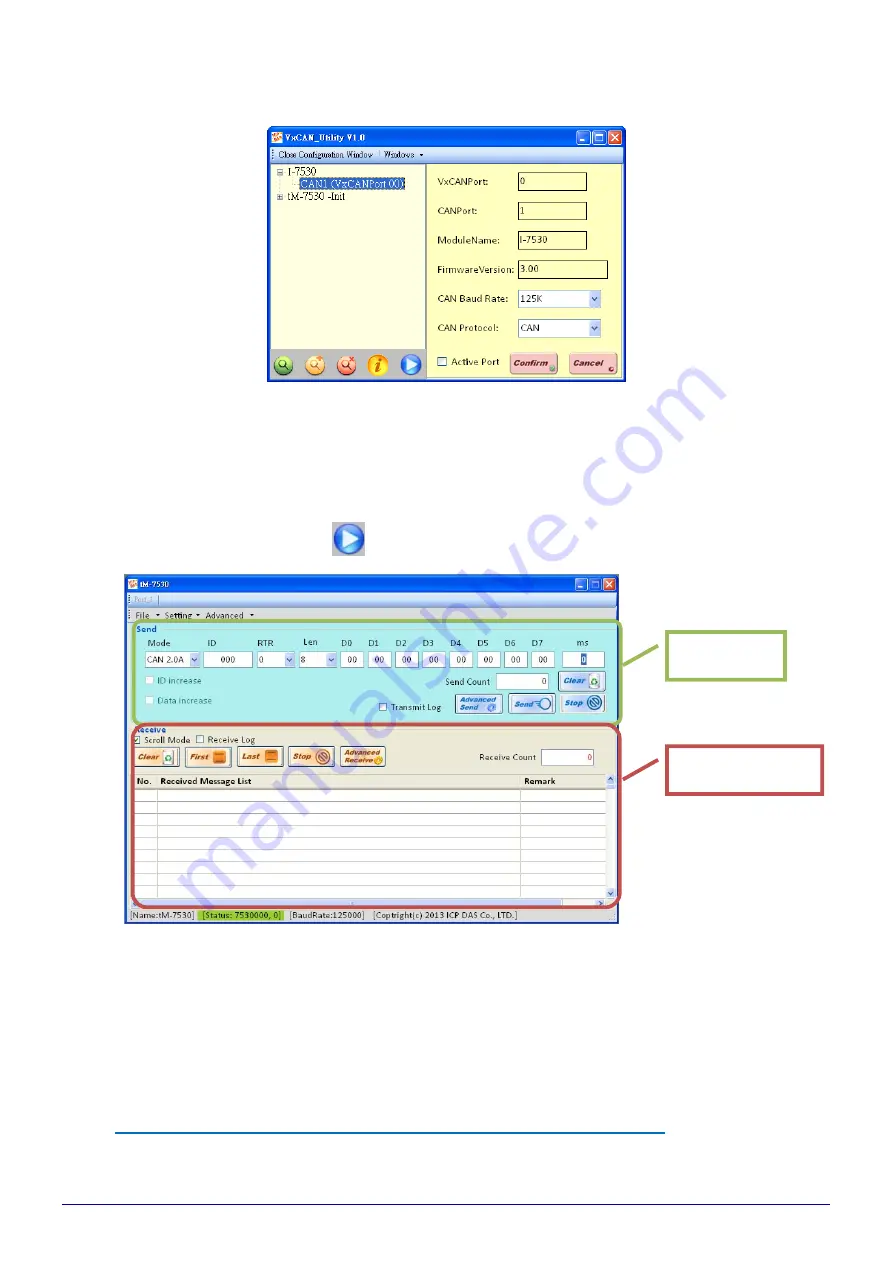
Check the “Active Port” and Click “Confirm” button to enable the CAN port of the CAN
converter. The parameters set here are not stored in the EEPROM. If users would like to
configure the other parameters expect the CAN parameters, please use Configuration
interface of the VxCAN Utility to do that.
Step 6. Click “Start” button
to open test interface.
The test interface is divided to two areas. One is for sending CAN messages, and the
other is for reception. If users want to send CAN message, fill the data into the
corresponding field, and click “Send” button. If the CAN converter gets any CAN
messages, they will be shown in received area automatically. About the details for the
VxCAN Utility operation please refer to the users’ manual of the VxCAN Utility in the
following web site.
http://ftp.icpdas.com/pub/cd/fieldbus_cd/can/virtual_can/vxcan_utility/
Received Area
Send Area
I-7530, I-7530-FT, I-7530A, I-7565, tM-7530, tM-7530A, tM-7565 User Manual Version 1.5
Page
:
36
Copyright © 2018 ICP DAS Co., Ltd. All Rights Reserved E-mail: [email protected]


