background image


GW-7553-B / GW-7553-M PROFIBUS/Modbus TCP Gateway User Manual 

(Version 1.35, May/2017)     


PAGE: 105 


Step 2:   

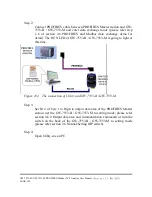
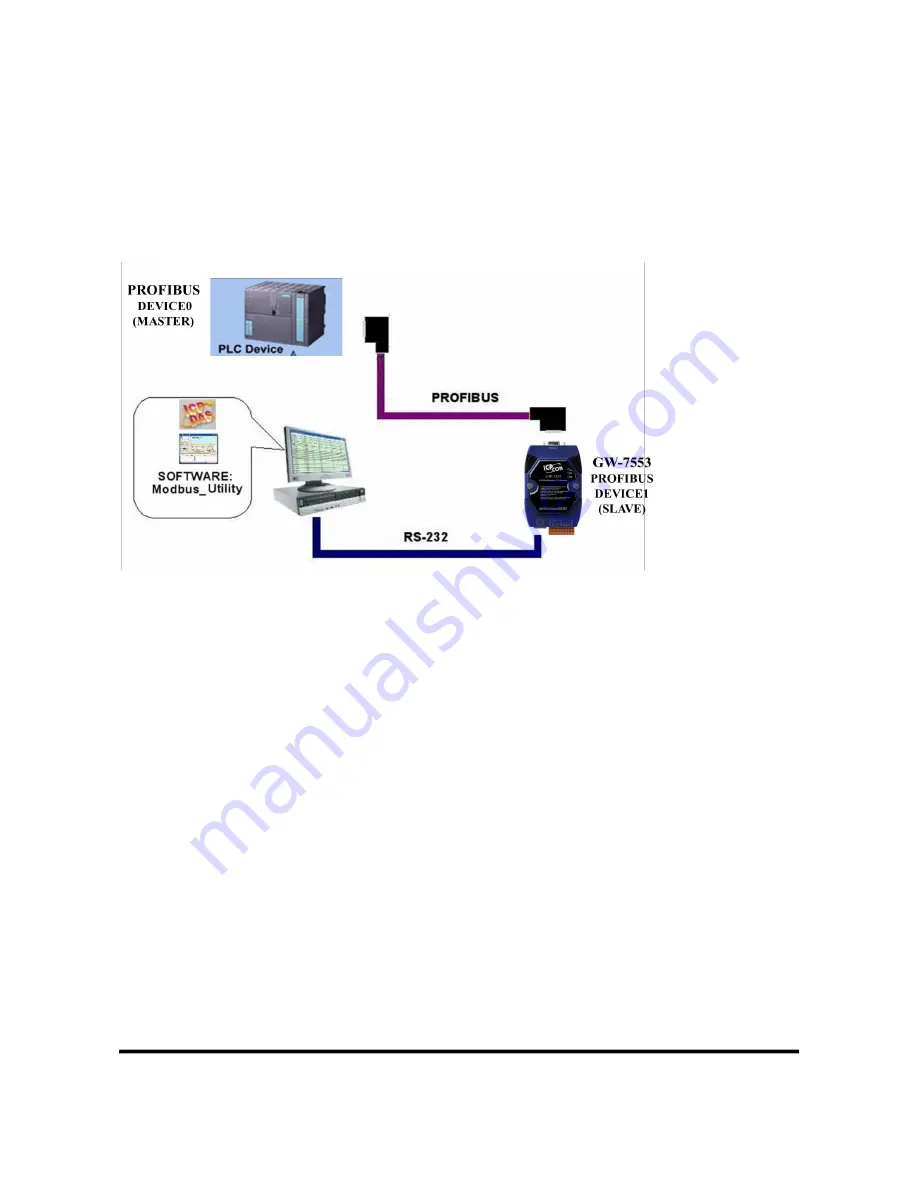
Connect PROFIBUS cable between PROFIBUS Master station and GW-
7553-B  /  GW-7553-M  and  enter  data  exchange  mode  (please  refer  step 
1~6  of  section  4.8  PROFIBUS  and  Modbus  data  exchange  demo  for 
detail). The RUN LED of GW-7553-B / GW-7553-M is going to light at 
this time. 


Figure 104    The connection of Utility and GW-7553-B / GW-7553-M 


Step 3:   

Set bit 2 of byte 1 to High in output data area of the  PROFIBUS Master 
station  (set  the  GW-7553-B  /  GW-7553-M  to  setting  mode;  please  refer 
section 4.6.2  Output data area and communication command) or turn the 
switch  on  the  back  of  the  GW-7553-B  /  GW-7553-M  to  setting  mode 
(please refer section 2.6 Normal/Setting DIP switch). 


Step 4: 

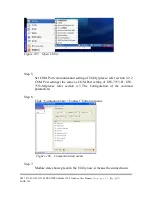
Open Utility.exe on PC. 
 

Содержание GW-7553-B

Страница 1: ...7553 B GW 7553 M PROFIBUS Modbus TCP Gateway User s Manual High Quality Industrial Data Acquisition and Control Products Warranty All products manufactured by ICP DAS are under warranty regarding defe...

Страница 2: ...to be accurate and reliable However no responsibility is assumed by ICP DAS for its use or for any infringements of patents or other right of third parties resulting from its use Copyright Copyright...

Страница 3: ...Communication 32 4 1 Field of application 32 4 2 GSD file 33 4 3 The Configuration of the common parameters 35 4 4 The Configuration of the modules 38 4 5 Diagnostic messages 40 4 6 I O data exchange...

Страница 4: ...s can easily put the Modbus TCP devices into PROFIBUS network Figure 1 shows an application example for the GW 7553 B GW 7553 M module Figure 1 Application architecture of the GW 7553 B GW 7553 M modu...

Страница 5: ...ROFIBUS network 3000VDC Isolation Protection on the PROFIBUS side Provide LED indicators Built in Watchdog Mountable on DIN Rail 1 2 Modules Support Only the following Modbus commands are supported by...

Страница 6: ...6M 12Mbps Address Setting 0 126 set by DIP switch or EEPROM Ethernet specs 10 100Base TX Auto negotiating Auto_MDIX LED indicator Power requirement Unregulated 10 30 VDC Power reverse protection Over...

Страница 7: ...7553 B GW 7553 M PROFIBUS Modbus TCP Gateway User Manual Version 1 35 May 2017 PAGE 7 2 Hardware 2 1 Block Diagram of GW 7553 B GW 7553 M Figure 2 Block diagram of GW 7553 B GW 7553 M 2 2 Pin Assignme...

Страница 8: ...t of GW 7553 B GW 7553 M Table 3 9 pin screw terminal block Pin Name Description 1 CTS Clear to Send of RS 232 2 RTS Request to Send of RS 232 3 RX Receive Data of RS 232 4 TX Transmit Data of RS 232...

Страница 9: ...ground for the first node and the last node 6 VP 5V Power Supply for the first node and the last node 7 N A 8 A Inverting Bus Line 9 N A 2 3 Wiring GW 7553 B GW 7553 M supports PROFIBUS to Serial or E...

Страница 10: ...s got three pins The wiring of the RS 232 device with the RS 232 port of the GW 7553 B GW 7553 M is shown in Figure 4 Figure 4 RS 232 wiring diagram 2 3 2 Ethernet connection The user can connect GW 7...

Страница 11: ...165 2 Capacity lower than 30 pF m 3 Loop resistance lower than 110 km 4 Wire diameter greater than 0 65 mm 5 Core cross section greater than 0 34 mm2 Table 6 Transmission rate decreasing with increas...

Страница 12: ...7 PROFIBUS connector The number of stations in a PROFIBUS network is restricted to 126 According to the PROFIBUS specification up to 32 stations are allowed per segment A repeater has to be used to li...

Страница 13: ...ower on if the DIP switch address setting differs from the address stored in the EEPROM Table 7 DIP switch setting example Station address DIP switch SW1 1 2 3 4 5 6 7 8 1 1 0 0 0 0 0 0 0 10 0 1 0 1 0...

Страница 14: ...ch the module off and change the DIP switch setting to any value from 126 to 254 This step is necessary in order to prevent the module to change its address in the EEPROM to 126 every time it is power...

Страница 15: ...3 M has diagnostic message it will flash slowly flash once about 220ms on Connection error between PROFIBUS Master and Slave or PROFIBUS system has not been configured correctly off Normal operation P...

Страница 16: ...iguration GW 7553 M module only can connect to Utility via setting the control bit please refer section 4 6 2 Output data area and communication command to enable the setting mode of the GW 7553 M Fig...

Страница 17: ...B GW 7553 M is a PROFIBUS DP Slave device The GW 7553 B GW 7553 M is first parameterized then configured and finally it goes into the data exchange mode Figure 11 Figure 11 State machine of PROFIBUS...

Страница 18: ...dule parameters The GW 7553 B GW 7553 M and PROFIBUS Master device have different data type and data address the GW 7553 B GW 7553 M can transfer different data format to PROFIBUS Master device throug...

Страница 19: ...553 B GW 7553 M Figure 14 The input data of PROFIBUS Master device receive from the GW 7553 B GW 7553 M When the GW 7553 B GW 7553 M acts as a Modbus Slave device it will send DO AO data to input data...

Страница 20: ...PROFIBUS Master device send to the GW 7553 B GW 7553 M Figure 16 The input data of PROFIBUS Master device receive from the GW 7553 B GW 7553 M 3 2 Modbus data exchange Modbus protocol belongs to Maste...

Страница 21: ...ata exchange between the Modbus devices and the GW 7553 B GW 7553 M When the GW 7553 B GW 7553 M acts as a Modbus Master device it can get query message through module parameter and DO AO data and sen...

Страница 22: ...ces Figure 19 GW 7553 B GW 7553 M receive data from Modbus Slave devices When the GW 7553 B GW 7553 M acts as a Modbus Slave device it can receive query message from Modbus Master device and then savi...

Страница 23: ...The GW 7553 B GW 7553 M receive data from Modbus Master device Figure 21 The GW 7553 B GW 7553 M output data to Modbus Master device 3 3 Communication protocol transfer In section 3 1 and 3 2 we can u...

Страница 24: ...ster Modbus and the GW 7553 B GW 7553 M When the GW 7553 B GW 7553 M acts as a Modbus Master device the data exchange runs continuously between PROFIBUS Master Modbus and the GW 7553 B GW 7553 M as sh...

Страница 25: ...GW 7553 B GW 7553 M PROFIBUS Modbus TCP Gateway User Manual Version 1 35 May 2017 PAGE 25 Figure 23 GW 7553 B GW 7553 M master mode flowchart...

Страница 26: ...the data exchange runs continuously between PROFIBUS Master and the GW 7553 B GW 7553 M and the data exchange runs between Modbus Master device and the GW 7553 B GW 7553 M when GW 7553 B GW 7553 M rec...

Страница 27: ...GW 7553 B GW 7553 M PROFIBUS Modbus TCP Gateway User Manual Version 1 35 May 2017 PAGE 27 Figure 25 GW 7553 B GW 7553 M slave mode flowchart...

Страница 28: ...rite application specific data acyclically to the slave and if required read data from the slave in the same cycle Data Transport Termination of a connection for acyclic communication between the cals...

Страница 29: ...able 12 Error code Error class Error_Class Meaning Error_Code 10 application 0 read error 1 write error 2 module failure 3 to 7 reserved 8 version conflict 9 feature not supported 10 to 15 user specif...

Страница 30: ...end the diagnostic messages to PROFIBUS Master and the system will be abnormal Slot 2 32 is used for Modbus modules Index mapped input output channel from corresponding module If a digital module DI D...

Страница 31: ...igital output module DO and 4 words analog input module AI In this case the range of slot index and length of each modules is shown in below system setting module slot 1 index 0 length 1 2 bytes digit...

Страница 32: ...ation 4 1 Field of application A master station can be a PLC PC or any other smart device The system can be a mono master system Figure 27 or a multi master system Figure 28 The GW 7553 B GW 7553 M en...

Страница 33: ...W 7553 M can be form the ICP DAS companion CD ROM PATH CD PROFIBUS GATEWAY GW 7553 GSD Users can copy the GSD file IPDS0C0D gsd and the Bitmap file ICP_7553 bmp i_7553 bmp into any local destination f...

Страница 34: ...GE 34 File CopyGSD Directory CD PROFIBUS GATEWAY GW 7553 GSD Step 2 Choose Install GSD file by clicking the Options button in the Step 7 Manager Figure 29 install GSD file Step 3 Click Browse button t...

Страница 35: ...tall button Figure 31 select the GSD file of the GW 7552 B to install Step 5 Check the window if the GW 7552 B and its details can be found if yes then GW 7552 B is successfully added Figure 32 Finish...

Страница 36: ...Value ms M 1 65535ms TCP_Connect_Num T M 1 8 PS a When stop bit of COM Port is 2 data bit of COM Port must be 7 or else stop bit of COM Port will be set to 1 b I O Safe Mode When GW 7553 B GW 7553 M...

Страница 37: ...s c Byte order is an important factor related to the memory allocation Big endian byte order Motorola format allocates more significant byte in lower memory address On the other hand little endian byt...

Страница 38: ...put Relay Coil 1 32 Bytes Input Register 1 64 Words Max length of I O data 480 Bytes Output length 0 240 Bytes Input length 0 240 Bytes Note The user must add System setting module at the first module...

Страница 39: ...the user wants to read a Modbus digital input module DI module Device ID is 1 data address is 10010 10019 and data count is 10 via the first TCP connection In this case the user can select an Input R...

Страница 40: ...e Digital Output Write AO WAO Write Analog Output Read DI RDI Read Digital Input Read DO RDO Read Digital Output Read AI RAI Read Analog Input Read AO RAO Read Analog Output f Change Word Order When t...

Страница 41: ...EVICE FAILED TO RESPOND 0x0B CRC LRC Error 0xFD Response Message Timeout 0xFE Response Message error 0xF8 Connection error 0xF7 System setting module Error Not find System setting module 0x3D Position...

Страница 42: ...tic message Lose PROFIBUS output data will be sent by the GW 7553 B GW 7553 M to the PROFIBUS Master 4 6 I O data exchange The I O data exchange is decided by Modbus type of the GW 7553 B GW 7553 M pl...

Страница 43: ...EX Input data area in byte 0 byte5 information is 04 05 A0 02 00 FE 04 means there are 4 diagnostic messages 02 means Module 2 error FE means Response Message Timeout 4 6 2 Output data area and commun...

Страница 44: ...e to trigger data output command the user must increase this byte in order ex 0 1 1 2 255 0 or else the GW 7553 B GW 7553 M will send a diagnostic message to the PROFIBUS Master please refer section 4...

Страница 45: ...module address of the output module ex byte 2 3 it represent that the user want to trigger data output command of the third module 4 7 Establish connection with GW 7553 B GW 7553 M Before establishin...

Страница 46: ...meantime if there is any error occurs GW 7553 B GW 7553 M will return to wait parameterization 4 8 Data exchange example Modbus RTU In this example a Modbus master device simulated by a PC program se...

Страница 47: ...e remain as default Please refer to section 4 3 the Configuration of the common parameters for setting instructions Shown as the diagram below Figure 35 Add GW 7553 B double click the GW 7553 B icon t...

Страница 48: ...GW 7553 B modules as shown in Figure 38 and Figure 39 Select System setting module System setting module always has to be selected otherwise no communication can be established between the gateway and...

Страница 49: ...aved and compiled Figure 39 Save and compile Step 6 Click PLC Download to download program to PLC Figure 40 Click Download to download the setting into PROFIBUS master 4 8 1 Sending data from a Modbus...

Страница 50: ...1 4 Open the connection Figure 41 MBRTU Utility Send Command to write DO of the GW 7553 B The user needs to input command 01 0F 00 00 00 10 02 FF FF here and click Send Command button to send Modbus c...

Страница 51: ...n 1 35 May 2017 PAGE 51 Figure 42 Send Modbus command output data 0xFF 0xFF Figure 43 Receive 0xFF in the input data area Table 17 Receive 0xFF in the input data area Module Byte Data type Representat...

Страница 52: ...0x00 NO Lo No Of points Lo byte 0x10 BC Byte Count 0x02 4 8 2 Receiving data from the PROFIBUS Master device Send Command to read DI of the GW 7553 B The user needs to input command 01 02 00 00 00 10...

Страница 53: ...2 00 00 00 10 in MBRTU and click Send Command button to send Modbus command 01 02 00 00 00 10 79 C6 again Then MBRTU can receive response message 01 02 02 FE DC F8 41 In this message the user can know...

Страница 54: ...and trigger output data command in the output data area Table 18 Set output data and trigger output data command Module Byte Data type Representation Value System module Output 0 Byte Hex 0x00 0x01 O...

Страница 55: ...n 1 35 May 2017 PAGE 55 Figure 46 Send Modbus command to read DI of the GW 7553 B and receive data 0xFE 0xDC PS Modbus command Query message DA FC SA Hi SA Lo NO Hi NO Lo CRC check 01 02 00 00 00 10 7...

Страница 56: ...ample Modbus TCP In this example a Modbus master device simulated by a PC program sends query message and receives response message from a Profibus master via the GW 7553 B gateway In the following ex...

Страница 57: ...need to change Modbus Type to Slave and Modbus Format to Modbus TCP The default setting is being used in the other parameters for this example Please refer to section 4 3 the Configuration of the comm...

Страница 58: ...GW 7553 B modules as shown in Figure 81 and Figure 82 Select System setting module System setting module always has to be selected otherwise no communication can be established between the gateway an...

Страница 59: ...US Modbus TCP Gateway User Manual Version 1 35 May 2017 PAGE 59 Figure 52 Save and compile Step 5 Save and complie Figure 53 Download to PLC Step 6 Now the setting done by the Step 7 has to be downloa...

Страница 60: ...same domain and different IP with the PC ex PC s IP 192 168 0 106 MASK 255 255 0 0 GW 7553 B s IP 192 168 0 107 MASK 255 255 0 0 Step 8 Reset the power of the GW 7553 B for an active setting 4 9 1 Re...

Страница 61: ...7553 B The user needs to input command 01 0F 00 00 00 10 02 FF FF here and click Send Command button to send Modbus command 01 0F 00 00 00 10 02 FF FF and then MBTCP can receive response message 01 0F...

Страница 62: ...mand output data 0xFF 0xFF Figure 57 Receive 0xFF in the input data area Table 19 Receive 0xFF in the input data area Module Byte Data type Representation Value Input module Input 6 Byte Hex 0xFF Inpu...

Страница 63: ...ive response message 01 02 02 00 00 In this message the user can know the value of DI0 DI1 is 0 in the GW 7553 B Send output data to write DI of the GW 7553 B by the PROFIBUS Master The user needs to...

Страница 64: ...53 M PROFIBUS Modbus TCP Gateway User Manual Version 1 35 May 2017 PAGE 64 Figure 56 Send Modbus command to read DI of the GW 7553 B Figure 57 Set output data and trigger output data command in the ou...

Страница 65: ...nd trigger output data command Module Byte Data type Representation Value System module Output 0 Byte Hex 0x00 0x01 Output 1 Byte Hex 0x00 Output 2 Byte Hex 0x00 Output module Output 3 Byte Hex 0x00 0...

Страница 66: ...byte 0x00 NO Lo No Of points Lo byte 0x10 BC Byte Count 0x02 4 10 PROFIBUS DP V1 Data exchange example Modbus RTU In this example a Modbus Master device simulated by a PC program sends query message a...

Страница 67: ...ure 34 Figure 59 Wiring diagram between PC and GW 7553 Step 3 Set the parameters of the GW 7553 We just need to change Modbus Type to Slave and the default setting is being used in the other parameter...

Страница 68: ...w Figure 61 Click Parameter Data button to open the Parameter Data window Figure 62 The user needs to change Modbus Type to Slave for this example and click OK button Step 4 Set the GW 7553 modules as...

Страница 69: ...the Modbus network Select Output Relay Coil module In this example a Output Relay Coil 2 Byte module is selected Select Input Relay Coil module In this example a Input Relay Coil 2 Byte module is sele...

Страница 70: ...y 2017 PAGE 70 Figure 64 Select modules Step 5 Close the Slave Configuration window by clicking the OK button Step 6 Now the setting done by the configuration tool has to be downloaded to the PROFIBUS...

Страница 71: ...Sending data from a Modbus Master device Start the test utility MBRTU Figure 41 on the PC This utility simulates a Modbus Master device and is on the web site in the following directory http ftp icpd...

Страница 72: ...user needs to input command 01 0F 00 00 00 10 02 FF FF here and click Send Command button to send Modbus command 01 0F 00 00 00 10 02 FF FF E3 90 and then MBRTU can receive response message 01 0F 00...

Страница 73: ...Receive 0xFF in the input data area Table 21 Receive 0xFF in the input data area Module Byte Data type Representation Value Input module Input 6 Byte Hex 0xFF Input 7 Byte Hex 0xFF PS Modbus command...

Страница 74: ...Count 0x02 4 10 2 Using PROFIBUS DP V1 to read data from a PROFIBUS Master Device Send Command to write DO of the GW 7553 In section 4 8 1 The user can find byte 6 7 of the input data area in the con...

Страница 75: ...gram to establish connection between Profibus Master and GW 7553 If configure CIF50 PB as a class 1 master user do not establish connection If configure CIF50 PB as a class 2 master user must establis...

Страница 76: ...ures Supported 2 0x00 S_Addr API 0x00 Profile Features Supported 1 0x00 S_Addr SCL 0x00 Profile Features Supported 2 0x00 D_Addr API 0x00 Profile Ident Number Lo 0x00 S_Addr SCL 0x00 Profile Ident Num...

Страница 77: ...3 Telegram Header Parameters Parameters Value Meaning for DPV1 Device Adr 0x01 PROFIBUS station address of GW 7553 Data Area 0x00 Unused Data Adr 0x03 Slot number Data Idx 0x00 Index Data Count 0x01 L...

Страница 78: ...inate connection If configure CIF50 PB as a class 2 master user must terminate connection Please click Online Message Monitor then fill in parameters relative to Abort request telegram as shown in Fig...

Страница 79: ...gram SyCon and then set the value of the first byte from 0 to 1 to trigger the data output command Send Command to read DI of the GW 7553 again Now the user can input command 01 02 00 00 00 10 in MBRT...

Страница 80: ...and trigger output data command in the output data area Table 24 Set output data and trigger output data command Module Byte Data type Representation Value System module Output 0 Byte Hex 0x00 0x01 O...

Страница 81: ...on 1 35 May 2017 PAGE 81 Figure 76 Send Modbus command to read DI of the GW 7553 and receive data 0xFE 0xDC PS Modbus command Query message DA FC SA Hi SA Lo NO Hi NO Lo CRC check 01 02 00 00 00 10 79...

Страница 82: ...00 00 01 31 CA and then MBRTU can receive response message 01 04 02 00 00 B9 30 In this message the user can know the value of AI0 is 0x00 0x00 in the GW 7553 4 10 5 Data Exchange example Modbus TCP...

Страница 83: ...ters of the GW 7553 We need to change Modbus Type to Slave and Modbus Format to Modbus TCP The default setting is being used in the other parameters for this example Please refer to section 4 3 the Co...

Страница 84: ...e to Slave and Modbus Format to Modbus TCP for this example and click OK button Step 4 Set the GW 7553 modules as shown in Figure 81 and Figure 82 Select System setting module System setting module al...

Страница 85: ...oil module In this example a Input Relay Coil 2 Byte module is selected Figure 81 Double click the GW 7553 icon to open the Slave configuration window Figure 82 Select modules Step 5 Close the Slave C...

Страница 86: ...ction 5 5 5 6 The settings of the GW 7553 must have the same domain and different IP with the PC ex PC s IP 192 168 0 106 MASK 255 255 0 0 GW 7553 s IP 192 168 0 107 MASK 255 255 0 0 Step 8 Reset the...

Страница 87: ...7553 The user needs to input command 01 0F 00 00 00 10 02 FF FF here and click Send Command button to send Modbus command 01 0F 00 00 00 10 02 FF FF and then MBTCP can receive response message 01 0F...

Страница 88: ...mand output data 0xFF 0xFF Figure 86 Receive 0xFF in the input data area Table 25 Receive 0xFF in the input data area Module Byte Data type Representation Value Input module Input 6 Byte Hex 0xFF Inpu...

Страница 89: ...receive response message 01 02 02 00 00 In this message the user can know the value of DI0 DI1 is 0 in the GW 7553 Send output data to write DI of the GW 7553 by the PROFIBUS Master The user needs to...

Страница 90: ...GW 7553 B GW 7553 M PROFIBUS Modbus TCP Gateway User Manual Version 1 35 May 2017 PAGE 90 Figure 87 Send Modbus command to read DI of the GW 7553...

Страница 91: ...utput data area Table 26 Set output data and trigger output data command Module Byte Data type Representation Value System module Output 0 Byte Hex 0x00 0x01 Output 1 Byte Hex 0x00 Output 2 Byte Hex 0...

Страница 92: ...uery message DA FC SA Hi SA Lo NO Hi NO Lo 01 02 00 00 00 10 Response message DA FC BC DATA 01 02 02 FE DC DA Device Address 0x01 FC Function Code 0x02 read DI SA Hi Start Address Hi byte 0x00 SA Lo S...

Страница 93: ...OM disk following the path of CD profibus gateway GW 7553 utilities or the web site ftp ftp icpdas com tw pub cd fieldbus_cd profibus gateway GW 7553 utilities Step 2 Execute the Setup exe file to ins...

Страница 94: ...53 B GW 7553 M PROFIBUS Modbus TCP Gateway User Manual Version 1 35 May 2017 PAGE 94 Figure 91 Set the installation path Step 4 Click the Next button to confirm installation Figure 92 Confirm installa...

Страница 95: ...E 95 Step 5 Click the Close button to finish and exit the installation program Figure 93 Installation complete Step 6 After finishing the installation of the PROFIBUS Modbus Gateway Utility users can...

Страница 96: ...uces main window of the utility first as shown in Figure 95 Figure 95 Main window of the utility Main window of the utility has 6 parts they are 1 Menu 2 COM Port settings 3 Module state 4 Module para...

Страница 97: ...configuration in PROFIBUS Display memory address configuration of select module in PROFIBUS Master station c Space configuration in Modbus Display memory address configuration of select module in the...

Страница 98: ...lay state of the PC s COM Port The green color means COM Port is open and the red color means COM Port is close 5 2 6 Status bar Display messages about COM Port connection the GW 7553 B GW 7553 M conn...

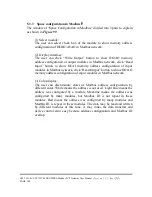
Страница 99: ...o show memory address configuration of DI DO AI AO in the GW 7553 B GW 7553 M as shown in Figure 97 Figure 97 Space configuration in device 5 3 2 Space configuration in PROFIBUS The user can select ch...

Страница 100: ...mory address configuration of input modules in Modbus network click Read Output button to show DO AO memory address configuration of input modules in Modbus network 3 Color display The user can discri...

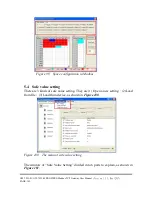
Страница 101: ...configuration in Modbus 5 4 Safe value setting There are 3 kinds of safe value setting They are 1 Open a new setting 2 Load from file 3 Load from device as shown in Figure 100 Figure 100 The menu of...

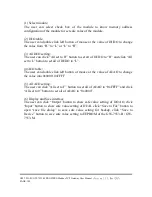
Страница 102: ...k All set to L button to set all of DI DO to L 4 AI O table The user can double click left button of mouse at the value of AI AO to change the value into 0x0000 0xFFFF 5 All AI O setting The user can...

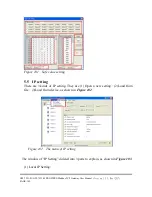
Страница 103: ...re 101 Safe value setting 5 5 IP setting There are 3 kinds of IP setting They are 1 Open a new setting 2 Load from file 3 Load from device as shown in Figure 102 Figure 102 The menu of IP setting The...

Страница 104: ...s by these IP settings and the maximum of Modbus TCP Slave device is 8 3 Save interface The user can click Save to File button to open save file dialog to save IP setting for backup click Save to Devi...

Страница 105: ...etail The RUN LED of GW 7553 B GW 7553 M is going to light at this time Figure 104 The connection of Utility and GW 7553 B GW 7553 M Step 3 Set bit 2 of byte 1 to High in output data area of the PROFI...

Страница 106: ...ion setting of Utility please refer section 5 2 2 COM Port settings the same as COM Port setting of GW 7553 B GW 7553 M please refer section 4 3 The Configuration of the common parameters Step 6 Click...

Страница 107: ...GW 7553 B GW 7553 M PROFIBUS Modbus TCP Gateway User Manual Version 1 35 May 2017 PAGE 107 complete Figure 107 Display connection state...

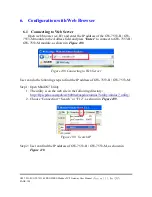
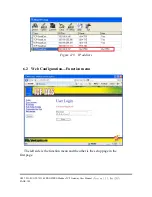
Страница 108: ...GW 7553 B GW 7553 M module as shown in Figure 108 Figure 108 Connecting to Web Server User can do the following steps to find the IP address of GW 7553 B GW 7553 M Step 1 Open MiniOS7 Utility 1 The u...

Страница 109: ...M PROFIBUS Modbus TCP Gateway User Manual Version 1 35 May 2017 PAGE 109 Figure 110 IP address 6 2 Web Configuration Function menu The left side is the function menu and the other is the setup page i...

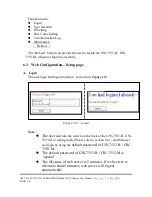
Страница 110: ...ully 6 3 Web Configuration Setup page A Login The user login and logout interface as shown in Figure 111 Figure 111 Login Note The user can turn the switch on the back of the GW 7553 B GW 7553 M to se...

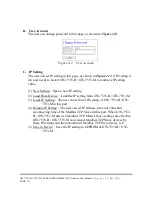
Страница 111: ...Open a new IP setting 2 Load From Device Load the IP setting from GW 7553 B GW 7553 M 3 Local IP Setting The user can set local IP setting of GW 7553 B GW 7553 M in this part 4 Remote IP Setting The...

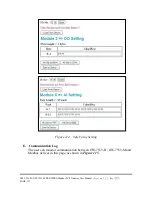
Страница 112: ...113 IP Setting D Safe Value Setting The user can set safe value setting in this page as shown in Figure 114 User select the module and press Enter to show the safe value setting of this module and it...

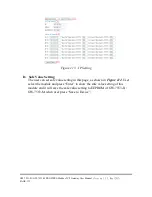
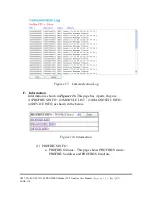
Страница 113: ...Modbus TCP Gateway User Manual Version 1 35 May 2017 PAGE 113 Figure 114 Safe Value Setting E Communication Log The user can monitor communication between GW 7553 B GW 7553 M and Modbus devices in thi...

Страница 114: ...munication Log F Information Information is shown in Figure 116 This page has 4 parts they are 1 PROFIBUS INFO 2 MODULE LIST 3 DIAGNOSTIC INFO 4 DEVICE INFO as shown in the below Figure 116 Informatio...

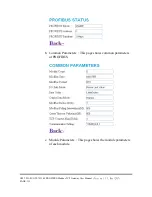
Страница 115: ...53 M PROFIBUS Modbus TCP Gateway User Manual Version 1 35 May 2017 PAGE 115 b Common Parameters This page shows common parameters of PROFIBUS c Module Parameters This page shows the module parameters...

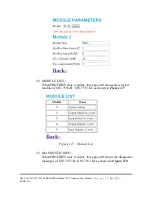
Страница 116: ...MODULE LIST When PROFIBUS state is online this page will shows all selected module of GW 7553 B GW 7553 M as shown in Figure 117 Figure 117 Module List 3 DIAGNOSTIC INFO When PROFIBUS state is online...

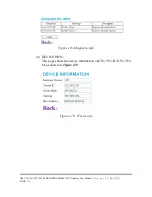
Страница 117: ...PROFIBUS Modbus TCP Gateway User Manual Version 1 35 May 2017 PAGE 117 Figure 118 Diagnostic info 4 DEVICE INFO This page shows the device information of GW 7553 B GW 7553 M as shown in Figure 119 Fig...

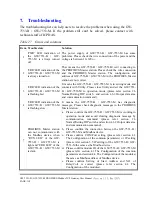
Страница 118: ...mal Setting DIP switch and section 4 6 2 Output data area and communication command 4 ERR LED indication of the GW 7553 B GW 7553 M is flashing slow It means the GW 7553 B GW 7553 M has diagnostic mes...

Страница 119: ...rouble state Solution f Please confirm the output data put in correct address and have changed value of byte 0 to trigger the output command when output data can not send to Modbus device in output da...

Страница 120: ...GW 7553 B GW 7553 M PROFIBUS Modbus TCP Gateway User Manual Version 1 35 May 2017 PAGE 120 8 Dimensions GW 7553 B...

Страница 121: ...GW 7553 B GW 7553 M PROFIBUS Modbus TCP Gateway User Manual Version 1 35 May 2017 PAGE 121...

Страница 122: ...GW 7553 B GW 7553 M PROFIBUS Modbus TCP Gateway User Manual Version 1 35 May 2017 PAGE 122 GW 7553 M...

Отзывы: