MANUAL for kg20 kg6 kg6 bAsic
dr
y
ic
e
bl
a
sting
eq
uipm
ent
fro
m
icetech
|
P
A
ge
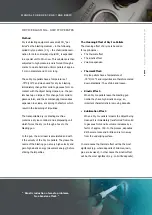
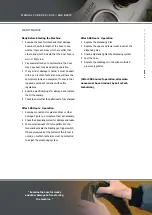
bLAsTiNg Hose
air coupling (male) for inser-
tion into the female air
coupling on the front of the
iceblast machine.
2
electrical male plug for
insertion into the female
socket on the front of the
iceblast machine.
electrical socket (female) for
connecting the blasting hose
to the ice gun (transmits
eletrical signal from the gun to
the machine control).
pneumatic coupling (female)
for connecting the blasting
hose to the ice gun.
electrical ice gun plug (male),
for electrical socket (female)
on the blasting hose.
6
standard Ø7 mm blasting
nozzle - interchangeable.
gun trigger switch.
Starts/ stops the
flow
of air
and dry ice to the ice gun as
long as the blasting machine is
turned on.
the outside protection sleeve might become
inflated
if the internal hose is leaking.
NoTe: if this fault occurs stop the
machine immediately.
sTANDArD ice gUN
blasting ice gun with insulated
handle.
2
6
6
LigHT gUN
blasting light gun with insulated
handle.
“ The blasting gun is ergonomically
designed. The gun is built up of modules and
can be adapted to suit any task. ”
MANUAL for kg20 kg6 kg6 bAsic
dr
y
ic
e
bl
a
sting
eq
uipm
ent
fro
m
icetech
|
P
A
ge
6
2
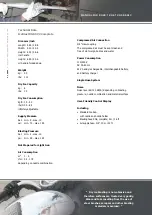
sTArTiNg THe icebLAsT MAcHiNe
setting Up
connect the battery charger.
2
turn on the battery charger.
the recharge starts automatically and the diode
on the battery charger turns yellow.
the diode turns green when the battery is fully
recharged.
the red diode on the battery charger indicates
that the charger is on.
unplug the charger from the machine and the
100V/220 supply when the battery is fully
charged
.
Fasten the earth connection wire in the
butterfly
nut on the back of the machine in order to pre-
vent static electricity. connect the terminal to
some place already adequately earthed.
make sure the machine is on a level, horizontal
foundation.
6
connect the primary air coupling to the main air
connection on the rear of the machine cabinet.
plug the blasting hose into the socket on the
front of the machine cabinet. check that the
hose is securely connected.
make the electrical connections at both ends of
the blasting hose with the corresponding sockets
on the blasting gun and on the front of the
machine cabinet.
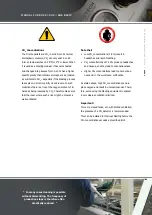
Dry ice check
dry ice for the cleaning process must be applied
into the built-in dry ice tank. this can be done while
the machine is in operation. it is recommended that
the
dry
ice tank be run
empty
for each
filling
to en
-
able the operator to see whether “snow” or lumps
appear in the dry ice. these can prevent a continu-
ous supply of dry ice to the dispensing system.
never leave the machine with the cover open.
dry ice must be handled in accordance with the safe-
ty regulations issued by the dry ice supplier, and the
operator must wear personal protection equipment
as described in the above safety regulations.
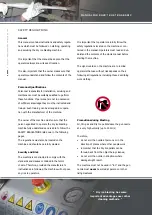
The Working Posture of the operator
before activating the blasting gun switch, the opera-
tor must stand in a working posture that prevents
loss of balance from blasting gun recoil. When used
at the highest blasting pressure, with the largest
nozzle diameter, the recoil energy can reach as
much as 6 kp. close off the working area and set up
possible mandatory signs pertaining to ear protec-
tion and safety goggles.
starting
When the machine has been set up, the following
procedure shall be followed before the cleaning
process is begun:
check carefully to ensure that the dispensing
system
at the
outflow
of the
dry
ice tank is
dry and clean.
0
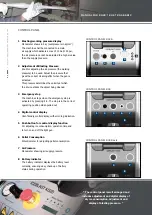
open the main pressure air supply (slowly).
emergency switch is turned to on


