background image

Troubleshooting

Testing the Computer

The following shows a basic way to test the computer:

1. Turn on the computer.

The power-on self-test (POST) runs automatically. If the test
ends without detecting an error, one of the following occurs:

The operating system or application screen appears.

A password prompt appears on the screen, if a password

has been set. Type the correct password and press Enter.

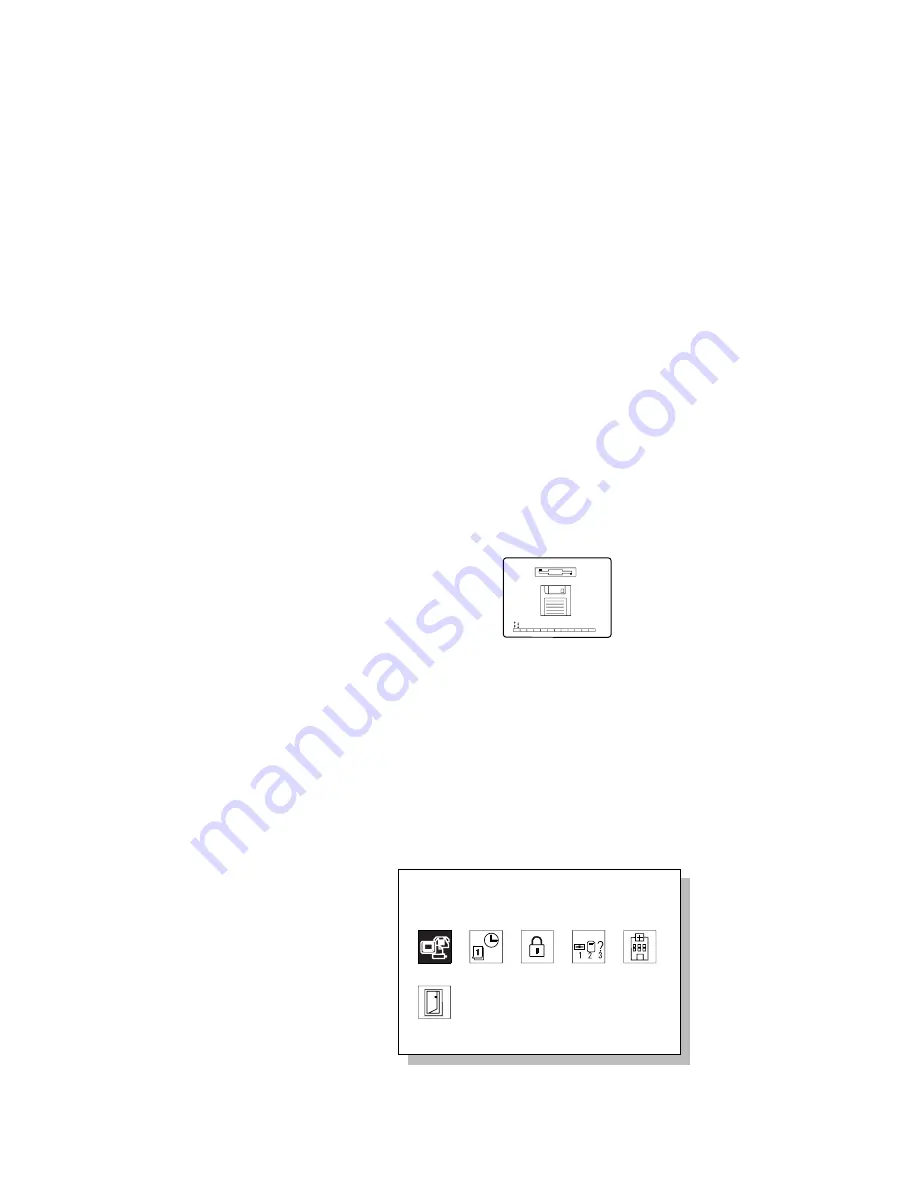
The Diskette and F1 prompts appear:

F2

F10

F1

This means no operating system is installed in your
computer. Install it now.

Did one of these screens appear?

Yes Turn off the computer and continue with step 2.

No

Go to page 147.

2. Make sure the speaker volume control is in its middle position.

3. Press and hold F1; then turn on the computer to start

Easy-Setup. Hold F1 until the following Easy-Setup menu
appears:

Date/Time

Password

Easy-Setup

Start up

Test

Restart

Config

BIOS part number,..Date
System-unit serial number
System board serial number

Microprocessor

nnnnnnnnnnnnnnnn
nnnnnnnnnnn

Pentium(

)Process

**

nnnnnnn

12/31/96

4. Did the Easy-Setup menu appear on the screen?


Chapter 8. Solving Computer Problems

145

Содержание ThinkPad 380

Страница 1: ...i...

Страница 2: ...anties in certain transactions therefore this statement may not apply to you This publication could include technical inaccuracies or typographical errors Changes are periodically made to the informat...

Страница 3: ...Thank You for Selecting an IBM ThinkPad 380 or 380D Computer We hope the powerful IBM ThinkPad 380 or 380D computer will fulfill your mobile computing needs iii...

Страница 4: ...function which is faster than computer power on quickly returning you to where you left off Security Features Page 73 You can set passwords or use locks to secure your computer The Personalization Uti...

Страница 5: ...Page 28 Creating the backup diskettes using utility programs Page 12 Reinstalling the operating system Chapter 7 Changing the system resource setting Appendix A The Basics Attaching an external displa...

Страница 6: ...es how to operate your computer with the battery pack Chapter 5 Protecting Your Computer provides information for protecting your computer Chapter 6 Installing and Removing Options describes how to in...

Страница 7: ...Appendix E Product Warranties and Notices contains the warranty statements for your computer and notices for this book The glossary defines terms appearing in this book vii...

Страница 8: ...hazardous to you It appears in text before the instruction or situation that could be hazardous Danger Indicates situations that are potentially lethal or extremely hazardous to you It is indicated by...

Страница 9: ...unique to the computer model or type For information referred to WIN Information for Microsoft Windows 95 users O S 2 Information for IBM Operating System 2 OS 2 users Information for Microsoft Window...

Страница 10: ...ronment Following some simple rules of the road will make things easier and bring you the maximum benefits of your ThinkPad computer Keeping in mind such basics as good lighting and proper seating for...

Страница 11: ...keys type with a soft touch 6 Chair Use a chair that gives you good back support What if I am traveling It may not be possible to observe the best ergonomic practices when you are using the ThinkPad c...

Страница 12: ...in the liquid crystal display LCD contains mercury Do not put it in trash that is disposed of in landfills Dispose of it as required by local ordinances or regulations The LCD is made of glass and ro...

Страница 13: ...countries the drive is certified to conform to the requirements of EN60825 CAUTION Do not open the CD ROM drive no user adjustments or serviceable parts are inside Use of controls adjustments or the...

Страница 14: ...xiv IBM ThinkPad 380 or 380D User s Guide...

Страница 15: ...eypad 24 Protecting the Computer from Damage 25 Chapter 3 Operating Your Computer 27 Using the ThinkPad Features Program 28 Starting the ThinkPad Features Program 29 Using Easy Setup 33 Starting Easy...

Страница 16: ...zation Feature 82 Using Locks 83 Chapter 6 Installing and Removing Options 85 Using the PC Card Slot 86 Installing a PC Card 86 Removing a PC Card 88 Increasing the Memory Capacity 89 Installing or Re...

Страница 17: ...pport Software for DOS 122 Installing Software for Windows Version 3 11 123 Installing Microsoft Windows Version 3 11 123 Installing the ThinkPad Features Program for Windows Version 3 11 126 Installi...

Страница 18: ...blems 162 Getting Service 163 Listing Installed Options 165 Recording Identification Numbers 165 How to receive Customer Support and Service 166 Purchasing Additional Services 170 Obtaining IBM Operat...

Страница 19: ...g the Allocated Resources for the PC Card 191 Avoiding PC Card Resource Conflicts 193 Virtual Card Services 194 Appendix C Using PS2 Commands 195 Appendix D Features and Specifications 203 Features 20...

Страница 20: ...xx IBM ThinkPad 380 or 380D User s Guide...

Страница 21: ...d smoothly You can use your ThinkPad 380 or 380D computer in the office or at home as a desktop computer by attaching an external keyboard display or other external devices And of course you can easil...

Страница 22: ...h all the necessary items Then install the battery pack in the computer Now you are ready to turn on the computer 2 Install Options If you have any options such as memory cards install the options 3 C...

Страница 23: ...e backup at the Diskette Factory program You can also make a backup copy of Windows 95 using Create System Disk It tells you how many diskette you need For your information Do you need more hard disk...

Страница 24: ...ack Supplies power to the computer for mobile operation AC Adapter Power Cord In some countries your AC Adapter is a 3 pin AC Adapter different from the one shown In this case make sure you read the s...

Страница 25: ...mbers 1 on page 165 The machine type has a prefix of Type The serial number has a prefix of S N These numbers are required when you order service After recording the numbers place the computer as it w...

Страница 26: ...es guide you through the process 1 Turn the computer upside down 2 Make sure the battery pack lock is upper position If not pull the battery pack lock upward 1 2 Battery pack lock 3 Install the batter...

Страница 27: ...rain Do not attempt to disassemble the battery pack Avoid mechanical shocks to the battery Always use battery packs recommended by IBM Keep the battery pack away from children When disposing of the b...

Страница 28: ...in the country where you will be using the computer Operating the computer with an incorrect AC Adapter can cause damage to the battery pack and to the computer For Your Information To use the AC Ada...

Страница 29: ...Position the LCD so that it is convenient for viewing Note The LCD opens up to 150 Do not force the LCD to open flat 180 8 Press the power switch to turn on the computer 1 Position the contrast 2 for...

Страница 30: ...Month Day Hour Month Second Year 1996 Date and Time menu panel Startup panel This menu instructs you to set the initial date and time To set the date and time see Using Easy Setup on page 33 The prei...

Страница 31: ...our computer Are you ready to use your computer If you have any application programs to install follow the instructions in the documentation that came with those programs Do you need to reinstall the...

Страница 32: ...Click on the diskette names you want to create then click on Build 3 Follow the instructions on the screen To use the Create System Disk utility of Windows 95 1 Click on Start 2 Click on Programs 3 Cl...

Страница 33: ...basic information about your computer Identifying the Hardware Features 14 System Status Indicators 18 Operating with the TrackPoint III 20 Using the Fn Key Function 22 Operating the Numeric Keypad 2...

Страница 34: ...you connect a stereo headphone or external speakers This jack can be used concurrently with the microphone line in jack See page 51 5 The microphone line in jack a 1 8 inch 3 5 mm diameter jack is wh...

Страница 35: ...cation programs 14 The TrackPoint III is a built in pointing device that provides a function similar to that of a mouse See page 20 15 The built in microphone captures sound and voice when it is used...

Страница 36: ...e anything in front of the louver that might block air flow The cooling fan starts at power on then stops and starts alternately depending on the temperature inside the computer 7 The suspend mode ind...

Страница 37: ...option See page 89 4 The battery pack lock locks or releases the battery pack 5 The battery pack is a built in power source for the computer 6 The power shutdown switch is used to turn the computer of...

Страница 38: ...ging 2 Drive in use Orange Data is being read from or written to the hard disk the diskette drive and the CD ROM drive 380D Do not enter suspend mode or turn off the computer when this indicator is on...

Страница 39: ...The computer is in suspend mode See page 63 for details about suspend mode Blinking green The computer is entering suspend mode or hibernation mode or is resuming normal operation 7 Power on Green Th...

Страница 40: ...ow the keyboard The motion of the pointer on the screen is controlled by the amount of pressure applied to the nonslip cap on the stick in any direction parallel to the keyboard the stick does not mov...

Страница 41: ...nter to move Pressing the stick away from you moves the pointer up the screen pressing it toward you moves the pointer down the screen You can also move the pointer side to side by pressing sideways 2...

Страница 42: ...e effect as when you press and hold the Fn key After you press a function key in the top row Fn returns to its normal state Function keys not shown in the following table have no function Key Combinat...

Страница 43: ...when an external monitor is attached External Both Display LCD Fn F11 Power mode switching When you press this key combination during battery power operation the power management power saving mode ch...

Страница 44: ...front of the keys To enable the numeric keypad press and hold Shift and then press NumLk 0 1 2 3 4 5 6 7 8 9 NumLk 6 Y F8 F9 F10 Shift Alt Ctrl F11 F12 H N _ Note The functions of the cursor and scree...

Страница 45: ...face of the LCD Remove the battery pack and keep it in a cool place if you will not be using the computer for a long period of time Insert a diskette straight into the diskette drive Inserting it at a...

Страница 46: ...26 IBM ThinkPad 380 or 380D User s Guide...

Страница 47: ...Network RPL Speed 38 Using the Computer LCD or the External Monitor 39 Display Output Type 39 Considerations for the DOS Screen on the LCD 41 Attaching an External Monitor 42 Setting the Monitor Type...

Страница 48: ...evice Configuration Management System which automatically detects a system resource such as IRQ DMA I O address or memory conflict so that you can easily set up your computer configuration for the new...

Страница 49: ...s except for Windows NT at the command prompt see Appendix C To start the ThinkPad Features program For OS 2 or Windows 3 11 or Windows NT 3 51 Double click on ThinkPad Features For Windows 95 or Wind...

Страница 50: ...for battery operation Click on one of the buttons to set the power mode for the battery operation to the high performance mode the automatic mode or the customized mode 3 Display device buttons Click...

Страница 51: ...us appear in this status bar 7 Device buttons Click on the button of your choice from the screen then set the options for that device in the window that appears When the device is enabled the red indi...

Страница 52: ...nds from the command prompt in OS 2 2 This menu screen might look different on your system You can select an item from the menu and follow the instructions on the screen to set any of the features For...

Страница 53: ...diskette drive Note You can change the screen color of the Easy Setup menu with the key combinations of Ctrl PgUp or Ctrl PgDn Use Ctrl Home to restore the original screen color Enter your password if...

Страница 54: ...menu The Esc key returns to the previous menu or cancels the changes Config Config contains the following Memory SystemBoard Initialize Exit Memory Memory shows the amount of installed memory and avai...

Страница 55: ...click on OK or press Enter To cancel the setting click on Cancel or press Esc Password Password is used to set the power on password and the hard disk password For more information about the power on...

Страница 56: ...computer hardware For more information see Testing the Computer on page 145 Restart Click on Restart to restart the computer after you have made your selections Then press Enter or click on OK OK Canc...

Страница 57: ...drive startup selectable boot allows you to control the startup sequence of the drives in your computer The order in which the computer searches the drives for your operating system is the drive star...

Страница 58: ...equence then press the Spacebar Repeat this step to set the other devices for the startup sequence You can set up to four devices 4 Click on OK or press Enter to save the change Selecting the Network...

Страница 59: ...colors Display Output Type To attach an external monitor Page 42 When you attach an external monitor that supports resolution higher than VGA mode you can get a maximum of 1024 by 768 video resolutio...

Страница 60: ...Start the ThinkPad Features program 2 Click on the following icons from the tools bar The LCD icon to display information on the LCD The CRT icon to display information on the external monitor The Bo...

Страница 61: ...y 480 resolution with your computer the screen image might appear smaller than the display size as shown 640 x 480 This is to maintain compatibility with DOS applications PS2 command for screen expans...

Страница 62: ...y driver Chapter 7 Note When installing an operating system you must install the display driver before you can use an external monitor with SVGA mode If you are attaching an SVGA monitor refer to Usin...

Страница 63: ...program Connecting an External Monitor to the Computer Attention Do not disconnect the external monitor while the computer is in suspend mode or hibernation mode If no external monitor is attached whe...

Страница 64: ...Use this table to set the display output LCD CRT or both Note Only a portion of the 1024x768 screen is displayed on the LCD 800x600 You can use the pointer to scroll up or down or left to right to se...

Страница 65: ...setting and the playback video quality is unsatisfactory try using the 800 by 600 resolution and 256 colors If you are playing back video in a WIN OS 2 full screen stop the video before you switch ba...

Страница 66: ...set of drivers Socket Services Card Services PC Card support software and common enablers PC Card support program Page 48 The PC Card slots operate at 5V dc and support the following Type I Type II a...

Страница 67: ...Zoomed Video port card cannot be used without a PC Card device driver and a display device driver The Zoomed Video port card device driver must correspond to Video Port Manager Version 1 10 or later...

Страница 68: ...Notifying you with a message sound and icons whenever a card is inserted or removed Allowing you to register an application program for a particular PC Card and starting the program automatically when...

Страница 69: ...other IrDA compliant systems To enable the infrared port use the ThinkPad Features program If you are using OS 2 or Windows click on the Infrared icon in the ThinkPad Features window If you are using...

Страница 70: ...nce from ambient light Do not use infrared communication under bright sunshine Light from a certain type of fluorescent lamps can also interfere with communication The infrared port is not directly fa...

Страница 71: ...esizer Capacity to record from various sound sources such as an integrated microphone an external microphone and an audio device attached to a line in jack or an integrated CD ROM drive DOS game compa...

Страница 72: ...52 IBM ThinkPad 380 or 380D User s Guide...

Страница 73: ...ow Battery Condition 59 Using the Fuel Gauge Program 59 Preserving Battery Pack Life 60 Maximizing Battery Powered Operation 60 Using Advanced Power Management 60 Decreasing LCD Brightness TFT Model O...

Страница 74: ...with you for maximum operating time Important If the battery pack is new or has not been used for a long time it will not be fully charged with only a single charging You will have to completely use i...

Страница 75: ...are using PC Cards either connect the AC Adapter or stop the PC Card application and remove the PC Card before doing the following procedure When you use an IBM PC Card that is listed on page 72 the...

Страница 76: ...ry Pack 2 Pull the battery pack lock upward 1 and slides it toward the rear of the computer 2 Using the notch 3 beside the battery pack lift the battery pack 4 from the computer 56 IBM ThinkPad 380 or...

Страница 77: ...3 Install the fully charged spare battery pack as shown 1 and slide the battery pack lock toward the rear 2 4 Push the battery pack lock downward 5 Turn the computer over again then open the LCD Chapt...

Страница 78: ...ct the AC Adapter to the computer leave the battery pack installed Replace the battery pack with a fully charged spare See Replacing the Battery Pack on page 55 Save the current data Off The battery p...

Страница 79: ...pend mode within 30 to 60 seconds To install the ThinkPad Features program Chapter 7 O S 2 Using the Fuel Gauge Program The Fuel Gauge program displays the following battery pack conditions on the scr...

Страница 80: ...port APM but the computer provides a device driver for the Windows NT power management APM allows you to reduce power consumption when your applications and devices are idle Each operating system come...

Страница 81: ...file using a text editor such as the DOS Editor DEVICE C DOS POWER EXE If you are using Windows 3 11 follow these instructions to check and install APM for Windows 1 Start the computer Make sure that...

Страница 82: ...ed to MS DOS System with APM on the screen If not return to step 3 on page 62 Windows Setup If your computer or network appears on the Hardware Compatibility List with an asterisk next to it press F1...

Страница 83: ...to save power when you use the battery pack or the AC Adapter Operation modes The operation modes control the processor speed or set timers for saving power For more information about the operation mo...

Страница 84: ...n Mode Standby Mode Suspend Mode Press the Power Switch Press the Power Switch Press the Power Shutdown Switch Open the LCD Close the LCD Press the Fn key Press Fn F4 Press Fn F3 Press Fn F12 Press An...

Страница 85: ...nd mode all tasks are stopped and stored in memory to save power When the computer resumes normal operation the tasks are automatically restored To create hibernation file Page 69 RediSafe suspend mod...

Страница 86: ...Enable hibernation and create the file on the hard disk drive 4 Click on the check box next to RediSafe suspend A mark appears in the check box when RediSafe suspend is selected 5 Click on OK DOS If...

Страница 87: ...running when the computer enters suspend mode When you resume normal operation the output might differ from what you expect because the device might be reset or lose its configuration settings Sometim...

Страница 88: ...after normal operation is resumed remove and then reinstall the PC Card before restarting the system or an application program For other kinds of PC Cards if the PC Card or computer does not operate...

Страница 89: ...ge appears and suspend mode indicator lamp blinks then a short beep sounds again to inform you that the computer has entered hibernation mode To return to normal operation press the power switch Befor...

Страница 90: ...ck on Battery 3 Click on Suspend Hibernation Resume options 4 Click on Enable Hibernation in the menu 5 Make sure the hard disk drive in the computer is selected then select OK to create the hibernati...

Страница 91: ...rnation file only on the hard disk drive installed in the computer The hibernation file is hidden and cannot be accessed The computer uses the battery power to enter hibernation mode Therefore it rese...

Страница 92: ...e if it is using one of the following IBM PC Cards IBM 28 8 14 4 Data FAX Modem IBM PCMCIA Data FAX Modem IBM High Speed PCMCIA Data FAX Modem IBM 3270 Emulation Credit Card Adapter IBM Token Ring 16...

Страница 93: ...reen to identify your computer Using Passwords 74 Power On Password 74 Setting a Power On Password 74 Entering a Power On Password 75 Changing a Power On Password 76 Removing a Power On Password 77 Ha...

Страница 94: ...ct it from being used by unauthorized persons If a power on password is set the password prompt appears on the screen whenever you turn on the computer and reminds you to enter the password Do Not For...

Страница 95: ...g a Power On Password Note If the return to normal operation is caused by a preset timer or an incoming call through the modem the password prompt does not appear To display a power on password prompt...

Страница 96: ...n is resumed To change a power on password Important Do not press Enter until you have finished all the steps to change the power on password 1 Turn off the computer and wait at least 5 seconds then t...

Страница 97: ...ving a Power On Password You must remove your power on password at the password prompt that appears when you turn on the computer You cannot remove it after normal operation is resumed To remove a pow...

Страница 98: ...for both the power on password and the hard disk password Do Not Forget Your Hard Disk Password Note the password and keep it in a safe place If you forget your hard disk password there is no way to r...

Страница 99: ...d again to verify it then press Enter Entering a Hard Disk Password If a hard disk password is set the hard disk password prompt appears when You turn on the computer When the computer returns to norm...

Страница 100: ...the power on password has not been set 1 Turn off the computer and wait at least 5 seconds then turn it on 2 If you have set a power on password type it then press Enter 3 When the hard disk password...

Страница 101: ...e 77 This operation removes both the hard disk password and the power on password 2 If you need a power on password reset it in Easy Setup When the hard disk password and the power on password are dif...

Страница 102: ...in the nonvolatile memory of your system A personalized password prompt screen consists of two parts the personal data area and the background bitmap area The personal data area 1 is the box in the c...

Страница 103: ...quality or performance of locking devices and security features You can attach a security system lock to your computer to prevent it from being removed without your permission To attach a lock do the...

Страница 104: ...84 IBM ThinkPad 380 or 380D User s Guide...

Страница 105: ...al devices and IBM options Using the PC Card Slot 86 Installing a PC Card 86 Removing a PC Card 88 Increasing the Memory Capacity 89 Installing or Removing the DIMM 90 Attaching an External Numeric Ke...

Страница 106: ...PC Card slots upper and lower slot to install two Type I or Type II PC Cards one in each slot a single Type III PC Card in the lower slot or a single Zoomed Video port card in the lower slot This sect...

Страница 107: ...o either the upper slot A or the lower slot B If you are using a Type III PC Card insert the card into the lower slot B Press the card firmly into the connector 1 until the eject button pops out 2 The...

Страница 108: ...ving a PC Card Raise the PC Card eject button 1 for the card you want to remove Then press the PC Card eject button 2 until the card pops out Remove the card 3 and save it for future use 88 IBM ThinkP...

Страница 109: ...your computer by installing a dual inline memory module DIMM available as an option You can insert a DIMM directly in the memory slot on the bottom of the computer and expand your computer memory cap...

Страница 110: ...y metal object with your hand to release any static electricity 3 Turn the computer over 4 Loosen the screw on the memory slot cover and remove the cover Attention To avoid damaging the DIMM do not to...

Страница 111: ...B on the edge of the DIMM b With the notched end of the DIMM toward the right side of the socket B insert the DIMM at an angle of approximately 20 into the socket then press it firmly c Pivot the DIMM...

Страница 112: ...IMM do not touch its contact edge 7 Remove the DIMM from the memory slot a Press out on the latches on both edges of the socket at the same time b Remove the DIMM Be sure to save the DIMM for future u...

Страница 113: ...KB by adding the DIMM memory size to the base memory size 16 384KB For example if you installed a 16Megabytes DIMM calculate the total memory size as follows 16 Megabytes x 1 24 Kilobytes 16 Kb 32384...

Страница 114: ...ry test starts e Does an OK message now appear under the Memory icon Yes You have installed the DIMM correctly Exit Easy Setup and go to the next step No You need to reinstall the DIMM Go to page 90 a...

Страница 115: ...use can be attached directly to the connector on the rear of the computer You can use both the IBM PS 2 Miniature Mouse and TrackPoint III as the pointing device Note You can remove the keypad cover 1...

Страница 116: ...e can be connected to the external input device connector Some mouse types require the TrackPoint III to be disabled before you can use them To disable the TrackPoint III O S 2 With OS 2 or Windows 1...

Страница 117: ...closed Be careful not to insert the connector 2 upside down The external keyboard must be connected through the keyboard mouse connector It will not work if it is connected directly to the computer W...

Страница 118: ...98 IBM ThinkPad 380 or 380D User s Guide...

Страница 119: ...ith Dual Boot 110 Installing OS 2 Warp with the Boot Manager 111 Installing OS 2 Warp Using a Diskette Drive and CD ROM Drive 112 Installing the CD ROM Device Driver for OS 2 113 Installing the ThinkP...

Страница 120: ...PC Card Support Software for Window NT 131 Installing the Audio Support Software for Windows NT 3 51 131 Installing the Audio Support Software for Windows NT 4 0 133 Installing the Video Features Dis...

Страница 121: ...d Create System Disk for Windows 95 diskette backup program which are preinstalled on your computer When reinstalling an operating system you must also reinstall the software in this list for your com...

Страница 122: ...e 104 O S 2 IBM Operating System 2 OS 2 Warp Go to Installing Software for OS 2 Warp on page 109 DOS IBM PC DOS Version 7 0 Go to Installing Software for DOS on page 119 Microsoft Windows 3 11 Go to I...

Страница 123: ...ormation described here WWW server on the Internet http www pc ibm com support html FTP site ftp ftp pc ibm com pub pccbbs mobiles CompuServe ThinkPad Forum Join the CompuServe ThinkPad Forum by enter...

Страница 124: ...uter to work as it did at the time of purchase install all this software Install Windows 95 See the manuals supplied with the machine 380D Install the CD ROM device driver This page Install the ThinkP...

Страница 125: ...D ROM device driver If you cannot find the line quit the file and go to step 4 3 Comment out the line to change it as follows REM DEVICE C xxxxxx IBMTPCD SYS R If the line is already commented out qui...

Страница 126: ...95 To use PC Cards in Windows 95 install the CardWorks software Important If your system is connected to a network log off before starting installation 1 Start Windows 95 2 Remove any PC Cards from th...

Страница 127: ...ble the function in the ThinkPad Features After you enable MIDI port capability you are prompted to insert the manufacturer s disk to install support software for the function Insert the Audio Support...

Страница 128: ...ge button on the Adapter tab 6 Click on Have Disk and click on OK 7 Insert the ThinkPad Video Feature Diskette for Windows 95 into the diskette drive 8 Make sure IBM ThinkPad NeoMagic MagicGraph 128ZV...

Страница 129: ...create the installation diskettes using the Diskette Factory program a diskette backup program that is preloaded on your computer Install OS 2 This page 380D Install the CD ROM device driver for OS 2...

Страница 130: ...on however pay attention to the following during installation Remove any supported devices under Multimedia device support at the System configuration screen Choose the following at the System configu...

Страница 131: ...ng Remove any supported devices under Multimedia Device Support at the System Configuration screen 380D At the System Configuration screen ensure that ThinkPad 755CD TEAC CD 40E is selected for the CD...

Страница 132: ...ert OS 2 Warp Diskette 1 insert it into the diskette drive and insert the OS 2 Warp CD ROM into the CD ROM drive Note If you have the OS 2 Warp FixPak 10 XR0010 or later install it after you complete...

Страница 133: ...ick on the CD ROM Device Support 5 If ThinkPad 755CD TEAC CD 40E is present in the list select this and click on OK If not select Non Listed IDE CD ROM or IDE CD ROM and click on OK 6 Click on OK at t...

Страница 134: ...atures program for the WIN OS 2 session a Exit the OS 2 screen then open a WIN OS 2 full screen b Follow the instructions in Installing the ThinkPad Features Program for Windows Version 3 11 on page 1...

Страница 135: ...utility PC Card client device drivers only when PC Card Director does not support the PC Card Note CardBus PC Cards cannot be used in OS 2 To install the PC Card Director 1 Start OS 2 then open the O...

Страница 136: ...he Selective Uninstall program When you reinstall the multimedia software supported by Selective install program make sure to remove the SoundBlaster Pro from the Multimedia Device support in the syst...

Страница 137: ...ed in TranXit for OS 2 and is installed when you install the application You need not install it separately The latter is included in the Infrared Features Diskette II and is installed as a Network De...

Страница 138: ...Start OS 2 2 Insert the Video Featres Diskette for OS 2 into the diskette drive and open the OS 2 full screen or OS 2 window 3 Go to the A prompt then type SET UP X X boot drive and press Enter 4 Sel...

Страница 139: ...diskette backup program that is preloaded on your computer Install DOS This page 380D Install the CD ROM device driver Page 120 Install the ThinkPad Features program Page 121 Install the PC Card supp...

Страница 140: ...estart the computer Software Parameters in the CONFIG SYS When the CD ROM device driver is installed in your computer the installation program UINSTALL EXE automatically modifies the CONFIG SYS file a...

Страница 141: ...plied with PC DOS Version 7 0 Installing the ThinkPad Features Program for DOS Note When installing an operating system you need to install the ThinkPad Features program To install the ThinkPad Featur...

Страница 142: ...ppears 4 Follow the instructions on the screen During installation use the Arrow keys or to highlight your selection then press Enter 5 After the installation is complete remove any diskette from the...

Страница 143: ...or DOS Page 120 Install the ThinkPad Features program for DOS Page 121 Install Windows Version 3 11 with Advanced Power Management This page Install the ThinkPad Features program for Windows Page 126...

Страница 144: ...d OS 2 If so change the path to C WINDOWS Do the following to install Windows Version 3 11 with Advanced Power Management APM 1 Install Windows Version 3 11 with the APM option a Start the installatio...

Страница 145: ...command prompt usually C type E AUTOEXEC BAT and press Enter b Find the line C WINDOWS MOUSE COM Y c Change it to C DOS MOUSE COM Y d Find the line that includes SHARE EXE and delete that line e Save...

Страница 146: ...NSTALLW and press Enter 4 Follow the instructions on the screen Default choices are already highlighted at the Installation Options screen Installing the PC Card Support Software for Windows Version 3...

Страница 147: ...eed to install MPU401 Support Software from the Windows 3 1 installation disk Select and install the Roland MPU401 device driver in the control panel Installing the Infrared Device Driver for Windows...

Страница 148: ...Features program after completing the installation of the ThinkPad Features program for Windows 2 Type SETUP to start the Windows setup program 3 Using the Up Arrow highlight Display and press Enter...

Страница 149: ...through several channels so that you can set up Windows NT on your computer with the information described here WWW server on the Internet http www pc ibm com support tps winnt html FTP site ftp ftp p...

Страница 150: ...ll the Windows NT ThinkPad Features Program Page 131 Install the PC Card support software Page 131 The Windows NT Audio support software Page 131 Install the Video Features Diskette for Windows NT V3...

Страница 151: ...If your system is connected to a network log off before starting installation 1 You must be logged on to Windows NT as Administrator 2 Remove any PC cards that are in the slot 3 Insert the CardWizard...

Страница 152: ...dated Driver 6 Specify the drive and path name as A and select OK 7 Select CrystalWare Audio driver and select OK A warning message appears on the screen and prompting you to restart Windows NT 8 Clic...

Страница 153: ...than 16 colors you need to install the Video Features Diskette If you are using Windows NT Version 3 51 1 Start Windows NT and log on with the user ID authorized as an administrator 2 Click on Control...

Страница 154: ...d party driver appears on the screen 9 Click on Yes then follow the instructions on the screen 10 Restart Windows NT after the installation is complete After you restart Windows NT the display resolut...

Страница 155: ...er the virtual screen mode you can use the pointer to scroll up or down or left to right to see information outside the displayed area 4 Reboot is required when switching color depth of 16 777 216 col...

Страница 156: ...n you are prompted insert the device driver diskette into the diskette drive Follow the instructions on the screen 4 When you are finished adding the adapter click on OK and follow the instructions on...

Страница 157: ...Token Ring I O address Primary Type PCMCIA Bus number 0 IRQ level 7 or 9 Memory base address 0xCA000 or a higher value For IBM Ethernet II PCMCIA Card I O address 200 260 or a higher value IRQ level...

Страница 158: ...138 IBM ThinkPad 380 or 380D User s Guide...

Страница 159: ...ction to take Important Use this chapter to test only IBM products Non IBM products can cause misleading error information or incorrect computer responses When testing non IBM products refer to the in...

Страница 160: ...heet for Your Problem Reporting 164 Listing Installed Options 165 Recording Identification Numbers 165 How to receive Customer Support and Service 166 Purchasing Additional Services 170 Obtaining IBM...

Страница 161: ...oes not show as good performance as I expected Performance varies depending on your hardware and software configurations such as memory size swapper file size or smart drive settings Error 2xx appears...

Страница 162: ...tering suspend mode might not be saved The computer does not enter suspend or hibernation mode Verify that If you are using the AC Adapter and the computer is communicating suspend and hibernation mod...

Страница 163: ...es in the computer How can I use DMA channels for both parallel port and infrared port When you enable ECP and choose DMA3 default value for the parallel port you may see the panel asking if you want...

Страница 164: ...h the serial port disabled Enable it as follows 1 Start ThinkPad Feature see page 29 2 Click on Serial port 3 Select Enable 4 If a warning message appeared click on OK 5 Click on OK 6 Close ThinkPad F...

Страница 165: ...no operating system is installed in your computer Install it now Did one of these screens appear Yes Turn off the computer and continue with step 2 No Go to page 147 2 Make sure the speaker volume co...

Страница 166: ...the computer then turn it on again and repeat step 3 on page 145 If a problem still exists have the computer serviced If you cannot go beyond the first screen have the computer serviced If an error i...

Страница 167: ...he Start up icon If you are unable to set the startup sequence have the computer serviced 4 Check the list of devices on the startup sequence box Is the default drive listed in the startup sequence bo...

Страница 168: ...tery error The computer has turned off because of a critical low battery condition Connect the AC Adapter to the computer and charge the battery pack or replace the battery pack with a fully charged o...

Страница 169: ...be damaged Have the external keyboard serviced Verify that the external keyboard is connected to the correct side of the keyboard mouse connector see page 97 Verify that the keyboard mouse connector i...

Страница 170: ...een remains blank have the computer serviced The screen is blank and there is a continuous beep or two or more beeps Have the computer serviced Only the cursor appears Reinstall your operating system...

Страница 171: ...ht dots on the screen is an intrinsic characteristic of TFT LCD technology and is not an LCD defect Message Action Diskette and F1 prompts F2 F10 F1 Make sure that you have installed an operating syst...

Страница 172: ...POST error prompt ERROR OK Cancel An error was found during the POST Press Enter then select Start from the test menu to run the test If the test ends with an error make a note of the error code and...

Страница 173: ...uct specifications See Specifications on page 205 Processor speed may decrease if the computer is used in a high temperature environment This is not a defect The computer has problems such as a broken...

Страница 174: ...the computer 3 Connect the AC Adapter to the computer and let it charge If the battery pack cannot be fully charged in 24 hours use a new battery pack The battery operating time indicated by the Fuel...

Страница 175: ...r remains blank run the display tests described in the instructions supplied with the external monitor If the tests show the external display is OK have the computer serviced The screen is unreadable...

Страница 176: ...te the hibernation file before entering hibernation mode see page 69 Are you using PC Cards If you are using one of the IBM communication PC Cards listed in the Considerations for Hibernation Mode on...

Страница 177: ...cation speed see page 49 The infrared port is clean and does not have any spots No cable or electrical device is between the computer and the communicating device The distance and angle between the co...

Страница 178: ...inter drifts when you are not using the TrackPoint III Drifting is a characteristic of the TrackPoint III and is not a defect The drifting occurs for several seconds under the following conditions Whe...

Страница 179: ...e external keyboard serviced A number appears when you type an alphabetic character The numeric lock function is on To disable it press and hold Shift then press NumLk Problem Action The computer hang...

Страница 180: ...ck on the Advanced button If the test programs for the option did not find the problem have the computer and option serviced or see Appendix A An IBM option that used to work no longer works Verify th...

Страница 181: ...er to the manuals supplied with your PC Card If the PC Card is not a modem ATA flash or SRAM card you must have the proper client device driver for the card In Windows 95 the PC Card must have an INF...

Страница 182: ...o determine if a problem is caused by the software verify that Your computer has the minimum memory required to use the software Refer to the manuals supplied with the software to verify this The soft...

Страница 183: ...can help identify what service action is required and help the service representative provide quick and efficient service Important During the warranty period you may be responsible for repair costs...

Страница 184: ...nuous problem Intermittent problem Error code Operating systems and versions if available Application programs used at the time of the problem Problem symptom Describe the problem more specifically Re...

Страница 185: ...____MB hard disk drive External diskette drive PC Cards Recording Identification Numbers The following information is needed when requesting repair services The machine type and serial number 1 are lo...

Страница 186: ...ng and setting up IBM options purchased from IBM or an IBM reseller Using the 30 day support for the preinstalled operating system Arranging for service Please have the following information ready whe...

Страница 187: ...support representative can arrange for ThinkPad EasyServ You should keep your original ThinkPad shipping materials to send the computer to the repair location If the original shipping carton is not av...

Страница 188: ...fax machine in the U S and Canada you can receive by fax free marketing and technical information on many topics including hardware operating systems and local area networks LANs You can call the IBM...

Страница 189: ...to 14 400 baud are supported Long distance telephone charges might apply To access the PC Company BBS In the U S call 1 919 517 0001 In Canada call the center closest to you Markham call 905 316 4255...

Страница 190: ...g non IBM options in IBM computers Using the operating system Using selected application software and games Tuning performance Installing device drivers remotely Setting up and using multimedia device...

Страница 191: ...Select the service for which you would like a Supported Products list For Enhanced PC Support Line select document 11682 For Network and Server Support Line select document 11683 In Canada contact IB...

Страница 192: ...d your warranty Warranty and Repair Services offers a ThinkPad EasyServ Maintenance Agreement For more information about warranty upgrades and extensions In the U S call 1 800 426 7697 In Canada call...

Страница 193: ...sentative Ordering Publications Additional publications are available for purchase from IBM For a list of publications available in your country In the U S and Puerto Rico call IBM PC Books at 1 800 4...

Страница 194: ...Customer Support and Services 174 IBM ThinkPad 380 or 380D User s Guide...

Страница 195: ...rce allocations for the computer and your expansion unit and select the available resource values by using the ThinkPad Features program When you want to install a new Ethernet PC Card in the computer...

Страница 196: ...FF Ethernet PC Card IRQ 5 I O Address HEX 0300 031F Memory Address HEX D0000 D1FFF D4000 D7FFF IRQ5 is the default setting used by the Sound Blaster emulation To do an Ethernet PC Card RPL change the...

Страница 197: ...the resources for an ATA PC Card IRQ 15 I O Address HEX 0170 0177 2 Start Easy Setup and select the Start Up icon 3 Select the PCMCIA icon The PC Card PCMCIA icon should not be set to follow the comp...

Страница 198: ...l port Disabled Disabled None None 4 03F8 03FF 3 02F8 02FF 4 03E8 03EF 3 02E8 02EF Parallel port 7 03BC 03BE and 07BC 07BE None 0 1 3 or disabled 7 0378 037F and 0778 077A 5 0278 027F and 0678 067A Di...

Страница 199: ...Depends on the type of PC Card Depends on the type of PC Card Depends on the type of PC Card None Real time clock 8 0070 0071 None None TrackPoint III or mouse 12 0060 and 0064 None None Math coproce...

Страница 200: ...180 IBM ThinkPad 380 or 380D User s Guide...

Страница 201: ...ten in the script files Once the information is written you can use the Auto Configurator Utility to edit these script files When Auto Configurator is installed the following line is added to the CONF...

Страница 202: ...on 3 Click on the Save button The names in the left list box Available Cards are the cards that can be registered The names in the right list box Selected Cards are the cards that are already register...

Страница 203: ...bottom a Select the PC Card you want to move b Click on the Down button Every time you click on the Down button the PC Card is moved toward the bottom of the list Moving a card toward the top a Select...

Страница 204: ...r Utility Edit Title Card ID I O port 1 I O Port 2 IRQ level COM No Memory window 1 Base address Size Card offset Memory window 2 Base address Size Card offset Modem Card 2F8 MODEM MD24XC 116E2 118C2...

Страница 205: ...s each driver registered in the CONFIG SYS file and the standard rules Registered Drivers and Standard Rules The following is a sample of the CONFIG SYS file for OS 2 BASEDEV PCMCIA SYS Card Services...

Страница 206: ...nstalled according to the card type Using only an ATA card BASEDEV PCM2ATA ADD DM ATA card device driver DEVICE C THINKPAD PCMSSDIF SYS Storage API device driver BASEDEV OS2PCARD DMD Storage Card Devi...

Страница 207: ...iver DEVICE C THINKPAD FLSH2MTD SYS Flash Card Memory Technology driver DEVICE C THINKPAD PCMSSDIF SYS Storage API device driver DEVICE C THINKPAD PCM2SRAM SYS SRAM card device driver DEVICE C THINKPA...

Страница 208: ...torage Cards Format new PCMCIA storage cards before use For Flash cards run the Flash Format Utility FFORMAT EXE FFORMAT2 EXE then format the Flash card For ATA cards and SRAM cards there is no need t...

Страница 209: ...rd When this parameter is set there will be no redundancy in assigning the logical drive to the slot where OS 2 was booted It depends on the ATA card whether you can start OS 2 from it STBTIME n Speci...

Страница 210: ...ction between PC Card Director or the mount utility and the OS 2 PCMCIA ATA card device driver As a result a utility in the upper layer can get the drive letter or partition information for the PCMCIA...

Страница 211: ...device To change the resource settings for the PC Card or other devices you can do one of the following Refer to the system manual or utility program and check which device is using the resources tha...

Страница 212: ...use serial port COM1 or COM2 and do not have the setup information for COM3 and COM4 These modem cards cannot be enabled when other devices are using COM1 and COM2 For example as a default COM1 is us...

Страница 213: ...If you are using OS 2 Warp Version 3 or later you can check the assigned system resources using RMVIEW EXE If there is a conflict If you are using OS 2 Warp Version 3 or later use RESERVE SYS to regis...

Страница 214: ...ollowing 1 Move the mouse pointer to the DOS object icon then click on the right mouse button 2 Select Settings or Property 3 Select Session 4 Select DOS WIN OS 2 Settings 5 Select All DOS DOS and WIN...

Страница 215: ...cal bar Highlighted Enter the exact highlighted letters in either uppercase or lowercase UPPERCASE Enter any value for the following XX 0 20 HH 0 23 MM 0 59 SS 0 59 The MM minutes and SS seconds are o...

Страница 216: ...LCd DISK SPeed and STandby to their original values DEFAULT Note This command is effective on the current power mode set by the PM commands Set the hard disk drive power saving timer for the specifie...

Страница 217: ...nd Hibernation Note This command is effective on the current power mode set by the PM command Set the LCD off when there is no computer operation after the specified number of minutes xx LCd xx Note y...

Страница 218: ...Parameter4 SPeed Fixed Auto MAX Medium Slow MIN AC DC Set the timer to enter hibernation mode from suspend mode after the specified number of minutes Parameter1 Parameter2 Parameter3 S2H 30 60 90 Dis...

Страница 219: ...60 75 85 60 75 85 60 70 75 Alarm Sound Commands Set the computer to beep in certain conditions BEEP ON OFf Alarm System Warn System Setup Commands Display the DMA channel assignments DMA Set the Fn ke...

Страница 220: ...the screen off standby and suspend timers for presentations PRESENtation Enable Disable Set the startup screen when the computer power is turned on STARTup Enable Disable Set the TrackPoint III TPOin...

Страница 221: ...em IRQ for PCI device PCIIRQ Disable or 3 4 5 7 9 10 11 15 Set the I O address of PCMCIA controller on Port Replicator PCCARD EXT 3E2 3E4 Other Commands Display the help menu Help Set the A drive to t...

Страница 222: ...Turn off the computer TURN OFF 202 IBM ThinkPad 380 or 380D User s Guide...

Страница 223: ...y The color LCD display uses TFT technology or DSTN technology and supports DSTN color LCD Width of 12 1 inches when measured diagonally Up to 65 536 colors Up to 800 by 600 resolution Up to 1024 by 7...

Страница 224: ...al input device connector External monitor connector Expansion connector PC Card slots two Type I or Type II PC Cards or one Type III PC Card Headphone jack Microphone line in jack supports a dynamic...

Страница 225: ...than 2438 m 8000 ft Operating with no diskette 5 to 35 C 41 to 95 F Operating with a diskette 10 to 35 C 50 to 95 F Nonoperating 5 to 43 C 41 to 109 F Relative humidity Operating with no diskette in...

Страница 226: ...al voltage 10 8 V dc Capacity 2 6 AH NiMH battery pack Nominal voltage 8 4 V dc Capacity 3 5 AH PC Card slots power Computer only total 5 w two slots Computer and ThinkPad 380 385 port replicator tota...

Страница 227: ...and Trinidad West Indies United States of America Venezuela 13H5267 Abu Dhabi Albania Antigua Bahrain Brunei Dubai Fiji Hong Kong India Ireland Kenya Kuwait Macao Malasia Nigeria Oman People s Republi...

Страница 228: ...name Taiwan Thailand Trinidad West Indies United States of America Venezuela 76H3518 Austria Belgium Bulgaria Czech Republic Egypt Finland France Germany Greece Hungary Iceland Indonesia Netherlands N...

Страница 229: ...es The 3 pin power cord must be used with a properly grounded outlet Turn everything OFF Turn everything OFF First attach all cables to devices First remove the power cord from the outlet Attach the s...

Страница 230: ...meet or exceed the following standards 1MB 3 5 inch unformatted diskette ANSI American National Standards Institute X3 137 ISO International Standards Organization 8860 ECMA European Computer Manufact...

Страница 231: ...upgrade Some of these transactions called Net Priced transactions may include additional parts and associated replacement parts that are provided on an exchange basis All removed parts become the prop...

Страница 232: ...T PERIOD In Canada warranties include both warranties and conditions Some jurisdictions do not allow limitations on how long an implied warranty lasts so the above limitation may not apply to you Limi...

Страница 233: ...e responsibility of the user IBM may have patents or pending patent applications covering subject matter in this document The furnishing of this document does not give you any license to these patents...

Страница 234: ...the following measures Reorient or relocate the receiving antenna Increase the separation between the equipment and receiver Connect the equipment into an outlet on a circuit different from that to wh...

Страница 235: ...eils num riques telles que prescrites par le R glement sur le brouillage radio lectrique tabli par le minist re des Communications du Canada European Community Directive Conformance Statement This pro...

Страница 236: ...Product Warranties and Notices 216 IBM ThinkPad 380 or 380D User s Guide...

Страница 237: ...ram or programs records with little or no operator action BIOS Basic Input Output System Microcode that contains such basic hardware operations as interactions with diskette drives hard disk drives an...

Страница 238: ...Enhanced graphics adapter EIA Electronics Industries Association EIA 232D An EIA interface standard that defines the physical electronic and functional characteristics of an interface line that connec...

Страница 239: ...time partial suspend mode A kind of suspend mode where only a part of the system components uses power password A series of letters or numbers that you designate to restrict access to your computer P...

Страница 240: ...Rs Terminate and stay resident programs memory resident programs that are loaded into memory and stay there so you can conveniently access them whenever you need to vertical expansion A video display...

Страница 241: ...ck indicator 18 card service 46 CardSoft device driver installing for DOS 122 CardWizard device driver installing for Windows Version 3 11 126 CardWorks software installing for Windows 95 106 CD ROM d...

Страница 242: ...OS 2 installing 118 for Windows 95 installing 108 for Windows NT installing 133 for Windows Version 3 11 installing 128 DMA channel system resource 178 DOS installing 119 drive startup sequence 37 dua...

Страница 243: ...dentification numbers recording 165 indicator panel 18 infrared device driver for OS 2 installing 117 for Windows Version 3 11 installing 127 infrared port location 16 problems 157 infrared port conti...

Страница 244: ...IBM PC DOS 119 OS 2 109 Windows 3 11 123 updates 173 options options continued DIMM 89 90 external keyboard 97 external monitor 42 external numeric keypad 95 mouse 95 PC Card installing 86 problems 1...

Страница 245: ...ernation 156 infrared communication 157 IRQ 175 keyboard 158 problems continued LCD 41 150 messages on screen 151 options 160 PC Card 161 193 pointing device 158 port replicator 159 printer 162 resour...

Страница 246: ...lamp 19 SVGA monitor 39 system resource list 178 system status indicators battery lamp 18 caps lock 18 location 18 system status indicators continued media in use 18 numeric lock 18 power on 19 scroll...

Страница 247: ...er virtual card services 194 volume control location 16 W warranty 173 extensions and upgrades 171 product 211 service international 167 weight machine specifications 205 Windows 3 11 installing 123 W...

Отзывы: