6 of 7
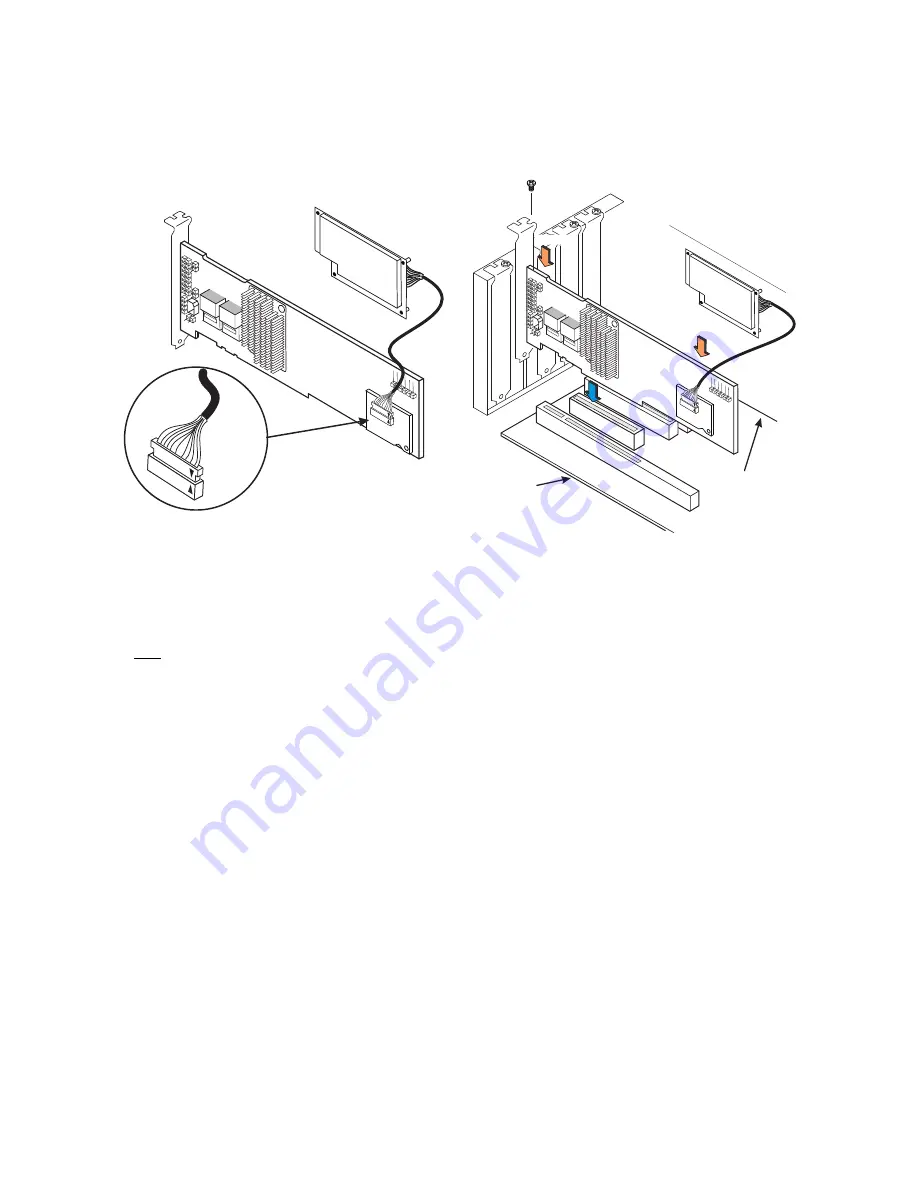
Figure 7 Connecting the ServeRAID M5000
Series Battery Kit Remotely to the
Interposer Card
Reinstalling the Controller in the Computer
Follow these steps to install the controller in the computer.
1.
With the power to the chassis still turned off, and the
power cords unplugged, make sure the chassis is
grounded and has no AC power.
2.
Insert the controller in a PCI Express slot on the
motherboard, as shown in the following figure.
Note:
Some PCI Express slots support only PCI
Express graphics cards; if a SAS/SATA controller
is installed in one of these slots, it will not
function. Refer to your computer documentation
for information about the PCI Express slot.
3.
Press down gently but firmly to seat the card correctly
in the slot.
Figure 8 Reinstalling the Controller
4.
Secure the controller to the computer chassis with the
bracket screw.
5.
Replace the computer cover and reattach the power
cords.
6.
Turn on the power to the computer.
See the
ServeRAID-M Software User’s Guide
for information
about running the configuration utility and installing the
software drivers.
D I S P O S I N G O F B A T T E R Y B A C K U P
U N I T S
The material in the battery pack contains heavy metals that
can contaminate the environment. Federal, state, and local
85039-08
Attention:
The battery in the M5000 Series Battery
Assembly must charge for at least six hours
under normal operating conditions. To protect
your data, the firmware changes the Write Policy
to
write-through
until the battery unit is sufficiently
charged. When the battery unit is charged, the
firmware changes the Write Policy to
write-back
to take advantage of the performance benefits of
data caching.
Attention: If the battery kit is damaged in any way, toxic
chemicals can be released.
Edge of Motherboard
Bracket Screw
Edge of
Motherboard
Press Here
85039-09
Press Here


