Appendix A. CLI setup and configuration
637
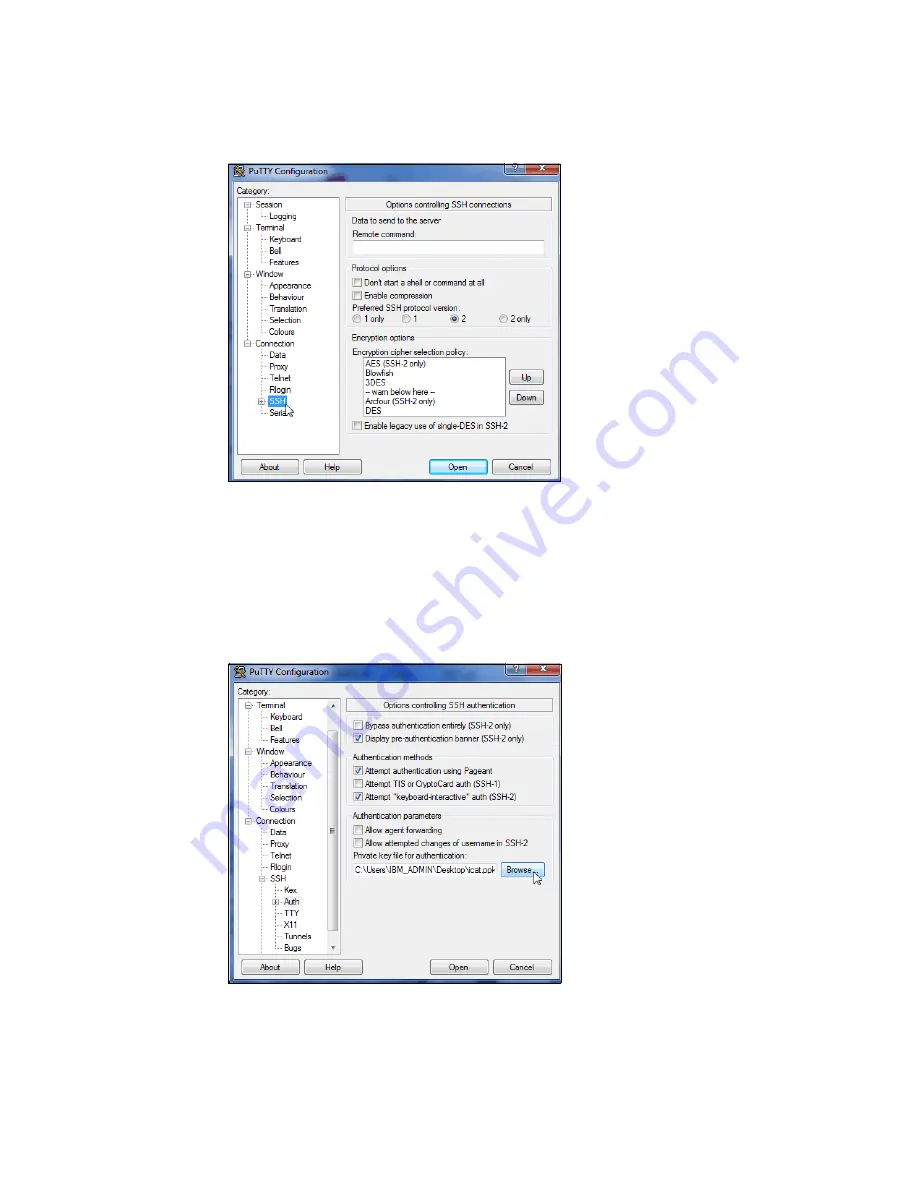
2. From the Category pane on the left side of the PuTTY Configuration window, click
Connection
SSH to open the PuTTY SSH Configuration window (Figure A-11).
Figure A-11 SSH protocol version 2
3. In the right pane, in the “Preferred SSH protocol version” section, select 2.
4. From the Category pane on the left side of the PuTTY Configuration window, click
Connection
SSH
Auth. As shown in Figure A-12, in the right pane, in the “Private
key file for authentication:” field under the Authentication Parameters section, either
browse to or type the fully qualified directory path and file name of the SSH client private
key file created earlier (for example,
C:\Support Utils\PuTTY\icat.PPK
).
Figure A-12 SSH authentication
5. From the Category pane on the left side of the PuTTY Configuration window, click
Session to return to the Session view (Figure A-10 on page 636).
Содержание Storwize V7000
Страница 2: ......
Страница 12: ...x IBM Flex System V7000 Storage Node Introduction and Implementation Guide...
Страница 18: ...xvi IBM Flex System V7000 Storage Node Introduction and Implementation Guide...
Страница 20: ...xviii IBM Flex System V7000 Storage Node Introduction and Implementation Guide...
Страница 176: ...156 IBM Flex System V7000 Storage Node Introduction and Implementation Guide...
Страница 208: ...188 IBM Flex System V7000 Storage Node Introduction and Implementation Guide...
Страница 332: ...312 IBM Flex System V7000 Storage Node Introduction and Implementation Guide...
Страница 476: ...456 IBM Flex System V7000 Storage Node Introduction and Implementation Guide...
Страница 530: ...510 IBM Flex System V7000 Storage Node Introduction and Implementation Guide...
Страница 664: ...644 IBM Flex System V7000 Storage Node Introduction and Implementation Guide...
Страница 669: ......


