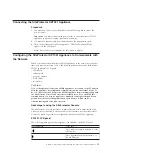
Connecting the SiteProtector SP1001 Appliance
Procedure
1.
Connect the power cords to the SiteProtector SP1001 appliance and to the
power source.
Important:
You must connect both power cords to the SiteProtector SP1001
appliance to prevent warning signals from sounding.
2.
Connect the Ethernet cable from the network to the management port.
3.
Turn on the SiteProtector SP1001 appliance. “IBM ISS Proventia SP1001”
appears on the LCD panel.
Note:
It may take several minutes for this screen to appear.
Configuring the SiteProtector SP1001 Appliance to Communicate with
the Network
When you connect the SiteProtector SP1001 appliance to the network for the first
time, you must enter some or all of the following information in the SiteProtector
SP1001 appliance’s LCD panel:
v
IP Address
v
subnet mask
v
gateway address
v
DNS Server
v
host name
CAUTION:
Do not change the SiteProtector SP1001 appliance’s host name or the IP address
after the appliance has established communication with an external device. To
do so will prevent the SiteProtector SP1001 appliance from communicating with
the SiteProtector Console and any other external device. To re-establish this
communication, you may be required to manually reconfigure the public and
private keys that are exchanged between these devices, which can be a
time-consuming and error prone process.
Advantage to using the SiteProtector Console
The SiteProtector Console provides a much easier interface to enter information.
After you have connected to the network for the first time, use the SiteProtector
Console as much as possible to configure the SiteProtector SP1001 appliance.
SP1001 LCD panel
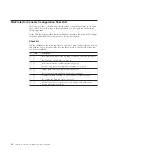
The following table provides descriptions of the buttons on the LCD panel:
Use this button...
To do this...
Move left between digits. Referred to as the
LEFT button.
Move right between digits. Referred to as
the RIGHT button.
Chapter 3. Connecting and Configuring the SiteProtector SP1001 Appliance
15
Содержание Proventia Management SiteProtector SP1001
Страница 2: ......
Страница 6: ...iv SiteProtector System SP1001 Hardware Configuration...
Страница 8: ...vi SiteProtector System SP1001 Hardware Configuration...
Страница 23: ...Korean Class A Compliance Statement Overview xxi...
Страница 24: ...xxii SiteProtector System SP1001 Hardware Configuration...
Страница 30: ...6 SiteProtector System SP1001 Hardware Configuration...
Страница 48: ...24 SiteProtector System SP1001 Hardware Configuration...
Страница 56: ...32 SiteProtector System SP1001 Hardware Configuration...
Страница 60: ...36 SiteProtector System SP1001 Hardware Configuration...
Страница 62: ...38 SiteProtector System SP1001 Hardware Configuration...
Страница 63: ......
Страница 64: ...Printed in USA...


