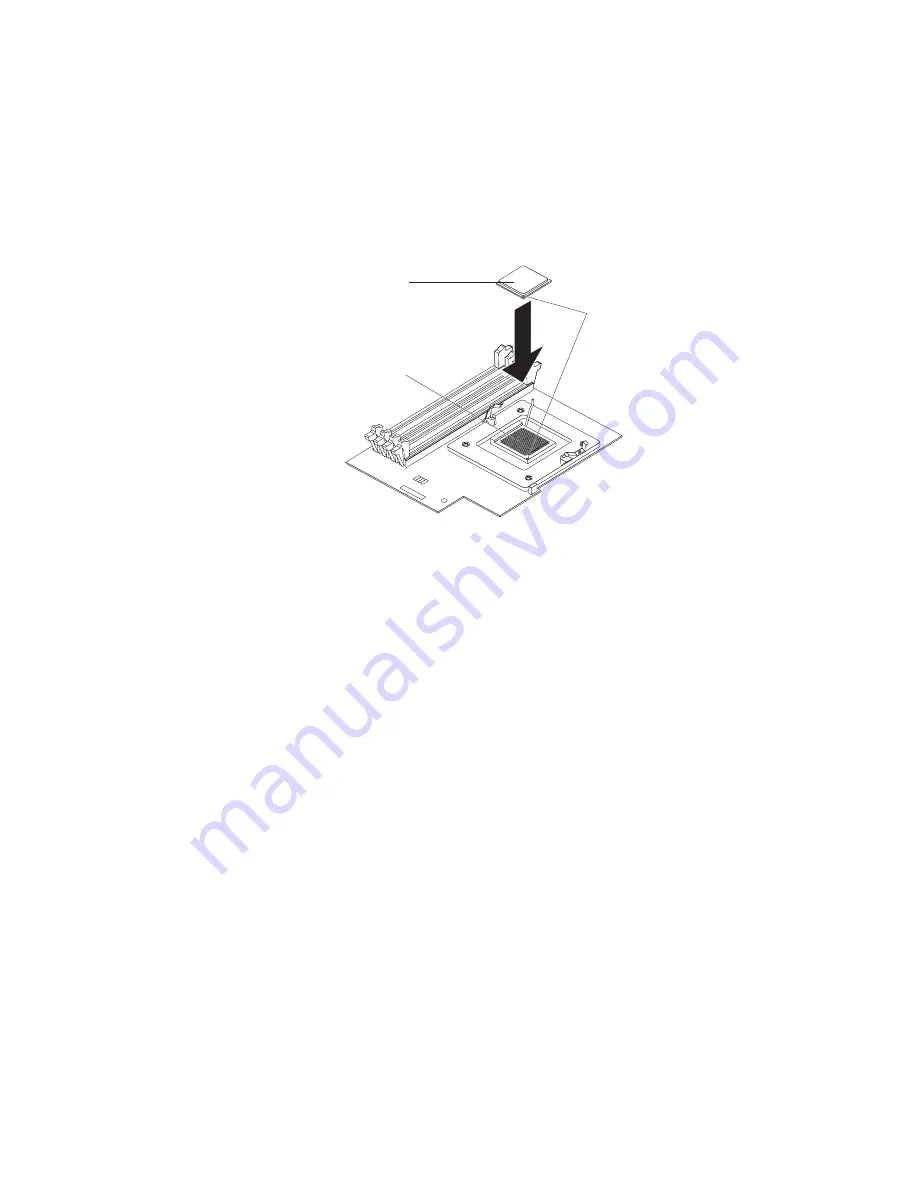
13.
Install
the
new
microprocessor:
a.
Touch
the
static-protective
package
containing
the
new
microprocessor
to
any
unpainted
metal
surface
on
the
computer;
then,
remove
the
microprocessor
from
the
package.
b.
Position
the
microprocessor
over
the
microprocessor
socket
as
shown
in
the
following
illustration.
Carefully
press
the
microprocessor
into
the
socket.
Attention:
To
avoid
bending
the
pins
on
the
microprocessor,
do
not
use
excessive
force
when
pressing
it
into
the
socket.
Microprocessor
Microprocessor
orientation indicators
Microprocessor
socket
14.
Close
the
microprocessor-release
lever
to
secure
the
microprocessor.
Attention:
v
Do
not
disturb
or
contaminate
the
grey
thermal
material
on
the
bottom
of
the
new
fan
sink.
Doing
so
damages
its
heat-conducting
capability
and
exposes
the
new
microprocessor
to
overheating.
v
If
you
need
to
remove
the
fan
sink
after
installing
it,
call
for
service.
Chapter
2.
Installing
the
hardware
35
Содержание IntelliStation A Pro
Страница 3: ...IntelliStation A Pro Type 6224 Installation Guide...
Страница 20: ...8 IntelliStation A Pro Type 6224 Installation Guide...
Страница 62: ...50 IntelliStation A Pro Type 6224 Installation Guide...
Страница 66: ...54 IntelliStation A Pro Type 6224 Installation Guide...
Страница 100: ...88 IntelliStation A Pro Type 6224 Installation Guide...
Страница 104: ...92 IntelliStation A Pro Type 6224 Installation Guide...
Страница 105: ......
Страница 106: ...Part Number 88P9043 Printed in USA 1P P N 88P9043...


