background image

2

The IBM T860 Flat Panel Monitor comes in models with a stand for desktop use and models without a
stand for arm or wall Mounting. Please refer to the appropriate sections on your model. Monitor
installation is the same for ether model.

Product Description

The IBM T860 Color Monitor supports SXGA 1280 X 1024, XGA 1024 x
768, SVGA 800 x 600, or VGA 640 x 480 at 60Hz.

In addition to the monitor, your option package includes the following:

IBM Monitor CD
Monitor Safety and Warranty manual
T860 Color Monitor Quick Start Guide
T860 Color Monitor

Setting up the monitor

Do not support the monitor
within the screen area. The
Liquid Crystal Display is glass
and can be damaged by rough
handling or excessive
pressure.

Handling Instructions

Handling Instructions

1. Lift the monitor by placing both hands under the bottom side of the

bezel. (The display will rise to maximum lift height when locking clip has
been removed. See page 3 for details on removing the locking clip.)

2. Before using your monitor for the first time, remove the clear protective

film from the front of the screen. 

System Hardware Requirements

This monitor requires a computer with a suitable on-board sub-system or
Video Adapter card that can support SXGA 1280 x 1024, XGA 1024 x 768,
SVGA 800 x 600, or VGA 640 x 480 at 60Hz.

Содержание 9494HB0 - T 860 - 18.1" LCD Monitor

Страница 1: ...ENGLISH T860 Flat Panel Monitor User Guide ...

Страница 2: ... or services do not imply that IBM intends to make these available in all countries in which IBM operates Any reference to an IBM product program or service is not intended to state or imply that only IBM s product program or service may be used Any functionally equivalent product program or service that does not infringe any of IBM s intellectual property rights or other legally protectable right...

Страница 3: ...age Setup for Analog Input 9 Auto Setup 9 AutoSetup for Windows 3 1 Windows 95 Windows 98 Windows 2000 Windows Me Windows XP or Windows NT 10 Adjusting the image settings in DOS 12 Manually adjusting the image settings 13 Ergonomic Considerations 14 Workplace preparation 14 Working Practices 14 Adjusting the Monitor Position 15 Caring for your Monitor 15 Adjusting Your LCD Monitor 16 User controls...

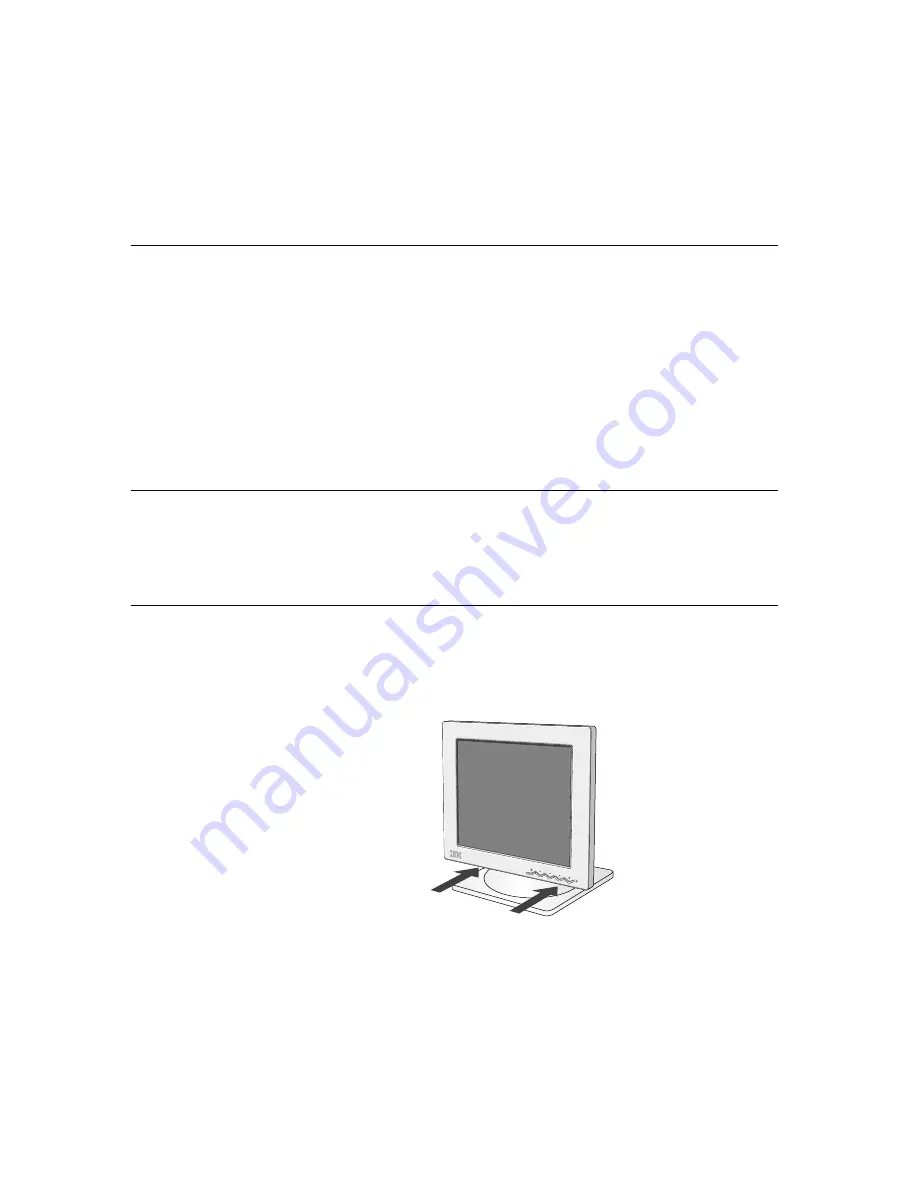
Страница 4: ...r Setting up the monitor Do not support the monitor within the screen area The Liquid Crystal Display is glass and can be damaged by rough handling or excessive pressure Handling Instructions Handling Instructions 1 Lift the monitor by placing both hands under the bottom side of the bezel The display will rise to maximum lift height when locking clip has been removed See page 3 for details on remo...

Страница 5: ...rm please refer to page 22 for detailed instructions Kensington Security Slot Connected to a locking cable that can be purchased separately at most computer stores A B A B Desk Top Use Remove the clip on stand models Before adjusting your monitor for the first time remove the locking clip on rear of the stand Carefully hold the screen of the monitor and then sqeeze at arrows shown to remove figure...

Страница 6: ...r When connecting the analog signal cable Figure A Connect the free end of the attached signal cable to the 15 pin Monitor port on the computer and tighten screws When connecting the digital signal cable Figure B Connect one end of the monitor signal cable to the white connector on the rear panel of the monitor Connect the other end to the white connector on the rear panel of the computer and tigh...

Страница 7: ...witch off your monitor push and release the power switch again 3 Switch on your computer 4 If you are using the analog connector run AUTO SETUP by following the instructions in the Auto Setup section on page 9 Switching on your Monitor A 3 Connect the power cord to the power adapter and then plug the power cord into a properly grounded outlet Next reconnect the power cord s to your computer and al...

Страница 8: ... the UPGRADE DEVICE DRIVER WIZARD window by clicking on CHANGE button and then select the NEXT button 4 Click the Display a list of the known drivers for this device so that I can choose a specific driver and then select the NEXT button 7 Insert the Setup CD into the CD driver and click the HAVE DISK button 8 Click OK 9 Ensure that the CD drive letter is selected 10 Choose IBM T860 monitor and Cli...

Страница 9: ...ick the NEXT button 11 Select the Display a list of the known drivers for this device so that I can choose a specific driver and then Click the NEXT button 12 Insert the Setup CD into the CD drive and click the HAVE DISK button 13 Click OK 14 Ensure that the CD drive letter is selected 15 Choose IBM T860 monitor and Click OK The files will be copied from the CD to your hard disk drive 16 Close all...

Страница 10: ... the NEXT button 11 Select the Install from a list or Specific location Advanced and then Click the NEXT button 12 Insert the Setup CD into the CD drive and click the HAVE DISK button 13 Click OK 14 Ensure that the CD drive letter is selected 15 Choose IBM T860 monitor and Click OK The files will be copied from the CD to your hard disk drive 16 Close all open windows and remove the CD 17 Restart t...

Страница 11: ...TO SETUP for both Windows and DOS You may run versions of AUTO SETUP in any order Before you begin AUTO SETUP for your computer 1 Make a backup copy of the setup CD supplied with the monitor 2 Make sure the computer video mode is set in the range of the supported screen resolution shown in the table on page 20 You should perform AUTO SETUP for each screen mode you use Image Setup for analog input ...

Страница 12: ...select AUTO and press the OSD Enter button This activates the AUTO SETUP procedure which will optimize the display settings with the provided test pattern The image may be affected during this procedure and you may notice small changes to the test pattern To abort the AUTO SETUP function press the ESC key 9 When finished the OSD main menu returns Press the Exit button once to exit from the OSD i I...

Страница 13: ...on your keyboard to return to Windows You have completed the monitor setup for Windows If you use other operating systems perform the appropriate AUTO SETUP for those systems and also see Adjusting the image settings in DOS on page 12 ...

Страница 14: ...activates the AUTO SETUP procedure which will optimize the display settings with the provided dot patterns The image may be affected during this procedure and you may notice small changes to the test pattern 12 When finished the OSD main menu returns Press the Exit button to exit from the OSD 13 Press the ESCAPE key to exit the test pattern program 14 Type Exit at the command prompt to return to W...

Страница 15: ...D Enter button to access the function 5 Using an Arrow button or select MANUAL press and then press once to select COARSE Left and right arrow adjustment indicators become illuminated see page 18 6 Use the Arrow buttons to manually adjust to correct as much as possible for jitter or noise in the image then press to save the changes 7 Use an Arrow button to select FINE and press the button 8 Use th...

Страница 16: ...the screen brightness and contrast to a comfortable level You may have to adjust these settings as the lighting changes during the day Many application programs let you select color combinations which can help you to view in comfort See the User controls section on page 16 for more information Working Practices i This section gives advice on what you should consider before you set up your monitor ...

Страница 17: ... cleaning materials to clean your IBM monitor or any other electrical apparatus Caring for your Monitor Viewing Angle You can tilt the screen forward and backward as shown below figure A Swivel You can swivel the screen leftward and rightward as shown below figure A Height You can adjust height of the screen figure B i With the IBM Flat Panel Monitor you can adjust its position in various ways for...

Страница 18: ...rent control settings while allowing the user to adjust Brightness or Contrast so that they cannot be inadvertently changed Push and hold the enter button for 10 seconds the message Controls Locked appears You can unlock the OSD controls at any time by pushing the enter button for 10 seconds the message Controls Unlocked will appear switch between input signals Icon Monitor controls and Display ma...

Страница 19: ...ustment M A I N M E N U DVI DIGITAL INPUT B R I G H T N E S S M A I N M E N U DSUB ANALOG INPUT B R I G H T N E S S B R I G H T N E S S 7 5 OSD functions OSD Icon Description sub menu s AUTO If AUTO is selected the image will automatically adjust Control and Adjustments Adjusts brightness Adjusts contrast The IMAGE SET UP function is used to adjust the level of noise in the video signal which caus...

Страница 20: ...reases greenness Increases or decreases blueness COLORMODE USER COLOR MODE Red Green Blue To adjust the focus of the display This item allows you to remove any horizontal noise and clear or sharpen the image of characters Fine adjustments should be done after adjusting the Coarse If manual is selected the user will go to the manual adjustment screen Controls and Adjustments Changes the position of...

Страница 21: ...ttons to move between information screens Information Display model name serial number year of manufacture and microcode level Display all preset modes stored in the monitor Display all user modes stored in the monitor The current display mode will be shown at the base of all information screens INPUT SELECT Use this button to make the analog or digital connector active This feature is used when t...

Страница 22: ...e flicker TFT technology is inherently flicker free If possible configure your computer for 1280 x 1024 addressability at 60Hz vertical refresh rate For the display modes listed below the screen image has been optimized during manufacture Factory Set Display Modes Further Information Display modes Note VESA timings are as detailed in the VESA Display Monitor Timing Specification Version 1 0 Revisi...

Страница 23: ...the table below As an ENERGY STAR 2000 Partner IBM has determined that this product meets the ENERGY STAR 2000 guidelines for energy efficiency IBM recommends that you switch off your monitor at the end of each working day or whenever you expect to leave it unused for long periods during the day Power Management On Active off Off State Power Indicator Steady green Normal Blank Blank Steady amber S...

Страница 24: ...d then the signal cable to the monitor 2 Lay the monitor facedown on a cushion and remove the four screws holding the hinge mechanism on the monitor 3 You have to use the four screw holds on the bottom of the stand to attach the monitor to the surface of wall For additional information see the instructions supplied with the purchased arm 4 Locate a place to which you want to attach the monitor Whe...

Страница 25: ...rols section on page 16 Power Management section on page 21 Connecting your Monitor section on page 4 Adjust brightness and contrast Press any key on the keyboard or move the mouse to restore operation Check the Power Management software on your computer Press the to switch between analog and digital mode If the panel is the wrong mode for the signal being provided the monitor appears to go into s...

Страница 26: ...or is flashing green every 0 5 second CHECK VIDEO CABLE message is shown and power indicator is steady amber Image appears to be smeared Image appears to be discolored A few dots are missing discolored or inappropriately lighted User Controls section on page 16 User Controls section on page 16 Select IMAGE SET UP menu in the OSD Then select MANUAL to adjust FINE COARSE settings Adjust the Color se...

Страница 27: ...posite SOG Digital DVI 1 0 10 to 35 C 20 to 60 C 20 to 60 C 10 to 80 5 to 95 5 to 95 Image Power Input Power Consumption Video Input Communications Sync Input VESA DDC Type E DDC Supported Display Modes Environment Height 13 01inch 330 5mm Width 15 63inch 397mm Depth 2 97inch 75 4mm Without Stand With Stand Viewable Image Size Maximum Height Maximum Width Pixel Pitch Supply Voltage Rated Current N...

Страница 28: ...52 x 870 1152 x 900 1280 x 1024 1280 x 1024 60 Hz 31 5 kHz 75 Hz 37 5 kHz 85 Hz 43 3 kHz 70 Hz 31 5 kHz 70 Hz 31 5 kHz 60 Hz 37 9 kHz 75 Hz 46 9 kHz 85 Hz 53 7 kHz 75 Hz 49 7 kHz 60 Hz 48 4 kHz 75 Hz 60 0 kHz 85 Hz 68 7 kHz 75 Hz 68 7 kHz 65 Hz 61 8 kHz 60 Hz 63 98 kHz 75 Hz 79 98 kHz Addressabillty Refresh Rate Range 3 Horizontal Frequency Range 3 ...

Отзывы: