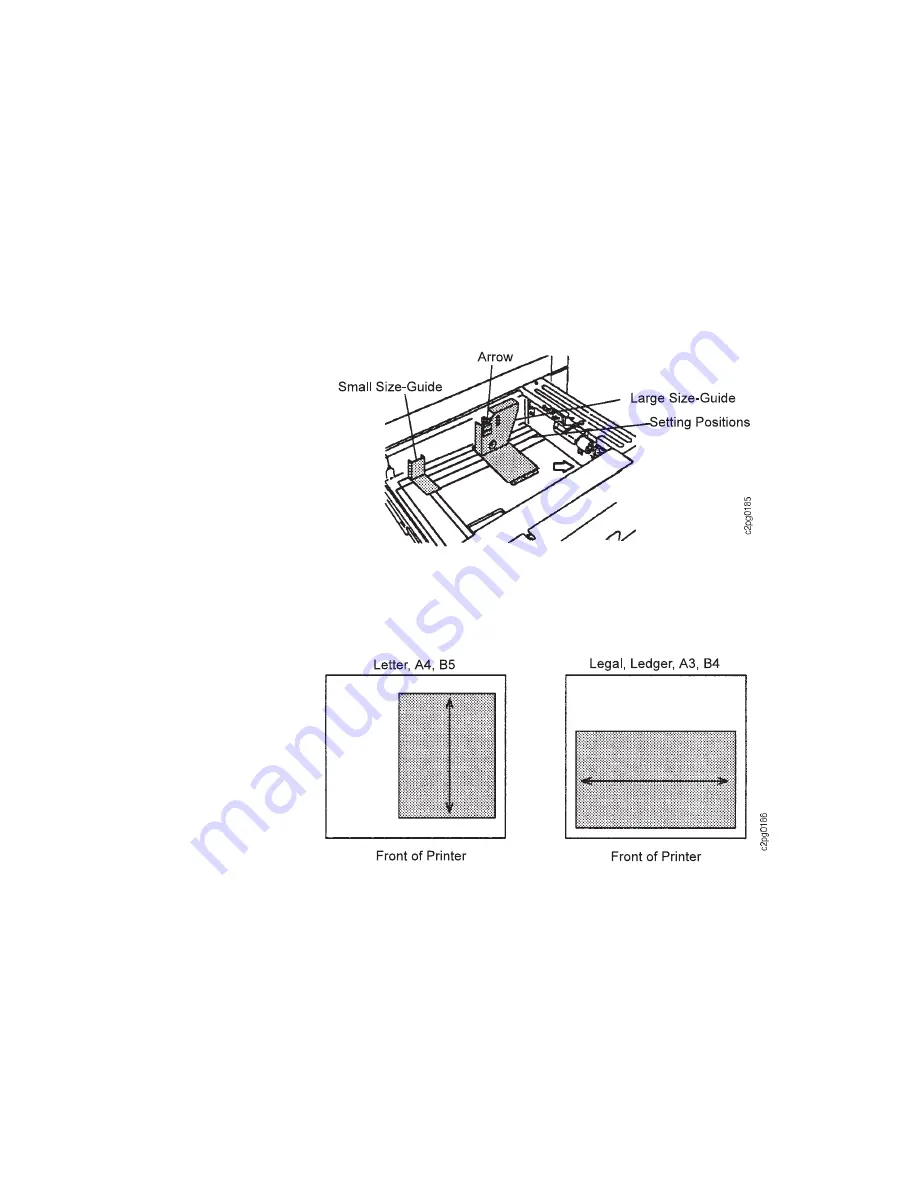
Small Size-Guide
Squeeze the vertical sides on the size-guide, lift up and slide the size-guide forward
or backward to the proper setting. Squeeze the sides again, and press down firmly
until both sides lock into the bottom of the tray at the desired setting.
Note: The small size-guide adjusts for A3 and ledger paper-sizes only.
Large Size-Guide
The setting positions for the paper size are marked on the bottom of the tray. Move
the handle in the direction of the arrow (to the right). Hold the handle down and
slide the size-guide forward or backward to the proper setting. Release the handle
and lock the size-guide into place.
1. Position the paper in the tray.
When loading paper, position each paper size as shown in the following
drawings.
Note: Place the paper so the corner is flush against the front right corner of
the tray. Do not stack paper above the red line.
Chapter 5. Printing and Paper Handling
5-13
Содержание 60
Страница 1: ...InfoPrint 60 Advanced Function Printer IBM User s Guide S544 5432 00 ...
Страница 2: ......
Страница 3: ...InfoPrint 60 Advanced Function Printer IBM User s Guide S544 5432 00 ...
Страница 12: ...x InfoPrint 60 User s Guide ...
Страница 72: ...4 30 InfoPrint 60 User s Guide ...
Страница 92: ...5 20 InfoPrint 60 User s Guide ...
Страница 162: ......
Страница 165: ......


