background image


Copyright ©  2013 IBASE Technology Inc. All Rights Reserved.


23 

IBASE Technology Inc.


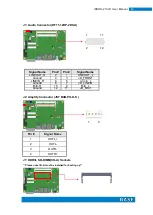
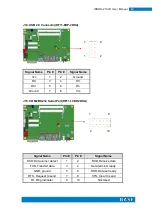
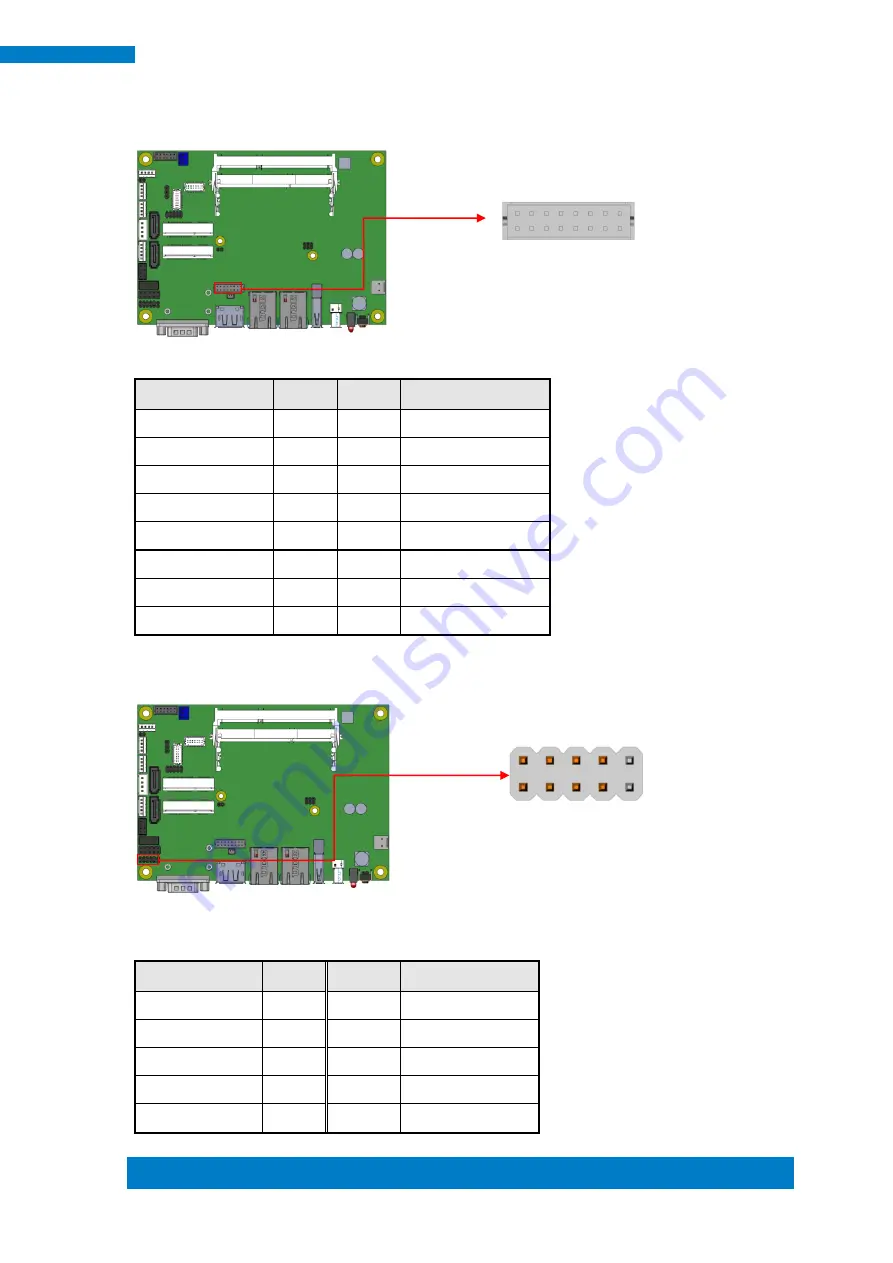
J16: VGA Connector (DF11-16DP-2DSA) 


Signal Name 

Pin # 

Pin # 

Signal Name 

+5V 

Red 

Ground 

Green 

N.C 

Blue 

DDCDATA 

N.C 

H_SYNC 

10 

GND 

V_SYNC 

12 

11 

GND 

DDCCLK 

14 

13 

GND 

N.C. 

16 

15 

GND 


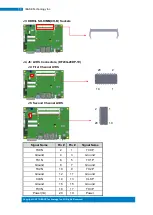
J17: Digital I/O(signal level 5V)Connector(2.54mm) 


Signal Name 

Pin # 

Pin # 

Signal Name 

GND 

VCC(500mA) 

OUT3 

OUT1 

OUT2 

OUT0 

IN3 

IN1 

IN2 

10 

IN0 

15                    1 

16                    2 

2                    10 

1                      9 

Содержание IDOOH-210-IR

Страница 1: ...www ibase com tw IBASE Technology Inc IDOOH 210 IR User Manual ...

Страница 2: ...Copyright 2013 IBASE Technology Inc All Rights Reserved 2 2 IDOOH 210 IR User Manual Revision Release Date VB1 2015 07 01 ...

Страница 3: ... without the express written permission of IBASE Technology INC IBASE Products and corporate names mentioned in this manual may or may not be registered trademarks or copyrights of their respective companies and are used for identification purposes only All trademarks are the property of their respective owners Every effort has been made to ensure that the contents of this manual are correct and u...

Страница 4: ...CTION 7 2 1 Introduction 7 2 2 Installing the Memory 10 2 3 Setting Jumpers 11 CHAPTER 3 BIOS SETUP 27 3 1 BIOS Introduction 27 3 2 BIOS Setup 27 3 3 Main Settings 28 3 4 Security Settings 39 CHAPTER 4 DRIVERS INSTALLATION 43 4 1 Intel Chipset Software Installation Utility 43 4 2 VGA Drivers Installation 45 4 3 Realtek High Definition Audio Driver Installation 46 4 4 Intel Trusted Execution Engine...

Страница 5: ...ings on the chassis are for ventilation Do not block or cover these openings Make sure you leave plenty of space around the system for ventilation Never insert objects of any kind into the ventilation openings This system should be operated from the type of power indicated on the marking label If you are not sure of the type of power available consult your dealer or local power company Use this pr...

Страница 6: ...service technician or your retailer The power cord or plug is damaged Liquid has been spilled into the system The system does not function properly even if you follow the operating instructions The system was dropped or the cabinet is damaged Lithium Ion Battery Warning CAUTION Danger of explosion if battery is incorrectly replaced Replace only with the same or equivalent type recommended by the m...

Страница 7: ...ational Inc Intel is registered trademarks of Intel Corporation Microsoft Windows is a registered trademark of Microsoft Corporation FINTEK is a registered trademark of FINTEK Electronics Corporation REALTEK is a registered trademark of REALTEK Electronics Corporation All other product names or trademarks are properties of their respective owners ...

Страница 8: ......

Страница 9: ...es with two SODIMM slots to accommodate up to 8GB of DDR3L 1333MHz system memory and one 2 5 SATA SSD for data storage It is provided with two Gigabit Ethernet one RS 232 422 485 port The unit is equipped with a front bezel with IR touch screen that has IP65 rated protection The IDOOH 210 IR supports a wide range 90 240VAC power and automatically temperature controlling system which makes it ideal...

Страница 10: ...sy accessible default 64G SSD Expansion Slots None Power Supply 90 240VAC LCD Size 21 5 LCD Color 16 7M LCD Resolution 1920x1080 LCD Brightness Up to 1200nits auto dimming LCD View Angle H V 140 120 Touch Screen IR touch Construction Aluminum front bezel and back cover Mounting VESA 200x100 200x200 mm Dimensions W x D x H mm 574x357x82 5 Operating Temperature 40 C 50 C With SSD Storage Temperature...

Страница 11: ...Copyright 2013 IBASE Technology Inc All Rights Reserved 3 IBASE Technology Inc 1 2 2 Dimensions IDOOH 210 IR ...

Страница 12: ...4 IDOOH 210 IR User Manual 1 2 3 I O View IDOOH 210 IR I O side 1 3 Accessory List Part No Description Quantity 1 Wi Fi BT Antenna 2 pc 2 DVD 1 pc 3 Motherboard manual 1 pc 4 Power Cord 1 pc ...

Страница 13: ...x M4 screw to fix your mounting accessories Power on Please just connect your power cord to power inlet IDOOH 210 IR supports auto power on you can change the setting under BIOS menu Advance iSmart controller Power On after Power failure If your setting is Enable the system will auto turn on when power linked If your setting is disable please push the power button hole to turn on off the system ...

Страница 14: ... fix to the connector of the back top side of the system Please note Due to the attached anteena is waterproof type which cannot adjust position you have to keep 5cm space from backcover to backwall Or you can order adjustable anteena from the market or our iBASE reference part No A055RFA02C2M20800P ...

Страница 15: ...TN3460 device Onboard connections are available for two SATAII ports two COM ports one USB 3 0 ports four USB2 0 ports audio two Mini PCI e x1 slots and Micro SD Power input is made with a 9 30V DC in interface Product Name IB897 I45P Form Factor 3 5 disk size SBC SoC Type Speed Intel AtomTM QC E3845 2MB cache 1 91GHz Package FCBGA1170 25mmx27mm 22nm Tj 40 ゚ C to 110 ゚ C BIOS AMI BIOS Memory Intel...

Страница 16: ... red green x1 for power and HDD status power button x 1 IB897 I45 I27 I15 4 pin header for LED indicator 2 pin header for power button via cable Onboard Header Connector 2x8 pin header for CRT 2x4 pin header for 2x USB 2 0 DF20 socket connector x2 for 24 bit dual channel LVDS 4 pin box header for backlight brightness control PWM 2x6 pin box header for Audio 4 pin header for speaker 2x5 pin box hea...

Страница 17: ...Copyright 2013 IBASE Technology Inc All Rights Reserved 9 IBASE Technology Inc Board Dimensions ...

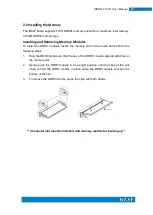
Страница 18: ...lot on the board and perform the following steps 1 Hold the DDR3 module so that the key of the DDR3 module aligned with that on the memory slot 2 Gently push the DDR3 module in an upright position until the clips of the slot close to hold the DDR3 module in place when the DDR3 module touches the bottom of the slot 3 To remove the DDR3 module press the clips with both hands Channel A slot must be i...

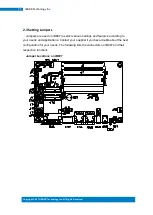
Страница 19: ...pers Jumpers are used on IB897 to select various settings and features according to your needs and applications Contact your supplier if you have doubts about the best configuration for your needs The following lists the connectors on IB897 and their respective functions Jumper Locations on IB897 ...

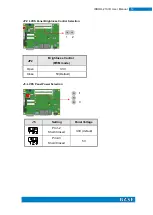
Страница 20: ...JP2 LVDS Panel Brightness Control Selection JP2 Brightness Control PWM mode Open 3 3V Close 5V Default J5 LVDS Panel Power Selection J5 Setting Panel Voltage Pin 1 2 Short Closed 3 3V default Pin 2 3 Short Closed 5V 1 2 2 1 3 3 3 ...

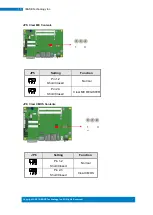
Страница 21: ...ved 13 IBASE Technology Inc JP5 Clear ME Contents JP5 Setting Function Pin 1 2 Short Closed Normal Pin 2 3 Short Closed Clear ME REGISTER JP6 Clear CMOS Contents JP6 Setting Function Pin 1 2 Short Closed Normal Pin 2 3 Short Closed Clear CMOS 1 3 3 1 3 3 ...

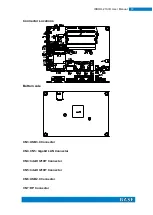
Страница 22: ...14 IDOOH 210 IR User Manual Connector Locations Bottom side CN3 USB3 0 Connector CN4 CN5 Gigabit LAN Connector CN4 Intel I210IT Connector CN5 Intel I210IT Connector CN6 USB2 0 Connector CN7 DP Connector ...

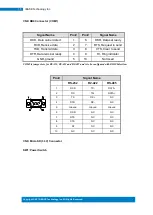
Страница 23: ...end TXD Transmit data 3 8 CTS Clear to send DTR Data terminal ready 4 9 RI Ring indicator GND ground 5 10 Not Used COM1 is jumper less for RS 232 RS 422 and RS 485 and is to be configured with BIOS Selection Pin Signal Name RS 232 R2 422 RS 485 1 DCD TX DATA 2 RX TX DATA 3 TX RX NC 4 DTR RX NC 5 Ground Ground Ground 6 DSR NC NC 7 RTS NC NC 8 CTS NC NC 9 RI NC NC 10 NC NC NC CN9 Micro SD 3 3V Conne...

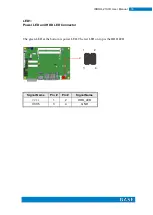
Страница 24: ...DOOH 210 IR User Manual LED1 Power LED and HDD LED Connector The green LED at the bottom is power LED The red LED on top is the HDD LED Signal Name Pin Pin Signal Name VCC3 1 2 HDD_LED VCC5 3 4 GND 1 2 3 4 ...

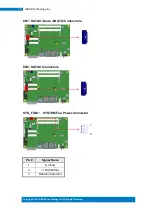
Страница 25: ...BASE Technology Inc All Rights Reserved 17 IBASE Technology Inc CN1 SATAII share mSATA Connectors CN2 SATAII Connectors SYS_FAN1 SYSTEM Fan Power Connector Pin Signal Name 1 Ground 2 12V 500mA 3 Rotation detection 1 3 ...

Страница 26: ...OUT_R 2 1 LINEOUT_L Ground 4 3 JD_FRONT LINEIN_R 6 5 LINEIN_L Ground 8 7 JD_LINEIN MIC R 10 9 MIC_L Ground 12 11 JD_MIC1 J2 Amplify Connector JST B4B PH K S Pin Signal Name 1 OUTL 2 OUTL 3 OUTR 4 OUTR J7 DDR3L SO DIMM CH A Sockets Please note CH A must be installed for booting up 1 11 11 2 12 1 4 4 ...

Страница 27: ...ets J4 J6 LVDS Connectors DF20G 20DP 1V J4 First Channel LVDS J6 Second Channel LVDS Signal Name Pin Pin Signal Name TX0N 2 1 TX0P Ground 4 3 Ground TX1N 6 5 TX1P Ground 8 7 Ground TX2N 10 9 TX2P Ground 12 11 Ground CLKN 14 13 CLKP Ground 16 15 Ground TX3N 18 17 TX3P Power 1A 20 19 Power 20 2 19 1 2 20 1 19 ...

Страница 28: ...20 IDOOH 210 IR User Manual J9 MCU Flash Connector factory use only J10 SATA HDD Power Connectors JST B4B XH A Pin Signal Name 1 5V 1A 2 Ground 3 Ground 4 12V 1A 4 1 4 1 ...

Страница 29: ...chnology Inc All Rights Reserved 21 IBASE Technology Inc J11 Smart Battery JST B5B PH K S Pin Signal Name 1 RST 2 ICHSWI 3 Ground 4 SMB_DATA 5 SMB_CLK J12 Mini PCIE Connector share mSATA J13 Mini PCIE Connector Half Size 1 5 ...

Страница 30: ... 4 D1 D0 5 6 D1 Ground 7 8 Vcc J15 COM2 RS232 Serial Port DF11 10DP 2DSA Signal Name Pin Pin Signal Name DCD Data carrier detect 1 2 RXD Receive data TXD Transmit data 3 4 Data terminal ready GND ground 5 6 DSR Data set ready RTS Request to send 7 8 CTS Clear to send RI Ring indicator 9 10 Not Used 7 1 8 2 1 9 2 10 ...

Страница 31: ...al Name Pin Pin Signal Name 5V 2 1 Red Ground 4 3 Green N C 6 5 Blue DDCDATA 8 7 N C H_SYNC 10 9 GND V_SYNC 12 11 GND DDCCLK 14 13 GND N C 16 15 GND J17 Digital I O signal level 5V Connector 2 54mm Signal Name Pin Pin Signal Name GND 1 2 VCC 500mA OUT3 3 4 OUT1 OUT2 5 6 OUT0 IN3 7 8 IN1 IN2 9 10 IN0 15 1 16 2 2 10 1 9 ...

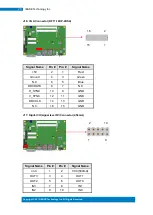
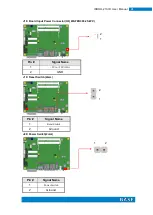
Страница 32: ...ual J18 Board Input Power Connector HK_WAFER396 2S WV Pin Signal Name 1 9V to 30V 10A 2 GND J19 Reset Switch 2mm Pin Signal Name 1 Reset Switch 2 Ground J20 Power Switch 2mm Pin Signal Name 1 Power Switch 2 Ground 2 1 2 1 1 2 ...

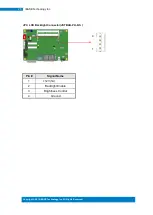
Страница 33: ...Copyright 2013 IBASE Technology Inc All Rights Reserved 25 IBASE Technology Inc JP3 LCD Backlight Connector JST B4B PH K S Pin Signal Name 1 12V 1A 2 Backlight Enable 3 Brightness Control 4 Ground 4 1 ...

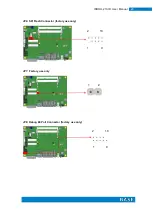
Страница 34: ...26 IDOOH 210 IR User Manual JP4 SPI Flash Connector factory use only JP7 Factory use only JP8 Debug 80 Port Connector factory use only 2 10 1 9 1 2 2 10 1 9 ...

Страница 35: ...el key POST Power On Self Test will continue with its test routines thus preventing you from invoking the Setup If you still wish to enter Setup restart the system by pressing the Reset button or simultaneously pressing the Ctrl Alt and Delete keys You can also restart by turning the system Off and back On again The following message will appear on the screen Press DEL to Enter Setup In general yo...

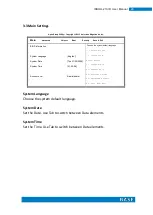
Страница 36: ...Select Screen Select Item Enter Select Change Field F1 General Help F2 Previous Values F3 Optimized Default F4 Save ESC Exit System Language English System Date System Time Tue 01 20 2009 21 52 06 Access Level Administrator System Language Choose the system default language System Date Set the Date Use Tab to switch between Data elements System Time Set the Time Use Tab to switch between Data elem...

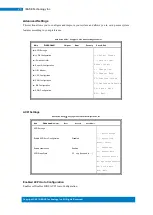
Страница 37: ...lp F2 Previous Values F3 Optimized Defaults F4 Save Exit ESC Exit iSmart Controller Super IO Configuration H W Monitor CPU Configuration PPM Configuration IDE Configuration SDIO Configuration ACPI Settings Aptio Setup Utility Copyright 2013 American Megatrends Inc Main Advanced Chipset Boot Security Save Exit ACPI Settings Select Screen Select Item Enter Select Change Opt F1 General Help F2 Previo...

Страница 38: ... Enable Hibernation Enables or Disables System ability to Hibernate OS S4 Sleep State This option may be not effective with some OS ACPI Sleep State Select ACPI sleep state the system will enter when the SUSPEND button is pressed ...

Страница 39: ... LVDS Backlight Control 1024 x 768 0 Min iSmart Controller Aptio Setup Utility Copyright 2013 American Megatrends Inc Main Advanced Chipset Boot Security Save Exit iSmart Controller Select Screen Select Item Enter Select Change Opt F1 General Help F2 Previous Values F3 Optimized Defaults F4 Save Exit ESC Exit Power On after Power failure Schedule Slot 1 Disable None Schedule Slot 2 None Power On a...

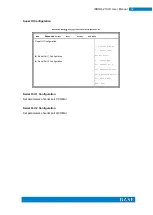
Страница 40: ...Save Exit Super IO Configuration Select Screen Select Item Enter Select Change Opt F1 General Help F2 Previous Values F3 Optimized Defaults F4 Save Exit ESC Exit Serial Port 1 Configuration Serial Port 2 Configuration Serial Port 1 Configuration Set parameters of serial port 1 COMA Serial Port 2 Configuration Set parameters of serial port 2 COMA ...

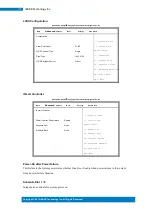
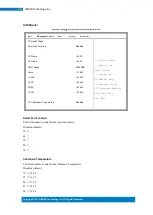
Страница 41: ...Previous Values F3 Optimized Defaults F4 Save Exit ESC Exit Smart Fan Function Disabled SYS temp 33 0 C CPU temp 34 5 C FAN1 Speed 4066 RPM Vcore 1 704 V 1 35V 1 544 V AVCC 3 360 V VSB3 VCC3V 3 344 V 3 328 V CPU Shutdown Temperature Disabled Smart Fan Function This field enables or disables the smart fan feature Disabled default 50 60 70 80 90 Shutdown Temperature This field enables or disables th...

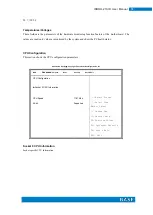
Страница 42: ...us CPU Configuration This section shows the CPU configuration parameters Aptio Setup Utility Copyright 2013 American Megatrends Inc Main Advanced Chipset Boot Security Save Exit CPU Configuration Socket 0 CPU Information Select Screen Select Item Enter Select Change Opt F1 General Help F2 Previous Values F3 Optimized Defaults F4 Save Exit ESC Exit CPU Speed 1751 Mhz 64 bit Supported Socket 0 CPU I...

Страница 43: ...n Aptio Setup Utility Copyright 2013 American Megatrends Inc Main Advanced Chipset Boot Security Save Exit CPU PPM Configuration Select Screen Select Item Enter Select Change Field F1 General Help F2 Previous Values F3 Optimized Default F4 Save ESC Exit EIST Enabled EIST Enable Disable Intel SpeedStep ...

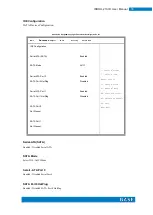
Страница 44: ...d F1 General Help F2 Previous Values F3 Optimized Default F4 Save ESC Exit Serial ATA SATA Enabled SATA Mode AHCI Serial ATA Port 0 Enabled SATA Port0 HotPlug Disabled Serial ATA Port 1 Enabled SATA Port1 HotPlug Disabled SATA Port0 Not Present SATA Port1 Not Present Serial ATA SATA Enabled Disabled Serial ATA SATA Mode Select IDE AHCI Mode Serail ATA Port 0 Enabled Disabled Serial Port 0 SATA Por...

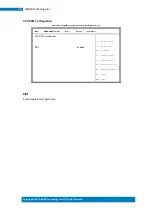
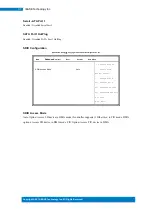
Страница 45: ...ility Copyright 2013 American Megatrends Inc Main Advanced Chipset Boot Security Save Exit Select Screen Select Item Enter Select Change Field F1 General Help F2 Previous Values F3 Optimized Default F4 Save ESC Exit SDIO Access Mode Auto SDIO Access Mode Auto Option Access SD device in DMA mode if controller supports it Otherwise in PIO mode DMA options Access SD device in DMA mode PIO Option Acce...

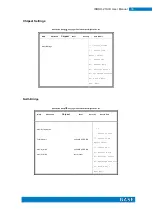
Страница 46: ... Previous Values F3 Optimized Defaults F4 Save Exit ESC Exit North Bridge North Bridge Aptio Setup Utility Copyright 2013 American Megatrends Inc Main Advanced Chipset Boot Security Save Exit Select Screen Select Item Enter Select Change Opt F1 General Help F2 Previous Values F3 Optimized Defaults F4 Save Exit ESC Exit Memory Information Total Memory 4096 MB LPDDR3 Memory Slot0 4096 MB LPDDR3 Memo...

Страница 47: ...reen Select Item Enter Select Change Opt F1 General Help F2 Previous Values F3 Optimized Defaults F4 Save Exit ESC Exit If ONLY the Administrator s password is set then this only limit access to Setup and is only asked for when entering Setup If ONLY the User s password is set then this is a power on password and must be entered to boot or enter Setup In Setup the User will have Administrator righ...

Страница 48: ...p Prompt Timeout 1 Bootup NumLock State On Quiet Boot Disabled Fast Boot Disabled Boot Option Priorities Boot Option 1 UEFI Built in EFI Setup Prompt Timeout Number of seconds to wait for setup activation key 65535 0xFFFF means indefinite waiting Bootup NumLock State Select the keyboard NumLock state Quiet Boot Enables or disables Quiet Boot option Fast Boot Enables or disables boot with initializ...

Страница 49: ...it Save Changes and Reset Discard Changes and Reset Save Options Save Changes Discard Changes Restore Defaults Save as User Defaults Restore User Defaults Boot Override Save Changes and Exit Exit system setup after saving the changes Discard Changes and Exit Exit system setup without saving any changes Save Changes and Reset Reset the system after saving the changes Discard Changes and Reset Reset...

Страница 50: ...r Manual Restore Defaults Restore Load Defaults values for all the setup options Save as User Defaults Save the changes done so far as User Defaults Restore User Defaults Restore the User Defaults to all the setup options ...

Страница 51: ...re Installation Utility before proceeding with the drivers installation 4 1 Intel Chipset Software Installation Utility The Intel Chipset Drivers should be installed first before the software drivers to enable Plug Play INF support for Intel chipset components Follow the instructions below to complete the installation 1 Insert the DVD that comes with the board Click Intel and then Intel R Baytrail...

Страница 52: ... IR User Manual 4 Click Yes to accept the software license agreement and proceed with the installation process 5 The Setup process is now complete Click Finish to restart the computer and for changes to take effect ...

Страница 53: ... that comes with the board Click Intel and then Intel R Baytrail Chipset Click Intel R Baytrail Graphics Driver 2 When the Welcome screen appears click Next to continue 3 Click Yes to accept the license agreement and continue the installation 4 Setup complete Click Finish to restart the computer and for changes to take effect ...

Страница 54: ...the DVD that comes with the board Click Intel and then Intel R Baytrail Chipset Click Realtek High Definition Audio Driver 2 On the Welcome screen click Next to proceed with the installation 3 InstallShield Wizard is complete Click Finish to restart the computer and for changes to take effect ...

Страница 55: ... 4 4 Intel Trusted Execution Engine Installation Note Windows 7 OS only 1 Insert the DVD that comes with the board Click Intel and then Intel R Baytrail Chipset Click Intel R Baytrail Graphics Driver 2 On the Setup Welcome screen click Next to proceed with the installation process ...

Страница 56: ...48 IDOOH 210 IR User Manual 3 Click Next accept the license agreement and continue the installation 4 Installation of the Intel Trusted Execution Engine is now complete Click Finish ...

Страница 57: ...emory access controller 0093h 009Fh Direct memory access controller 00C0h 00DF h Direct memory access controller 00F0h 00F0h Numeric data processor 02F8h 02FFh Communications Port COM2 03B0h 03BB h Intel R HD Graphics 4600 03C0h 03DF h Intel R HD Graphics 4600 03F8h 03FFh Communications Port COM1 0D00h FFFF h PCI bus E000h EFFF h Intel R 8 Series C220 Series PCI Express Root Port 7 8C1C F000h F03F...

Страница 58: ...10 IR User Manual F0C0h F0C3 h Intel R 8 Series C220 Series SATA AHCI Controller 8C02 F0D0h F0D7 h Intel R 8 Series C220 Series SATA AHCI Controller 8C02 F0E0h F0E7 h Intel R Active Management Technology SOL COM3 ...

Страница 59: ...System Timer IRQ3 Serial Port 2 IRQ4 Serial Port 1 IRQ 10 Intel R 8 Series C220 Series SMBus Controller 8C22 IRQ 13 Numeric data processor IRQ 16 High Definition Audio Controller IRQ 16 Intel R 8 Series C220 Series USB EHCI 2 8C2D IRQ 16 Intel R Management Engine Interface IRQ 19 Intel R 8 Series C220 Series SATA AHCI Controller 8C02 IRQ 19 Intel R Active Management Technology SOL COM3 IRQ 22 High...

Страница 60: ...HANTABILITY AND OR FITNESS FOR A PARTICULAR PURPOSE ifndef __NCT5523D_H define __NCT5523D_H 1 define NCT5523D_INDEX_PORT NCT5523D_BASE define NCT5523D_DATA_PORT NCT5523D_BASE 1 define NCT5523D_REG_LD 0x07 define NCT5523D_UNLOCK 0x87 define NCT5523D_LOCK 0xAA unsigned int Init_NCT5523D void void Set_NCT5523D_LD unsigned char void Set_NCT5523D_Reg unsigned char unsigned char unsigned char Get_NCT552...

Страница 61: ...PURPOSE include dos h include conio h include stdio h include stdlib h include NCT5523D H int main void void Dio5Initial void void Dio5SetOutput unsigned char unsigned char Dio5GetInput void void Dio5SetDirection unsigned char unsigned char Dio5GetDirection void int main void char SIO SIO Init_NCT5523D if SIO 0 printf Can not detect Nuvoton NCT5523D program abort n return 1 Dio5Initial for GPIO20 ...

Страница 62: ...54 IDOOH 210 IR User Manual printf Current DIO status 0x X n Dio5GetInput printf Set DIO output to high n Dio5SetOutput 0x0F printf Set DIO output to low n Dio5SetOutput 0x00 return 0 ...

Страница 63: ...ucBuf 0x04 Set_NCT5523D_Reg 0x30 ucBuf void Dio5SetOutput unsigned char NewData Set_NCT5523D_LD 0x07 switch to logic device 7 Set_NCT5523D_Reg 0xE1 NewData unsigned char Dio5GetInput void unsigned char result Set_NCT5523D_LD 0x07 switch to logic device 7 result Get_NCT5523D_Reg 0xE1 return result void Dio5SetDirection unsigned char NewData NewData 1 for input 0 for output Set_NCT5523D_LD 0x07 swit...

Страница 64: ...56 IDOOH 210 IR User Manual unsigned char result Set_NCT5523D_LD 0x07 switch to logic device 7 result Get_NCT5523D_Reg 0xE8 return result ...

Страница 65: ...SS FOR A PARTICULAR PURPOSE include NCT5523D H include dos h unsigned int NCT5523D_BASE void Unlock_NCT5523D void void Lock_NCT5523D void unsigned int Init_NCT5523D void unsigned int result unsigned char ucDid NCT5523D_BASE 0x4E result NCT5523D_BASE ucDid Get_NCT5523D_Reg 0x20 if ucDid 0xC4 NCT5523D goto Init_Finish NCT5523D_BASE 0x2E result NCT5523D_BASE ucDid Get_NCT5523D_Reg 0x20 if ucDid 0xC4 ...

Страница 66: ...DOOH 210 IR User Manual void Unlock_NCT5523D void outportb NCT5523D_INDEX_PORT NCT5523D_UNLOCK outportb NCT5523D_INDEX_PORT NCT5523D_UNLOCK void Lock_NCT5523D void outportb NCT5523D_INDEX_PORT NCT5523D_LOCK ...

Страница 67: ...outportb NCT5523D_DATA_PORT LD Lock_NCT5523D void Set_NCT5523D_Reg unsigned char REG unsigned char DATA Unlock_NCT5523D outportb NCT5523D_INDEX_PORT REG outportb NCT5523D_DATA_PORT DATA Lock_NCT5523D unsigned char Get_NCT5523D_Reg unsigned char REG unsigned char Result Unlock_NCT5523D outportb NCT5523D_INDEX_PORT REG Result inportb NCT5523D_DATA_PORT Lock_NCT5523D return Result ...

Страница 68: ... timer counts to zero SAMPLE CODE File of the NCT5523D H THIS CODE AND INFORMATION IS PROVIDED AS IS WITHOUT WARRANTY OF ANY KIND EITHER EXPRESSED OR IMPLIED INCLUDING BUT NOT LIMITED TO THE IMPLIED WARRANTIES OF MERCHANTABILITY AND OR FITNESS FOR A PARTICULAR PURPOSE ifndef __NCT5523D_H define __NCT5523D_H 1 define NCT5523D_INDEX_PORT NCT5523D_BASE define NCT5523D_DATA_PORT NCT5523D_BASE 1 define...

Страница 69: ...T LIMITED TO THE IMPLIED WARRANTIES OF MERCHANTABILITY AND OR FITNESS FOR A PARTICULAR PURPOSE include dos h include conio h include stdio h include stdlib h include NCT5523D H int main void void WDTInitial void void WDTEnable unsigned char void WDTDisable void int main void char SIO SIO Init_NCT5523D if SIO 0 printf Can not detect Nuvoton NCT5523D program abort n return 1 WDTInitial WDTEnable 10 ...

Страница 70: ...ed char NewInterval unsigned char bBuf Set_NCT5523D_LD 0x08 switch to logic device 8 Set_NCT5523D_Reg 0x30 0x01 enable timer bBuf Get_NCT5523D_Reg 0xF0 bBuf 0x08 Set_NCT5523D_Reg 0xF0 bBuf count mode is second Set_NCT5523D_Reg 0xF1 NewInterval set timer void WDTDisable void Set_NCT5523D_LD 0x08 switch to logic device 8 Set_NCT5523D_Reg 0xF1 0x00 clear watchdog timer Set_NCT5523D_Reg 0x30 0x00 watc...

Страница 71: ...R FITNESS FOR A PARTICULAR PURPOSE include NCT5523D H include dos h unsigned int NCT5523D_BASE void Unlock_NCT5523D void void Lock_NCT5523D void unsigned int Init_NCT5523D void unsigned int result unsigned char ucDid NCT5523D_BASE 0x4E result NCT5523D_BASE ucDid Get_NCT5523D_Reg 0x20 if ucDid 0xC4 NCT5523D goto Init_Finish NCT5523D_BASE 0x2E result NCT5523D_BASE ucDid Get_NCT5523D_Reg 0x20 if ucDi...

Страница 72: ...0 IR User Manual return result void Unlock_NCT5523D void outportb NCT5523D_INDEX_PORT NCT5523D_UNLOCK outportb NCT5523D_INDEX_PORT NCT5523D_UNLOCK void Lock_NCT5523D void outportb NCT5523D_INDEX_PORT NCT5523D_LOCK ...

Страница 73: ...outportb NCT5523D_DATA_PORT LD Lock_NCT5523D void Set_NCT5523D_Reg unsigned char REG unsigned char DATA Unlock_NCT5523D outportb NCT5523D_INDEX_PORT REG outportb NCT5523D_DATA_PORT DATA Lock_NCT5523D unsigned char Get_NCT5523D_Reg unsigned char REG unsigned char Result Unlock_NCT5523D outportb NCT5523D_INDEX_PORT REG Result inportb NCT5523D_DATA_PORT Lock_NCT5523D return Result ...

Страница 74: ...66 IDOOH 210 IR User Manual Optional Wi Fi Module IDOOH 210 IR offers optional Wi FI module please check with iBASE to get details information ...

Отзывы: