8
ARCHIVING VIDEO FOOTAGE TO USB FLASH DRIVE OR CD/DVD
To archive / save a video clip, follow the steps below.
Step 1.
Plug in your USB flash drive into the USB port on the front panel of the DVR, if using, OR
Press the CD/DVD eject button on the front panel of the DVR and insert a blank CD or DVD disk into the drive. Press the eject button again to
close the drive.
Step 2.
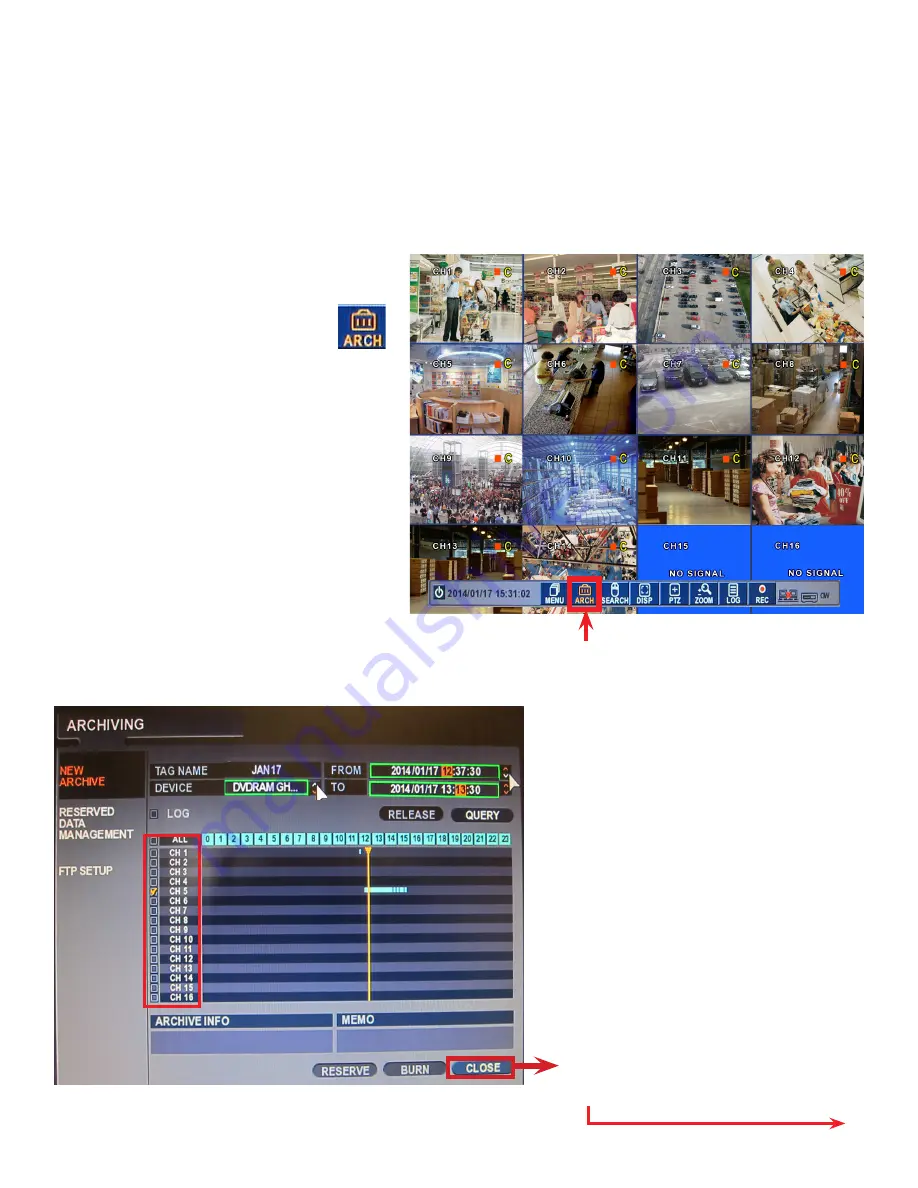
In the Live Mode, use your mouse cursor to click
the ARCH icon in the Quick Menu panel.
ARCHIVING window will be displayed.
Step 3.
In the ARCHIVING window, use the mouse cursor to set
the FROM time and date. This determines the start date
and time of the saved video clip.
Step 4.
Use the mouse cursor to set the TO time and date. This
determines the end date and time of the saved video clip.
Step 5.
Use the mouse cursor to click on the UP / DOWN arrows inside the
DEVICE
field.
Set the destination device to either DVDRAM to burn a CD/DVD or select the name
of your USB Flash drive to save the video clip to your USB drive.
Step 6.
Position your mouse cursor over the TAG NAME field,
then use the on-screen keyboard to enter the tag
name.
Step 7.
Select the cameras for backup. To select all video
cameras for backup, use your mouse cursor to check
the ALL checkbox. To save one or more cameras, check
all corresponding camera checkboxes. In this example,
only CH 5 has been selected for backup.
See the next page for further instructions
Step 3
Step 4
Step 5
Step 6
Step 7
Step 2
EXIT ARCHIVING SCREEN.
RETURN TO LIVE MODE.


