


User Manual | 17
4. The screen is flickering
� Press the “Auto” - adjustment control by remote control or OSD to adjust.
Re-locate nearby devices, such as motor, or transformer, which generate magnetic
field, away from the monitor. Check if the specific voltage is applied.
� Check if the signal timing of signal source (PC, IPC, laptop or media player) is within
the specification of monitor. If you are unable to correct the fault by following this
chart, stop using your monitor and contact your distributor or dealer for further
assistance.
※
Should all above trouble-shooting measure fails, please write down the S/N, Serial Number,
which is located on the left-side of the monitor, and provide that S/N to the service personnel, this
will help processing or further diagnosis easier.
7. Supplement
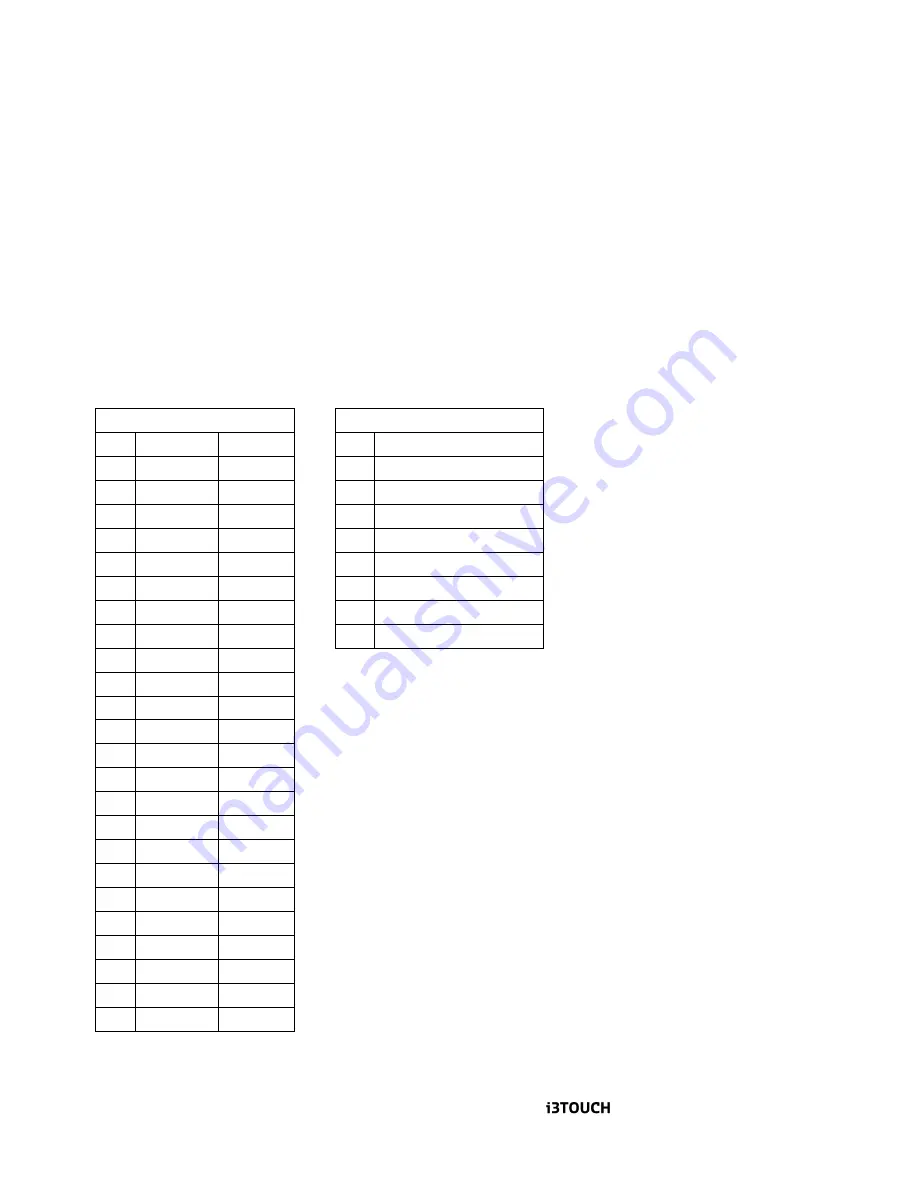
This Monitor is designed to meet following VESA standard resolution and timing per two different
types of panel’s native resolution.
VGA Timing
HDMI/ DP Timing
1
640x480 60Hz
1
480i60
2
640x480 72Hz
2
480p60
3
640x480 75Hz
3
576p50
4
800x600 56Hz
4
720p60
5
800x600 60Hz
5
720p50
6
800x600 72Hz
6
1080p50
7
800x600 75Hz
7
1080p60
8
1024x768 60Hz
8
3840x2160 24HZ
9
1024x768 70Hz
9
3840x2160 30HZ
10 1024x768 75Hz
11
1152x864
75Hz
12
1280x720
60Hz
13 1280x768 60Hz
14 1280x800 60Hz
15 1280x960 60Hz
16 1280x1024 60Hz
17 1280x1024 75Hz
18
1360x768
60Hz
19 1440x900 60Hz
20 1600x1200 60Hz
21 1600x1200
65Hz
22 1600x1200
70Hz
23 1600x1200
75Hz
24 1680x1050
60Hz
25 1920x1080
60Hz
Timing modes exceeding above chart may show abnormal, off-centered, unproportioned
picture on the screen, or even "No Signal" as such timing mode maybe completely
All manuals and user guides at all-guides.com


