i3 i3TOUCH Premium Скачать руководство пользователя страница 10

10    |    Learn more about i3TOUCH and other product in the i3 line? Visit www.i3-learning.com 


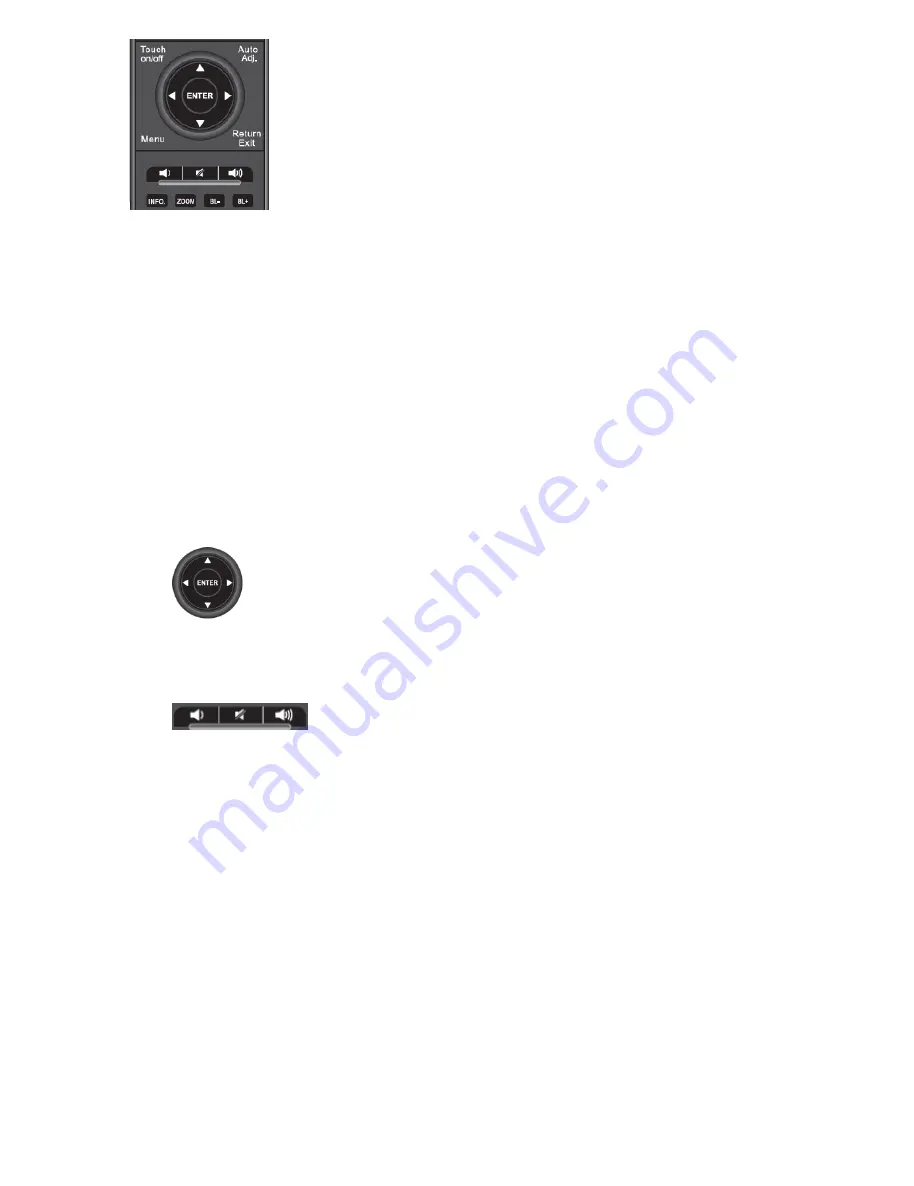
Press the Touch button to turn on/off the panel lock function. Terminate Touch function and 
keyboard mouse function which were connected with USB A1/ A2 on monitor.   
 

j.


  Auto Adj. 

Press this button to auto-adjust and optimize picture screen of the monitor. 


k.


  Menu 

Press the Menu button to go into OSD menu. 


l.


  Mute 

Press this button to mute or un-mute. 
 

m.


  Return/ Exit 

Press Exit button to exit setting, or, exit OSD menu.   


n.


Select function for adjustment 

Press 

  button to navigate the intended function items for adjustment, and then 

press the Enter button to select that function item. 


o.


Volume 


Press 

  to adjust value of volume and mute on/ off. 


p.


  Info. 

Press to show source information   
 

q.


  Zoom 

Press Zoom button to auto-adjust and optimize picture screen of the monitor. 


r.


  BL+/ BL- 

Press Bl+/ Bl- button to adjust backlight of the monitor. 
 

All manuals and user guides at all-guides.com

Содержание i3TOUCH Premium

Страница 1: ...Premium User Manual Model no P6505 T10 P7505 T10 All manuals and user guides at all guides com a l l g u i d e s c o m...

Страница 2: ...product in the i3 line Visit www i3 learning com 1 Introduction 2 Connecting the Monitor 3 Using the Monitor 4 Cleaning the screen of LCD Monitor 5 Disclaimer 6 Trouble Shooting 7 Supplement All manua...

Страница 3: ...ug having a third grounding pin This plug will only fit into a grounding type power outlet This is a safety feature If you do not have proper outlet to insert the plug contact your electrician to repl...

Страница 4: ...o OPS internal HDMI o Display Port o VGA o Android AUDIO INPUT o For VGA audio input AUDIO OUTPUT o Audio output follow source DATA CONNECTIONS USB A x 3 A type USB B x 1 B type only for connection to...

Страница 5: ...ures for setting up your Monitor kit is as followed 2 1 Power Signal Connections Power cord connection Connect the power cord to the AC outlet Power on Switch on the main power of your monitor switch...

Страница 6: ...er product in the i3 line Visit www i3 learning com VGA HDMI1 HDMI2 DP on rear Please connect the signal source first then follow by connecting USB cable for touch All manuals and user guides at all g...

Страница 7: ...he physical monitor as figure below and described in the following paragraphs Please note that connectors may vary in some derivative models please refer to individual leaflet for special notation 3 2...

Страница 8: ...e Visit www i3 learning com 3 3 Keypad Side View 3 4 Remote Control The outlook of remote control is shown in the Figure hereafter Size 197 2 x 47 1 x 23 2mm 7 7 x 1 85 x 0 9 x in Operation distance 1...

Страница 9: ...video player list under Android e Photo Press the Photo button to enter photo player list under Android f H1 H2 OPS DP VGA Press H1 button to select the HDMI 1 signal source Press H2 button to select...

Страница 10: ...nto OSD menu l Mute Press this button to mute or un mute m Return Exit Press Exit button to exit setting or exit OSD menu n Select function for adjustment Press button to navigate the intended functio...

Страница 11: ...u Picture press UP Down to select sub menu press to next page Sound Input Picture Mode to select User to active sub menu Contrast Brightness Colour Colour Temperature All manuals and user guides at al...

Страница 12: ...y Display press UP Down to select sub menu press to next page Sound Setup Panel Lock To select ON to active Panel Lock function disable Touch function Under source VGA the sub menu of Auto Position Au...

Страница 13: ...User Manual 13 INPUT press UP Down to select sub menu press to next page Setup Picture All manuals and user guides at all guides com...

Страница 14: ...g these should be 0 and 9 to act as the global address Type The third character is the command type TBD Property ID CmdH and CmdL The four and fifth and characters are the property command identifier...

Страница 15: ...2 OPS DP WB Android S 0 0 2 0 0 0 0 1 2 3 4 5 6 EN Brightness 0 S 0 0 3 0 0 0 0 EN 50 0 0 5 0 100 0 1 0 0 Plus 1 0 0 0 Minus 2 0 0 0 Language English S 0 0 4 0 0 2 0 EN France 1 German 2 Chinese S 6 C...

Страница 16: ...m Check Point Symptom Check Point 1 No picture Check if the signal cable is firmly seated in the socket Check if the Power is ON at the computer Check if the brightness control is at the appropriate p...

Страница 17: ...sing or further diagnosis easier 7 Supplement This Monitor is designed to meet following VESA standard resolution and timing per two different types of panel s native resolution VGA Timing HDMI DP Tim...

Страница 18: ...Learn more about i3TOUCH and other product in the i3 line Visit www i3 learning com undisplayed please refer to graphic card output timing mode respectively All manuals and user guides at all guides c...

Отзывы: