17
3
Connections
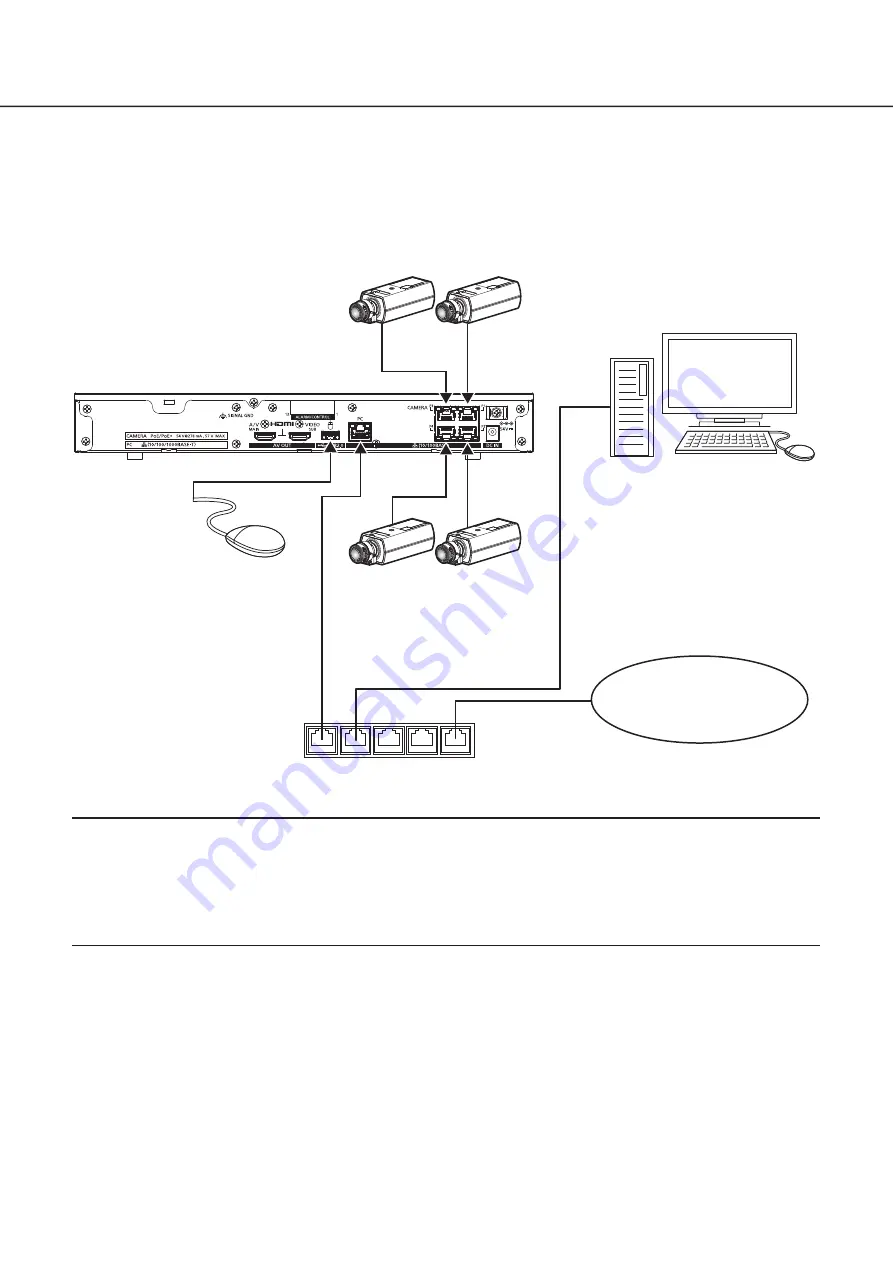
Connection of cameras, a mouse and a PC
Connect the camera to the camera port on the rear side of this product.
Connect the included mouse to the mouse connection port on the rear side of the recorder.
Connect PC to the PC port on the rear side of this product via a switching hub.
Connect this product to the camera and switching hub by using an Ethernet cable (locally procured: category 5e or higher,
straight).
IP address: 192.168.0.250
Subnet mask: 255.255.255.0
Default gateway: 192.168.0.1
IP address: 192.168.0.x (0, 1, 250, 255,
Except the camera's IP address)
Subnet mask: 255.255.255.0
Default gateway: 192.168.0.1
Recorder
WJ-NU101
Mouse (included)
Camera (×4 max.)
IP address (example): 192.168.0.101~
192.168.0.104
Subnet mask: 255.255.255.0
PoE+ Switching hub
(locally procured)
Network
Ethernet cable
(locally procured: category 5e or above, straight)
Note:
• The camera port comes with the PoE+ power supply function that complies with IEEE802.3at.
• If the camera is located at a distance (approx. 100 m) greater than the PoE+ power supply capacity, connect it to the PC
port via the PoE+ camera power supply unit (locally procured) or use WJ-PU201*(option).
• For WJ-NU300, connect the 9th to 16th cameras to the PC port via PoE+ Switching hub (locally procured) or use
WJ-PU201*(option).
* WJ-PU201 refer to WJ-PU201P (For U.S.), WJ-PU201/G (For Europe), WJ-PU201F/G (For Europe).


