background image

Page 60 - Chapter 3

Chapter 3 - Page 61

MESSAGING

MESSAGING

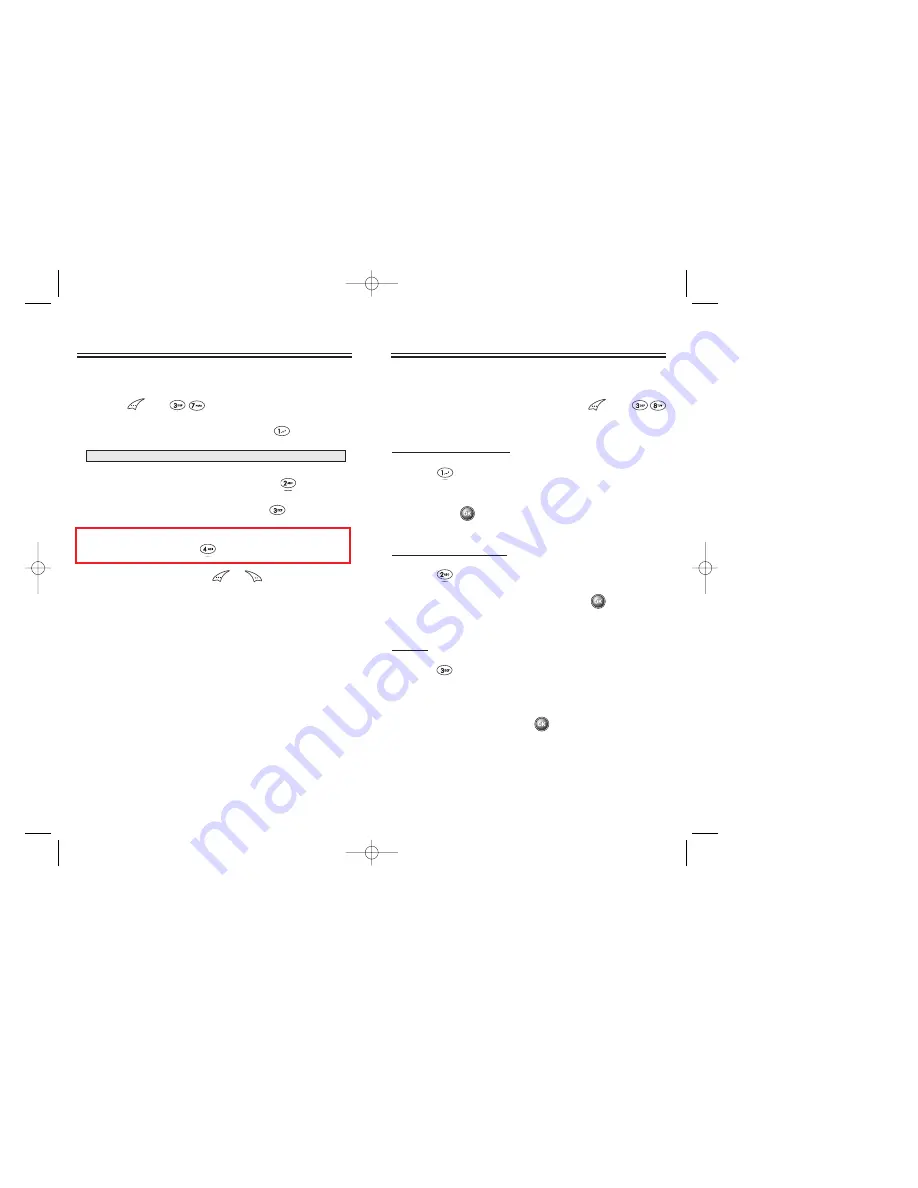
ERASE ALL

1. Press         and            .

2.1. To erase the inbox messages, press

2.2. To erase the outbox messages, press

.

2.3. To erase the filed messages, press

2.4. To erase the my object (SOUND/PICTURE/

ANIMATION), press

3. Select “Yes” or “No” with        or        .

NOTE:

Select “Entire inbox” or “Old inbox”.

MESSAGING

MESSAGING

SETTINGS

1. To enter the SETTINGS menu, press

then  

“SETTINGS”.

SAVE SENT MESSAGE

1. Press       “SAVE SENT MSG”.

2. Select (NO/YES/PROMPT) using the navigation key, 

then press

.

DEFAULT CALL BACK

1. Press

“DEFAULT CB#”.

2. Input the call back number, then press

.

ALERT

1. Press       “ALERT”.

2. Select the alert type (RINGER/VIBRATE/SILENT/

RINGER & REMIND/VIBRATE & REMIND) using the 

navigation key, then press

.

CDM-86002/18  2003.2.18  10:29 AM  Page 62

Содержание TX-55C

Страница 1: ...ialing and 2 way speakerphone are great for enhancing hands free use of this phone T9TM Text Input vibrating alert and a 7 line LCD display make the TX 55C easier to use Several optional accessories are available for the TX 55C including hands free devices installed earphone microphone cigarette lighter charger charging devices vehicle travel desktop AC data interface cables belt clips and of cour...

Страница 2: ...Talk and Standby Times 13 Battery Information 14 CHAPTER 2 BASIC OPERATION 15 Using the Phone 16 Turning the Phone On 16 Turning the Phone Off 16 Using the Menu 17 Menu Summary 18 Basic Functions 22 Making a Call 23 Pause Feature 23 Speaker Phone 24 Answering Calls 24 Caller ID 24 Call Waiting 25 Answering Machine Display 25 Adjusting the Volume 26 Lock 26 Vibrate 27 Manner Mode 27 Functions Durin...

Страница 3: ... My Phone 29 My Profile 29 Voice Pravacy 30 Location 30 CHAPTER 3 MEMORY SETTINGS 31 Storing Phone Numbers 32 Text Input Methods 33 Entering Characters 33 Alpha Mode 33 T9TM Predictive Text Mode T9ABC 34 Numeric Mode 123 36 Symbol Mode SYM 36 Speed Dialing 37 One Touch Two Touch Dialing 37 Phone Book 38 By Name 38 By Number 38 By Group 39 Editing Your Phone Book 39 Edit Group 40 Edit SMS Group 42 ...

Страница 4: ...sumer Update 132 CHAPTER 6 WARRANTY 141 Protect Your Warranty 142 12 Month Limited Warranty 143 Please read and fully understand this manual before using your phone This chapter addresses your phone its keys and dis play icons and covers the charging and proper use of the battery Once you have read this chapter you can move on to the basic and advanced features of your phone Package Contents Hands...

Страница 5: ...nd the dimensions are 3 3 x 1 6 x 9 Chapter 1 Page 7 P PACKAGE CONTENTS ACKAGE CONTENTS Thank you for purchasing the TX 55C wireless handset The phone s giftbox contains all of the items listed below NOTE Immediately Report any product defects to the placeof purchase User Manual Desktop Charger Hand strap Handset Standard Battery Page 6 Chapter 1 Antenna For best call quality fully extend the ante...

Страница 6: ...ne is mute during a call Chapter 1 Page 9 FUNCTION KEYS FUNCTION KEYS END KEY Press to turn the handset on or off Terminates a call or exits the current menu SEND KEY Press to make or receive a call NAVIGATION KEY Press to scroll through the menu SOFT KEYS Press to perform the functions displayed above them on the LCD Display e g When REDIAL is displayed on the bottom left of the dis play press to...

Страница 7: ...n the battery compartment the handset will not turn on and or the battery may detach during use Page 10 Chapter 1 Phone receive an UPAlert Phone receive an UPAlert and have a text massage whice it isn t checked Silent Mutes key beep during a call Emergency call Blinks when an emergency call is in progress Answering machine memo New voice memos Answering machine Phone in answering machine mode Etiq...

Страница 8: ...the LED flickers while charging the battery contacts may need cleaning 4 Once fully charged the LED may change from red to green This does not indicate a prob lem with the battery 5 Battery operating time gradually decreases over time 6 If the battery fails to perform normally you may need to replace the battery Page 12 Chapter 1 POWER CONNECTION Connect the charger to a standard 110V AC outlet Th...

Страница 9: ...ure to temperature extremes A phone with a hot or cold battery may temporarily not work or charge even if the battery is fully charged Always allow it to cool down or warm up first and keep the battery between 41o F and 95o F 5o C and 35o C When not in use store the battery uncharged in a cool dark dry place The battery is a self contained unit Do not attempt to open its case Battery operating tim...

Страница 10: ...ING THE PHONE USING THE PHONE TURNING THE PHONE ON 1 Press NOTE 1 Immediately if LOW BATTERY WARNING POWER OFF appears and the power goes off there is a possibility of damaging your phone s memory Change or charge the battery 2 If the battery is removed while the phone is on information about the last call may be erased NOTE The default password is the last 4 digits of your phone number If PASSWOR...

Страница 11: ... Password Chapter 2 Page 19 MENU SUMMAR MENU SUMMARY Y 2 RECENT CALLS 1 PHONE BOOK u u 3 MESSAGING u 1 By Name 2 By Number 3 By Group 1 Add New Group 2 Change Group Name 3 Clear Group 1 Add New Group 2 Change Group Name 3 Edit Existing Group 4 Clear Group 1 Last Call 2 All Calls 3 Home Calls 4 Roam Calls 5 Cumulative Calls 1 Sound 2 Picture 3 Animation 1 Inbox 2 Outbox 3 Filed 4 My Object 1 Find 2...

Страница 12: ... Yes No 2 Wake Up 3 Top Level 4 Digital Dial 4 System 5 Location 6 Others 7 UP Proxy IP 1 Schedule 2 Calculator 3 World Clock 4 Stopwatch 1 Connection 2 Data Speed 3 TTY Mode 1 Voice Memo 2 Call Answer 3 Voice Command 7 TOOLS u 8 DATA SVC u 9 VOICE SVC u MENU SUMMAR MENU SUMMARY Y 1 List 2 Add 3 Clear All 1 On Off 2 Record 3 Play 4 Clear 1 Untrain All 2 Prompt Mode 3 Digit Mode 4 HFK Mode 5 Set Ac...

Страница 13: ... PROFILE 6 VOICE PRIVACY 7 LOCATION STANDBY MENU PAUSE INPUT 1 PREFIX 2 HARD PAUSE 3 TIME HYPHEN PAUSE FEATURE Pauses are used for automated systems i e voice mail and calling cards Insert a pause after a phone number then enter another group of numbers The second set of numbers is dialed automatically after the pause This feature is useful for dialing into systems that require a code 1 Enter the ...

Страница 14: ... CALLER ID Identifies caller by displaying that person s phone num ber If the caller s name and number are stored in your phone book the name and number from the memory location are displayed BASIC FUNCTIONS BASIC FUNCTIONS CALL WAITING If you have call waiting this function notifies you of an incoming call when you are on another call by sounding a beep tone 1 When you hear the beep press to answ...

Страница 15: ...k the phone input the password Chapter 2 Page 27 BASIC FUNCTIONS BASIC FUNCTIONS Page 26 Chapter 2 NOTE The default password is the last 4 digits of your phone number BASIC FUNCTIONS BASIC FUNCTIONS VIBRATE Disables the ringer and vibrates when an incoming call is received To enable this function 1 Press 2 Select SOUND then press 3 Select VIBRATE MANNER MODE Silences all phone sounds while attendi...

Страница 16: ... the other party cannot hear you if you speak 1 Press MUTE MESSAGING 1 Press MESSAGING Page 28 Chapter 2 SCRATCHPAD Stores a new phone number during a call without the calling party hearing the keypad tones 1 While on a call press SCRATCH PAD 2 Enter a phone number press and then save the phone number in the phonebook FUNCTIONS DURING A CALL FUNCTIONS DURING A CALL MY PROFILE Enables to review and...

Страница 17: ...ls Data Svc Voice Svc Chapter 3 MEMORY SETTINGS Chapter 3 Page 31 Page 30 Chapter 2 LOCATION Enables the bell mobility network to locate your cur rent location through Global Positioning System GPS Refer to page 77 for more details 1 Press LOCATION VOICE PRIVACY Enhances voice privacy during a call 1 Press VOICE PRIVACY 2 Select STANDARD or ENHANCED with the navigation key FUNCTIONS DURING A CALL ...

Страница 18: ...oose Alpha mode press then choose ABC The chart below outlines the key presses needed to display each letter or number in this mode Chapter 3 Page 33 2 Enter the person s name and press 3 To mark the phone number as Secret select Yes STORING PHONE NUMBERS STORING PHONE NUMBERS The TX 55C memory stores up to NUMBER frequently dialed numbers 1 Enter the phone number including area code and press NOT...

Страница 19: ...t Right Press to change text input mode T9Abc Abc 123 Sym Select T9Abc for predictive text input Press to view the next matching word if the underlined word is not the word you intended Press once to accept a word and add a space Press once to delete the character to the left of the cursor To move cursor KEY FUNCTION T9TM Predictive Text Mode T9ABC To choose T9 mode press then choose T9ABC This mo...

Страница 20: ...g the call NOTE One touch dialing must be turned on in the handset See page 46 Chapter 3 Page 37 Numeric Mode 123 Numeric mode allows you to add a number to your entry message To select numeric mode press then select 123 TEXT INPUT METHODS TEXT INPUT METHODS Symbol Mode SYM To select symbol mode allows you to add various sym bols to your entry Whether you are adding an email address to your phone ...

Страница 21: ...rn to the previous page press BY GROUP 1 Press 2 Select one of the options Family Friends Work Etc All with the navigation key 3 To retrieve the phone book by the group press 4 All the entries under the group will appear You can either delete or view an entry by pressing or respectively when it is selected 5 To call the selected number press BY NAME 1 Press 2 Enter a name or its character string t...

Страница 22: ...ve it press 5 To confirm it press EDIT GROUP Adds changes and deletes a group PHONE BOOK PHONE BOOK ADD NEW GROUP 1 To add a new group press A maximum of 7 groups is allowed 2 Input a new group name 3 To save press EDIT EXISTING ENTRY 1 To edit an existing entry press The 4 entry groups appear Personal Business Etc All 2 Use the navigation key to select one of the groups 3 Select an entry under th...

Страница 23: ...p name 4 Input a new name 5 To save it press 6 To confirm it press EDIT EXISTING GROUP 1 To editing menu press 2 The 3existing group appear Family Friend Work 3 Use the navigation key to select an existing group 4 To edit a group 5 To save it press 6 To confirm it press CLEAR GROUP 1 To clear a group name press 2 The 3existing group appear Family Friend Work 3 Use the navigation key to select an c...

Страница 24: ...location press then the navigation key to delete it 3 Select the group where the phone number is saved then press 4 Select the entry then press 5 Select the phone number then press PHONE BOOK PHONE BOOK MY PROFILE Saves and edits your personal information 1 To review and edit your personal information Name My phone number Birthday Blood Type Address Home E Mail Work Phone Memo Set Secret press 2 T...

Страница 25: ...0 most recently dialed numbers press The most recent call will be listed first 2 Use the navigation key to scroll through the list of dialed calls then select the desired number To view call details press Detail information includes the phone number its log number time and date of the call 3 To dial the number press Chapter 3 Page 47 RECENT CALLS RECENT CALLS The TX 55C keeps a log of the 10 most ...

Страница 26: ... number time and date of the call 3 To dial the number press RECENT CALLS RECENT CALLS LAST CALL To displays the total amount of time of your last call 1 Press ALL CALLS To displays the total amount of time of all your calls 1 Press HOME CALLS To display the total amount of time for calls placed with in your home area 1 Press ROAM CALLS To display the total amount of time for calls placed out side...

Страница 27: ...NG MESSAGING Your Hyundai wireless handset features Two Way Short Message Service SMS This feature sends and receives text messages through your phone Voice mail notification is also supported Urgent New Msg Urgent Read Msg New Msg unread Duplicate New Msg Old Msg read Lock read MESSAGE INDICATORS The following symbols indicate the status of message received by your phone These symbols appear for ...

Страница 28: ...ter IMMEDIATE TIME DATE by using the navigation key then press Chapter 3 Page 53 MESSAGING MESSAGING EDIT RECIPIENT 1 To change the recipient press EDIT RECIPIENT 2 Input the phone number then press 3 Input new text message if necessary then press Page 52 Chapter 3 INSERT SIGNATURE 1 To insert signature press INSERT SIGNATURE 2 Select the parameter YES NO by using the navigation key then press SAV...

Страница 29: ...n your phone press SAVE 2 Press INBOX To enter the INBOX menu follow the procedures for CHECKING RECEIVED TEXT MESSAGES on page 101 REPLY 1 To reply to the text message press REPLY 2 Enter your message then press MESSAGING MESSAGING FORWARD 1 To forward the text message press FORWARD 2 Input the phone number of the person you are sending the message then press 3 Input any text message to go along ...

Страница 30: ...ERASE 1 To erase the message press ERASE 2 Select Yes or No with or SAVE ADDRESS 1 To save the Callback number press phone numbers in text the destination address from the text message press SAVE ADDRESS 2 To save the Callback number into a memory location follow the procedures for STORING PHONE NUMBERS on page 32 SEND TO 1 To send to the message press SEND TO 2 Input the phone number then press 3...

Страница 31: ... message is saved from Inbox menu this screen will be displayed If the text message is saved from Outbox menu this screen will be displayed 4 Select one by pressing My Object 1 Press and Select a text message with the navigation key Press Page 58 Chapter 3 MESSAGING MESSAGING Chapter 3 Page 59 SOUND 1 Press PICTURE 1 Press ANIMATION 1 Press CDM 86002 18 2003 2 18 10 29 AM Page 60 ...

Страница 32: ...with or NOTE Select Entire inbox or Old inbox MESSAGING MESSAGING SETTINGS 1 To enter the SETTINGS menu press then SETTINGS SAVE SENT MESSAGE 1 Press SAVE SENT MSG 2 Select NO YES PROMPT using the navigation key then press DEFAULT CALL BACK 1 Press DEFAULT CB 2 Input the call back number then press ALERT 1 Press ALERT 2 Select the alert type RINGER VIBRATE SILENT RINGER REMIND VIBRATE REMIND using...

Страница 33: ...RY MODE 2 Select ALPHA MODE T9 MODE using the navigation key then press BLOCK OR UNBLOCK 1 Press BLOCK OR UNBLOCK 2 Select BLOCK UNBLOCK VIEW LIST OF BLOCKED ADDRESS using the navigation key then press READ ACK 1 Press READ ACK 2 Select YES NO using the navigation key then press SIGNATURE 1 Press SIGNATURE 2 Select EDIT SIGNATURE INSERT SIGNATURE using the navigation key then press DIRECT VIEW 1 P...

Страница 34: ...Follow the prompt to download applications To select an option press then press When a prompt appears press to proceed or to cancel DOWNLOADING MELODIES WALLPAPERS Before downloading melody ringers and wallpapers you need to download the dedicated downloader Please contact your service provider for details APPLYING MELODIES WALLPAPERS Downloaded melody ringers apply to several functions including ...

Страница 35: ...er 3 Page 67 Page 66 Chapter 3 ERASING AN APPLICATION 1 Press 2 Select Get It Now with then press 3 Select Options with then press 4 Select the application to be erased with then press 5 Select Remove then press CDM 86002 18 2003 2 18 10 29 AM Page 68 ...

Страница 36: ...inger types 3 To confirm press MY DOWNLOAD 1 Press 2 Select Setting or Sound List then press to save it Setting To select 1 Step 5 Steps with the Navigation key Sound List Press to select Midi file 1 Midi file 5 RINGER MODE Alerts you to incoming calls in the following modes 1 Press 2 Select one of the following options with the navigation key Ringer Vibrator Ringer after Vibrate The ringer sounds...

Страница 37: ...ion key 3 To save press Chapter 3 Page 71 Page 70 Chapter 3 SETTINGS SETTINGS ALERT Sounds an alert to any change occurring on the phone MINUTE ALERT Sounds an alert every minute of a phone call 1 Press 2 Select OFF or ON with the navigation key then press to save it ROAM ALERT Sounds an alert when leaving a service area and entering a roaming service area 1 Press 2 Select OFF or ON with the navig...

Страница 38: ...n key then press to save it Chapter 3 Page 73 Page 72 Chapter 3 SETTINGS SETTINGS ROAM RINGER Reminds you that you are in a roaming service area by sounding a different ringer from what you set as voice call in Ringer type 1 Press 2 Select Distinctive or Normal with the navigation key then press to save it TONE LENGTH Adjusts the tone length 1 Press 2 Select Normal or Long with the navigation key ...

Страница 39: ...tion key up down left and right 3 To save press SETTINGS SETTINGS Chapter 3 Page 75 Page 74 Chapter 3 SETTINGS SETTINGS POWER OFF 1 Press 2 Select one from the Animation List to display when you turn off the handset by moving the navigation key up down left and right 3 To save press MAIN DISPLAY SETTING Selects your favorite LCD display in the following modes GREETING INPUT To edit the greeting pr...

Страница 40: ...ge 77 Page 76 Chapter 3 SETTINGS SETTINGS CONTRAST The LCD display contrast can be adjusted to 5 levels 1 Press 2 Adjust the LCD contrast for better view 3 To save press GRAPHIC SETTING SCREEN SAVER 1 Press TIME SETTING Select one of the following options Off 5Secs 10Secs 20Secs 30Secs SCREEN SAVER Select parameters DOWNLOAD IMAGE EMS IMAGE by using the navigation key then press WALL PAPER 1 Press...

Страница 41: ...INGS SETTINGS SECURITY Prevents others from using the phone without permission and allows access to security features only after inputting a password RESTRICT Enables you to restrict certain features with the password You are to unlock it to use the features AUTOMATIC LOCK Prevents others from using your phone without permis sion When locked the menu cannot be accessed with out password 1 Press th...

Страница 42: ...ocks all outgoing calls except emergency calls from being placed but allows incoming calls to be answered 1 Press then enters PASSWORD 2 Press then select Allow or Restrict with the navigation key 3 To save press RECEIVED CALL HISTORY 1 Press then enters PASSWORD 2 Press then select Allow or Restrict with the navigation key 3 To save press Restrict Restrict access to incoming call history Allow Al...

Страница 43: ...l SETTINGS SETTINGS 900 S Restricts calling 900 dial service numbers 1 Press then enters PASSWORD 2 Press then select Allow or Restrict with the navigation key 3 To save press LONG DISTANCE Restricts calling long distance numbers the phone is limited to calling numbers within the area 1 Press then enters PASSWORD 2 Press then select Allow or Restrict with the navigation key 3 To save press NOTE Th...

Страница 44: ...the navigation key Press NOTE The default password is the last 4 digits of your phone number SETTINGS SETTINGS RESET PHONE Resets phone to default settings 1 Press then enters PASSWORD 2 Press 3 Select Yes or No with the navigation key Press CHANGE PASSWORD Clears all phone book entries 1 Press then enters PASSWORD 2 Press 3 Enter a new password then press 4 Enter the new password again then press...

Страница 45: ...M To automatically switch phone to the proper NAM when you have multiple NAM registrations 1 Press 2 Select Yes or No then press to save it CHANGE NAM To changes the NAM used by the phone when you have multiple registrations 1 Press 2 Select a NAM NAM1 NAM2 with the navigation key then press to save it NAM SETTING Enables Auto NAM Number Assignment Modules or manually changes a NAM 1 Press PRL ID ...

Страница 46: ...ion On Your location is now available to the network SETTINGS SETTINGS OTHERS ANSWER MODE Selects an Answer mode 1 Press 2 Select Any Key or Send Key with the navigation key 3 To save press ACTIVE FLIP Selects an Active Flip Answer mode as follows 1 Press 2 Select On or Off with the navigation key 3 To save press Any Key Press any key to answer an incoming call except and Send Key Press only to an...

Страница 47: ...ave press AUTO ANSWER Automatically answers a call after a preset number of rings An ideal setting for the hands free car kit 1 Press 2 Select one from the following items with the navigation key 3 To save press VOICE PRIVACY Enhances voice privacy and avoids tapping during a call 1 Press 2 Select Standard or Enhanced if available 3 To save press NOTE This function will not be activated when you s...

Страница 48: ...er or press digit keys one by one to enter the time 3 To save press Not exceed three digits S W VERSION Displays the version of your phone 1 Press 2 The version of the software and hardware appears UP PROXY IP To access your service provider s website the phone can have up to 3 sets of the server IP Internet Protocal addresses and Port numbers These may already be preset or be separately programme...

Страница 49: ...he following in the first line On time 10 Min before 30 Min before 1 Hour before No alarm To change the date and time in the second line by moving to year month day time input with the navigation key Chapter 3 Page 95 Page 94 Chapter 3 TOOLS TOOLS ALARM 1 To display three alarm entries press 2 Select one of the entries with the navigation key 3 To edit the existing alarm or set a new alarm press T...

Страница 50: ...4 and press the navigation key Move it down Input 2 and press the to input Press 5 then 4 To reset press NOTE 1 Up to 7 integer digits and up to 2 decimals can be displayed If the calculated result has more than 7 digits the result is displayed in 7 digit logarithm 2 There is no sign To express a negative number use 0 value TOOLS TOOLS WORLD CLOCK Displays the time in a pre programmed specific cit...

Страница 51: ...asur ing a third one press And keep repeating the above to measure up to 6 time periods Press to stop it and to view the results Press or to return to the stopwatch To reset it press Chapter 3 Page 99 Page 98 Chapter 3 DA DAT TA SVC A SVC CONNECTION Select a connection mode based on the handset usage 1 Press 2 Select one of the following connection modes with the navigation key 3 To save press NOT...

Страница 52: ...S Phone Then type the message you want to send on the TTY s keyboard 19200 BPS 115200 BPS 230400 BPS DA DAT TA SVC A SVC TTY MODE Your phone is able to operate with a TTY Teletyperwriter device in both analog and digital modes This feature is system dependent and may not be available in all areas CONNECTING TO TTY DEVICE 1 Turn the TTY device off 2 Connect the TTY device to the phone at the earpho...

Страница 53: ...me CALL ANSWER Sets and operates the answering machine 1 Press 2 Press 3 Select one of the following options with the navigation key then press ON OFF Turns the Auto Answering machine on off INBOX Play or erase a recorded memo GREETING Records Plays and Erases your personalized greeting You have the maximum 30 seconds to record a greeting ICONS IN THE STORED MEMO LIST Unchecked recorded memo in An...

Страница 54: ...AIN ALL Train Yes No set to recognize your voice UNTRAIN ALL Untrain Yes No set not to recognize trained control words WAKE UP Use the Wake Up to train or untrain the VR with the control word wake up 1 Press 2 Press 3 Select one of the following options with the navigation key then press LIST WORDS Displays the list of control words in the wake up set Select a control word from the list then press...

Страница 55: ...LL Train Top level set to recognize your voice UNTRAIN ALL Untrain Top level set not to recognize trained control words DIGIT DIAL Use the Digit dial to train or untrain the VR with the control words 1 to 9 Zero Oh Verify Clear Call 1 Press 2 Press 3 Select one of the following options with the navigation key then press LIST WORDS 1 2 Displays the list of control words in the digit dial set Select...

Страница 56: ...ears Press then say a name 2 Voice Setting Change appears Press select a phone number then press again 3 Clear Removing Voice Names Proceed appears Press ADD 1 Press 2 To add a voice tag to phone book entry press 3 Select one group with the navigation key then press 4 Select a phone number with the navigation key then press 5 To add a voice tag to the number say the name CLEAR ALL 1 Press 2 To era...

Страница 57: ...mode 1st prompt Main menu followed by a short beep 2nd prompt Speak a name to call or say dial redial voice memo phone book or cancel followed by a short beep Expert mode 1st prompt A sequence of high and low tones 2nd prompt Main menu NOTE The VR times out and the phone returns to the standby mode after the 1st and 2nd prompts are heard and nothing is said VOICE ALERT Sets the voice alert service...

Страница 58: ...re when the phone is in hands free car kit 1 Press 2 Press 3 Select Off or On with the navigation key then press ECHO Digit echoes back when entered BEEP Digit beeps when entered ECHO BEEP Digit echoes and beeps when entered NOTE Once you say Wake Up and the phone recognizes your voice you will hear a beep The second time you say Wake Up your phone turns to VR mode VOICE SVC VOICE SVC SET ACTIVE 1...

Страница 59: ...age 115 E911 CALLING Allows you to place emergency calls even when the phone is locked Emergency calls are placed on any available system 1 Enter 911 and press 2 The call will connect EMERGENCY CALLING EMERGENCY CALLING Page 114 Chapter 3 When a call ends the phone returns to the Emergency Mode for 5 minutes CDM 86002 18 2003 2 18 10 29 AM Page 116 ...

Страница 60: ...tion such as news sports weather and stock quotes when you subscribe to Internet service with your service provider Please contact your service provider for a list of available websites and service details 1 To access wireless Internet network press 2 The Internet browser will launch 3 To access the Internet press Your service provider s home page appears 4 Scroll the page using 5 To select the op...

Страница 61: ... session with the UP Link 1 To select Restart Browser press Chapter 4 Page 119 RELOAD Reloads current page 1 To select Reload press SETTINGS Displays Browser Menu Settings 1 To select Settings press HOMEPAGE Enables you to change the homepage 1 To select Homepage press PROXY Enables you to select another WAP PROXY 1 To select Set UP Link press CIRCUIT LINGER 1 To select Circuit Linger Timer press ...

Страница 62: ... Menu Options 1 To select About press OPENWAVE When Openwave is selected from the browser menu the browser version and copyright information is dis played The device layer version is also displayed 1 To select Openwave press SECURITY Display a list of security related items 1 To select Security press Selecting the encryption item from the browser menu displays a list of security related items CDM ...

Страница 63: ...ing conditions require Chapter 5 Page 123 SAFETY INFORMATION FOR WIRELESS HANDHELD PHONES EXPOSURE TO RADIO FREQUENCY SIGNALS Your wireless handheld portable telephone is a low power radio transmitter and receiver When it is ON it receives and also sends out radio frequency RF signals In August 1996 the Federal Communications Commissions FCC adopted RF exposure guidelines with safety levels for ha...

Страница 64: ...esult Posted Facilities Turn your phone OFF where posted notices so require Chapter 5 Page 125 SAFETY INFORMATION FOR WIRELESS HANDHELD PHONES ELECTRONIC DEVICES Most modern electronic equipment is shielded from RF energy However certain electronic equipment may not be shielded against the RF signals from your wireless phone Pacemakers The Health Industry Manufacturers Association recommends that ...

Страница 65: ...gents to clean this phone Always clean it with a soft damp cloth 8 DO NOT paint this phone This can clog moving parts Chapter 5 Page 127 SAFETY INFORMATION FOR WIRELESS HANDHELD PHONES OTHER SAFETY GUIDELINES Aircraft FCC Regulations prohibit using your phone while in the air Switch OFF your phone before boarding an aircraft Blasting Areas To avoid interfering with blasting operations turn your ph...

Страница 66: ...59 inchs 1 5cm must be maintained between the user s body and the back of the phone including the antenna whether extended or retracted Other belt clips holsters and similar accessories not used by this device may not comply with FCC RF exposure limits and should be avoided Note For more information about RF exposure please visit the FCC website at www fcc gov SAFETY INFORMATION FOR FCC RF EXPOSUR...

Страница 67: ... Commission of the U S Government These lim its are part of comprehensive guidelines and establish permitted levels of RF energy for the general population The guidelines are based on standards that were developed by independent scientif ic organizations through periodic and thorough evaluation of sci entific studies The standards include a substantial safety margin designed to assure the safety o...

Страница 68: ...ween the phone and the user s head These RF expo sures are limited by Federal Communications Chapter 5 Page 133 U S Food and Drug Administration Center for Devices and Radiological Health Consumer Update on Mobile Phones 1 Do wireless phones pose a health hazard The available scientific evidence does not show that any health problems are associated with using wireless phones There is no proof howe...

Страница 69: ... in government industry and academic organizations CTIA fund ed research is conducted through Chapter 5 Page 135 Commission safety guidelines that were developed with the advice of FDA and other federal health and safety agencies When the phone is located at greater distances from the user the exposure to RF is drastically lower because a person s RF exposure decreases rapidly with increasing dist...

Страница 70: ...n and teenagers using wireless phones Reducing the time of wireless Chapter 5 Page 137 contracts to independent investigators The initial research will include both laboratory studies and studies of wireless phone users The CRADA will also include a broad assessment of addi tional research needs in the context of the latest research devel opments around the world 7 How can I find out how much radi...

Страница 71: ...adiofrequency energy RF from wireless phones can interact with some electronic devices For this reason FDA helped devel op a detailed test method to measure electromagnetic interference EMI of implanted cardiac pacemakers and defibrillators from wireless telephones This test method is now part of a standard sponsored by the Association for the Advancement of Medical instrumentation AAMI The final ...

Страница 72: ...Protect Your Warranty 12 Month Limited Warranty Page 140 Chapter 5 MEMO MEMO Chapter 6 WARRANTY Chapter 6 Page 141 CDM 86002 18 2003 2 18 10 29 AM Page 142 ...

Страница 73: ... from exposure to moisture humidity excessive temperatures or extreme environmental conditions d Damage resulting from connection to or use of any accessory or other product not approved or authorized by the Company PROTECT YOUR W PROTECT YOUR WARRANTY ARRANTY Read your Warranty carefully with the special consideration to paragraph seven of the Limited Warranty for your unit Warranty does not appl...

Страница 74: ...and non operative parts f Product damaged from external causes such as fire flooding dirt sand weather conditions battery leakage blown fuse theft or improper usage of any electrical source The Company disclaims liability for removal or reinstallation of the product for geographic coverage for inadequate signal reception by the antenna or for communications range or operation of the Cellular Syste...

Отзывы: