


WARNING:
Make sure that the tool is
correctly and safely installed. The tool can
cause serious injury if it falls off the product.
WARNING:
It can be necessary to be
in the work area when you change the tool.
Prevent accidental start of the product while
you change the tool and make sure that you
can quickly stop the product. Keep hands
and feet away from areas where there is a
risk of crush injury.
1. Remove dirt from the hydraulic couplings on the
product.
2. Start the product. Refer to
145) on page 52
and
275, DXR 305, DXR 315) on page 53
.
3. Put the product on a stable surface.
4. Extend the outriggers. Refer to
outriggers on page 61
.
5. Put the tool in front of the product. The holder on the
tool must point at the product.
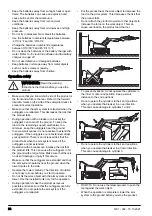
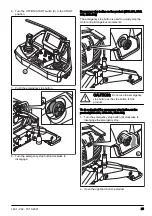
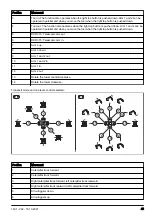
6. Make sure that the tool is in correct position. Do the
procedure that follows. The tool is seen from the rear
side.
a) Make sure that the return hose is on the right
side of the product (A).
B
A
b) Make sure that the pressure hose of the tool is
on the left side of the product (B).
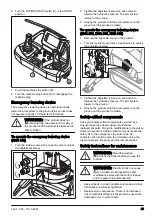
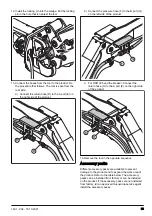
7. Move the arm system until the tool holder on the arm
system holds the tool.
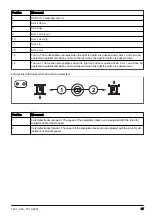
8. Lift the arm system and fully retract cylinder 4 (C) to
tighten the tool on the tool holder.
C
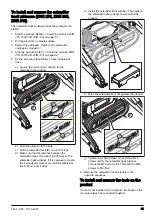
9. Turn the OFF/ON/START switch on the remote
control to the OFF position.
10. Install the wedge from the right. The stop notch on
the wedge must point up.
11. Use a hammer to fully lock the wedge.
32
1401 - 002 - 15.10.2021