33
34
Learn more. Visit hunterindustries.com/golf
INLET VALVE REMOVAL
INLET VALVE REMOVAL
I
INLET VALVE REMOVAL –
G800 SERIES
With the main-line or sub-main depressurized, the riser assembly removed, the water extracted
from the body cavity, and the safety interlock feature disengaged, proceed with removal of the
G800’s white lower snap-ring and inlet valve as follows:
First, notice that close to each end of the white lower snap-ring there are two raised areas
(FIGURE 76). These two raised areas are used to remove the white lower snap-ring. Also notice
that the inlet valve has two posts protruding upward on top of the inlet valve. Take a moment
to note the orientation of these posts and how they nest within the white lower snap-ring.
Understanding this alignment and orientation will help later to confirm that the white lower snap-
ring has been properly seated after installation.
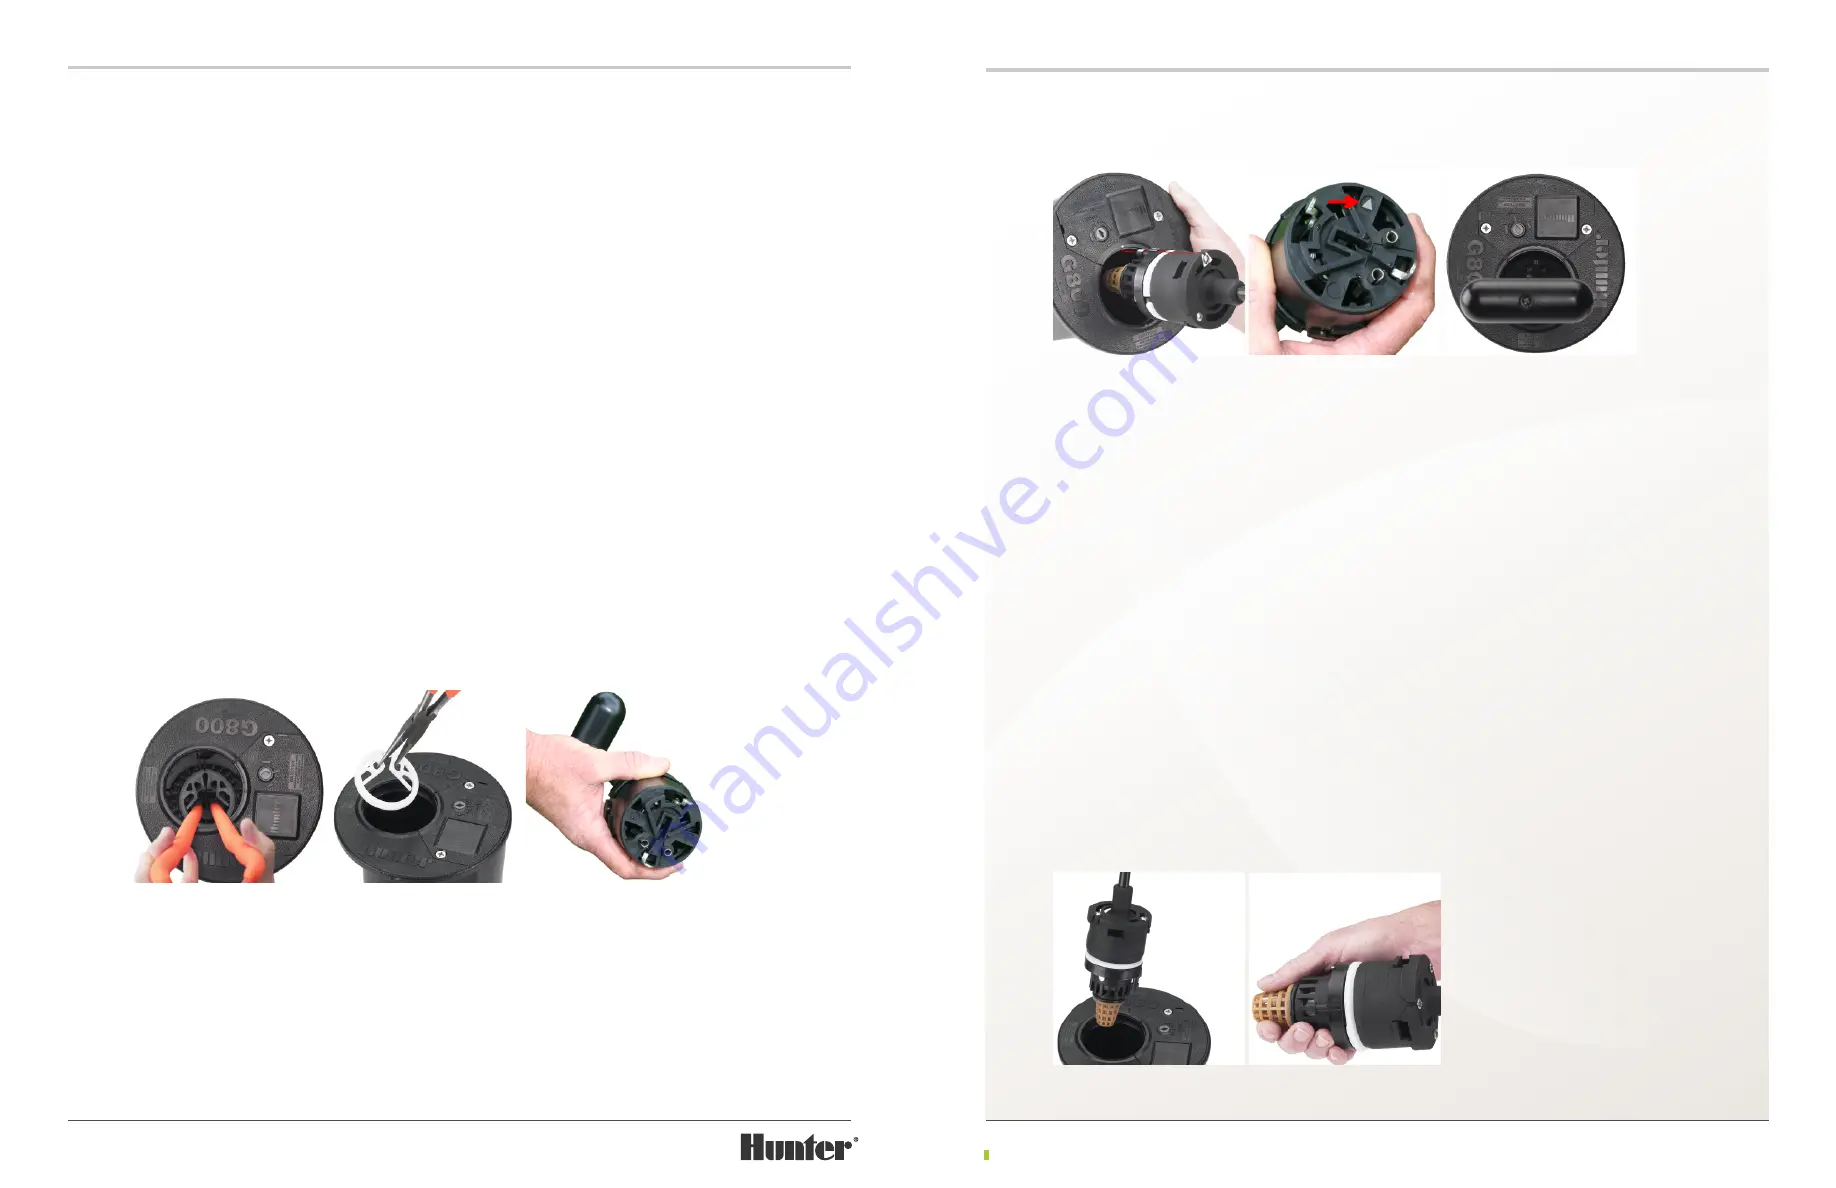
To remove the white lower snap-ring, use the 16” Needle-Nose Pliers Tool to grab the outer side
of the two raised areas near the ends of the white lower snap-ring. Next, squeeze the two raised
areas together with the tips of the 16” Needle-Nose Pliers Tool (FIGURE 78). This action will
collapse the white lower snap-ring. While holding the collapsed white lower snap-ring, pull the
16”needle-nose pliers up and out along with the white lower snap-ring (FIGURE 79).
Inlet valve removal option 1
– Once the white lower snap-ring has been removed, the inlet valve
is released and is ready for removal. G800 Series inlet valves are removed from the body using
the G800 Valve Tool. Prior to using the tool, familiarize yourself with the individual features of the
G800 Valve Tool. First, notice there are two metal hooks at the bottom of the tool (FIGURE 80).
These hooks are used to grab/hook the inlet valve for removal from the rotor’s body. The black
plastic part of the G800 Valve Tool includes physical features that hold or nest the inlet valve to
the tool during inlet valve removal and installation.
In order to engage the inlet valve with the G800 Valve Tool properly, you must be familiar with the
pointing and alignment features on the tool’s black plastic part. First, look at the three retaining
screws on top of the tool. Next, find the screw that has a pointer arrow engraved around the head
of the screw (FIGURE 81). This pointer is used to indicate the direction and alignment that the tool
must have as it is inserted into the rotor’s body. A second pointer arrow is located directly below
on the underside of the G800 Valve Tool (FIGURE 82).
To remove the inlet valve, it is necessary to
align the pointer arrow on the G800 Valve Tool
with the alignment dot on the rotor’s flange.
The alignment dot is centered on the flange
compartment lid adjacent to (next to) the body
cavity opening (FIGURE 81). A second alignment
dot is located below the lid in case the flange
compartment lid has been removed. Align the
pointer arrow on the tool with the alignment
dot and lower the tool into the rotor’s body.
As the G800 Valve Tool is lowered into the
rotor’s body, recessed areas on the black
plastic part on the tool will engage vertical
rails inside the body wall (FIGURE 83). The
tool must engage these rails or the tool will
not align with the inlet valve below. Continue
pressing downward, compressing the spring
on the G800 Valve Tool. While holding the
tool down with the spring compressed, turn
the tool’s handle clockwise until it stops. Next,
release the spring’s compression by lifting the
handle slightly on the G800 Valve Tool. This
action hooks and locks the inlet valve to the
tool. Finally, pull upward on the tool’s handle to
remove the tool and inlet valve from the rotor’s
body (FIGURE 84).
Important: Take note of how the G800 Valve Tool nests with the attached inlet valve. This
will help later when attaching the inlet valve to the tool prior to inlet valve installation.
To disengage the inlet valve from the G800
Valve Tool, hold the inlet valve with one hand
and the tool with the other hand. Next, push the
tool’s handle toward the inlet valve to compress
the tool’s spring (FIGURE 85). While compressing
and holding the spring, rotate the tool’s handle
counter-clockwise to release the tool’s hooks
from the inlet valve.
Fig 78
Fig 79
Fig 78
Fig 79
Fig 80
Fig 81
Fig 82
FIGURE 78
FIGURE 79
FIGURE 80
Fig 80
Fig 81
Fig 82
Fig 83
Fig 84
Fig 85
Fig 80
Fig 81
Fig 82
Fig 83
Fig 84
Fig 85
Fig 83
Fig 84
Fig 85
FIGURE 81
FIGURE 84
FIGURE 82
FIGURE 85
FIGURE 83


