background image

23 


VALVE ERROR 


1.


Let the fire cool down (if hot). 


2.


Check if batteries are good and mounted correctly.  Replace with new batteries if in any 

doubt 


3.


Reset the error by first pressing the power button (once the fire has cooled down).  Then 

press once again to try to start the fire. 


IMPORTANT NOTE:  The handset will need to be paired with the valve after installation.  (If 

using a handset with display, the time will be lost after some minutes of no power, but the 

pairing will remain.  Refer to the instructions on how to set the time to restore the time to the 

display.  Do not press the buttons on the valve to make a new pairing.  If you do then you will 

have to reset the handset to accept a new pairing and make a new pairing, see the sections on 

restoring handset communication). 

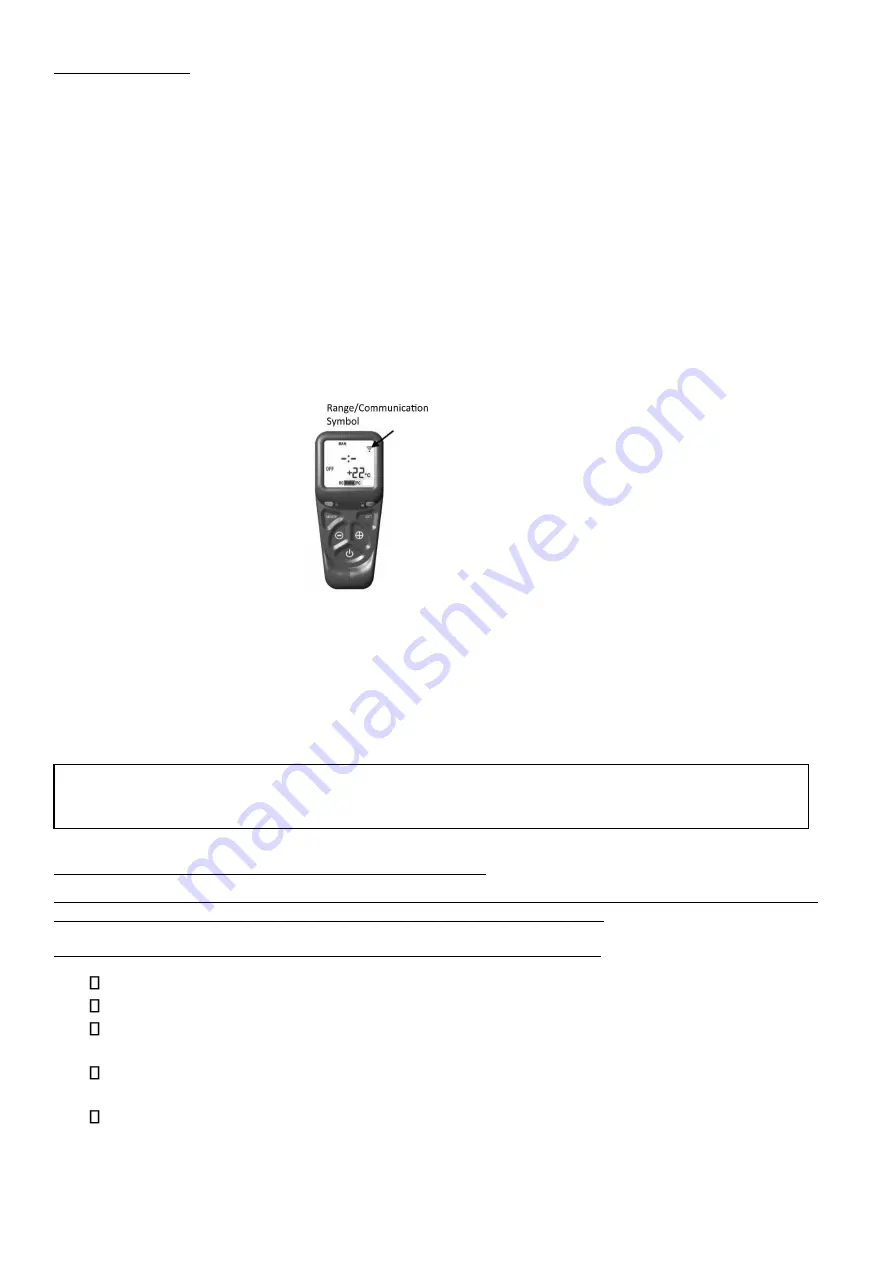
If the green indicator is flashing like a heartbeat, it is not in communication with the valve for 
some reason (on display handset additionally the communication symbol is missing see photo 

below. 


Communication can be lost by: 


The slide switch on the valve not in the on (I) position. 


The batteries need replacing in the valve (see section) 


The handset is too far away from the fire (it needs to be some within a few metres) 


If the above is correct, and the handset is still flashing, then the pairing on the valve may have been 
accidentally altered and the handset will need to be reset, and a new pairing performed to restore 

communication (see section on restoring handset communication. 


If this does not resolve the problem, call a service engineer. 

F

REQUENTLY 

A

SKED 

Q

UESTIONS 

NOTE: USE THIS GUIDE IN ASSOCIATION WITH YOUR GAS FIRE USER HANDBOOK, ONLY ATTEMPT WORK AS 
RECOMMENDED IN THOSE INSTRUCTIONS AND WHERE SUITABLY QUALIFIED 


W

HAT SHOULD 

DO IF MY FIRE DOES NOT LIGHT OR STAY LIT


Check if gas supply is on.


If the fire is hot, wait for fire to cool down.


If your fire has a remote handset, put the handset to one side and access the gas valve 
in the fire (check user instructions for details on how to do this).


Remove battery cover from valve and check batteries are ok, with no leaks visible, or 
any other contamination present. If in doubt replace with new, unused batteries.


When replacing batteries, ensure contacts are clean, dry, and free from any contaminants 
or surface damage. Be careful not to bend or displace contacts.


THERE ARE VIDEOS AVAILABLE ON YOUTUBE TO WATCH THESE 

PROCEDURES.  THESE CAN BE FOUND BY SEARCHING TESC GAS CONTROL 

Содержание AVALON 4 Series

Страница 1: ...leave this instruction booklet with the user after the installation is complete Leave the system ready for operation and instruct the user in the correct use of the appliance and operation of its con...

Страница 2: ...T 5 GTBAV4NM1 GTBAV4NR1 GTBCN5NM1S GTBCN5NR1S GTBAV4LM1 GTBAV4LR1 GTBCN5LM1SGTBCN5LR1S GTBCN5NM1B GTBCN5NR1B GTBCN5LM1B GTBCN5LR1B HAWK 4 MKII GTBHK4NM1D GTBHK4NR1D GTBHK4LM1D GTBHK4LR1D GTBHK4NM1T GT...

Страница 3: ...Up Full Function Handset LCD 17 19 Advanced Setting Full Function Handset LCD 19 20 Restoring Communication with The Fire 20 21 Remote Care and Maintenance 22 24 Installation and Commissioning Checkl...

Страница 4: ...AL DATA 0558 NATURAL GAS MANUAL REMOTE LPG MANUAL REMOTE Energy Efficiency Class Nominal Gas Pressure 20mbar 37mbar Main Burner Injector mm 0 59 x 7 1 03 Pilot Injector mm 0 35 0 27 Burner Aeration 7...

Страница 5: ...5 STOVE DIMENSIONS AVALON 4 CONSORT 5 HAWK 4 MKII...

Страница 6: ...onto a combustible wall Any combustible materials must be removed from behind the appliance 6 The appliance must be sited on a non combustible hearth of minimum 12mm thickness 7 The hearth should be e...

Страница 7: ...ust have a minimum of 2 6 meters of vertical height measured from the top of the stove to the bottom of the terminal outlet Please note for rear flue appliances it is recommended that the vertical flu...

Страница 8: ...e should incorporate a gas service isolation tap situated within 1 metre of the application Figure 2 Gas Supply Access The 8mm Bundy pipe being fitted to the gas inlet on the valve The compression joi...

Страница 9: ...Inlet Gas Pressure should be 20mbar 1 0mbar for Natural Gas 37mbar for LPG The supply pressure test point shown in figure 6 is measured at the burner inlet point INSTALLATION OF THE FIRE BED INTO THE...

Страница 10: ...groove to the right of Log B behind the third flame port hole in the matrix The top of the log sits in the cut out that is located on the top edge of the back of the base ceramic Figure 7 Log D1 sits...

Страница 11: ...and windows in the room containing the fire before the test is carried out Complete the Log picture close the door and replace the handle and fixing bolt Ensure that the fire is burning at full rate...

Страница 12: ...n of the appliance before testing Check the spark gap on the pilot is correct See Diagram 2 After testing advise the customer of any work that needs to be carried out A GAS SAFE registered fitter usin...

Страница 13: ...13 TROUBLESHOOTING...

Страница 14: ...14...

Страница 15: ...dryer It is only CE approved for use as a room heater with a decorative fuel effect WARNING Do not use the appliance if the glass door panel is broken removed or if the door is open The GAS SAFE REGIS...

Страница 16: ...gistered engineer should be contacted to examine the appliance and installation CARE MAINTENANCE AND SERVICING Check your chimney and flue arrangement and have the chimney system swept at least once a...

Страница 17: ...they are mounted firmly and in the correct orientation and that the battery covers are replaced fully Ensure the small isolation switch on the gas control is switched to the ON I position Hold the han...

Страница 18: ...BE ACHIEVED BY A CONSCIOUS DELIBERATE ACT ERGO IT MAY TAKE SOME TIME TO BECOME FAMILIAR WITH THE INTRICACIES OF HANDSET OPERATION TIME DATE AND TEMPERATURE 1 Hold the handset in one hand ensuring you...

Страница 19: ...a certain period has elapsed 2 Hold the handset in one hand ensuring it is in contact with both sides The green light of the unlock symbol should be lit The snooze time can be set either before or dur...

Страница 20: ...n and set the temperature When no longer requiring the thermostat mode turn off the burner and the handset will return to manual mode RESTORING COMMUNICATION WITH THE FIRE FULL FUNCTION LCD HANDSET If...

Страница 21: ...control valve Note Pressing of the power button must be done within 1 second of the red light coming on If not done quickly enough then the above must be repeated until done correctly 3 When done cor...

Страница 22: ...both in the handset 2 x 1 5v AA Alkaline and in the valve 3 x 1 5v AA Alkaline The battery covers can be opened without tools by using your finger tip and pressing to unhook the clip that retains the...

Страница 23: ...tion The handset is too far away from the fire it needs to be some within a few metres If the above is correct and the handset is still flashing then the pairing on the valve may have been accidentall...

Страница 24: ...heck correct function Hold the handset firmly the unlock keypad light should be lit solid green If NO LIGHT present on handset Check the batteries in the handset are good mounted correctly and firmly...

Страница 25: ...de Appliance Description Serial Number COMMISSIONING CHECK Complete Sign YES NO Does the chimney flue system meet the appropriate standard Has the chimney flue system been swept and passed the soundne...

Страница 26: ...26 SERVICE RECORDS...

Страница 27: ...ion date for the second year of the standard warranty to be valid and within every 12 month anniversary thereafter to maintain the validity and coverage of any extended warranty For this purpose the i...

Страница 28: ...osote content or any other painted treated timber 5 Consequential loss to associated non Hunter Stoves Group products is not covered under the warranty 6 Consequential loss relating to decorations sof...

Отзывы: