background image

OPERATION

16

Clear the Remote/Wireless Wall Switch from Blind Memory (If Necessary)

The following steps will clear the remote/wireless wall switch from the blind memory which 
removes all channels. 


Traverse the blind to the fully open position.


With a pocket screwdriver, press and continue to hold the 
motor program button. The motor will beep (one long then 
two short beeps) and the carriers will jog. Continue to 
hold while the motor repeats this sequence three times, 
then release.


Traverse the blind to test whether or not the memory is clear. The blind should not  
move if clearing the blind memory was successful. If the blind moves, repeat the previous 
two steps.

Assign a Blind to a Channel (If Necessary)

There are five channels available on your remote. 


These steps need to be completed without delay between steps using a pocket screwdriver  
and/or paperclip.


Press the channel selector until the light for the channel you are programming your blind 
to illuminates.


Using a pocket screwdriver or paperclip, press and 
hold the motor program button until you hear a series 
of beeps and the carriers jog, then release.


Using a pocket screwdriver or 
paperclip, press and hold the 
program button. The motor will 
beep (one long then two short 
beeps) and the carriers will jog, 
then release. The blind has been 
assigned to the channel.


Traverse the blind to test whether 
or not the blind is assigned to the 
channel. If the blind doesn't move, 
repeat the previous three steps.

Motor

Program

Button

Motor

Program

Button

Press and 

Hold

Press and

Hold

Содержание Specialty Motorized Vertical Blinds

Страница 1: ...Installation Operation Care Vertical Blinds Specialty Motorized...

Страница 2: ...ll the Headrail 11 Connecting the Transformer 11 If You Have a Wired Wall Switch 12 Install the Vanes 13 Operation Blind Operation 14 Clear the Remote Wireless Wall Switch from Blind Memory If Necessa...

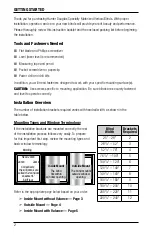
Страница 3: ...GETTING STARTED 1 Product View Motor Inside Mount Bracket Outside Mount Bracket Assembly Headrail Vanes Carrier...

Страница 4: ...ate correctly Installation Overview The number of installation brackets required varies with headrail width as shown in the table below Mounting Types and Window Terminology If the installation bracke...

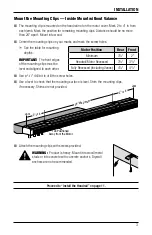
Страница 5: ...clips must be level and aligned to each other Use a 3 32 drill bit to drill the screw holes Use a level to check that the mounting surface is level Shim the mounting clips if necessary Shims are not...

Страница 6: ...bracket s no more than 24 apart and mark their location Mount into wood Center the brackets on your marks and mark the screw holes A minimum 2 flat vertical surface is required to mount the brackets...

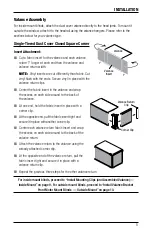
Страница 7: ...e around to the back of the valance At one end hold the fabric insert in place with a corner clip At the opposite end pull the fabric insert tight and secure it in place with another corner clip Cente...

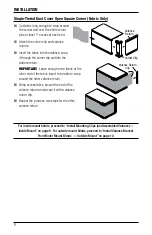
Страница 8: ...Leave enough extra fabric at the other end of the fabric insert to be able to wrap around the other valance return Wrap excess fabric around the end of the valance return and secure it with a valance...

Страница 9: ...valance corner and through the valance return Wrap excess fabric around the end of the valance return and secure it with a valance return clip Pull the fabric tight from the other end of the fabric i...

Страница 10: ...d on the top and bottom of the upper valance and only on the bottom of the lower valance Install the valance stacking clips into the back lips of the upper dust cover valance and space 24 apart For ou...

Страница 11: ...the valance in the same locations as the screws for the valance Use a 3 32 drill bit to drill the screw holes Attach the mounting clip using the screws provided Warning Product is heavy Mount into woo...

Страница 12: ...unt Blinds Outside Mount Use a pencil to lightly mark the position of valance bracket placed in between each installation bracket Important The front edges of the installation brackets must be level a...

Страница 13: ...or Only If a valance is included snap on a valance hanger next to each L bracket Center the valance over the headrail and slide the valance into the valance hangers Connecting the Transformer Route th...

Страница 14: ...t of the reach of children They can wrap cords around their necks and STRANGLE They can also put small parts in their mouths and CHOKE Warning Electric shock and or a fire hazard may occur if the DC p...

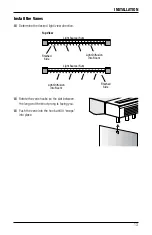
Страница 15: ...rection Rotate the vane hooks so the slot between the long and the short prong is facing you Push the vane into the hook until it snaps into place Finished Side Top View Finished Side Light Diffusion...

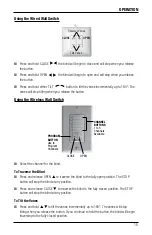
Страница 16: ...erse the blind to the fully open position If you press and hold OPEN the blind will begin to open and will stop when you release the button Press and release CLOSE v to traverse the blind to the close...

Страница 17: ...averse the Blind Press and release OPEN to traverse the blind to the fully open position The STOP button will stop the blind at any position Press and release CLOSE to traverse the blind to the fully...

Страница 18: ...ign a Blind to a Channel If Necessary There are five channels available on your remote These steps need to be completed without delay between steps using a pocket screwdriver and or paperclip Press th...

Страница 19: ...and tilt the vanes to your favorite position Press and hold the MY button The motor will beep one long then two short beeps indicating the button has been programmed Test the MY button Open the blind...

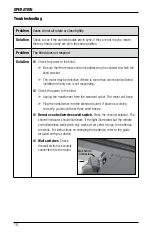
Страница 20: ...ed and only one is not responding Check the power to the blind Unplug the transformer from the standard outlet The motor will beep Plug the transformer into the standard outlet If power is working cor...

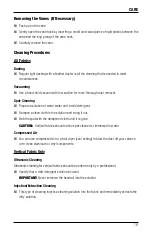
Страница 21: ...detergent Dampen a clean cloth in the solution and wring it out Dab the spot with the dampened cloth until it is gone CAUTION Vertical fabrics should not be spot cleaned or immersed in water Compresse...

Страница 22: ...Notes...

Страница 23: ......

Страница 24: ...Hunter Douglas window fashion products are covered for defects in materials workmanship or failure to operate for as long as the original retail purchaser owns the product unless shorter periods are...

Отзывы: