background image

5

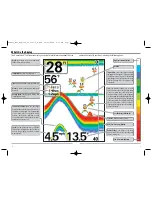
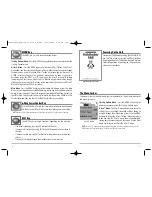
the bottom. Depth Range is automatically selected to keep the bottom visible on the
display, although you can adjust it manually as well (see 

Sonar X-Press™ Menu

). Five

additional Digital Readouts display information from optional-purchase accessories.
These information boxes can be customized to show only the information desired (see

Setup Menu Tab, Select Readouts

).  

NOTE:

If the Depth number is flashing, it means that the unit is having trouble locating the

bottom.  This usually happens if the water is too deep, the transducer is out of the water, the boat
is moving too fast, or for any other reason that the unit can’t accurately receive continuous data.  

Understanding Sonar History

It is important to understand the significance of the Humminbird® display. The display
does NOT show a literal 3-dimensional representation of what is under the water. Each
vertical band of data received by the control head and plotted on the display represents
something that was detected by a sonar return at a particular time. As both the boat and
the targets (fish) may be moving, the returns are only showing a particular segment of
time when objects were detected, not exactly where those objects are in relation to
other objects shown on the display.

Real Time Sonar (RTS

®

) Window

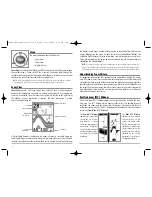
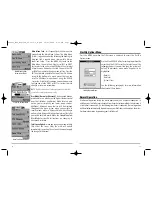
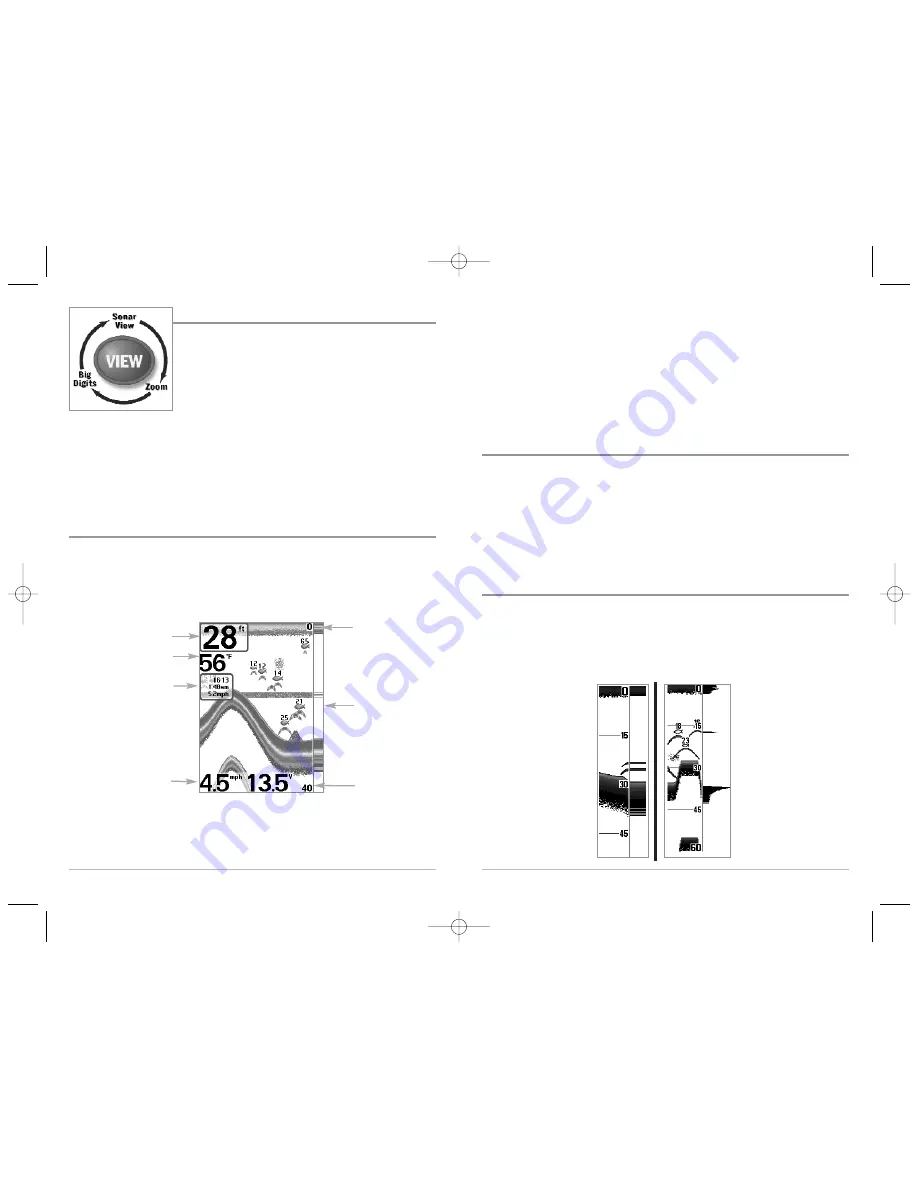
A Real Time Sonar (RTS®) window appears on the right side of the display in the Sonar
View only.  The RTS® Window always updates at the fastest rate possible for depth
conditions and shows only the returns from the bottom, structure and fish that are
within the transducer beam.  The RTS® Window plots the depth and intensity of a sonar
return (see 

Sonar Menu - RTS® Window

).

The 

Narrow RTS® Window

indicates the sonar intensity
through the use of colors.
Red indicates a strong
return and blue indicates a
weak return. The depth of
the sonar return is indicated
by the vertical placement of
the return on the display
depth scale.

The 

Wide RTS® Window 

indicates the sonar intensity
through the use of a bar
graph.  The length of the
plotted return provides an
indication of whether the
return is weak or strong.  The
depth of the sonar return is
indicated by the vertical
placement of the return on
the display depth scale.

4

Views

The views available on your FishFinder are:

• Sonar View
• Zoom View
• Big Digits View.

Sonar View

is the default view. When the VIEW key is pressed, the display cycles through

the available views.  When the EXIT key is pressed, the display cycles through the
available views in reverse order. Any view can be hidden or displayed as part of the view
rotation using Select View from the Advanced Setup Menu. 

NOTE:

When you change any menu settings that affect the sonar, the view will update

immediately (i.e. you don’t have to exit the menu to apply the change to the screen). 

Sonar View

Sonar View

presents a historical log of sonar returns. Depth is always displayed.

Readouts for temperature and speed are automatically displayed if the appropriate
accessory is connected. The most recent sonar returns are charted on the right side of
the window; as new information is received, the older information is moved 
across the display to the left. 

A Digital Depth Readout is displayed in the upper left corner. A scale with Upper and
Lower Depth Range readouts appears along the right edge of the Sonar View. The scale
indicates the distance from the surface of the water to a depth range sufficient to show

Upper Range

Depth

Temperature

Triplog w/ 

Temp/Speed

Speed w/

Temp/Speed

Lower Range

RTS® Window

FF585c_Man_English_531363-1_B.qxd  12/27/2004  8:33 PM  Page 10

Содержание 585C

Страница 1: ...531363 1_A FishFinder 585c Operations Manual FishFinder 585c Operations Manual FF585c_Man_English_531363 1_B qxd 12 27 2004 8 33 PM Page 1 ...

Страница 2: ...r website at www humminbird com WARNING This device should not be used as a navigational aid to prevent collision grounding boatdamage orpersonalinjury Whentheboatismoving waterdepthmaychangetooquickly toallowtimeforyoutoreact Alwaysoperatetheboatatveryslowspeedsifyoususpectshallow water or submerged objects WARNING Disassembly and repair of this electronic unit should only be performed by authori...

Страница 3: ...Restore Defaults 34 Select Views Advanced 35 Select Readouts Advanced Sonar View Only 36 Depth Offset Advanced 37 Temp Offset Advanced 37 Speed Calibration Advanced with Temp Speed Only 37 Table of Contents iii How Sonar Works 1 Single Beam Sonar 1 What s On the Display 2 Views 4 Sonar View 4 Understanding Sonar History 5 Real Time Sonar RTS Window 5 Sonar Zoom View 6 Big Digits View 7 Bottom Pres...

Страница 4: ...s boat speed wave action bottom hardness water conditions and transducer installation v Troubleshooting 38 FishFinder Doesn t Power Up 38 FishFinder Defaults to Simulator with a Transducer Attached 38 Display Problems 39 Finding the Cause of Noise 40 Humminbird FishFinder Accessories 40 Specifications 41 Contact Humminbird 42 NOTE Entries in this Table of Contents which list International Only are...

Страница 5: ...n keep a Triplog of nautical or statute miles traveled Battery Voltage the voltage of the boat s battery can be set to alarm if the voltage falls belowacertainpoint RTS RealTimeSonar Window Structure wherefishmaybehiding Thermoclines layers of water with different temperatures that appear at different depths and different times of the year A thermocline typicallyappearsasacontinuousbandofmany gray...

Страница 6: ...rintensity through the use of colors Red indicates a strong return and blue indicates a weak return The depth of thesonarreturnisindicated by the vertical placement of the return on the display depthscale The Wide RTS Window indicates the sonar intensity through the use of a bar graph The length of the plotted return provides an indication of whether the returnisweakorstrong The depth of the sonar...

Страница 7: ...e of the full range view on the right and the zoomed view on the left The full range view on the right also contains the Zoom Preview Box that shows what part of the full range view is shown in zoom view on the left the Zoom Preview Box tracks the bottom in the full range view As the depth changes the zoomed view updates automatically to display a magnified image of the bottom The Zoom Preview Box...

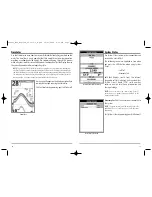
Страница 8: ...roughallavailableviews PresstheVIEW key to advance to the next view Repeatedly pressing VIEW cycles through all views available Views can be hidden to optimize the system to your fishing requirements see Setup Menu Tab Select Views Advanced 8 Bottom Presentation Astheboatmoves theunitchartsthechangesindepthonthedisplaytocreateaprofile of the Bottom Contour The type of bottom can be determined from...

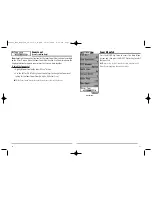
Страница 9: ...onavigatethrough the whole menu system When the X Press menu is displayed you can use the UP or DOWN Cursor keys to move to a particular menu choice As soon as you alter a parameter using the RIGHT or LEFT Cursor keys the X Press menu will collapse temporarily and the screen will update if it is affected by your menu setting change allowing you to see the effects of your action immediately Reactiv...

Страница 10: ...e DOWN or UP key to select a specific menu item under that tab then use the LEFT or RIGHT keys again to change a menu setting Press the EXIT key to move quickly to the top of the tab A down arrow at the bottom of a menu means that you can scroll to additional menu choices using the DOWN Cursor key A right or left arrow on a menu choice means that you can use the RIGHT or LEFT Cursor keys to make c...

Страница 11: ...mulator Use the Simulator to learn how to use your FishFinder before taking your boat on the water The Simulator is a very powerful tool that simulates on the water operation providing a randomly updated display We recommend going through this manual whileusingtheSimulator sinceallofthemenusfunctionandaffectthedisplaytheway they actually do when in Normal operating state NOTE To get the full benef...

Страница 12: ...in the water however the display may become too cluttered When operating in very clear water or greater depths increased sensitivity shows weaker returns that may be of interest Decreasing the sensitivity eliminates the clutter from thedisplaythatissometimespresentinmurkyormuddywater IfSensitivityisadjusted too low the display may not show many sonar returns that could be fish To adjust the Sensit...

Страница 13: ...UpperRangeisoftenusedwithLowerRange To adjust the Upper Range 1 MakesureyouareinAdvancedMode thenhighlightUpperRangeontheSonar X Press menu 2 Use the LEFT or RIGHT 4 Way Cursor Control keys to increase or decrease the Upper Range setting 0 to 990 feet or 0 to 327 meters International Models Only Default 0 Lower Range Lower Range sets the deepest depth range that will be displayed Automatic is the ...

Страница 14: ... Sonar Zoom View and is only available on the X Press menu when the Sonar Zoom View is active Use Zoom to increase the display resolution to separate sonar returns that are very close together To adjust the Zoom Level 1 Highlight Zoom Level on the Sonar X Press menu 2 Use the LEFT or RIGHT 4 Way Cursor Control keys to change the Zoom Level setting for the Sonar Zoom View 2x 4x 6x 8x Default 2x NOT...

Страница 15: ...eys to change the RTS Window setting Wide Narrow Off Default Narrow RTS Window Narrow RTS Window Off RTS Window Wide 22 Fish ID Fish ID uses advanced signal processing to interpret sonarreturns andwilldisplayaFishSymbolwhenveryselectiverequirementsaremet Whenafishisdetected afishiconanditsdeptharedisplayedabovethereturnthathas been classified as being a fish Three different fish size icons represe...

Страница 16: ...main menu 2 Use the LEFT or RIGHT 4 Way Cursor Control keys to change the Surface Clutter setting Low 1 to High 10 Default 5 Surface Clutter 24 Depth Lines Advanced Depth Lines divide the display into four equal sections which are separated by three horizontaldepthlines Thedepthofeachlineisdisplayedalongthedepthscale Youcan either turn Depth Lines On or Off The Depth Lines menu choice is available...

Страница 17: ...of the sonar returns In some deep water situations the High setting may actually hinder your FishFinder s ability to find the bottom To change the Noise Filter setting 1 Make sure you are in Advanced User Mode then highlight Noise Filter on the Sonar main menu 2 Use the LEFT or RIGHT 4 Way Cursor Control keys to change the Noise Filter setting Off Low Medium High Default Low Max Depth Advanced Max...

Страница 18: ...ed 28 Alarms Menu Tab From any view press the MENU key twice to access the Main Menu System The Alarms tab will be the default selection NOTE When an alarm is triggered you can silence it by pressing any key The alarm will be silenced and will not be triggered again until you enter a new instance of the alarm condition Depth Alarm DepthAlarmsoundswhenthedepthbecomesequaltoor less than the menu set...

Страница 19: ...attery Alarm setting 1 Highlight Low Battery Alarm on the Alarms main menu 2 Use the LEFT or RIGHT 4 Way Cursor Control keys to change the Low Battery Alarm setting Off 8 5V 13 5V Default Off Temp Alarm Temp Alarm sounds when the water temperature detected by the FF585c reaches the Temp Alarm setting which is either set in degrees FahrenheitorCelsius InternationalModelsOnly Forexample iftheTempAla...

Страница 20: ...ult English 32 Units Depth Units Depth selects the units of measure for all depth related readouts To change the Units Depth setting 1 Highlight Units Depth on the Setup menu 2 Use the LEFT or RIGHT 4 Way Cursor Control keys to change the Units Depth setting Meters International Models Only Feet Fathoms Default is Meters for International models and Feet for Domestic models Units Temp Internationa...

Страница 21: ...mp SpeedAccessoryisconnectedandthepaddlewheelhasmovedatleastonce The Triplog provides the following information timer for elapsed time distance traveled since last reset and average speed NOTE See Setup Menu Tab Select Readouts Advanced to find out how to display Triplog information on the screen NOTE The Timer distance traveled and average speed information is remembered by the FishFinder unit wh...

Страница 22: ... the Speed Calibration setting 1 MakesureyouareinAdvancedUserMode thenhighlightSpeedCalibrationon the Setup menu 2 UsetheLEFTorRIGHT4 WayCursorControlkeystochangetheSpeedCalibration setting 20 to 20 Default 0 36 Select Readouts Advanced Sonar View Only Select Readouts sets individual digital readouts on the Sonar View This Advanced feature allows you to select what data will be displayed in each o...

Страница 23: ...the boat s engine may be interfering with sonar reception See Finding the Cause of Noise for more information 38 Troubleshooting Before contacting the Humminbird Customer Resource Center please read the following section Taking the time to review these troubleshooting guidelines may allow you to solve a performance problem yourself and therefore avoid sending your unit back for repair FishFinder D...

Страница 24: ...es require a separate purchase Other electronic devices The boat s engine Cavitation from the boat s propeller Turn off any nearby electronic devices to see if the problemgoesaway thenturnthemononeatatimeto see if the noise re appears Todeterminewhethertheboat sengineisthesourceof thenoise increasetheRPMswhiletheboatisinneutral and stationary to see if the noise increases proportionately if noise ...

Страница 25: ... 8 00 a m to 4 30 p m Central Standard Time 1 800 633 1468 By e mail typically we respond to your e mail within three business days custserv johnsonoutdoors com For direct shipping our address is Humminbird Service Department 678 Humminbird Lane Eufaula AL 36027 USA FF585c_Man_English_531363 1_B qxd 12 27 2004 8 33 PM Page 48 ...

Отзывы: