VDL1200SM
2
VELLEMAN
4. Installation
•
Have the device installed by a qualified person, respecting EN 60598-2-17 and all other applicable norms.
•
The carrying construction must be able to support 10 times the weight of the device for 1 hour without deforming.
•
The installation must always be secured with a secondary attachment e.g. a safety cable.
•
Never stand directly below the device when it is being mounted, removed or serviced. Have a qualified technician
check the device once a year and once before you bring it into service.
•
Install the device in a location with few passers-by that is inaccessible to unauthorised persons.
•
Overhead mounting requires extensive experience: calculating workload limits, determining the installation
material to be used… Have the material and the device itself checked regularly. Do not attempt to install the
device yourself if you lack these qualifications as improper installation may result in injuries.
•
Adjust the desired inclination angle via the mounting bracket and tighten the bracket screws.
•
Make sure there is no flammable material within a 0.5m radius of the device.
•
Have a qualified electrician carry out the electric connection.
•
Connect the device to the mains with the power plug. Do not connect it to a dimming pack.
•
The installation has to be approved by an expert before the device is taken into service.
5. Use
•
Make sure the power switch is set to OFF.
•
Use the right liquid (see “
Technical Specifications
”) to add in the tank on top of
the unit.
•
Insert the power cable into the mentioned power supply.
•
Set the power switch on the backside of the device to ON. The device starts
operating.
•
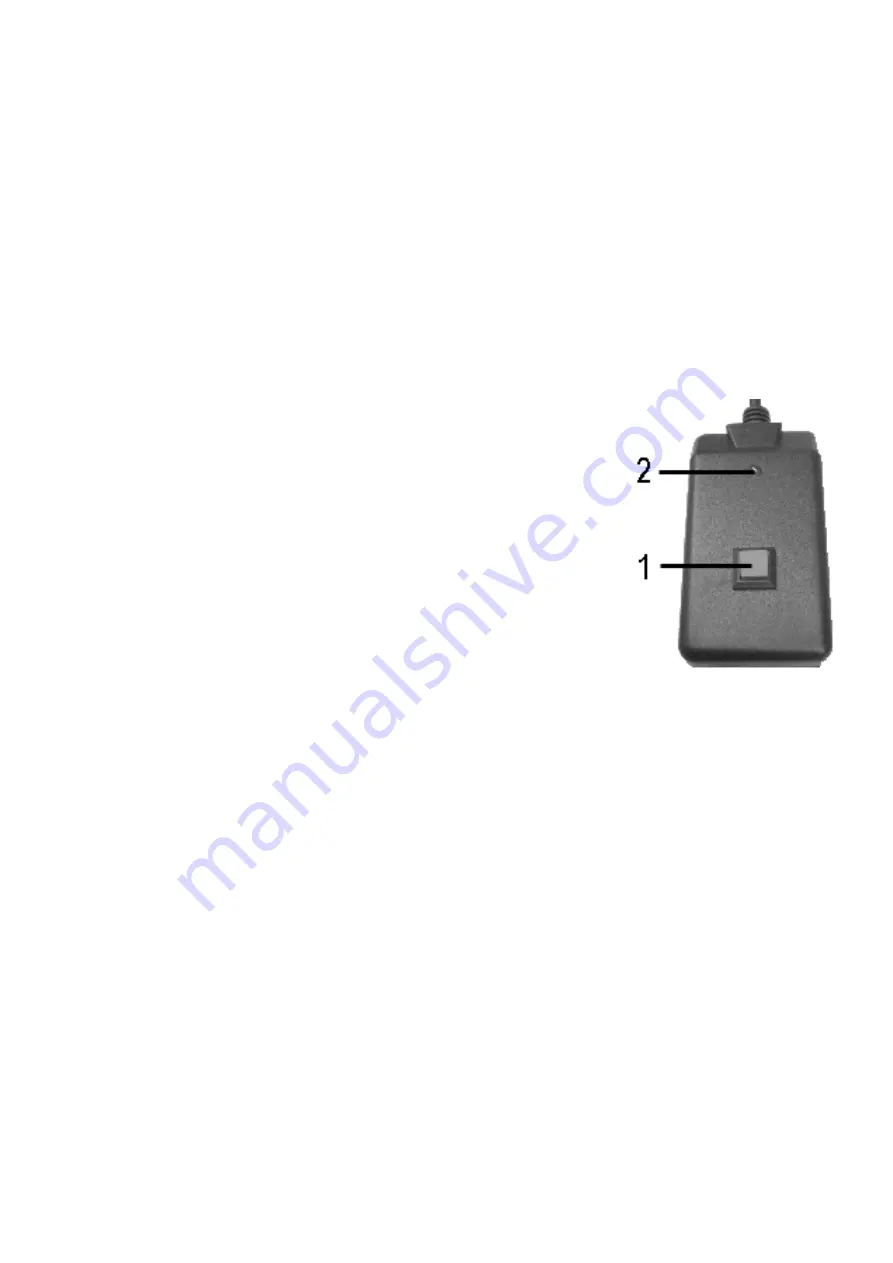
The green LED (2) on the controller will light up.
•
Push the button (1) on the controller and the device will start spurting smoke.
•
Set the power switch to OFF to stop the device.
6. Cleaning and Maintenance
1. All screws should be tightened and free of corrosion.
2. The housing, visible parts, mounting supports and the installation location (e.g. ceiling, suspension, trussing)
should not be deformed, modified or tampered with e.g. do not drill extra holes in mounting supports, do not
change the location of the connections, …
3. Moving mechanic parts must not show any signs of wear and tear.
4. The electric power supply cables must not show any damage. Have a qualified technician maintain the device.
5. Disconnect the device from the mains prior to maintenance activities.
6. Wipe the device regularly with a moist, lint-free cloth. Do not use alcohol or solvents.
7. There are no user-serviceable parts.
8. Contact your dealer for spare parts if necessary.
7. Technical Specifications
Power Supply
max. 230VAC / 50Hz
Power Consumption
max. 1200W
Liquid
VDLSL5
,
VDLSLH5
,
VDSLHT5
Tank capacity
2.5l
Dimensions
410 x 255 x 140mm
Total Weight
7.5kg
Max. Ambient Temperature
45°C
Max. Housing Temperature
130°C
The information in this manual is subject to change without prior notice.


