TP585L User Manual
15
4 INSTALLATION AND USAGE
4.1 Media Loading
Caution, sharp edges
To indicate that the marked item contains sharp edges and should not be
touched without taking care.
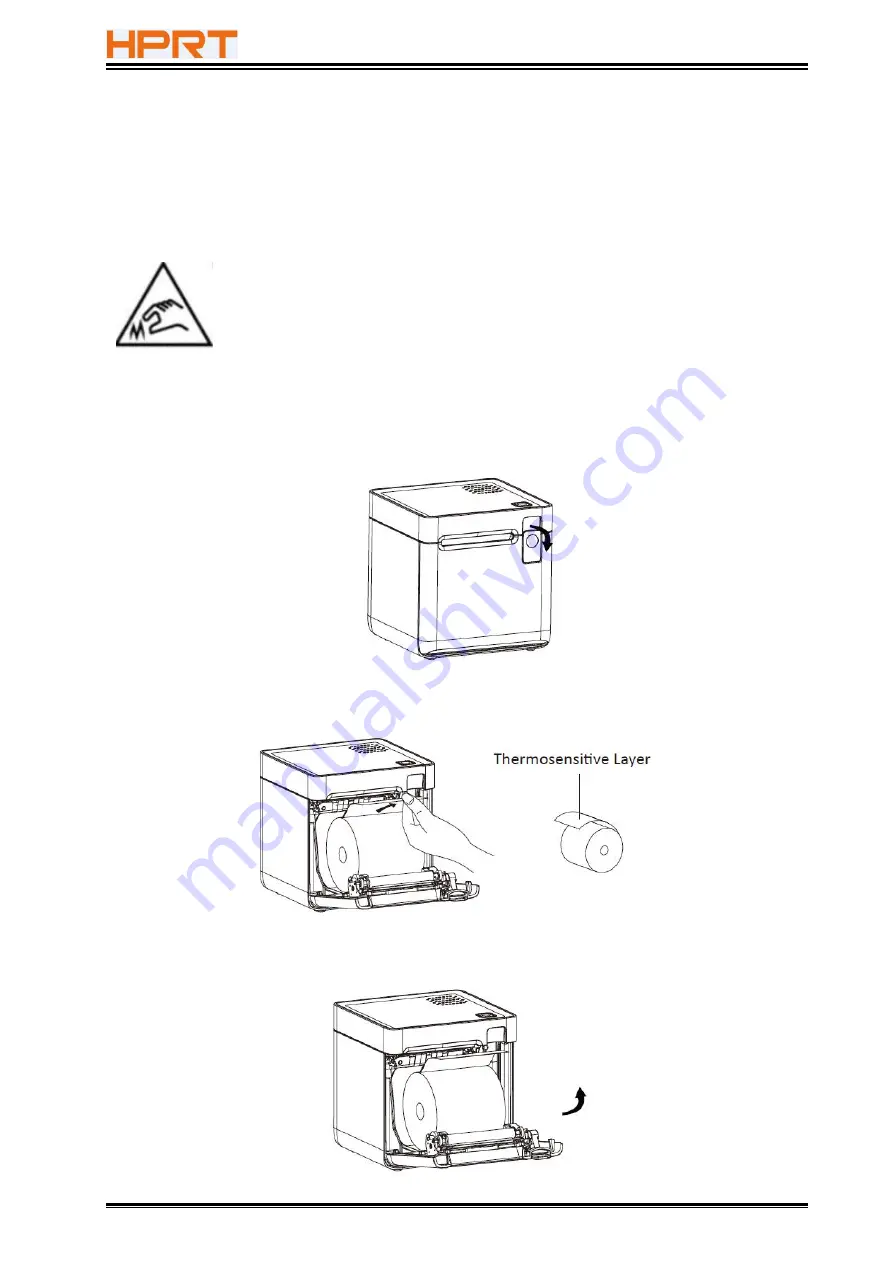
1) Pull the cover open lever to open the front cover.
2) Load the paper roll in the correct direction as shown below.
3) Pull out some paper, and close the printer cover.
Содержание TP585L
Страница 26: ...TP585L User Manual 26 4 Click Next 5 Select start menu folder Click Next ...
Страница 27: ...TP585L User Manual 27 6 Click Install 7 Click Finish Utility is installed successfully ...
Страница 32: ...TP585L User Manual 32 8 2 1 4 Connection Test 1 Choose the printer Click Connection Test ...
Страница 39: ...TP585L User Manual 39 2 Click Send by Hex input the content Convert text to HEX or send ESC command ...
Страница 49: ...TP585L User Manual 49 Auto Line Feed DPI Mode Default 203DPI USB Port Mode ...
Страница 51: ...TP585L User Manual 51 Return to the printer utility and click Modify Printer ...
Страница 52: ...TP585L User Manual 52 Change the port to COM2 COM2 ...
Страница 57: ...TP585L User Manual 57 8 3 Firmware Update 1 Click FW Update ...
Страница 61: ...TP585L User Manual 61 4 Click Next ...
Страница 65: ...TP585L User Manual 65 2 According to the different needs choose Paper Offset Rotate Effect Copies in Page ...
Страница 66: ...TP585L User Manual 66 Click on Paper Name Click on Manager add or delete paper Set direction of paper ...
Страница 68: ...TP585L User Manual 68 Feed Paper Feed Distance 0 5 10 15 20mm End Document ...
Страница 69: ...TP585L User Manual 69 Cash Drawer Custom Command ...
Страница 71: ...TP585L User Manual 71 Click Download Click Add to add a logo BMP format is recommended ...
Страница 73: ...TP585L User Manual 73 Select Printer properties in Devices and Printers then click Preference ...
Страница 74: ...TP585L User Manual 74 Click the Advanced then click Logo ...
Страница 76: ...TP585L User Manual 76 Then click OK ...
Страница 77: ...TP585L User Manual 77 Click Print Test Page to view the printing effect ...
Страница 79: ...TP585L User Manual 79 Code Page ...
Страница 80: ...TP585L User Manual 80 3 Click Watermark Set watermark to print ...
Страница 81: ...TP585L User Manual 81 4 Click Halftone to set the halftone ...
Страница 84: ...TP585L User Manual 84 Add Barcode firstly ...
Страница 85: ...TP585L User Manual 85 Set the Font Name and the Barcode Option ...
Страница 86: ...TP585L User Manual 86 Click the Printer Setting Choose the Display Language for Properties ...
Страница 88: ...TP585L User Manual 88 ...
Страница 89: ...TP585L User Manual 89 ...
Страница 90: ...TP585L User Manual 90 ...
Страница 93: ...TP585L User Manual 93 Select the System Font for example Arial ...
Страница 94: ...TP585L User Manual 94 Select the font to that you want to replace Click Set ...
Страница 95: ...TP585L User Manual 95 ...
Страница 97: ...TP585L User Manual 97 3 Set the Ports 4 Click Advanced to set the printing time ...
Страница 100: ...TP585L User Manual 100 ATTACHMENT 1 TP585L ...


