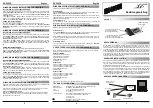
Preparing the HP Netserver for 2-post rack installation
Each HP Netserver has two rails attached at the factory and shipped to customers. These two rails must be
removed to attach the brackets, before the Netserver can be mounted in the rack.
1. Lay the HP Netserver on a flat surface.
2. Remove the 3 screws holding the rails to each side of the chassis. See figure above.
3. Refer to the installation instruction for the HP J1527A Slide Rackmount Kit and HP J1480A 2-post Slide
Mount Adapter.
Before you begin installation
Step 1. Verify that the floor where the equipment will be located can support the weight. Also verify that
there is enough space for slide mounted equipment to be fully extended and that doors can swing freely.
Step 2. Verify that the appropriate electrical power is available.
Step 3. Unpack and place rack at the designated location.
Step 4. Secure and level the rack(s) using the leveling feet. Be sure to deploy the anti-tip feet, if appropriate.
Step 5. Install the equipment.
23
HP Netserver High Density Rack Solutions Overview (LP 2000r)


