background image

HP E-MSM430, E-MSM460, E-MSM466 Dual Radio 802.11n Access Points Quickstart  

3

Installation

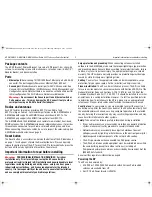
Caution:

If the AP will be powered by a user-supplied PoE power injector, 

use only a gigabit-compatible power injector. Although 10/100 PoE-enabled 
switches are compatible, PoE injectors designed for 10/100 networks only are 
NOT compatible with the AP.

Installation

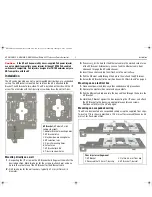
The AP can be mounted on a wall, a wall-mounted electrical box, or a suspended 
ceiling. The AP Bracket is mounted first and then the AP is attached to the 
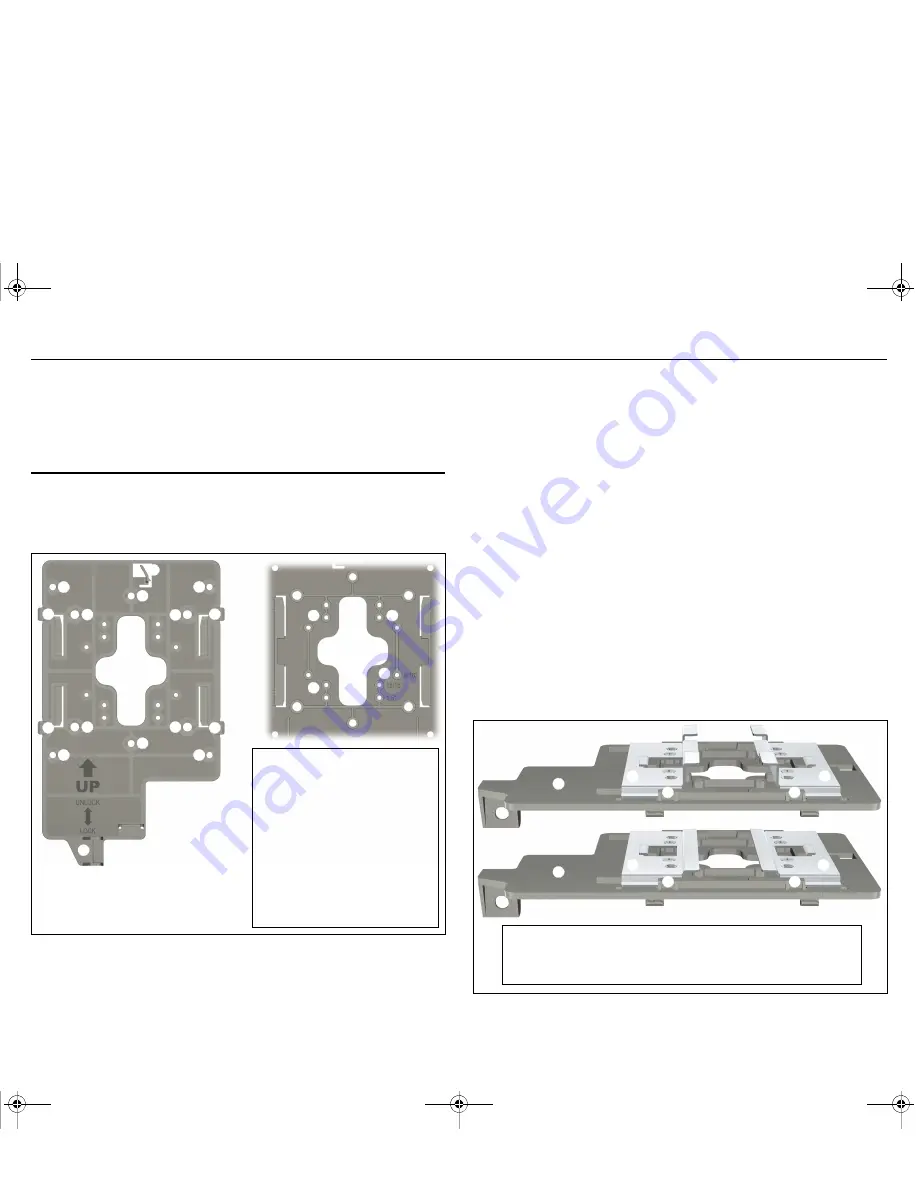
bracket. The AP Bracket is two-sided: The AP is installed on the side with the UP 
arrow. The other side with the T-bar clip screw holes faces the wall or T-bar.

Mounting directly on a wall

1.

Respecting the UP arrow on the AP Bracket, hold it against the wall at the 
desired position. Mark two holes for the screws (wall anchors) and one 
hole in the cutout area of the AP Bracket for the Ethernet cable.

2.

Drill two holes for the wall anchors, typically 4.7 mm (3/16 inch) in 
diameter.

3.

If necessary, drill a hole for the Ethernet cable in the marked cutout area 
of the AP Bracket. Alternatively, you can feed the Ethernet cable from 
above and through the AP cable channel.

4.

Insert the anchors and tap them flush with the wall surface.

5.

Pull the Ethernet cable through the hole in the wall and the AP Bracket.

6.

Screw the AP Bracket to the wall. Continue with 

Attach the AP 

on page 4.

Mounting on an electrical box

1.

Disconnect power and take any other needed security precautions.

2.

Remove the electrical box cover and any contents. 

3.

Pull the Ethernet cable down into the box and then through the hole in the 
AP Bracket.

4.

Hold the AP Bracket against the box respecting the UP arrow, and attach 
the AP Bracket to the box using appropriate countersunk screws. 
Continue with 

Attach the AP 

on page 4.

Mounting on a suspended ceiling

The AP can be mounted on a suspended ceiling using the supplied T-bar clips. 
Two sets of T-bar clips are provided, a 12.5 mm set for recessed tiles and a 4.5 
mm set for flush-mount tiles. 

AP Bracket 

(AP side left, wall/

ceiling side right)
1: Adapter Bracket mounting holes
2: AP Bracket latch
3: Electrical box mounting holes 
4: AP retention tabs
5: Drywall mounting holes
6: Cutout area
7: AP Bracket lock tab
8: T-bar clip screw holes

T-bar clips for ceiling mount

1: AP Bracket
2: Recessed tile 12.5 mm T-bar clip

3: Flat tile 4.5 mm T-bar clip
4: AP Bracket T-bar slot

E-MSM430-460-466-QS-Jan11-5998-0615-v55.fm  Page 3  Wednesday, January 19, 2011  5:38 PM

Содержание J9650A

Страница 1: ...rences are made See Products list on page 8 for part numbers Please visit www hp com networking support for the latest documentation including the MSM3xx MSM4xx Access Points Management and Configuration Guide and the MSM7xx Controllers Management and Configuration Guide Hardware overview Front view 1 Status Lights Left to right Power Ethernet Radio 1 Radio 2 2 Cable lock hole 3 Retention screw ho...

Страница 2: ...e comply with local safety and radio regulations Surge protection and grounding When connecting antennas installed outdoors to the E MSM466 make sure that proper lightning surge protection and grounding precautions are taken according to local electrical code Failure to do so may result in personal injury fire equipment damage or a voided warranty The HP hardware warranty provides no protection ag...

Страница 3: ...ve and through the AP cable channel 4 Insert the anchors and tap them flush with the wall surface 5 Pull the Ethernet cable through the hole in the wall and the AP Bracket 6 Screw the AP Bracket to the wall Continue with Attach the AP on page 4 Mounting on an electrical box 1 Disconnect power and take any other needed security precautions 2 Remove the electrical box cover and any contents 3 Pull t...

Страница 4: ...es 6 Re install the ceiling tile through which you will pass the Ethernet cable 7 Using the hole in the AP Bracket as a guide drill or cut a hole in the ceiling tile at the desired position large enough to pass through the Ethernet connector Alternatively you can run a cable outside of the ceiling tile and through the cable channel 8 Slide the ceiling tile to the side Feed the Ethernet cable down ...

Страница 5: ...ting the AP vertically on a wall About controlled mode and autonomous mode The AP can operate in one of two modes controlled the default or autonomous Switching modes resets all configuration settings to factory defaults Controlled mode To become operational the AP must establish a management tunnel with an MSM7xx Controller The controller manages the AP and provides all configuration settings Dis...

Страница 6: ...4 Properties 2 Disable any wireless connection on your computer B Connect the cables and power on the AP 1 Connect the cables If using a PoE switch use Ethernet cables to connect your computer and the AP to an unused factory default PoE switch If using a PoE injector use Ethernet cables to connect your computer to the data in port of the PoE injector and the AP to the data and power out port of th...

Страница 7: ...ss after the AP connects to the network After the DHCP server has assigned the AP an IP address you can then find the IP address of the AP by looking for its Ethernet base MAC address in the DHCP server log For example after Step F 4 below you could go to the DHCP server log to retrieve the IP address assigned to the AP Assign a static IP address to the AP The address must be on the same subnet as...

Страница 8: ...designed to provide reasonable protection against harmful interference in a residential installation This equipment generates uses and can radiate radio frequency energy and if not installed and used in accordance with the instructions may cause harmful interference to radio communications However there is no guarantee that interference will not occur in a particular installation If this equipment...

Отзывы: