


Chapter 6
Replacing Parts
133
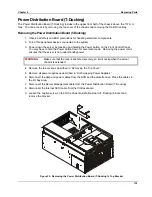
10. Remove the 12 V DC-DC converter from the top of the Power Distribution Board (T-Docking).
11. Remove the fan, DVD, and floppy drive cable power connector from the Power Distribution
Board by squeezing the lock tab and carefully pulling the connector upwards.
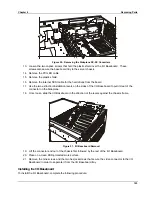
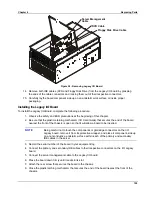
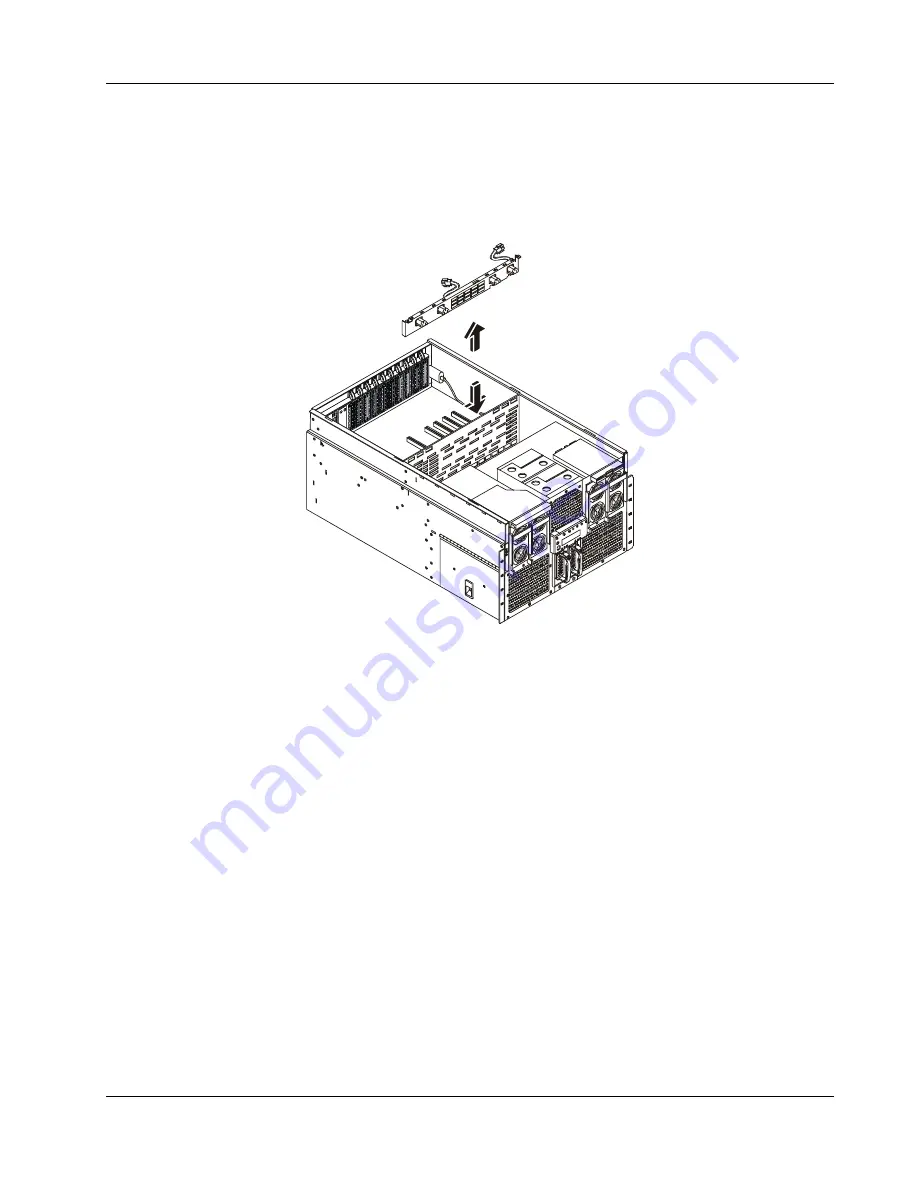
Loosen the two top captive screws from the AC Power Distribution Bracket. Lift the AC distribution
bracket out of the way and disconnect the AC input cables from both connectors.
Figure 56. Removing the AC Distribution Bracket
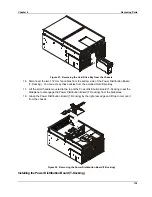
13. Loosen the six captive thumbscrews securing the Power Distribution Board plastic overlay.
Remove the overlay.
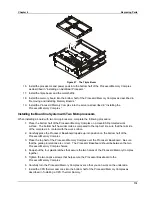
14. Remove the two hot swap drives from the Hard Drive Bay.
15. Remove the four screws securing the Hard Drive Bay and pull the bay completely out of the
chassis.
Содержание Integrity rx4610
Страница 1: ...hp server rx4610 Service Manual Online Version 1 0 Last Updated June 2001 ...
Страница 8: ...8 ...
Страница 16: ...Chapter 1 General Information 8 ...
Страница 38: ......
Страница 86: ......
Страница 144: ...Chapter 6 Replacing Parts 136 ...