


Setting Up Your Printer
DMX 400/430 Operator’s Manual
23
2.4.1 Setting the Baud Rate
For all modes of operation, you must set the baud rate of the
interface. On the back of the Printer, you will find a single eight-
position DIP Switch, positions 1, 2, and 3 control the setting of the
baud rate.
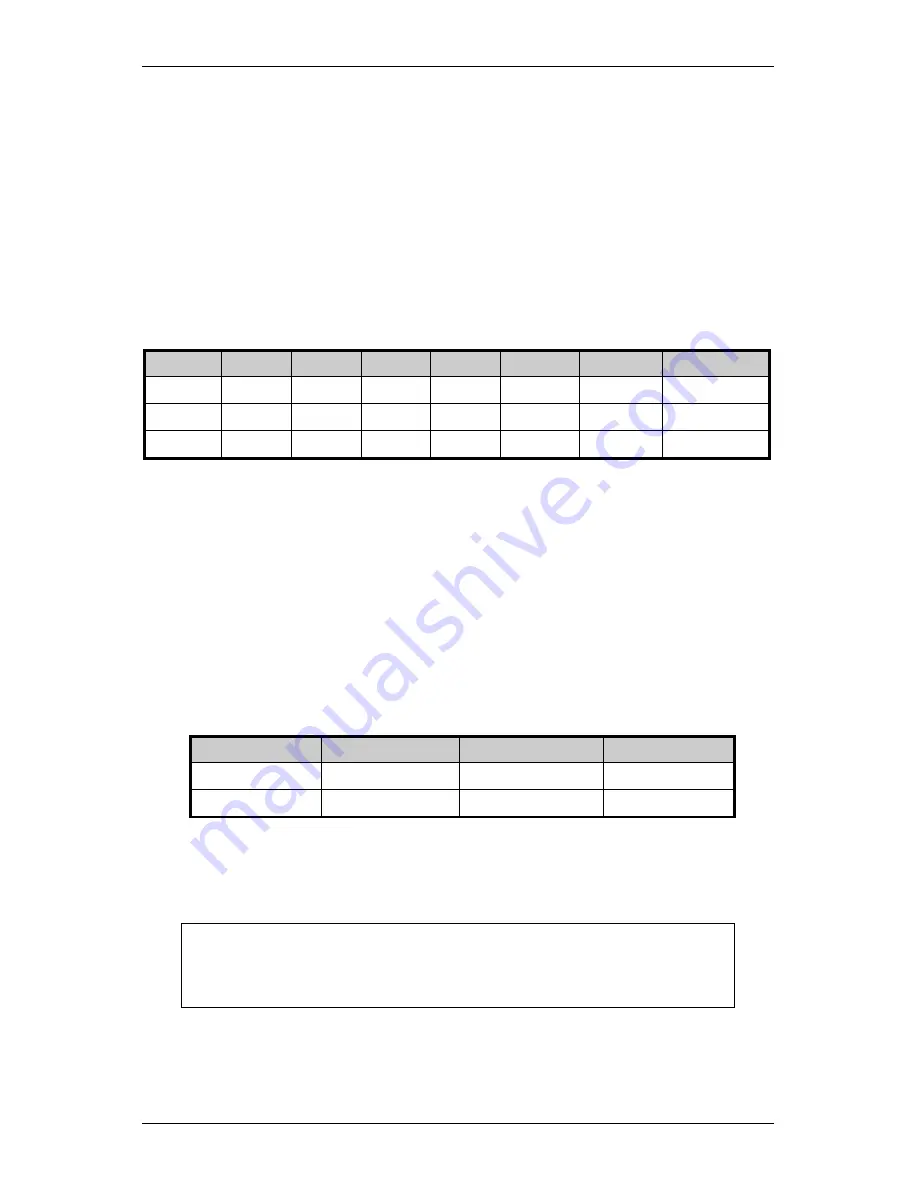
The following table provides the position of the three switches and
the corresponding baud rate that can be obtained by each setting.
Baud
9600
4800
2400
1200
600
300
9600 Test
SW-1
off
off
off
off
on
on
on
SW-2
off
off
on
on
off
off
on
SW-3
off
on
off
on
off
on
on
Table 2-2 Baud Rate
The Printer can accept 7- or 8-bit data, while ignoring parity. It also
requires at least one stop bit. This configuration assures the highest
degree of compatibility with most serial devices, even if the data
format arrangement of the host cannot be modified. Switch SW-4,
located on the back of the Printer, selects the word length.
SW-4
Data Bits
Parity
Stop Bits
on
7
none
2
off
8
none
1
Table 2-3 Word Length
Note:
It will be necessary to select the 8-bit mode if you want
to access the foreign language characters. These
characters are available in fonts 1 through 6 and 9.
Содержание DMX 400
Страница 1: ...DMX 400 430 Operator s Manual ...
Страница 4: ......
Страница 6: ......
Страница 10: ...iv ...
Страница 12: ...Getting Started 2 DMX 400 430 Operator s Manual ...
Страница 14: ...Getting Started 4 DMX 400 430 Operator s Manual Figure 1 2 Rear View Figure 1 3 Mechanism Detail ...
Страница 35: ...Setting Up Your Printer DMX 400 430 Operator s Manual 25 ...
Страница 47: ...Creating Labels Using Internal Batach Software DMX 400 430 Operator s Manual 37 Figure 3 4 Sample Label Format ...
Страница 84: ...Troubleshooting 74 DMX 400 430 Operator s Manual ...
Страница 100: ......
Страница 102: ...D 2 DMX400 430 Operator s Manual ...
Страница 118: ...G 4 DMX400 430 Operator s Manual ...