Adding or replacing an optical drive
1.
If necessary, remove the existing drive. See
Removing an optical drive on page 36
2.
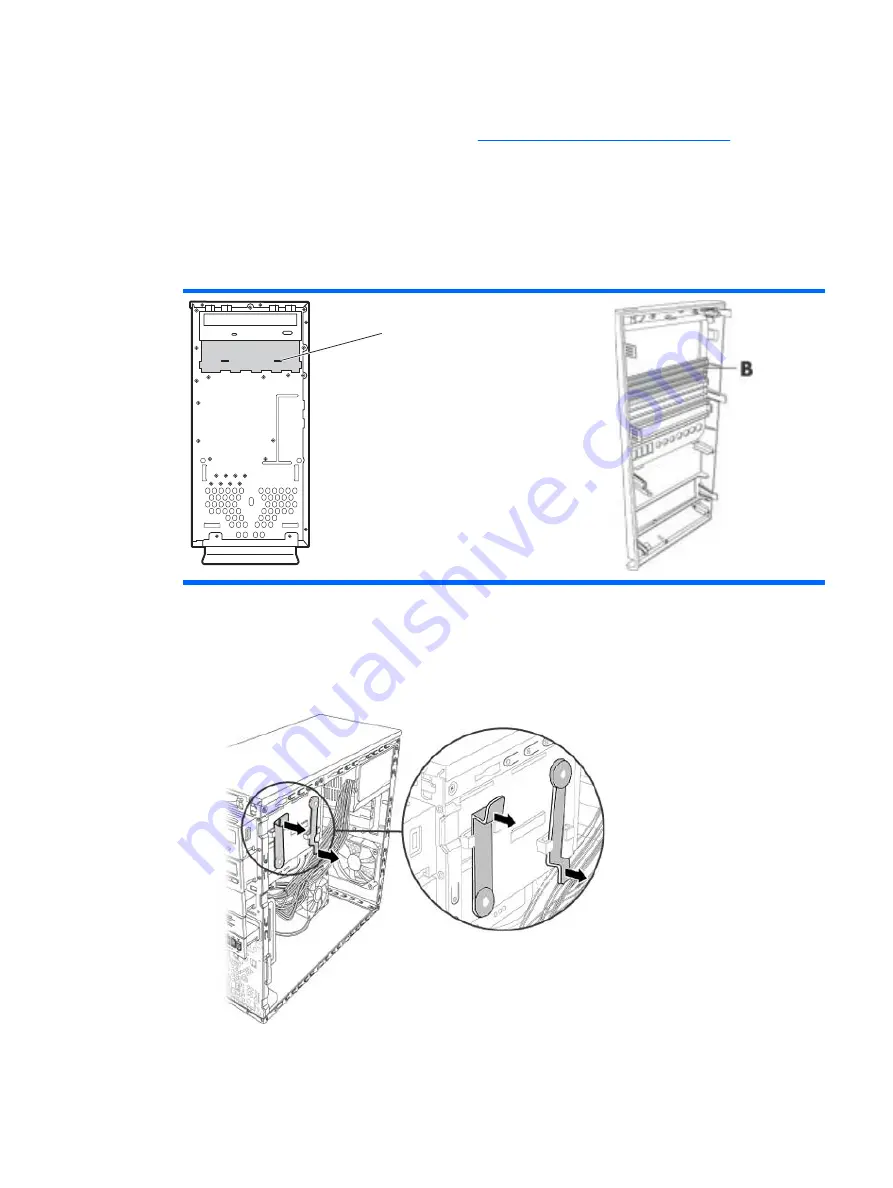
If you are adding a drive to an empty lower optical drive bay, you must remove the knockout plate
from the bay. To do so, insert a flat screwdriver into the knockout plate slot (
A
) and rotate the
screwdriver to break the knockout plate out of the chassis. Discard the knockout plate.
3.
Remove the knockout plate on the front cover. To do so, insert a flat screwdriver into the knockout
plate slot (
B
) and rotate the screwdriver to break the knockout plate out of the front cover. Discard
the knockout plate.
A
4.
On some models, the optical drives are secured by latches. On other models, the optical drives
are secured by screws. Follow the instructions below for your model.
●
Release the drive by pulling the latch out away from the chassis and then pulling the drive
part way out of the front of the chassis. (The latch drive brackets secure the drives in their
respective positions in the chassis.)
Removing and replacing drives
39


