22
BULLETIN RC454
A GUIDE TO BURNING COAL IN YOUR FURNACE
will allow the fire to burn off any accumulated gases. Open
the feed door, and with a small rake, hoe, or hooked poker
pull the glowing coals to the front of the firebox. Try not to
disturb the fire too much. Next, add a fresh charge to the
back being careful not to seal off the top. Close the feed
door, but leave the spin damper (or thermostat) open for a
few minutes until the volatile gases have burned off. It is not
necessary to shake down the ashes each time you refuel the
furnace. Experience will be your best teacher.
BANKING THE FIRE
For extended operation, such as overnight, the fire will need
to be banked. To do so heap coal up along the sides and
back of the firebox so that the fire gradually burns it over a
longer period of time. The intensity of the fire will also be re
-
duced without letting it go out. Follow the same procedure as
for refueling. If possible, avoid shaking, as a heavier layer of
ash will help reduce the intensity of the fire during this time.
After loading, let the fire establish itself for about 30 minutes.
Then close your damper and automatic control to the point
where the house does not become too cold. It is important
that you begin banking early enough before retiring or leav
-
ing that you can make necessary adjustments after the fire
is well established.
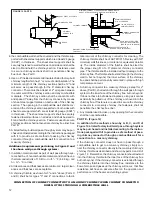
To revive a coal fire that is almost out, (1) open the ash door
and stove pipe damper and close the spin damper under
the door to get a good draft through the grate. (2) place a
thin layer of dry coal over the entire top of the fire. DO NOT
POKE OR SHAKE THE FIRE AT THIS TIME! (3) after the
fresh coal has become well ignited shake the grate (just a
little), refuel.
DO NOT burn coke, charcoal, high volatile bituminous coal,
sub bituminous, lignite or cannel coal (sometimes called
channel coal or candle coal).
NEVER burn wax or chemically impregnated sawdust logs -
their intended use is for fireplaces only.
NEVER fill the stove or furnace above the firebrick or cast
iron liner.
Содержание 1357M
Страница 6: ...6 Figure 2 Model 1557M Figure 1 Model 1357M DIMENSIONS OF FURNACE ...
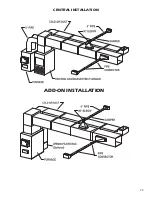
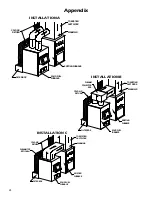
Страница 23: ...23 CENTRAL INSTALLATION CENTRAL INSTALLATION ADD ON INSTALLATION ...
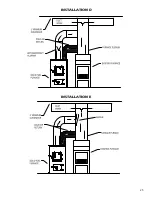
Страница 25: ...25 INSTALLATION D INSTALLATION E ...
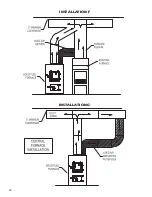
Страница 26: ...26 INSTALLATION F INSTALLATION G ...
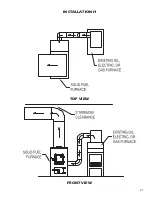
Страница 27: ...27 INSTALLATION H TOP VIEW FRONT VIEW ...
Страница 30: ...30 NOTES ...
Страница 31: ...31 NOTES ...

