5
ASSEMBLING YOUR SUPER TITAN
NOTES:
1. Each panel includes a label indicating the final assembled orientation
(e.g. TOP, BOTTOM, FRONT, etc.). LEFT and RIGHT are as you face the front
of the vault.
2. For easier assembly, the FIRESHIELD blankets can be removed from the
TOP, BOTTOM and SIDE panels.
3. At first, loosely screw on nuts to insure all exterior panels properly align
and remain square during assembly. The nuts can be tightened after all
exterior panels are assembled.
4. The INTERIOR PANELS are designed to fit snuggly, but do not force into
place as it may damage them.
STEPS:
1. Unpack and lay out all parts except the front door assembly.
2. To lighten the door assembly for easier removal from the shipping crate,
remove the doors by following the steps below.
a. Thread DOOR HANDLE SPOKES onto the hub on DOOR (Part 11B).
b. IMPORTANT – Remove temporary door hinge screws from door hinges.
c. Install a fresh high-quality 9V battery in the Entry Keypad
(page 9)
.
d. Enter the factory combination code and open the DOOR, then carefully
lift it off the DOOR FRAME (Part 6) and set aside.
NOTE:
To assure the safe is assembled square it is best to build the safe on
its back and then stand it up after tightening all bolts.
Each panel is identified with a label that also indicates assembly
orientation. Follow the instructions on the label to ensure proper panel
orientation during assembly.
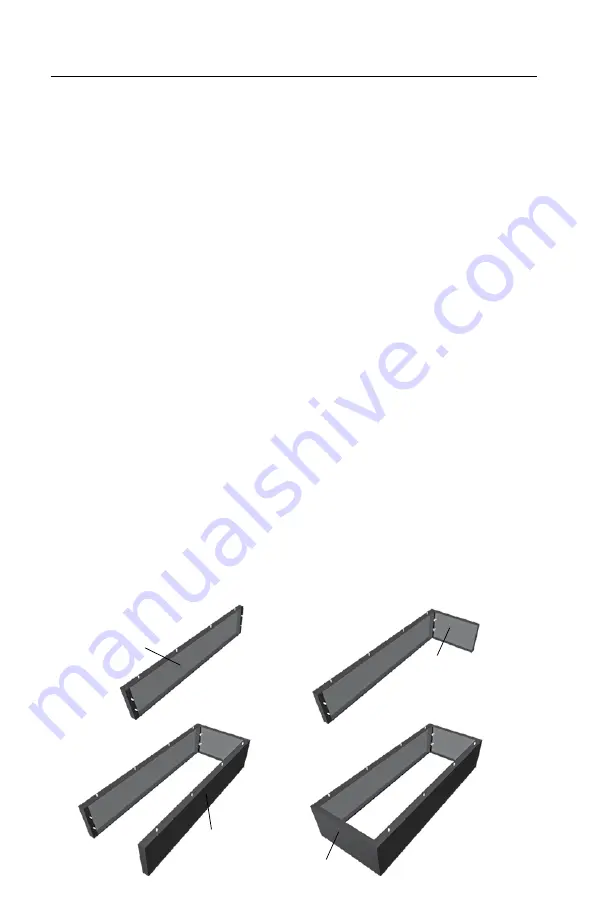
3. To begin, assemble the Top, Bottom and Sides (Parts 1 through 4) first.
Loosely hand tighten bolts to hold panels together.
RIGHT SIDE
LEFT SIDE
BOTTOM
TOP
Loosely tighten bolts


