background image

55

Network and sharing  

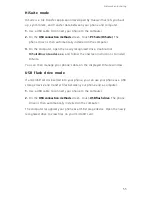
HiSuite mode

HiSuite is a file transfer application developed by Huawei that lets you back 

up, synchronize, and transfer data between your phone and computer.

1. 

Use a USB cable to connect your phone to the computer. 

2. 

On the 

USB connection methods

 screen, touch 

PC Suite (HiSuite)

. The 

phone driver is then automatically installed on the computer.

3. 

On the computer, open the newly recognized drive, double-click 

HiSuiteDownLoader.exe

, and follow the onscreen instructions to install 

HiSuite. 

You can then manage your phone's data on the displayed HiSuite window. 

USB flash drive mode

If a microSD card is inserted into your phone, you can use your phone as a USB 

storage device and transfer files between your phone and a computer. 

1. 

Use a USB cable to connect your phone to the computer. 

2. 

On the 

USB connection methods

 screen, touch 

USB flash drive

. The phone 

driver is then automatically installed on the computer.

The computer recognizes your phone as a USB storage device. Open the newly 

recognized drive to view files on your microSD card. 

Содержание x4

Страница 1: ...User Guide 4X ...

Страница 2: ...tion control 11 Status icons 12 Home 15 Notification 16 Accessing applications 16 Personalizing your phone 18 Texting Calls and contacts 22 Making a call 24 Answering or rejecting a call 25 What you can do during a call 26 Answering a third party call 26 Making a conference call 27 Using the call log 27 Turning on pocket mode 28 Call settings 28 Managing contacts 29 Searching for a contact 30 Impo...

Страница 3: ...ylist 48 Playing a playlist 48 Deleting a playlist 48 Setting a song as the ringtone 49 Playing a video Network and sharing 50 Turning on mobile data 50 Wi Fi network 51 Sharing your phone s mobile data connection 52 Transferring data through Bluetooth 53 Transferring data using Wi Fi Direct 54 Transferring data between your phone and computer Applications 56 Managing applications 57 Backup 58 Pho...

Страница 4: ...end button 68 Changing the lock screen style 69 Turning on or off airplane mode 70 Setting the PIN of your SIM card 71 Setting up an account 71 Restoring factory settings 72 Updating your phone 73 Setting the date and time 73 Changing the system language 74 Accessibility Legal Notice ...

Страница 5: ...nt are for your reference only The actual product may vary Features in this guide are for your reference only Some features may not be supported by all phones Symbols and definitions Note Highlights important information and tips and provides additional information Caution Indicates potential problems that may arise such as device damage or data loss if proper care or attention is not given ...

Страница 6: ...y questions and then touch Done Adding files to the Safe 1 On the home screen touch Files 2 Under Categories or Local touch 3 Enter the password and touch Done 4 Touch Add 5 Follow the onscreen instructions and select files you want to add to the Safe 6 Touch Add to add the selected files to the Safe Taking a photo before focusing the camera In all focus mode you can change the focus point of a ph...

Страница 7: ...creen touch Gallery 2 Flick down from the Time screen to display the viewfinder in half screen mode and flick down again to open the camera Not all camera features are available in half screen mode 3 Touch to take a photo 4 Touch Return to return to Gallery QR code You can scan QR codes using the camera and gallery Scanning a QR code using Gallery 1 On the home screen touch Gallery 2 Choose a QR c...

Страница 8: ...ss functions 4 Scanning a QR code using Camera 1 On the home screen touch Camera 2 Frame the QR code with the camera The camera will automatically scan the QR code entry 3 Touch the QR code entry to view details ...

Страница 9: ... After being idle for a specified period of time your phone automatically locks its screen To set the screen lock method touch Settings on the home screen On the displayed General tab touch Screen lock Screen lock Unlocking the screen When the screen is off press the power button to turn it on Slide your finger towards any direction to unlock the screen ...

Страница 10: ...data When you don t need to access the Internet turn off mobile data to save battery power and reduce data usage Connecting your phone to a computer Use a USB cable to connect your phone to a computer and follow the onscreen instructions to select a connection mode to transfer photos videos songs and other files between your phone and computer Device file manager MTP Read manage and transfer files...

Страница 11: ...cts in your old phone as a vcf file to a microSD card and then import the contacts to your new phone For details see Importing contacts from a storage device Bluetooth Turn on Bluetooth on both your old and new phones and import your contacts using Bluetooth For details see Importing contacts from a Bluetooth device Backup If your old phone supports Backup back up your contacts and restore them to...

Страница 12: ...ome screen to enter editing mode Flick Move your finger vertically or horizontally across the screen For example you can flick left or right under Notifications of the notification panel to dismiss a notification Flick vertically or horizontally to go to other home screens scroll through a document and more Drag Touch and hold an item and then move it to another position You can rearrange applicat...

Страница 13: ...Under All touch Motion control 3 On the Motion control screen select an option and select a motion to enable it Flip Mute sounds and stop vibration from incoming calls alarms and timers Spread apart and pinch together Spread two fingers apart to zoom in and pinch them together to zoom out on a map web page or picture Pinch three fingers together On the home screen pinch three fingers together to d...

Страница 14: ... screen to enter editing mode Shake your phone to arrange your icons Double touch Double touch the screen to turn it on Draw When your phone s screen is turned off draw a letter to open the corresponding application Motion control may vary according to phone models ...

Страница 15: ... enabled Silence mode enabled Alarms enabled Charging Battery full Battery low Call in progress Missed calls New messages New emails New voicemails Selecting an input method Wi Fi network available Connected to a Wi Fi network Uploading data Downloading data Phone memory full Upcoming events No SIM card found Sign in or synchronization problem Synchronizing data Synchronization failed Portable Wi ...

Страница 16: ...to give you a more convenient and direct path to your applications Status bar displays notifications and icons Flick down from the status bar to open the notification panel Display area displays application icons folders and widgets Screen position indicator shows the current screen s position Dock displays frequently used applications 1 2 3 4 1 2 3 4 ...

Страница 17: ...ng games 1 Flick down from the status bar to open the notification panel 2 Under Shortcuts touch Auto rotate to enable or disable the auto rotate screen function Taking a screenshot Want to share an interesting scene in a movie or show off your new high score in a game Take a screenshot and share away Press the power and volume down buttons simultaneously to take a screenshot Then open the notific...

Страница 18: ... You can then drag an application or widget to any fitting blank space Deleting an application or widget On the home screen touch and hold the application icon or widget you want to delete until is displayed Drag the unwanted application icon or widget to Creating a folder On the home screen drag one application on top another application to create a folder containing both applications Managing ho...

Страница 19: ...ady yellow when charging The battery level is medium Steady green when charging The battery is almost or already full Blinking green There are unread messages or notifications Notification panel Flick down from the status bar to open the notification panel Flick left or right to switch between the notifications and shortcuts tabs Touch to view the notification details and flick left or right acros...

Страница 20: ...isplay recently used applications Flick up on an application thumbnail to close it Flick up from the bottom on the screen until is displayed to close all the applications in the list Personalizing your phone Changing the home screen style Your phone supports the standard and simple home screen styles 1 On the home screen touch Settings Touch to delete all notifications Touch to expand or collapse ...

Страница 21: ...pers screen you can Touch Lock screen wallpaper to set the wallpaper displayed on the phone lock screen Touch Home screen wallpaper to set the home screen wallpaper Touch Home screen wallpaper to change the home screen wallpaper by shaking your phone Touch the Random change switch to have the home screen wallpaper changed automatically at periodic intervals Setting the ringtone 1 On the home scree...

Страница 22: ...with multiple text input methods You can quickly enter text using the onscreen keyboard Touch a text box to bring up the onscreen keyboard To hide the onscreen keyboard touch Selecting an input method 1 On the text input screen flick down from the status bar to open the notification panel 2 Under Notifications touch Choose input method 3 Select an input method To change your phone s default input ...

Страница 23: ...and uppercase letters Touch and hold to go to the input settings screen Touch to enter numbers and symbols Touch to enter a space Touch and hold to choose another language Touch to delete the character next to the cursor Touch and hold to quickly delete multiple characters next to the cursor 2 3 4 6 5 1 8 1 2 3 4 5 6 ...

Страница 24: ... on caps lock Touch to enter numbers and symbols Touch to use voice input Touch and hold to open the Input options menu Touch to enter a space Touch and hold to choose another input method Touch to enter a period Touch and hold to enter symbols Touch to delete the character to the left of the cursor Touch and hold to quickly delete multiple characters to the left of the cursor 1 2 3 4 5 6 1 2 3 4 ...

Страница 25: ...o bring up Then drag or to select more or less text or touch Select all to select all text in the text box Copy text Select text and touch Copy Cut text Select text and touch Cut Paste text Touch and hold where you want to insert the text drag to move the insertion point and touch Paste to paste the text you copied or cut ...

Страница 26: ... then displayed in a list 3 From the list select the contact you want to call If your phone supports dual cards touch or to make a call 4 To end the call touch Making a call from Contacts 1 On the home screen touch Dialer 2 Under Contacts touch the contact you want to call 3 Touch the contact number If your phone supports dual cards touch or to make a call Making a call from the call log 1 On the ...

Страница 27: ...network quality use environment service provider policies and local laws and regulations Never rely solely on your phone for critical communications when emergencies occur Speed dialing 1 On the home screen touch Dialer 2 Under Dialer touch Speed dial settings 3 Touch to choose a contact from the list and assign a number key to the contact The number key 1 is the default key for voicemail You can ...

Страница 28: ... Touch If your phone supports dual cards touch or Answering or rejecting a call When a call comes in you can press the volume button to mute the ringtone Drag right to answer the call Drag left to reject the call Drag up to reject the call and send the caller a message On the dialer screen touch Call settings Reject calls with SMS to edit the message that will be sent 1 2 ...

Страница 29: ...ute or unmute the microphone Touch to start a three way call Before you use three way calling make sure you have subscribed to this service For details contact your service provider Touch to use the speaker Touch to display the dialer Touch to end the call Touch to display your contacts Touch to write a note 6 7 9 8 1 3 4 2 5 1 2 3 4 5 6 7 8 ...

Страница 30: ...Making a conference call Making conference calls with your friends family and co workers is easy with your phone Call one number or receive a call and then call another number to add it to the conference call Before you make conference calls make sure that you have subscribed to this service For details contact your service provider 1 Call the first participant 2 When the call is connected touch t...

Страница 31: ...ing call records 1 On the home screen touch Dialer 2 Under Dialer you can Touch and hold a contact name or phone number and then touch Delete entry to delete the call record Touch Delete call log to delete multiple records simultaneously Turning on pocket mode Are you ever worried about missing important calls when your phone is in your pocket Pocket mode can help you out by increasing the rington...

Страница 32: ...ect a forwarding mode 5 Enter the phone number to which you want to forward calls and touch Enable Enabling call waiting The call waiting function lets you answer another incoming call when you are already busy in a call and switch between the two calls 1 On the home screen touch Dialer 2 Under Phone touch Call settings 3 Touch Additional settings If your phone supports dual cards touch CARD 1 SET...

Страница 33: ... Touch and hold the contact you want to edit and then touch Edit 3 Edit the contact information 4 Touch Deleting a contact 1 On the home screen touch Contacts 2 Touch Delete 3 Touch the contacts you want to delete or touch Select all to select all contacts 4 Touch 5 Touch Delete Searching for a contact 1 On the home screen touch Contacts 2 Enter the contact name or initials Matching contacts are d...

Страница 34: ...ts dual cards you can select which card you want to export your contacts to 3 Touch the contacts you want to import or touch Select all to select all contacts and then touch 4 Choose the location you want the contacts to be imported to Your phone will automatically import the contacts Importing contacts from a Bluetooth device 1 On the home screen touch Contacts 2 Touch Import Export Import from a...

Страница 35: ... Exporting contacts to a storage device 1 On the home screen touch Contacts 2 Touch Import Export Export to storage 3 Touch Export 4 Choose where you want to export the contacts from and touch OK To view the vcf file you just exported open Files By default the file is saved to the root directory of your phone s internal storage Exporting contacts to a SIM card 1 On the home screen touch Contacts 2...

Страница 36: ... to your favorites and then touch Add to favorites You can also touch Add to favorites on a contact details screen to add the contact to your favorites Contact groups You can create a contact group and send a message or email to all group members simultaneously Creating a contact group 1 On the home screen touch Contacts 2 Touch Groups then 3 Name the group and touch OK 4 Touch 5 Select contacts y...

Страница 37: ...roup name Sending messages or emails to a contact group 1 On the home screen touch Contacts 2 Touch Groups and select the contact group you want to send a message or email to 3 Touch to send a message or touch to send an email Deleting a contact group 1 On the home screen touch Contacts 2 Touch Groups 3 Touch and hold the contact group you want to delete and then touch Delete Deleting a contact gr...

Страница 38: ...ntact group 4 Touch the text field to write your message Touch to select an attachment type and then select the attachment you want to add The message will automatically turn into a multimedia message 5 Touch Replying to a message 1 On the home screen touch Messaging 2 In the list of message threads touch a contact name or phone number to view the conversation thread 3 Touch the text field to writ...

Страница 39: ...he home screen touch Messaging 2 In the list of message threads touch a contact name or phone number to view the conversation thread 3 Touch and hold the message you want to add to your favorites and touch Copy to Favorites In the list of message threads touch Favorites to view your favorite messages Deleting a message 1 On the home screen touch Messaging 2 In the list of message threads touch a c...

Страница 40: ...ail accounts touch Settings Add account on the Inbox screen Adding an Exchange account Exchange is an email system developed by Microsoft to implement communication inside an enterprise Some email service providers also provide Exchange accounts for individuals and families Certain parameters must be set when you add an Exchange email account For details contact your email service provider 1 On th...

Страница 41: ... and contents and touch to add an attachment 6 Touch Checking your emails 1 On the home screen touch Email 2 On the Inbox screen touch to select an email account 3 Touch the email you want to read You can then Touch to delete it Touch to reply to it Touch to reply to all Touch to forward it Flick left or right on the screen to read the previous or next email Mail retrieval may be slightly delayed ...

Страница 42: ...unt 1 On the home screen touch Email 2 On the Inbox screen touch Settings 3 Select the account you want to remove 4 Touch Remove account then OK After you remove an email account your phone will no longer send or receive emails using that account Personalizing your email account 1 On the home screen touch Email 2 On the Inbox screen touch Settings You can then Touch General to set the sender photo...

Страница 43: ...de Touch to view your photos and videos Touch and hold to take burst shots and release your finger to stop Touch to switch the filter Touch an object on the viewfinder to focus the camera on it Spread two fingers apart to zoom in or pinch them together to zoom out Touch to switch between the rear and front cameras 1 2 3 4 5 6 7 ...

Страница 44: ...l and beautify the face in the photo Panorama Widen the photo frame HDR Improve photos taken under insufficient or excessive light conditions Audio note Record a brief audio clip after you take a photo Best photo Your phone takes several photos in a row and automatically picks the best Watermark Add various watermarks on your photos Audio control Touch and enable this under Settings You can use vo...

Страница 45: ...ama to switch to panorama mode 3 Touch to start shooting 4 Follow the onscreen instructions and move your phone slowly to capture multiple photos 5 Touch to stop shooting The camera automatically stitches the photos together to create one panorama photo Using Best photo in continuous shooting 1 On the home screen touch Camera 2 Touch Best photo to switch to best photo mode 3 Touch to take several ...

Страница 46: ...king 1 On the home screen touch Camera 2 Touch 3 Touch Object tracking to turn on object tracking mode 4 Touch an object on the capture screen Your camera will keep it as the focus point while capturing a photo Object tracking can t be used with smile capture at the same time Shooting a video 1 On the home screen touch Camera 2 Flick left or right to touch Video 3 Touch to start video shooting 4 W...

Страница 47: ...ion Preferred save location Set the default save location for your photos and videos Internal storage or microSD card GPS tag Display the location where the photo or the video was taken ISO Set a photo s ISO Increasing the ISO can reduce blurring caused by dark conditions or movement White balance Adjust a photo s white balance according to the sunlight conditions Image adjustment Adjust a photo s...

Страница 48: ...ry 2 Touch the photo you want to edit and touch 3 You can then Touch to rotate the photo Touch to select a filter Touch to adjust the saturation color and more Touch to crop the photo Touch to add whitening smooth or other beautifying effects to faces Deleting a photo 1 On the home screen touch Gallery 2 Touch the photo you want to delete and touch Delete Sharing a photo or video You can share you...

Страница 49: ... or video flick up from the bottom of your screen to enable the free sharing mode and share the file with your friends through Bluetooth Setting a photo as the wallpaper 1 On the home screen touch Gallery 2 Choose the photo you want to set as the wallpaper 3 Touch Set as and follow the onscreen instructions to set the photo as the wallpaper ...

Страница 50: ... cable For details see MTP mode Downloading songs from the Internet Copying songs through Bluetooth For details see Receiving a file using Bluetooth Copying songs from other devices using Wi Fi Direct For details see Receiving a file using Wi Fi Direct Listening to music 1 On the home screen touch Music 2 Select a category 3 Touch the song you want to play Touch the playing song to enter the main ...

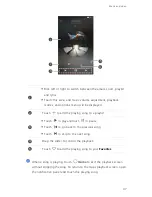
Страница 51: ...t or right to switch between the album cover playlist and lyrics Touch this area and music volume adjustment playback modes and options menu will be displayed Touch to add the playing song to a playlist Touch to play and touch to pause Touch to go back to the previous song Touch to skip to the next song Drag the slider to control the playback Touch to add the playing song to your Favorites 1 2 3 5...

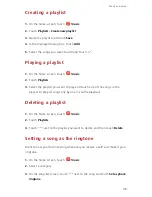
Страница 52: ...e playlist you want to play and touch one of the songs in the playlist or play all songs one by one in shuffle playback Deleting a playlist 1 On the home screen touch Music 2 Touch Playlists 3 Touch next to the playlist you want to delete and then touch Delete Setting a song as the ringtone Want to hear your favorite song whenever you receive a call Just make it your ringtone 1 On the home screen ...

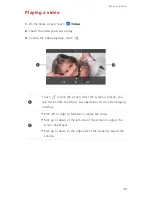
Страница 53: ... Touch to lock the screen After the screen is locked you will not be able to perform any operations on the video playing interface Flick left or right to forward or replay the video Flick up or down at the left side of the screen to adjust the screen brightness Flick up or down at the right side of the screen to adjust the volume 2 1 1 2 ...

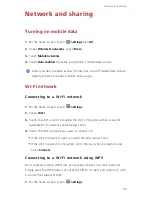
Страница 54: ...n the home screen touch Settings 2 Touch Wi Fi 3 Touch the Wi Fi switch to enable the Wi Fi Your phone then scans for available Wi Fi networks and displays them 4 Touch the Wi Fi network you want to connect to If the Wi Fi network is open you will directly connect to it If the Wi Fi network is encrypted enter the key when prompted and touch Connect Connecting to a Wi Fi network using WPS Wi Fi pro...

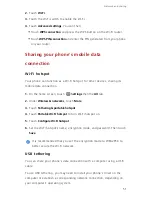
Страница 55: ...e screen touch Settings then the All tab 2 Under Wireless networks touch More 3 Touch Tethering portable hotspot 4 Touch Portable Wi Fi hotspot to turn Wi Fi hotspot on 5 Touch Configure Wi Fi hotspot 6 Set the Wi Fi hotspot s name encryption mode and password Then touch Save It is recommended that you set the encryption mode to WPA2PSK to better secure the Wi Fi network USB tethering You can shar...

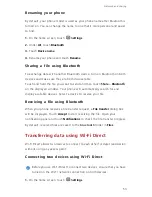
Страница 56: ...th 1 On the home screen touch Settings then the All tab 2 Under Wireless networks touch More 3 Touch Tethering portable hotspot 4 Touch Bluetooth tethering to share your mobile data connection Transferring data through Bluetooth Turning on Bluetooth and pairing your phone with another Bluetooth device 1 On the home screen touch Settings 2 Under All touch Bluetooth 3 Touch Turn on Bluetooth to turn...

Страница 57: ...ne will automatically search for and display available devices Select a device to receive your file Receiving a file using Bluetooth When your phone receives a file transfer request a File transfer dialog box will be displayed Touch Accept to start receiving the file Open your notification panel and touch Notifications to check the file transfer progress By default received files are saved to the ...

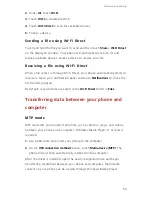
Страница 58: ...on panel and touch Notifications to check the file transfer progress By default received files are saved to the Wi Fi Direct folder in Files Transferring data between your phone and computer MTP mode MTP mode lets you transfer media files such as photos songs and videos between your phone and a computer Windows Media Player 11 or later is required 1 Use a USB cable to connect your phone to the com...

Страница 59: ...k HiSuiteDownLoader exe and follow the onscreen instructions to install HiSuite You can then manage your phone s data on the displayed HiSuite window USB flash drive mode If a microSD card is inserted into your phone you can use your phone as a USB storage device and transfer files between your phone and a computer 1 Use a USB cable to connect your phone to the computer 2 On the USB connection met...

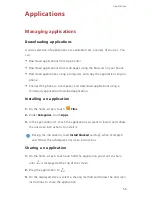
Страница 60: ...cation download application Installing an application 1 On the home screen touch Files 2 Under Categories touch Apps 3 In the application list touch the application you want to install and follow the onscreen instructions to install it During the installation read Install blocked carefully when prompted and follow the subsequent onscreen instructions Sharing an application 1 On the home screen tou...

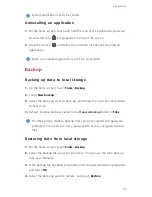
Страница 61: ...p 2 Touch New backup 3 Select the data you want to back up and follow the onscreen instructions to back it up By default backup data are saved to the HuaweiBackup folder in Files On some phone models backup files can be encrypted and password protected You need to enter a password to access encrypted backup files Restoring data from local storage 1 On the home screen touch Tools Backup 2 Select th...

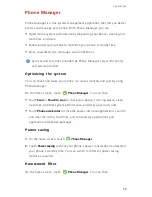
Страница 62: ... phone run more smoothly and quickly using Phone Manager On the home screen touch Phone Manager You can then Touch Scan or Touch to scan to check your phone s running status clean trash files optimize system performance and clear up security risks Touch Phone accelerator to close the power intensive applications scan for and clear the cache trash files and unnecessary applications and application ...

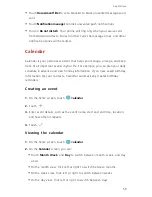
Страница 63: ...an plan your daily schedule in advance and view holiday information If you have saved birthday information for your contacts Calendar automatically creates birthday reminders Creating an event 1 On the home screen touch Calendar 2 Touch 3 Enter event details such as the event name start and end time location and how often it repeats 4 Touch Viewing the calendar 1 On the home screen touch Calendar ...

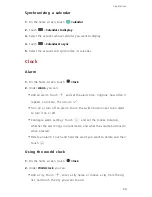
Страница 64: ... ringtone how often it repeats and more Then touch Turn on or turn off an alarm Touch the switch button next to an alarm to turn it on or off Configure alarm settings Touch and set the snooze duration whether the alarm rings in silent mode and what the volume buttons do when pressed Delete an alarm Touch and hold the alarm you want to delete and then touch Using the world clock 1 On the home scree...

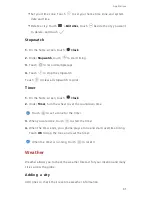
Страница 65: ... all stopwatch records Timer 1 On the home screen touch Clock 2 Under Timer turn the wheel to set the countdown time Touch to set a tone for the timer 3 When you are done touch to start the timer 4 When the timer ends your phone plays a tone and starts overtime timing Touch OK to stop the tone and reset the timer When the timer is running touch to reset it Weather Weather allows you to check the w...

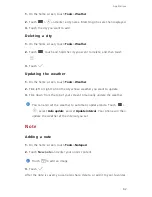
Страница 66: ...ols Weather 2 Flick left or right to find the city whose weather you want to update 3 Flick down from the top of your screen to manually update the weather You can also set the weather to automatic update mode Touch select Auto update and set Update interval Your phone will then update the weather at the interval you set Note Adding a note 1 On the home screen touch Tools Notepad 2 Touch New note ...

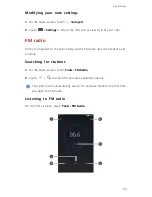
Страница 67: ...ct a headset to the phone because the FM radio uses the headset as its antenna Searching for stations 1 On the home screen touch Tools FM Radio 2 Touch to search for and save available stations Your phone will automatically search for and save stations the first time you open the FM radio Listening to FM radio On the home screen touch Tools FM Radio 1 2 4 5 3 6 ...

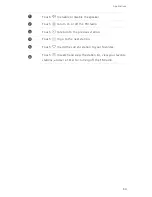
Страница 68: ...n or off the FM radio Touch to return to the previous station Touch to go to the next station Touch to add the current station to your favorites Touch to search and view the station list view your favorite stations and set a timer for turning off the FM radio 1 2 3 4 5 6 ...

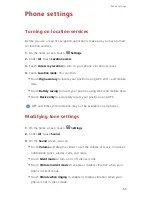
Страница 69: ...ate your position using Wi Fi and mobile data Touch Device only to accurately locate your position using GPS GPS and time synchronization may not be available on all phones Modifying tone settings 1 On the home screen touch Settings 2 Under All touch Sound 3 On the Sound screen you can Touch Volume and drag the sliders to set the volume of music ringtones notification tones alarms calls and more T...

Страница 70: ...r disable the screen saver If this function is enabled the screen saver will automatically run while your phone is being charged Touch Indicator light to enable or disable the blinking indicator when you receive notifications Touch Brightness to adjust the screen brightness Touch Color temperature to adjust the screen color temperature To manually adjust the color temperature clear the Default che...

Страница 71: ...ll phones Turning on the suspend button The suspend button contains a variety of useful functions and shortcuts which lets you quickly launch tools such as Calendar Messaging and Notes and quickly perform common functions like returning to the home screen and memory cleanup 1 On the home screen touch Settings then the All tab 2 Under Smart assistance touch More 3 Touch Suspend button 4 Touch Suspe...

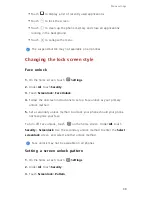
Страница 72: ... Touch Screen lock Face Unlock 4 Follow the onscreen instructions to set up Face unlock as your primary unlock method 5 Set a secondary unlock method to unlock your phone should your phone not recognize your face To turn off Face unlock touch on the home screen Under All touch Security Screen lock Use the secondary unlock method to enter the Select screen lock screen and select another unlock meth...

Страница 73: ... 3 Touch Screen lock Password 4 Enter at least four characters among which one should be a letter and then enter them again for confirmation Turning on or off airplane mode Your phone s signal reception or transmission may interfere with an airplane s flight system Power off your phone or switch to airplane mode as required when you are on a flight In airplane mode your phone s wireless features a...

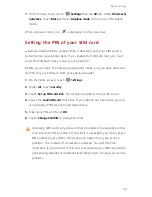
Страница 74: ...rovider 1 On the home screen touch Settings 2 Under All touch Security 3 Touch Set up SIM card lock If your phone supports dual cards touch 4 Select the Lock SIM card check box If your phone has dual cards you can set individual PINs for each card respectively 5 Enter your PIN and touch OK 6 Touch Change SIM PIN to change the PIN Generally SIM cards only allow a limited number of consecutive retri...

Страница 75: ...ctions to delete the account Turning on data synchronization 1 On the home screen touch Settings then the All tab 2 Under Accounts select an account type 3 Select the account you want to synchronize from 4 Touch the Sync email switch to turn on data synchronization Restoring factory settings Restoring your phone to the factory settings erases all your personal data from phone storage including inf...

Страница 76: ...rtant data before updating your phone Online update Before you perform updates on your phone ensure that your phone is connected to the network 1 On the home screen touch Settings 2 Under All touch Updater 3 Touch Check for updates Follow the onscreen instructions to download and install the updates if there is any Online update may incur excessive data usage fees It is recommended that you update...

Страница 77: ... Touch the Automatic time zone switch to use the network time zone or manually set the time zone Touch the Use 24 hour format switch to switch between 24 hour and 12 hour formats Touch Select date format to select how you want the date to be displayed Touch Dual clocks to display two clocks when you are using data roaming Manual date and time settings may not be provided by all service providers C...

Страница 78: ...cessibility You can turn on or off accessibility features such as zoom magnification and large font 1 On the home screen touch Settings 2 Under All touch Accessibility 3 Select the accessibility features you want to enable ...

Страница 79: ...by applicable laws or such actions are approved by respective copyright holders Trademarks and Permissions and are trademarks or registered trademarks of Huawei Technologies Co Ltd Android is a trademark of Google Inc LTE is a trade mark of ETSI The Bluetooth word mark and logos are registered trademarks owned by Bluetooth SIG Inc and any use of such marks by Huawei Technologies Co Ltd is under li...

Страница 80: ...mission tools outside of the control of Huawei To the greatest extent permitted by applicable law it is explicitly stated that Huawei shall not compensate or be liable for services provided by third party service providers or the interruption or termination of third party contents or services Huawei shall not be responsible for the legality quality or any other aspects of any software installed on...

Страница 81: ...R SUCH LOSSES ARE FORSEEABLE OR NOT THE MAXIMUM LIABILITY THIS LIMITATION SHALL NOT APPLY TO LIABILITY FOR PERSONAL INJURY TO THE EXTENT APPLICABLE LAW PROHIBITS SUCH A LIMITATION OF HUAWEI ARISING FROM THE USE OF THE PRODUCT DESCRIBED IN THIS MANUAL SHALL BE LIMITED TO THE AMOUNT PAID BY CUSTOMERS FOR THE PURCHASE OF THIS PRODUCT Import and Export Regulations Customers shall comply with all appli...

Страница 82: ...layout may vary All statements information and recommendations in this guide do not constitute a warranty of any kind express or implied Please visit http consumer huawei com en support hotline for recent updated hotline and email address in your country or region Model Che2 L11 Che2 L12 Che2 L23 V100R001_01 ...

Отзывы: