11
Select “Advance Setting” followed by any or both of the
Part-arm-I or II selections
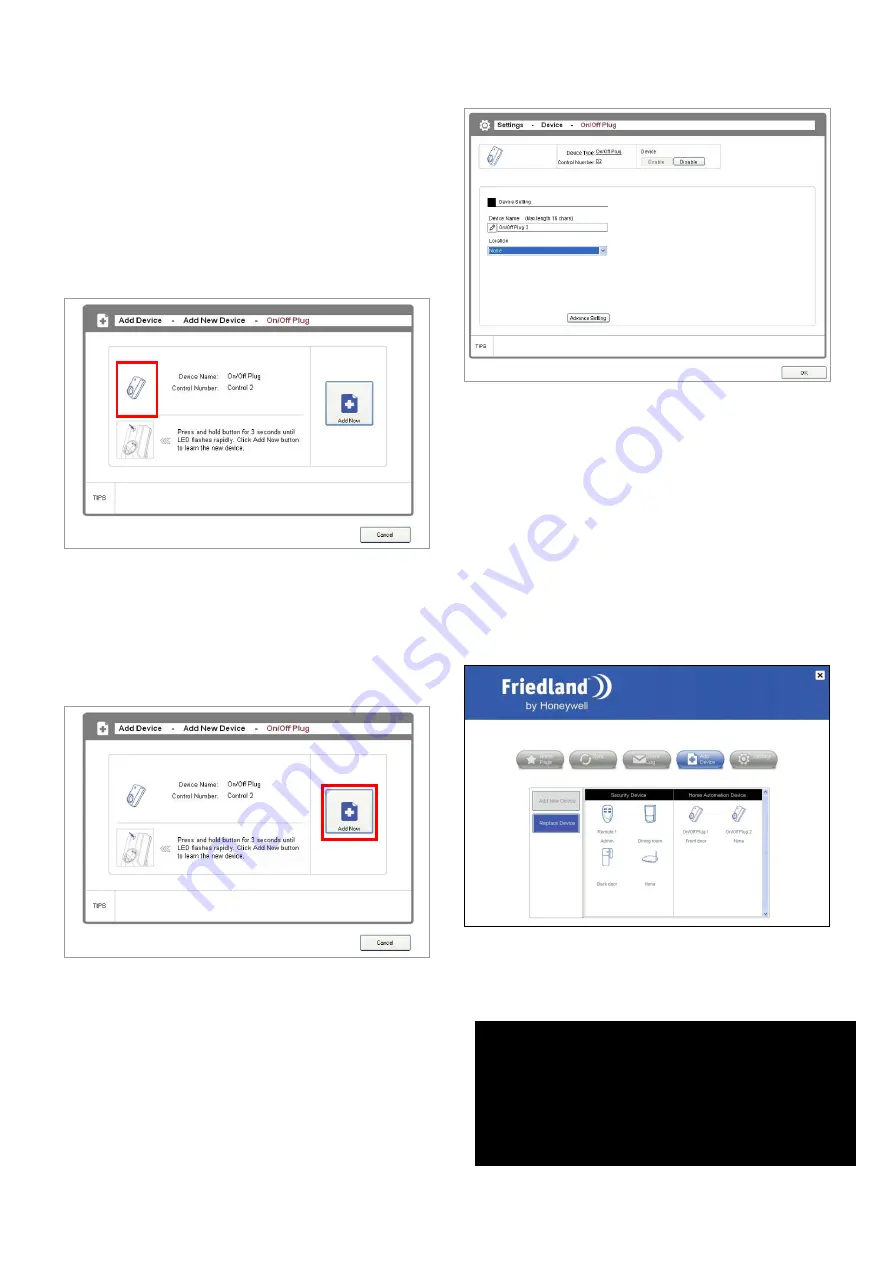
Example 2: Adding a Home Automation device:
1. Click on the On/Off Plug icon.
2. The system will display the code learning prompt.
3. Follow the on-screen instructions to set the selected
device into learning mode.
4. After the device is placed into learning mode, click
the [Add Now] button on the screen.
5. Wait until the Control Panel issues the learning code
command, and the code learning process for the
device is complete.
6. The Control Panel will issue test commands, and
you should see the selected lighting device go on and
off to demonstrate that code learning has been
properly completed.
7. The system will promptly bring up the device setting
window for you to configure the device’s properties.
2-5-2. Replace Device
When you click the [Replace Device] on the left side, all
existing devices will be displayed on the right panel. To
replace a device, simply click on an icon and follow the
screen prompts to complete the procedures. This
function is useful whenever a device has become faulty.
You can simply purchase the same device and use this
function to replace the faulty one without having to
make any configurations. The device will operate and
function according to your previous settings.
Example: Replacing a PIR movement detector.
CUSTOMER HELPLINE
Most issues can be solved over the phone in a few minutes.
Please contact our Helpline Team on the number below for any
installation and general advice regarding our products:
0844 736 9149
Lines open 9.00am to 5.00pm, Monday to Friday.
Calls charged at service providers national rate.


