background image

CONTINUED

When the system senses rainfall, it
turns on the windscreen wipers and
varies their speed (intermittent, low
speed, or high speed) depending on
how hard it is raining. This function
is available when the vehicle speed
exceeds 10 km/h (6 mph).

When the wiper lever is in the ‘‘LO’’
(low speed) or ‘‘HI’’ (high speed)
position, the windscreen wipers run
at that speed. Automatic sensing is
disabled.

The automatic intermittent wiper
system senses rainfall and
automatically turns on the
windscreen wipers. To enable
sensing, push the lever down to
select AUTO.

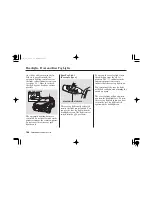
When you pull back on the wiper
control lever with the headlight
switch ON, the headlight washers
and windscreen washers work at the
same time.

The headlight washers use the same
fluid reservoir as the windscreen
washers.

On some types

Windscreen Wipers and Washers

Instruments and Controls

Automatic Intermittent Wipers

Headlight Washer
(For some types)

161

06/09/13 17:14:42 32SWA600_166

Содержание Cr-v 2007

Страница 1: ...pecifications or design at any time without notice and without incurring any obligation whatsoever Although this manual is applicable to both right hand and left hand drive models the illustrations contained in this manual mainly refer to the left hand drive models This illustrations of vehicles with diesel engine are noted by Diesel model This owner s manual covers all versions Therefore you may ...

Страница 2: ... read this owner s manual for proper and safe operation of your vehicle As you read this manual you will find information that is preceded by a symbol This information is intended to help you avoid damage to your vehicle other property or the environment On German type Mounting the front licence plate Mount the front licence plate to the provided holder taking care that the upper edge of the licen...

Страница 3: ... safety information in a variety of forms including on the vehicle preceded by a safety alert symbol and one of three signal words or These signal words mean such as Important Safety Reminders or Important Safety Precautions such as Driver and Passenger Safety how to use this vehicle correctly and safely This entire book is filled with important safety information please read it carefully A Few Wo...

Страница 4: ...ing Guidelines on page of this manual and the section on page Failure to operate this vehicle correctly might result in loss of control or an accident In many countries the law prohibits off road driving e g driving in forests trailblazing etc Please check your local laws and regulations before commencing any off road driving activity Your vehicle has higher ground clearance than a passenger vehic...

Страница 5: ...06 09 13 18 14 52 32SWA600_005 ...

Страница 6: ...to check them Tips on cleaning and protecting your vehicle This section covers several problems motorists sometimes experience and details how to handle them ID numbers dimensions capacities and technical information Important information about the proper use and care of your vehicle s seat belts an overview of the supplemental restraint system and valuable information on how to protect children w...

Страница 7: ...ithout navigation system is shown SUNSHADE SWITCH HEATING COOLING CONTROLS CLIMATE CONTROL SYSTEM AUDIO SYSTEM MIRROR CONTROLS ACCESSORY POWER SOCKET MANUAL TRANSMISSION AUTOMATIC TRANSMISSION HAZARD WARNING BUTTON P 14 32 P 212 P 178 P 208 P 333 P 335 AUXILIARY INPUT JACK P 275 P 218 MULTI INFORMATION DISPLAY INFORMATION DISPLAY P 100 P 104 P 277 P 210 P 14 32 P 171 P 245 P 228 235 P 354 P 358 06...

Страница 8: ...ADLIGHTS TURN SIGNALS FRONT FOG LIGHTS REAR FOG LIGHT CRUISE CONTROL BUTTONS HAZARD WARNING BUTTON P 274 P 379 173 VEHICLE STABILITY ASSIST VSA SYSTEM OFF SWITCH HEADLIGHT ADJUSTER P 174 P 170 WINDSCREEN WIPERS WASHERS HEADLIGHT WASHERS P 161 P 160 P 171 P 282 REAR WINDOW DEMISTER HEATED MIRROR BUTTON P 171 213 P 164 167 166 VSA SYSTEM OFF SWITCH P 169 P 379 ADAPTIVE FRONT LIGHTING SYSTEM AFS OFF ...

Страница 9: ...EM OFF SWITCH P 379 CMBS OFF SWITCH P 169 ADAPTIVE FRONT LIGHTING SYSTEM AFS OFF SWITCH P 371 HANDS FREE TELEPHONE SYSTEM BUTTONS P 310 TILT TELESCOPIC ADJUSTMENT P 174 DISTANCE BUTTON P 296 P 164 REAR FOG LIGHT FRONT FOG LIGHTS P 166 167 REAR WINDOW DEMISTER HEATED MIRROR BUTTON P 171 213 AUDIO SYSTEM P 160 P 161 INSTRUMENT PANEL BRIGHTNESS P 170 P 171 VOICE CONTROL BUTTONS CRUISE CONTROL BUTTONS...

Страница 10: ...ROLS POWER DOOR LOCK MASTER SWITCH POWER WINDOW SWITCHES FUEL FILL DOOR RELEASE HANDLE CLIMATE CONTROL SYSTEM AUTOMATIC TRANSMISSION P 171 P 14 32 P 277 CLOCK AUDIO SYSTEM P 245 P 228 235 P 354 P 358 ACCESSORY POWER SOCKET SUNSHADE SWITCH P 210 INFORMATION DISPLAY P 100 P 104 P 212 P 178 P 208 P 333 P 335 P 14 32 P 275 AUXILIARY INPUT JACK P 218 MULTI INFORMATION DISPLAY HEATING COOLING CONTROLS 0...

Страница 11: ...NDSCREEN WIPERS WASHERS HAZARD WARNING BUTTON ADAPTIVE FRONT LIGHTING SYSTEM AFS OFF SWITCH VSA SYSTEM OFF SWITCH P 171 REAR WINDOW DEMISTER HEATED MIRROR BUTTON P 171 213 P 164 166 167 P 170 P 160 HEADLIGHT WASHERS P 161 VEHICLE STABILITY ASSIST VSA SYSTEM OFF SWITCH HEADLIGHT ADJUSTER P 379 173 P 174 CRUISE CONTROL BUTTONS P 282 HEADLIGHTS TURN SIGNALS REAR FOG LIGHT FRONT FOG LIGHTS REMOTE AUDI...

Страница 12: ... 213 P 174 VOICE CONTROL BUTTONS HANDS FREE TELEPHONE BUTTONS P 310 REMOTE AUDIO CONTROL BUTTONS P 274 P 296 DISTANCE BUTTON WINDSCREEN WIPERS WASHERS HEADLIGHT WASHERS P 161 P 170 P 379 ADAPTIVE FRONT LIGHTING SYSTEM AFS OFF SWITCH P 169 CMBS OFF SWITCH P 371 CRUISE CONTROL BUTTONS MULTI INFORMATION BUTTONS P 105 INSTRUMENT PANEL BRIGHTNESS P 160 TILT TELESCOPIC ADJUSTMENT ADAPTIVE CRUISE CONTROL...

Страница 13: ...8 06 09 13 18 15 55 32SWA600_013 ...

Страница 14: ... How Your Front Airbags Work 32 How Your Side Airbags Work 34 How Your Side Curtain Airbags Work 34 How the SRS Indicator Works 35 Airbag Service 37 Additional Safety Precautions 37 Protecting Children General Guidelines 39 All Children Must Be Restrained 39 All Children Should Sit in a Back Seat 40 The Passenger s Front Airbag Poses Serious Risks 40 The Side Airbag Poses Serious Risks 43 If You M...

Страница 15: ...isk Be sure to follow all instructions and warnings in this manual Alcohol and driving don t mix Even one drink can reduce your ability to respond to changing conditions and your reaction time gets worse with every additional drink So don t drink and drive and don t let your friends drink and drive either Excessive speed is a major factor in crash injuries and deaths Generally the higher the speed...

Страница 16: ...our part These include a strong steel framework that forms a safety cage around the passenger compartment front and rear crush zones a collapsible steering column and tensioners that tighten the front seat belts in a crash Your Vehicle s Safety Features Driver and Passenger Safety always wear your seat belts 11 2 2 5 1 3 4 9 9 11 7 11 10 8 6 11 Outer Lap Tensioners 1 Safety Cage 2 Crush Zones 3 Se...

Страница 17: ... you in almost every type of crash including frontal side and rear impacts and rollovers Help keep you from being thrown against the inside of the vehicle and against other occupants Keep you from being thrown out of the vehicle Help keep you in a good position should the airbags ever deploy A good position reduces the risk of injury from an inflating airbag and allows you to get the best advantag...

Страница 18: ...the lap section of the belt across the abdominal area must be avoided Seat belts should be adjusted as firmly as possible consistent with comfort to provide the protection for which they have been designed A slack belt will greatly reduce the protection afforded to the wearer Belts should not be worn with straps twisted Each belt assembly must only be used by one occupant it is dangerous to put a ...

Страница 19: ...of the driver or a front seat passenger during a moderate to severe side impact see page for more information on how your side airbags work In addition your vehicle has side curtain airbags to help protect the heads of the driver front passenger and passengers in the outer rear seating positions during a moderate to severe side impact or rollover see page for more information on how your side curt...

Страница 20: ...mber however that no safety system can prevent all injuries or deaths that can occur in a severe crash even when seat belts are properly worn and the airbags deploy To do their job airbags must inflate with tremendous force So while airbags help save lives they can cause minor injuries or more serious or even fatal injuries if occupants are not properly restrained or sitting properly Your Vehicle ...

Страница 21: ...e tailgate is not tightly closed The above illustration shows that all doors and the tailgate are open See page for how the monitor display works After everyone has entered the vehicle be sure the doors and the tailgate are closed Your vehicle has a door and tailgate open monitor on the instrument panel to indicate when a specific door or the tailgate is not tightly closed See page for how the doo...

Страница 22: ... and in and out see page If you cannot get far enough away from the steering wheel and still reach the controls we recommend that you investigate whether some type of adaptive equipment may help Once your manual seat is adjusted correctly rock it back and forth to make sure it is locked into position See page for how to adjust the front seats 174 189 Protecting Adults and Teens Driver and Passenge...

Страница 23: ...ver s seat back to a comfortable upright position leaving ample space between your chest and the airbag cover in the centre of the steering wheel Adjust the driver s head restraint so the back of your head rests against the centre of the restraint Have passengers adjust their head restraints properly as well Taller persons should adjust their restraint as high as possible 188 Adjust the Seat Backs...

Страница 24: ...lt can cause serious injuries in a crash The seat belt in the centre position of the back seat can be unlatched and retracted to allow the back seat to be folded up or down This seat belt should be latched whenever the seat back is in an upright position See page for how to unlatch and relatch the seat belt 192 199 CONTINUED Protecting Adults and Teens Driver and Passenger Safety Fasten and Positi...

Страница 25: ...ash over the strongest bones in your upper body If the seat belt touches or crosses your neck or if it crosses your arm instead of your shoulder you need to adjust the seat belt anchor height The front seats have adjustable seat belt anchors To adjust the height of an anchor press and hold the release buttons and slide the anchor up or down as needed it has four positions Driver and Passenger Safe...

Страница 26: ...eat belt does not seem to work as it should it may not protect the occupant in a crash Using a seat belt that is not working properly can result in serious injury or death Have your dealer check the belt as soon as possible See page for additional information about your seat belts and how to take care of them In a front passenger leans sideways and his head is in the deployment path of the side ai...

Страница 27: ...front airbag Each time you have a checkup ask your doctor if it s okay for you to drive A passenger who is not wearing a seat belt during a crash or emergency stop can be thrown against the inside of the vehicle against other occupants or out of the vehicle If they do they could be very seriously injured in a crash If they do they could be very seriously injured in a crash Advice for Pregnant Wome...

Страница 28: ...the airbags or be propelled inside the vehicle and hurt someone if the airbags inflate If a side airbag or a side curtain airbag inflates a cup holder or other hard object attached on or near the door could be propelled inside the vehicle and hurt someone This could result in injuries if your side curtain airbags inflate Protecting Adults and Teens Driver and Passenger Safety Do not put any access...

Страница 29: ...turned to the ON II position If either the driver or a front passenger does not fasten their seat belt while driving the beeper will sound and the indicator will flash again at regular intervals The seat belt system includes an indicator on the instrument panel and a beeper to remind you and your passengers to fasten your seat belts On vehicles with collision mitigation brake system CMBS the front...

Страница 30: ...splay and page on vehicles with information display The front passenger s seat belt use monitoring system uses the occupant detection sensor in the front passenger s seat The system may not work properly under these conditions To fasten the belt insert the latch plate into the buckle then tug on the belt to make sure the buckle is latched see page for how to properly position the belt The front pa...

Страница 31: ...nt see page If the shoulder part of the belt is pulled all the way out the lockable retractor will activate The belt will retract but it will not allow the passenger to move freely To deactivate the lockable retractor unlatch the buckle and let the seat belt fully retract To refasten the seat belt pull it out only as far as needed The lap shoulder belt in the centre seating position on the rear se...

Страница 32: ... can also be activated during a collision in which the front airbags In this case the airbags would not be needed but the additional restraint could be helpful If a side airbag or side curtain airbag deploys during a side impact the tensioner on that side of the vehicle will also deploy If there is no passenger on the front passenger s seat and the seat belt is not fastened the front passenger s a...

Страница 33: ...rce to properly restrain you and your front passenger After they activate the e pretensioners release the retracted seat belts To get the full benefit of the e pretensioners you and your front passenger must sit normally in your seats and wear your seat belts properly see page The e pretensioners do not activate when the seat belts are not worn or when the vehicle stability assist VSA off indicato...

Страница 34: ... if needed If the automatic seat belt tensioners activate during a crash they must be replaced 469 It is essential to replace the entire assembly after it has been worn in a severe impact even if damage to the assembly is not obvious Care should be taken to avoid contamination of the webbing with polishes oils and chemicals and particularly battery acid Cleaning may safely be carried out using mil...

Страница 35: ...ons Front Seat Additional Information About Your Seat Belts Driver and Passenger Safety Anchorage Points 30 Not checking or maintaining seat belts can result in serious injury or death if the seat belts do not work properly when needed Check your seat belts regularly and have any problem corrected as soon as possible 06 09 13 18 18 51 32SWA600_035 ...

Страница 36: ...iver and front passenger seat belt use when the ignition switch is in the ON II position Sensors that can detect whether the driver s seat belt and a front passenger s seat belt is latched or unlatched see page Sensors that can detect a moderate to severe front impact side impact or a rollover Front seat belt e pretensioners see page An indicator on the instrument panel that alerts you to a possib...

Страница 37: ...a frontal crash your seat belt restrains your lower body and torso and the front airbag helps protect your head and chest Although both airbags normally inflate within a split second of each other it is possible for only one airbag to deploy This can happen if the severity of a collision is at the margin or threshold that determines whether or not the airbags will deploy In such cases the seat bel...

Страница 38: ...e the quickest and greatest protection In a crash one stage will ignite first then the second stage will ignite a split second later This provides longer airbag inflation time with a little less force Your front airbags are also dual threshold airbags Airbags with this feature have two deployment thresholds that depend on whether sensors detect the occupant is wearing a seat belt or not If the occ...

Страница 39: ...injure a child For the information of the side airbags hazards see pages and In a moderate to severe side impact sensors will detect rapid acceleration and signal the control unit to instantly inflate the side curtain airbag and activate the seat belt tensioner on the driver s or the passenger s side of the vehicle If you ever have a moderate to severe side impact sensors will detect rapid acceler...

Страница 40: ... control unit which immediately deploys both side curtain airbags and activates both front seat belt tensioners The airbag on the passenger s side will deploy and the seat belt tensioner will activate even if there are no passengers on that side of the vehicle This indicator also alerts you to a possible problem with the seat belt e pretensioners When you turn the ignition switch to the ON II posi...

Страница 41: ... comes on or flashes on and off while you drive If the indicator stays on after the engine starts If the SRS indicator does not come on after you turn the ignition switch to the ON II position 125 On vehicles with multi information display Additional Information About Your Airbags Driver and Passenger Safety 36 Ignoring the SRS indicator can result in serious injury or death if the airbag systems ...

Страница 42: ...te properly Handling is allowed by trained personnel only It is prohibited to remove the airbag unit belt tensioner from the vehicle In case of malfunction shutdown or after airbag inflation belt tensioner operation you have to ask a qualified shop for repair or removal Any airbag that has deployed must be replaced along with the control unit and other related parts Any seat belt tensioner that ac...

Страница 43: ...ing or covering front seat back covers can prevent your side airbags from inflating during a side impact Do not expose the front seat backs to liquid Do not cover or replace front seat back covers without consulting your dealer Additional Information About Your Airbags Driver and Passenger Safety 38 06 09 13 18 19 54 32SWA600_043 ...

Страница 44: ...d injuries infants and children should be properly restrained when they ride in a vehicle see pages see pages 39 65 67 71 properly CONTINUED All Children Must Be Restrained Infants and small children must be restrained in an approved child restraint system that is properly secured to the vehicle Larger children must be restrained with a lap shoulder belt and ride on a booster seat until the seat b...

Страница 45: ...quirements According to crash statistics children of all ages and sizes are safer when they are restrained in a back seat It is recommended that all children age 12 and under be properly restrained in a back seat Front airbags have been designed to help protect adults in a moderate to severe frontal collision To do this the passenger s front airbag is quite large and it can inflate with enough for...

Страница 46: ...ack seat in a booster seat if needed and be properly restrained with a seat belt see page for important information about protecting larger children In all cases observe the legal requirements of the countries in which you will drive 67 CONTINUED Small Children Larger Children Placing a front facing child restraint system in the front seat of a vehicle equipped with a passenger s front airbag can ...

Страница 47: ...passenger s doorjamb and on the front passenger s sun visor Please read and follow the instructions on these labels Protecting Children General Guidelines Driver and Passenger Safety 42 DO NOT place rear facing child seat on this seat with airbag DEATH OR SERIOUS INJURY can occur Extreme Hazard DO NOT use a rearward facing child restraint on a seat protected by an airbag in front of it 06 09 13 18...

Страница 48: ...a child To remind you of the side airbags hazards and that children must be properly restrained in the back seat your vehicle has the safety label on each front doorjamb The Side Airbag Poses Serious Risks Protecting Children General Guidelines Driver and Passenger Safety 43 Leaning over the front door can result in serious injury or death if the side airbag inflates Always sit upright with their ...

Страница 49: ...hild is large enough to wear the lap shoulder belt properly see page Move the vehicle seat as far to the rear as possible see page Have the child sit upright and well back in the seat see page Make sure the seat belt is properly positioned and secured see page If you are not wearing a seat belt in crash you could be thrown forward and crush the child against the dashboard or a seat back If you are...

Страница 50: ...n switch can accidentally set the vehicle in motion possibly injuring themselves or others Children who play in vehicles can accidentally get trapped inside Teach your children not to play in or around vehicles 59 62 181 Use the main power window switch to prevent children from opening the windows Using this feature will prevent children from playing with the windows which could expose them to haz...

Страница 51: ...jure an infant Only a rearward facing child restraint system provides proper support for a baby s head neck and back Two types of restraints may be used a restraint system designed exclusively for infants or a convertible restraint system used in the rearward facing reclining mode For EU countries refer to page for the recommended child restraint system If placed facing forward an infant could be ...

Страница 52: ... child restraint system If the passenger s front airbag inflates it can hit the rearward facing child restraint system with great force The rearward facing child restraint system can be dislodged or struck with enough force to cause very serious injury to the infant Protecting Infants and Small Children Driver and Passenger Safety 47 DO NOT place rear facing child seat on this seat with airbag DEA...

Страница 53: ...ng airbag can strike the child with enough force to cause very serious or fatal injuries If it is necessary to put a front facing child restraint system in the front move the vehicle seat as far to the rear as possible and be sure the child restraint system is firmly secured to the vehicle and the child is properly strapped in the restraint system 52 Protecting Small Children Child Restraint Syste...

Страница 54: ...ld restraint system with a rigid rather than a flexible anchor see page In EU countries a child restraint system with a flexible anchor is not available In seating positions and vehicles not equipped with lower anchorages system a lower anchorages system compatible child restraint system can be installed using a seat belt Conventional child restraint systems must be secured to a vehicle with a sea...

Страница 55: ...at you test the restraint system in the specific vehicle seating position or positions where the child restraint system will be used For EU countries refer to page for the recommended child restraint system 52 The child restraint system should be of the proper type and size to fit the child The child restraint system should fit the vehicle seating position or positions where it will be used 3 2 Se...

Страница 56: ... vehicle with the lap part of a lap shoulder belt or with the lower anchorages system A child whose restraint system is not properly secured to the vehicle can be endangered in a crash Make sure the child is properly strapped in the child restraint system according to the child restraint system maker s instructions A child who is not properly secured in a child restraint system can be seriously in...

Страница 57: ...on not suitable for children in this mass group Suitable for universal category child restraints approved for use in this mass group For group I the front facing genuine Honda ISO FIX child restraint system is available from your dealer Adjust the front seat forward to 30 mm 3 notches from its rearmost position U X IL IUF 1 2 Seating Position Rear passenger Centre Honda BABY SAFE IL Honda BABY SAF...

Страница 58: ...the lower anchorages Your vehicle has the manual adjustable rear seat To install a child restraint system in any seating position on the rear seat slide the rear seat as far back as it can go 54 Installing a Child Restraint System Driver and Passenger Safety 53 The use of any child restraint system which is not suitable for your vehicles would not properly secure the infant or child who could ther...

Страница 59: ...ther of the rear outer seats Store the seat belt buckle or tongue in the storage pockets When you install a child restraint system in the rear centre seating position use the centre lower anchorages as shown in the illustration To install a child restraint system in either outer seating position use the outer lower anchorages You can install up to two child restraint systems at a time using the ou...

Страница 60: ...er s instructions Attach the guide cups to the lower anchorages as shown in the illustration Make sure there are no objects near the anchorages that could prevent a secure connection between the child restraint system and the anchorages You may use optional guide cups that came with your child restraint system to install it to the lower anchorages without damaging the seat surface 4 3 2 CONTINUED ...

Страница 61: ...should be routed in EU countries Set the head restraint to its highest position Route the tether strap over the seat back through the outsides of the head restraint legs then attach the attaching clip to the tether anchor fitting in the ceiling as shown in the illustration Make sure the strap is not twisted then tighten the strap according to the child restraint system maker s instructions 5 7 6 I...

Страница 62: ...On some child restraint types route the tether strap between the legs of the head restraint as shown Follow step 1 through 5 as described previously to secure the child restraint system 8 1 CONTINUED Installing a Child Restraint System Driver and Passenger Safety Using the Centre Lower Anchorages 57 ATTACHING CLIP TETHER ANCHOR FITTING COVER TETHER ANCHOR FITTING CENTRE LOWER ANCHORAGES 06 09 13 1...

Страница 63: ...strap over the seat back then attach the attaching clip to the tether anchor fitting in the centre of the ceiling making sure the strap is not twisted Tighten the strap according to the child restraint system maker s instructions On some child restraint system route the tether strap over the head restraint as shown Push and pull the child restraint system forward and from side to side to verify th...

Страница 64: ...ke sure the detachable seat belt anchor is securely latched see page Place the child restraint system in the desired back seating position Make sure the child restraint is positioned well back in the seat back The procedures in the following pages are described based on a front facing child restraint system available in EU countries For EU countries refer to page for installing a child restraint s...

Страница 65: ...the belt is locked you will not be able to pull it out If you can pull the belt out it is not locked and you will need to repeat these steps After confirming that the belt is locked grab the shoulder part of the belt near the buckle and pull up to remove any slack from the lap part of the belt Remember if the lap part of the belt is not tight the child restraint system will not be secure 4 3 5 6 I...

Страница 66: ...lt allow it to retract fully then repeat these steps To remove slack it may help to put weight on the child restraint system or push on the back of the restraint system while pulling up on the belt Secure the belt in the slit by pushing up the tab Make sure the belt is not twisted and it is positioned properly in the slit 8 7 Driver and Passenger Safety Installing a Child Restraint System 61 06 09...

Страница 67: ... you secure a child restraint system with a lap shoulder belt be sure you install a locking clip on the seat belt see page 63 On vehicles without lockable retractor fitted to the seat where the child is positioned Installing a Child Restraint System Driver and Passenger Safety Except for European models 62 LOCKING CLIP 06 09 13 18 23 04 32SWA600_067 ...

Страница 68: ...straint system is firmly secured to the vehicle and the child is properly strapped in the restraint system see page A locking clip is usually included with the child restraint system If you need a clip contact the seat s manufacturer or a store that sells child restraints Always use a seat belt locking clip when you secure a child restraint system to your vehicle with a lap shoulder belt This help...

Страница 69: ...ystem with a tether can be installed in any seating position in the back seat using one of the anchor points shown in the illustration After properly securing the child restraint system see page or route the tether strap over the seat back and on both sides of the head restraint as shown The above illustration shows how the tether strap should be routed in EU countries 1 59 54 Installing a Child R...

Страница 70: ...int to the lowest position After properly securing the child restraint system see page open the anchor cover On some child restraint types route the tether strap between the legs of the head restraint as shown 2 3 1 2 59 CONTINUED Installing a Child Restraint System Driver and Passenger Safety Using the Centre Anchor 65 ATTACHING CLIP ANCHOR FITTING TETHER ANCHOR FITTING COVER 06 09 13 18 23 32 32...

Страница 71: ...ap according to the child restraint system maker s instructions On some child restraint system route the tether strap over the head restraint as shown 3 4 Child restraint anchorages are designed to withstand only those loads imposed by correctly fitted child restraints Under no circumstances are they to be used for adult seat belts harnesses or for attaching other items or equipment to the vehicle...

Страница 72: ...who must sit in front Protecting Larger Children Driver and Passenger Safety 67 Allowing a child age 12 or under to sit in front can result in injury or death if the passenger s front airbag inflates If a child must ride in front move the vehicle seat as far back as possible use a booster seat if needed have the child sit up properly and wear the seat belt properly Leaning over the front door can ...

Страница 73: ...s Will the child be able to stay seated like this for the whole trip If you answer yes to all these questions the child is ready to wear the lap shoulder belt correctly If you answer no to any question the child needs to ride on a booster seat A child who has outgrown a front facing child restraint system should ride in a back seat and use a booster seat until the lap shoulder belt fits them prope...

Страница 74: ...ollow the booster seat maker s instructions If a child who uses a booster seat must ride in front move the vehicle seat as far back as possible and be sure the child is wearing the seat belt properly A back rest may be available for a specific booster seat Install the back rest to the booster seat and adjust it to the vehicle seat according to the booster seat maker s instructions Make sure the se...

Страница 75: ...e the vehicle seat to the rear most position Have the child sit up straight back against the seat and feet on or near the floor Check that the child s seat belt is properly and securely positioned It is recommended that all children age 12 and under be properly restrained in the back seat Physically a child must be large enough for the lap shoulder belt to properly fit see pages and If the seat be...

Страница 76: ...child s comfort or reposition the shoulder part of a seat belt can make the belt less effective and increase the chance of serious injury in a crash Additional Safety Precautions Do not let a child wear a seat belt across the neck Do not let a child put the shoulder part of a seat belt behind the back or under the arm Two children should never use the same seat belt Do not put any accessories on a...

Страница 77: ...damaged the underside Select the fresh air mode Select the mode Turn the fan on high speed Set the temperature control to a comfortable setting With the tailgate open airflow can pull exhaust gas into your vehicle s interior and create a hazardous condition If you must drive with the tailgate open open all the windows and set the heating and cooling system climate control system as shown below If ...

Страница 78: ... of the bonnet CONTINUED Safety Labels Driver and Passenger Safety 73 Follow service manual instructions carefully Safety alert symbol SRS Airbag SRS Airbag SRS AIRBAG SIDE AIRBAG EXPANSION TANK CAP DANGER LABEL Diesel models CHILD SAFETY SRS AIRBAG Left hand drive type CHILD SAFETY SRS AIRBAG Right hand drive type CHILD SAFETY RADIATOR CAP DANGER LABEL BATTERY DANGER LABEL DUAL DECK LUGGAGE SHELF...

Страница 79: ...acing the injectors your authorized dealer should perform this work Contact your dealer The label shown below is attached to the left side on the dual deck luggage shelf On vehicles with dual deck luggage shelf On Diesel models Safety Labels Driver and Passenger Safety 74 Safety alert symbol Follow owner s manual instructions carefully Side Airbag 06 09 13 18 24 48 32SWA600_079 ...

Страница 80: ... Keys and Locks 175 Immobilizer System 176 Ignition Switch 177 Door Locks 178 Power Door Locks 178 Super Locking 180 Childproof Door Locks 181 Remote Transmitter 182 Tailgate 186 Seats 188 Driver s Seat Power Adjustments 188 Manual Seat Adjustments 189 Driver s Seat Height Adjustment 190 Armrests 191 Head Restraints 192 Reclining the Front Seats 194 Folding the Rear Seats Down 195 Folding the Rear...

Страница 81: ...S SEAT HEATER SWITCHES SUNSHADE SWITCH AUDIO SYSTEM HAZARD WARNING BUTTON INFORMATION DISPLAY BONNET RELEASE HANDLE MULTI INFORMATION DISPLAY P 104 P 100 P 212 P 178 P 208 P 335 MANUAL TRANSMISSION AUTOMATIC TRANSMISSION P 201 AUXILIARY INPUT JACK P 275 P 218 P 354 P 358 HEATING COOLING CONTROLS P 228 P 210 P 171 CLOCK P 277 P 245 CLIMATE CONTROL SYSTEM P 235 P 333 ACCESSORY POWER SOCKET 06 09 13 ...

Страница 82: ...LE Vehicle without navigation system is shown AUDIO SYSTEM AUTOMATIC TRANSMISSION INFORMATION DISPLAY SEAT HEATER SWITCHES ACCESSORY POWER SOCKET SUNSHADE SWITCH P 171 CLOCK P 277 P 171 HEATING COOLING CONTROLS CLIMATE CONTROL SYSTEM P 228 P 235 MANUAL TRANSMISSION P 354 P 358 P 275 P 218 P 201 P 335 P 333 P 208 P 178 P 212 P 100 P 104 MULTI INFORMATION DISPLAY P 210 AUXILIARY INPUT JACK 06 09 13 ...

Страница 83: ...L INDICATOR AMBER ANTI LOCK BRAKE SYSTEM INDICATOR SEAT BELT REMINDER INDICATOR CRUISE CONTROL MAIN INDICATOR CRUISE CONTROL INDICATOR IMMOBILIZER SYSTEM INDICATOR PARKING SENSOR INDICATORS DOOR AND TAILGATE OPEN MONITOR CHARGING SYSTEM INDICATOR REAR SEAT BELT USE MONITOR LOW OIL PRESSURE INDICATOR RED PARKING BRAKE AND BRAKE SYSTEM INDICATOR SECURITY SYSTEM INDICATOR P 91 VSA ACTIVATION INDICATO...

Страница 84: ...ION BRAKE SYSTEM CMBS INDICATOR CHARGING SYSTEM INDICATOR ANTI LOCK BRAKE SYSTEM INDICATOR LOW FUEL INDICATOR SECURITY SYSTEM INDICATOR LOW OIL PRESSURE INDICATOR VEHICLE STABILITY ASSIST VSA SYSTEM INDICATOR VSA ACTIVATION INDICATOR SEAT BELT REMINDER INDICATOR IMMOBILIZER SYSTEM INDICATOR SYSTEM MESSAGE INDICATOR SUPPLEMENTAL RESTRAINT SYSTEM INDICATOR ELECTRIC POWER STEERING EPS INDICATOR P 89 ...

Страница 85: ... INDICATOR HIGH BEAM INDICATOR LOW FUEL INDICATOR CHARGING SYSTEM INDICATOR LIGHT CONTROL INDICATOR PGM FI INDICATOR LOW OIL PRESSURE INDICATOR RED OIL LEVEL INDICATOR AMBER VSA ACTIVATION INDICATOR CRUISE CONTROL INDICATOR WATER IN FUEL FILTER INDICATOR ANTI LOCK BRAKE SYSTEM INDICATOR VEHICLE STABILITY ASSIST VSA SYSTEM INDICATOR SEAT BELT REMINDER INDICATOR SUPPLEMENTAL RESTRAINT SYSTEM INDICAT...

Страница 86: ...T FOG LIGHT INDICATOR HIGH BEAM INDICATOR LOW FUEL INDICATOR COLLISION MITIGATION BRAKE SYSTEM CMBS INDICATOR LOW OIL PRESSURE INDICATOR ANTI LOCK BRAKE SYSTEM INDICATOR SEAT BELT REMINDER INDICATOR SUPPLEMENTAL RESTRAINT SYSTEM INDICATOR VEHICLE STABILITY ASSIST VSA SYSTEM INDICATOR IMMOBILIZER SYSTEM INDICATOR SECURITY SYSTEM INDICATOR GLOW PLUGS INDICATOR CHARGING SYSTEM INDICATOR P 89 P 94 P 9...

Страница 87: ...age You will also see the symbol or this symbol with a CHECK SYSTEM message on the multi information display see page If either the driver or a front passenger does not fasten their seat belt while driving the beeper will sound and the indicator will flash again at regular intervals For more information see page You will also see the symbol for a driver for a front passenger or this symbol with a ...

Страница 88: ...ation of each seat belt retractor The highlighted indicators show you how many rear seat belts are being used and remind you and your passengers to fasten their seat belts 115 On vehicles with information display On vehicles with multi information display Instrument Panel Indicators Instruments and Controls Rear Seat Belt Use Monitor 83 The seat belt indicator system judges the use of the seat bel...

Страница 89: ... oil level indicator and keep driving with this indicator on you can seriously damage the engine You will also see the symbol or this symbol with an OIL PRESSURE LOW message on the multi information display see page If this indicator comes on when the engine is running the battery is not being charged For more information see page You will also see the symbol or this symbol with a CHECK SYSTEM mes...

Страница 90: ...a problem with the engine control system If this happens have your vehicle checked by your dealer as soon as possible If you ignore this indicator and continue driving the engine control system will be seriously damaged For more information see page If this indicator comes on it means that water stays in the fuel system This may cause damage to the fuel injection system Contact your dealer as soon...

Страница 91: ... in the multi information display see page This indicator normally comes on for a few seconds when you turn the ignition switch to the ON II position and when the ignition switch is turned to the START III position If it comes on at any other time there is a problem with the ABS If this happens have your vehicle checked at a dealer With this indicator on your vehicle still has normal braking abili...

Страница 92: ...tor SRS indicator VSA system indicator etc This indicator comes on when there is a system message in the multi information display Press the INFO button on the steering wheel to see the message see page You will also see the symbol or this symbol with a CHECK SYSTEM message on the multi information display This indicator will also alert you to the seat belt e pretensioners 105 35 On vehicles with ...

Страница 93: ...drive until the indicator goes out it may take up to about 10 minutes This will increase the exhaust temperature and help to burn and remove the PM from the DPF If you ignore the indicator blinking it stops blinking then stays on If this happens take your vehicle to a Honda dealer as soon as possible to have the DPF system checked If you ignore this indicator and continue driving the DPF and your ...

Страница 94: ...ther time there is a problem in the electric power steering system You will also see the symbol or this symbol with a CHECK SYSTEM message on the multi information display see page If this happens stop the vehicle in a safe place and turn off the engine Reset the system by restarting the engine The indicator will stay on but should go off after driving a short distance If it does not go off or com...

Страница 95: ...in the multi information display see page This indicator has four functions It comes on along with the VSA system indicator if there is a problem with the VSA system You will also see the symbol or this symbol with a CHECK SYSTEM message on the multi information display see page This indicator normally comes on for a few seconds when you turn the ignition switch to the ON II position and when the ...

Страница 96: ... to your dealer to have it checked For more information see page When you push the ACC button on the steering wheel this indicator comes on green You will also see ACC on the multi information display see page This indicator comes on when you set the cruise control See page for information on operating the cruise control 282 282 285 292 If equipped If equipped If equipped If equipped Cruise Main I...

Страница 97: ...ymbol with a CHECK SYSTEM message on the multi information display In this case your vehicle still has the VSA traction and stability enhancement but it will not have the trailer stability assist function For more information see page This indicator normally comes on for a few seconds when you turn the ignition switch to the ON II position If it comes on at any other time there is a problem with t...

Страница 98: ... vehicle to a dealer and have it checked For more information see page When this indicator is on the CMBS is not working The left or right turn signal indicator blinks when you signal a lane change or turn If an indicator does not blink or blinks rapidly it usually means one of the turn signal bulbs is burned out see page Replace the bulb as soon as possible since other drivers cannot see that you...

Страница 99: ... the or position If you turn the ignition switch to the ACCESSORY I or the LOCK 0 position without turning off the light switch this indicator will remain on A reminder chime will also sound when you open the driver s door without the key in the ignition switch You will also see the symbol or this symbol with a HEADLIGHTS ON message on the multi information display see page This indicator also com...

Страница 100: ... comes on in this display if the tailgate or any door is not closed tightly 303 279 On vehicles with information display On vehicles with information display Instrument Panel Indicators Instruments and Controls Security System Indicator For some types Door and Tailgate Open Monitor Parking Sensor Indicators For some types 95 SECURITY SYSTEM INDICATOR LEFT CORNER SENSOR INDICATORS REAR CENTRE SENSO...

Страница 101: ...e runs out of fuel This indicator comes on as a reminder that you must refuel soon You will also see the symbol or this symbol with FUEL LOW petrol models or DIESEL FUEL LOW diesel models message on the multi information display 461 On diesel models On vehicle with multi information display Low Fuel Indicator Priming the Fuel System Instrument Panel Indicators Instruments and Controls 96 06 09 13 ...

Страница 102: ...ormation display 97 FUEL GAUGE INFORMATION DISPLAY ODOMETER AVERAGE FUEL MILEAGE CURRENT FUEL MILEAGE OUTSIDE TEMPERATURE INDICATOR TACHOMETER SELECT RESET KNOB TEMPERATURE GAUGE TRIP METER SPEEDOMETER Diesel model is shown 06 09 13 17 06 17 32SWA600_102 ...

Страница 103: ...ontrols On vehicles with multi information display 98 SPEEDOMETER Diesel model with navigation system is shown MULTI INFORMATION DISPLAY FUEL GAUGE TACHOMETER SELECT RESET KNOB TEMPERATURE GAUGE 06 09 13 17 06 22 32SWA600_103 ...

Страница 104: ...ach near the red mark If it reaches the red hot mark pull safely to the side of the road Turn to page on petrol models and page on diesel models for instructions and precautions on checking the engine cooling system This shows how much fuel you have It may show slightly more or less than the actual amount Avoid driving with an extremely low fuel level Running out of fuel could cause the engine to ...

Страница 105: ...lay press and release the Select Reset knob repeatedly When you turn the ignition switch to the ON II position the last selection is displayed There are two trip meters Trip A and Trip B Switch between these displays by pressing the Select Reset knob repeatedly Each trip meter works independently so you can keep track of two different distances To reset a trip meter display it and then press and h...

Страница 106: ...r 10 seconds To see the average fuel mileage press and release the Select Reset knob repeatedly This distance is estimated from the fuel economy you have achieved over the last few kilometers miles so it will vary with changes in speed traffic condition etc The display may show a current fuel mileage reading higher than in normal driving while the particulate matter PM is burnt and removed from th...

Страница 107: ...temperature This may take several minutes This indicator displays the outside temperature in Centigrade If the outside temperature is incorrectly displayed you can adjust it up to 3 C warmer or cooler NOTE The temperature must be stabilized before doing this procedure To adjust the outside temperature display press and hold the Select Reset knob for 10 seconds The display changes as shown above Ou...

Страница 108: ...uence will appear 0 1 2 3 3 2 1 0 When it reaches the desired value push the Select Reset knob to enter the setting You should see the new outside temperature displayed In certain weather conditions temperature readings indicate near freezing 0 C and the display starts blinking This could mean that ice is forming on the road surface Gauges Instruments and Controls 103 06 09 13 17 07 06 32SWA600_10...

Страница 109: ...middle segments display the trip computer and the rear seat belt use and the lower segment displays the odometer trip meter and outside temperature There are two types of symbols messages normal display symbols messages and system warning symbols messages You can select the displayed language and also customize some vehicle control settings to your liking with the multi information display and the...

Страница 110: ... remaining trip computer items are displayed in the middle segment Each time you press the INFO button the trip computer changes from the average fuel economy to the estimated distance to the elapsed time to the average speed and then to the rear seat belt use as shown on the next page If there is any system warning system warning symbol s will be shown on the multi information display following t...

Страница 111: ...blank display in the middle segment the upper display will also change to the blank display Multi Information Display Instruments and Controls 106 Left hand drive type Right hand drive type 06 09 13 17 07 27 32SWA600_111 ...

Страница 112: ...timated distance you can travel on the fuel remaining in the tank This distance is estimated from the fuel economy you have achieved over the last few kilometers miles so it will vary with changes in speed traffic condition etc The time travelled since you last turned the ignition switch to the ON II position Your vehicle s current fuel mileage in kilometers per hour and l 100 km Your vehicle s cu...

Страница 113: ...ress the SEL RESET button repeatedly When you turn the ignition switch to the ON II position what you last selected is displayed Each trip meter works independently so you can keep track of two different distances To reset a trip meter display it and then press and hold the SEL RESET button until the number resets to 0 0 The lower segment always shows the odometer trip meter and the outside temper...

Страница 114: ...pdate until it reaches the correct outside temperature This may take several minutes If the outside temperature is incorrectly displayed you can adjust it by up to 3 C warmer or cooler see page NOTE The temperature must be stabilized before doing this procedure In certain weather conditions temperature readings near freezing 0 C could mean that ice is forming on the road surface You will also see ...

Страница 115: ...m is corrected When your vehicle is new the multi information display shows the system warning symbols without the message This is the default setting when the vehicle leaves the factory You can customize this setting to see the system warning symbols with messages see page Some symbols such as the low outside temperature rear seat belt reminder indicator etc do not have a message In this section ...

Страница 116: ...23 and 506 See pages 89 and 126 See pages 125 and 507 See pages 123 and 511 See pages 35 and 125 See pages 125 and 366 See pages 117 and 214 See pages 118 and 421 See pages 126 and 358 See pages 126 and 378 See pages 123 and 391 Multi Information Display Instruments and Controls 111 06 09 13 17 08 16 32SWA600_116 ...

Страница 117: ... and 285 See pages 291 and 301 See pages 120 and 289 See pages 120 and 289 See pages 128 and 368 See page 369 See pages 128 and 303 See pages 124 and 535 See pages 124 and 536 See page 116 See pages 286 301 and 371 Instruments and Controls Multi Information Display 112 06 09 13 17 08 28 32SWA600_117 ...

Страница 118: ...127 and 426 See pages 109 and 119 See pages 127 and 165 See pages 119 and 133 See pages 119 and 133 See pages 96 and 118 See pages 96 and 118 Petrol models Diesel models Instruments and Controls Multi Information Display 113 06 09 13 17 08 36 32SWA600_118 ...

Страница 119: ...lt while the vehicle is moving In addition to the seat belt reminder indicator in the instrument panel the current display is interrupted and the multi information display shows this symbol or this symbol with a FASTEN SEAT BELT message if you do not fasten your seat belt while driving This symbol message remains displayed if you ignore it and do not wear your seat belt while the vehicle is moving...

Страница 120: ...tem detects any seat belt use of all three rear seat seating positions according to the activation of each seat belt retractor The system shows you how many rear seat belts are being used and reminds you and your passengers to fasten their seat belts According to the rear seat belt use 1 through 3 you will see the indicator s highlighted on the right side of the middle segment CONTINUED Multi Info...

Страница 121: ...his happens the SRS indicator also comes on Have your vehicle checked by your dealer see page While driving you can also confirm the rear seat belt use Press and release the INFO button repeatedly to change the display 35 Multi Information Display Instruments and Controls 116 The seat belt indicator system judges the use of the seat belt based on the amount of seat belt pulled out from the retract...

Страница 122: ...rake the current display is interrupted and the multi information display shows this symbol or this symbol with a RELEASE PARKING BRAKE message This symbol message continues and a chime sounds until you release the parking brake Ignition Key Release Parking Brake Pressing the INFO button on the steering wheel momentarily changes the display but it will come back after about 5 seconds Multi Informa...

Страница 123: ... a FUEL LOW message on the display and you must refuel soon The low fuel indicator in the instrument panel will also come on see page Brake Fluid Low If the brake fluid level is at or below the MIN mark on the side of the brake fluid reservoir in the engine compartment you will see this symbol or this symbol with a BRAKE FLUID LOW message If you see this message have the brake system checked by yo...

Страница 124: ...e set speed You can set two different speeds for the alarm For more information to set the speed alarm see page Headlights On If you turn the ignition switch to the ACCESSORY I or LOCK 0 position without turning off the headlights or position lights and open the driver s door you will see this symbol or this symbol with a HEADLIGHTS ON message on the display The lights on indicator in the instrume...

Страница 125: ...opriate time to change a higher or lower gear when the adaptive cruise control system is activated For more information see page 289 On vehicles with adaptive cruise control ACC Manual transmission only Multi Information Display Instruments and Controls 120 Shift down Shift up 06 09 13 17 09 25 32SWA600_125 ...

Страница 126: ... a beep with this symbol message on You should check the oil level and add engine oil For more information see page If you ignore the oil level symbol message and keep driving with this symbol message on you can seriously damage the engine You will also hear a beep when the symbol or the symbol with a message is displayed on the multi information display at the first time 505 CONTINUED System Warn...

Страница 127: ... symbol or this symbol with a CHECK SYSTEM message on the multi information display it means one of the engine s emissions systems may have a problem Have your vehicle checked by a dealer see page on petrol models and page on diesel models If there is a problem with the brake system including the front to rear barking distribution system you will see this symbol or this symbol with a CHECK SYSTEM ...

Страница 128: ...m the trailer stability assist function shuts down and you will see this symbol or this symbol with a CHECK SYSTEM message on the multi information display For more information of the trailer stability assist function see page If there is a problem with the engine oil level sensor system you will see this symbol or this symbol with a CHECK SYSTEM message on the multi information display If you ign...

Страница 129: ...ti information display while the engine is running it means the diesel particulate filter DPF is clogged with accumulated particulate matter PM and it should be checked then repaired or replace Take your vehicle to a Honda dealer as soon as possible If you ignore this symbol message and continue driving the DPF and your vehicle s emission control systems will be seriously damaged For more informat...

Страница 130: ...symbol with a CHECK SYSTEM message on the multi information display it means the battery is not being charged For more information see page If there is a problem with your front airbags side airbags automatic seat belt tensioners or side curtain airbags you will see this symbol or this symbol with a CHECK SYSTEM message on the multi information display Take your vehicle to a dealer as soon as poss...

Страница 131: ...with a CHECK SYSTEM message on the multi information display The VSA system and VSA activation indicators in the instrument panel will also come on If you see this symbol message have the VSA system checked by your dealer For more information see page For some types Check System Automatic Transmission If there is a problem with the automatic transmission you will see this symbol or this symbol wit...

Страница 132: ...s there is a problem with the automatic headlights on control system If you see this symbol message have the vehicle checked by your dealer as soon as possible Check System Adaptive Front Lighting System For some types If there is a problem with the adaptive front lighting AFS system the AFS indicator comes on in the instrument panel and you will also see this symbol or this symbol with a CHECK SY...

Страница 133: ...n brake system CMBS the CMBS indicator comes on in the instrument panel and you will also see this symbol or this symbol with a CHECK SYSTEM message on the multi information display For more information see page Check System Parking Sensor System If there is a problem with the parking sensor system you will see this symbol or this symbol with a CHECK SYSTEM message on the multi information Have th...

Страница 134: ...F km h mph ON OFF up to 3 C 0 C ON OFF Page 133 136 141 142 145 146 148 150 151 Description Sets the speed alarm on and changes the alarm speed setting Sets the speed alarm on Sets the beep to sound when the system detects a vehicle ahead of you Changes the displayed measurement with the ACC on Switches warning message to be displayed or not Changes the outside temperature reading above or below i...

Страница 135: ...omized settings to the factory default Setting Option ENGLISH ITALIAN SPANISH GERMAN FRENCH PORTUGUESE CANCEL OK Group Setup LANGUAGE P 154 DEFAULT ALL P 155 Page 154 155 Factory default setting Multi Information Display Instruments and Controls 130 06 09 13 17 10 49 32SWA600_135 ...

Страница 136: ...or about 3 seconds while the multi information display is in its normal display Here are the settings you can customize Each time you press the INFO button the display switches from SPEED ALARM CHG SETTING LANGUAGE DEFAULT ALL EXIT and then back to SPEED ALARM as shown above DEFAULT ALL To return to the default settings see page SPEED ALARM To set the speed alarm see page LANGUAGE To select langua...

Страница 137: ...ayed the customizing mode display will return to the normal display after about 10 seconds Use the INFO button on the steering wheel to see and scroll through the settings and the SEL RESET button to enter your selections Customizing is also cancelled if you turn the ignition switch out of the ON II position or release the parking brake M T or move the shift lever out of Park A T If you select and...

Страница 138: ...lti information display is showing SPEED ALARM press the SEL RESET button The display changes to the setting mode You can access different alarm functions when the vehicle is stopped or while driving While driving you can select either of the two speed alarm settings When your vehicle is stopped you can customize the setting speed to your preference To set the speed alarm while the vehicle is stop...

Страница 139: ...You can set the alarm on or off and adjust the setting speeds above or below 50 km h 30 mph Speed setting 2 You can set the alarm on or off and adjust the setting speeds above or below 80 km h 50 mph Each time you press and release the INFO button the selected icon is changed from set 1 to 50 km h 30 mph and to set 2 to 80 km h 50 mph Then press the INFO button again to exit Multi Information Disp...

Страница 140: ...eed values over 5 km h 5 mph with 5 km h mph steps Always follow the posted speed limit and never drive faster than is safe for the traffic conditions To enter your selection select the SET icon by pressing the INFO button then press and hold the SEL RESET button The displayed number is the current speed setting Select either the or icon by pressing the INFO button repeatedly then press the SEL RE...

Страница 141: ...SEL RESET button Each time you press the SEL RESET button the selected speed icon switches between on and off To exit the customizing mode select the exit mode shown above by pressing the INFO button repeatedly then press the SEL RESET button The display goes back to the normal display Press the INFO button for about 1 second to switch the display You will see the speed alarm settings on the multi...

Страница 142: ... returns to the normal display after about 10 seconds After your selection press and release the INFO button to move to the exit mode Press the SEL RESET button to enter your setting If you press the INFO button the display goes back to the setting mode Repeat the setup Multi Information Display Instruments and Controls 137 Alarm on 06 09 13 17 11 41 32SWA600_142 ...

Страница 143: ...m settings On the other vehicles the change setting consists of all items in the meter setup menu The following items are the settings you can customize Multi Information Display Instruments and Controls Change Setting 138 ACC Setup is available on vehicles with adaptive cruise control Go to the ACC Setup Customize Setting Display see page 140 Go to the Meter Setup Customize Setting Display see pa...

Страница 144: ... the setup you want to customize and press the SEL RESET button to enter your selection Each time you press the INFO button the display changes as shown To customize each setting follow the procedures described on the following pages To exit the customizing mode after your selection select the exit mode shown above by pressing the INFO button repeatedly then press the SEL RESET button The display ...

Страница 145: ...ou can turn on or off the alarm when the system detects a vehicle ahead of you see page ACC DISPLAY SPEED UNIT Measurements in the ACC display can be selected km or miles see page 141 142 Multi Information Display Instruments and Controls Adaptive Cruise Control ACC Setup ACC Setup 140 Press the SEL RESET button Press the INFO button 06 09 13 17 11 59 32SWA600_145 ...

Страница 146: ...elect ON or OFF Each time you press the INFO button the selected mode switches between on and off Enter your selection by pressing the SEL RESET button When your selection is successfully completed the display shows SETUP ON for a few seconds then goes back to the CHG SETTING display Press the SEL RESET button then press the INFO button repeatedly to select another customizing mode On vehicles wit...

Страница 147: ... CAR DETECT BEEP display To return to the normal display select the display then press the SEL RESET button While the multi information display is showing ACC DISPLAY SPEED UNIT press the SEL RESET button The display changes to the setting display The speed unit measurements of the adaptive cruise control can be selected km h or mph On vehicles with adaptive cruise control ACC Multi Information Di...

Страница 148: ...conds then goes back to the CHG SETTING display Press the SEL RESET button then press the INFO button repeatedly to select another customizing mode If you fail to enter your selection you will see INCOMPLETE on the display for a few seconds The display returns to the setting mode Repeat the setup To exit this mode without changing the current setting select and press the SEL RESET button Multi Inf...

Страница 149: ...r when you reset the trip meter A or B see page TRIP A RESET WITH REFUEL Average fuel mileage for trip meter A can be reset after refueling see page ADJUST OUTSIDE TEMP DISPLAY The outside temperature indicator value is adjustable up to or 3 C see page PRIMARY DISP SELECTION A trip computer item displayed in the upper segment can be selected see page 145 146 148 150 151 Multi Information Display I...

Страница 150: ...i information display is showing WARNING MESSAGE press the SEL RESET button The display changes to the setting display When your selection is successfully completed the display shows SETUP ON for a few seconds then goes back to the CHG SETTING display Press the SEL RESET button then press the INFO button repeatedly to select another customizing mode CONTINUED Instruments and Controls Multi Informa...

Страница 151: ...ss the SEL RESET button see page The display goes back to the WARNING MESSAGE display To return to the normal display select the display then press the SEL RESET button If you find that the temperature reading is always a few degrees below or above the actual temperature adjust it as described on the following columns 139 Multi Information Display Instruments and Controls Outside Temperature Displ...

Страница 152: ... button to change the setting value You can select the value between 0 1 2 3 and 0 1 2 3 To enter your selection select the SET icon by pressing the INFO button then press the SEL RESET button When your selection is successfully completed the display shows SETUP C for a few seconds then goes back to the CHG SETTING display Press the SEL RESET button then press the INFO button repeatedly to select ...

Страница 153: ...my the estimated distance the elapsed time and the average speed The upper segment always displays one of the trip computer items as a primary display when you turn the ignition switch to the ON II position This selected item in the upper segment does not switch even if you press the INFO button For more information of each trip computer items see page Here are the settings you can customize Curre...

Страница 154: ...with a SETUP message for a few seconds then goes back to the CHG SETTING display Press the SEL RESET button then press the INFO button repeatedly to select another customizing mode You can select each trip computer symbol Each time you press the INFO button the selected symbol switches between them Enter your selection by pressing the SEL RESET button Multi Information Display Instruments and Cont...

Страница 155: ...d as follows While the multi information display is showing TRIP A RESET WITH REFUEL press the SEL RESET button The display changes to the setting display If you fail to enter your selection you will see INCOMPLETE on the display for a few seconds The display returns to the setting mode Repeat the setup If you select and press the SEL RESET button the normal display is shown again Multi Informatio...

Страница 156: ...he setup To exit the customizing mode select the exit mode by pressing the INFO button repeatedly then press the SEL RESET button The display will return to the normal display To cause the elapsed time to reset every time you turn the ignition switch to the LOCK 0 position or reset the trip meter A or B adjust it as described as follows While the multi information display is showing ELAPSED TIME R...

Страница 157: ...when you reset the trip meter A TRIP B The elapsed time is reset when you reset the trip meter B When your selection is successfully completed the display shows the appropriate setting SETTING IGN OFF SETUP TRIP A or SETUP TRIP B for a few seconds then goes back to the CHG SETTING display Press the SEL RESET button then press the INFO button repeatedly to select another customizing mode Multi Info...

Страница 158: ...splay returns to the setting mode Repeat the setup To exit the customizing mode select the exit mode by pressing the INFO button repeatedly then press the SEL RESET button The display goes back to the normal display Multi Information Display Instruments and Controls 153 06 09 13 17 13 35 32SWA600_158 ...

Страница 159: ...rench German Spanish Italian Portuguese Press and release the INFO button to select the language then press the SEL RESET button to enter the selection When the language selection is successfully completed the display changes to the screen shown above for a few seconds then goes back to the LANGUAGE display Press the INFO button repeatedly to select another customizing mode Selecting Language Mult...

Страница 160: ...ssing the INFO button repeatedly then press the SEL RESET button The display goes back to the normal display If you want to set the customizable vehicle control settings to the default setting press the INFO button on the steering wheel repeatedly until DEFAULT ALL is displayed then press the SEL RESET button CONTINUED Default Settings Multi Information Display Instruments and Controls 155 06 09 1...

Страница 161: ...es back to the normal display To set the default settings select OK by pressing the INFO button then press and hold the SEL RESET button for about 3 seconds to set After the DEFAULT ALL operation is completed you will see the above display for a few seconds then the display switches to the language setting mode Multi Information Display Instruments and Controls 156 06 09 13 17 13 55 32SWA600_161 ...

Страница 162: ...t setting is cancelled Measurements in the ACC display are km h on the left hand drive type and mph on the right hand drive type A beep will not sound when the system detects a vehicle ahead of your vehicle Outside temperature display adjustment value is 0 C The primary display in the upper segment is the current fuel mileage Average fuel mileage for trip meter A is not reset on refueling The elap...

Страница 163: ...SWITCH P 379 P 173 ADAPTIVE FRONT LIGHTING SYSTEM AFS OFF SWITCH P 169 P 274 P 309 P 174 P 285 P 171 P 171 213 REAR WINDOW DEMISTER HEATED MIRROR BUTTON P 160 P 170 P 164 166 167 HEADLIGHT ADJUSTER VSA SYSTEM OFF SWITCH HANDS FREE TELEPHONE SYSTEM BUTTONS MULTI INFORMATION BUTTONS P 105 TILT TELESCOPIC ADJUSTMENT HEADLIGHTS TURN SIGNALS FRONT FOG LIGHTS REAR FOG LIGHT P 379 ADAPTIVE CRUISE CONTROL...

Страница 164: ...TCH P 169 P 274 P 309 P 174 P 282 P 171 213 REAR WINDOW DEMISTER HEATED MIRROR BUTTON P 160 P 170 P 164 166 167 HEADLIGHT ADJUSTER VSA SYSTEM OFF SWITCH MULTI INFORMATION BUTTONS P 105 TILT TELESCOPIC ADJUSTMENT CRUISE CONTROL BUTTONS VOICE CONTROL BUTTONS P 309 HANDS FREE TELEPHONE SYSTEM BUTTONS Right hand drive type ADAPTIVE CRUISE CONTROL SYSTEM BUTTONS P 285 HEADLIGHTS TURN SIGNALS FRONT FOG ...

Страница 165: ...elay the wipers will change to low speed operation when the vehicle speed exceeds 20 km h 12 mph Vary the delay by turning the INT TIME ring The wipers operate every few seconds At low speed and high speed the wipers run continuously Pull the wiper control lever toward you and hold it The washers spray until you release the lever The wipers run at low speed then complete one more sweep after you r...

Страница 166: ...c sensing is disabled The automatic intermittent wiper system senses rainfall and automatically turns on the windscreen wipers To enable sensing push the lever down to select AUTO When you pull back on the wiper control lever with the headlight switch ON the headlight washers and windscreen washers work at the same time The headlight washers use the same fluid reservoir as the windscreen washers O...

Страница 167: ...near the rearview mirror If the sensor is covered with mud oil dust etc the wipers may not operate properly or may operate unexpectedly You can adjust the sensitivity of the system by turning the AUTO sensitive ring on the wiper lever Windscreen Wipers and Washers Instruments and Controls 162 RAINFALL SENSOR AUTO SENSITIVE RING 06 09 13 17 14 47 32SWA600_167 ...

Страница 168: ...w washer and turn the wiper on When you shift the transmission to the reverse position with the front windscreen wiper activated the rear wiper operates automatically even if the rear wiper switch is off With the front wiper in INT or AUTO position the rear wiper operates intermittently If the front wiper is set to the LO or HI position the rear wiper runs continuously The rear window washer uses ...

Страница 169: ...lever in the proper direction lightly and release it The left or right turn signal indicator on the instrument panel and the appropriate outside turn signals will blink three times If you hold the turn signal lever the turn signal continues to blink and will stop when you release it When the light switch is in the or the position the lights on indicator comes on as a reminder Turn signal Off Posit...

Страница 170: ...the LOCK 0 position To turn them on again either turn the ignition switch to the ON II position or turn the light switch to position Even with the automatic lighting feature turned on we recommend that you turn on the lights manually when driving at night or in a dense fog or when you enter dark areas such as long tunnels or parking facilities Do not leave the light switch in AUTO if you will not ...

Страница 171: ...turn the headlights off To turn the rear fog light on again you have to turn the rear fog light switch again with the headlights on If there is a problem with the automatic lighting control system the light control indicator comes on see page Have the vehicle checked by your dealer as soon as possible The automatic lighting feature is controlled by a sensor located on the windscreen near the rearv...

Страница 172: ...es on as a reminder To turn the rear fog light on with the front fog lights turn the switch one position up from the position You can turn off the rear fog light with the front fog lights on by turning the switch up again The front and rear fog lights will go off when you turn the light control switch off With only the rear fog light on it will go off when you turn the headlights off When you turn...

Страница 173: ... helps to improve visibility during nighttime driving The AFS controls the aiming direction and lighting distribution of the low beams according to the amount of turn applied to the steering wheel during cornering or turning To turn the AFS on turn the ignition switch to the ON II position and turn the headlights on When the AFS indicator comes on you will also see the symbol or this symbol with a...

Страница 174: ... The system requires an initialization period It does not begin to operate until you have driven the vehicle a short distance AFS is not activated when the vehicle is stationary AFS is turned off when the shift lever is in reverse This switch is under the power mirror adjustment switch Press it to turn the AFS on and off When AFS is off the AFS indicator comes on as a reminder when you turn on the...

Страница 175: ... When you turn the knob the middle segment shows the current brightness level with circles You will hear a tone when you reach the maximum or minimum brightness The brightness level goes out about 5 seconds after you stop adjusting On vehicles with multi information display On vehicles with information display Instrument Panel Brightness Instruments and Controls 170 BRIGHTNESS LEVELS On the multi ...

Страница 176: ...shers This causes all outside turn signals and both turn indicators in the instrument panel to flash Use these lights to give a warning to other road users that your vehicle is causing a hazard To reduce glare at night the instru ment panel illumination dims when you turn the light switch to or position Turning the Select Reset knob fully to the right until you hear a beep will cancel the reduced ...

Страница 177: ...en cleaning the glass always wipe side to side Pushing the demister also turns the mirror heaters on and off For more information see page On some types the demister will shut itself off within about 10 to 30 minutes according to the outside temperature 213 Instruments and Controls Rear Window Demister 172 Automatic air conditioning system 06 09 13 17 16 15 32SWA600_177 ...

Страница 178: ...ea within the limits of maximum permissible axle weight and maximum permissible vehicle weight Turn the ignition switch to the ON II position Turn the adjusting dial to select an appropriate angle of the headlights Your vehicle is equipped with an automatic headlight adjusting system that senses changes in the vehicle posture due to riding and loading conditions of the passengers and their luggage...

Страница 179: ...in and out Move the steering wheel up or down and in or out so it points toward your chest not toward your face Make sure you can see the instrument panel gauges and indicators 1 2 3 4 Steering Wheel Adjustments Instruments and Controls 174 Adjusting the steering wheel position while driving may cause you to lose control of the vehicle and be seriously injured in a crash Adjust the steering wheel ...

Страница 180: ...on keys come with your vehicle You should keep one of them in a safe place away from the vehicle as a spare They fit all the locks on your vehicle You should have received a key number tag with your keys You will need this key number if you ever have to get a lost key replaced Use only Honda approved key blanks Your two ignition keys are also fitted with remote transmitters see page for an explana...

Страница 181: ...izer system indicator should come on briefly then go off If the indicator starts to blink it means the system does not recognize the coding of the key Turn the ignition switch to the LOCK 0 position remove the key reinsert it and turn the ignition switch to the ON II position again The system may not recognize your key s coding if another immobilizer key or other metal object i e key fob is near t...

Страница 182: ...rs on the instrument panel come on as a test when you turn the ignition switch from the ACCESSORY I to the ON II position On some types the headlights come on automatically in this position Use this position only to start the engine The switch returns to the ON II position when you let go of the key You will hear a reminder beeper if you leave the key in the ignition switch in the LOCK 0 or the AC...

Страница 183: ...the driver s door Pushing the bottom of the master door lock switch or pushing forward the lock tab on the driver s door will unlock all doors and the tailgate If your vehicle has an automatic transmission the shift lever must be in Park before you can remove the key from the ignition switch Instruments and Controls Power Door Locks Ignition Switch Door Locks 178 Removing the key from the ignition...

Страница 184: ...e driver s door is not disabled if the driver s door is closed Pulling the driver s lock tab rearward will lock all doors and the tailgate If you try to lock an open driver s door by pulling the lock tab rearward with the outside handle pulled the lock tabs on all doors pop out and unlock the doors When you lock the doors and the tailgate with the key or the remote transmitter all outside turn sig...

Страница 185: ...ill not set if any door or the tailgate is not fully closed It will be set even if the bonnet or any window is open To cancel the super locking unlock the driver s door with the key or the remote transmitter If you set the super locking with the windows open the ultrasonic sensor may activate the alarm unexpectedly when the system senses strong vibrations on the vehicle or loud sound 183 On vehicl...

Страница 186: ...ck lever near the edge With the lever in the LOCK position lever is down the door cannot be opened from the inside regardless of the position of the lock tab To open the door push the lock tab forward and use the outside door handle Childproof Door Locks Door Locks Instruments and Controls 181 Unlock Lock LEVER 06 09 13 17 17 24 32SWA600_186 ...

Страница 187: ...button all outside turn signals and both indicators in the instrument panel flash once The front ceiling light if the light switch is in the Door position and rear ceiling light if the light switch is in the centre position will come on when you press the UNLOCK button If you do not open any door or the tailgate within 30 seconds the lights fade out If you relock the doors and tailgate with the re...

Страница 188: ...e temperature Do not immerse the transmitter in any liquid If you lose a transmitter the replacement needs to be reprogrammed by your dealer To cancel the super locking push the UNLOCK button on the remote transmitter or unlock the driver s door with the key 180 Super Locking For some types Remote Transmitter Care Remote Transmitter Instruments and Controls 183 If there are persons inside the vehi...

Страница 189: ...he transmitter with a small Phillips head screwdriver Separate the transmitter by prying its middle seam with your fingernail To replace the battery Inside the transmitter separate the inner cover from the keypad by carefully prying on the edge with a coin 1 3 2 Replacing the Transmitter Battery Instruments and Controls Remote Transmitter 184 SCREW 06 09 13 17 17 48 32SWA600_189 ...

Страница 190: ...An improperly disposed of battery can hurt the environment Always confirm local regulations for battery disposal Remove the old battery from the back of the inner cover and insert a new battery into the back of the cover with the side facing down Install the parts in reverse order 4 5 Remote Transmitter Instruments and Controls EU models 185 BATTERY 06 09 13 17 17 55 32SWA600_190 ...

Страница 191: ...ilgate push the release then lift up To close the tailgate use the inner handle to pull it down then press down on the back edge Keep the tailgate closed at all times while driving to avoid damaging the tailgate and to prevent exhaust gas from getting into the interior See on page 72 Carbon Monoxide Hazard Tailgate Instruments and Controls 186 HANDLE RELEASE 06 09 13 17 18 01 32SWA600_191 ...

Страница 192: ...e cover then use a small flat tip screwdriver to remove the cover on the back of the tailgate To open the tailgate access the tailgate release lever from inside the vehicle If you need to open the tailgate manually it means there is a problem with the tailgate Have the vehicle checked by your dealer Tailgate Instruments and Controls Opening the Tailgate Manually 187 Unlock RELEASE LEVER 06 09 13 1...

Страница 193: ... the power adjustable driver s seat are on the outside edge of the seat bottom You can adjust the seat with the ignition switch in any position Make all seat adjustments before you start driving The front passenger s seat can be adjusted manually see the next page See pages for important safety information and warnings about how to properly position the seats and seat backs 17 18 On vehicles with ...

Страница 194: ...e front or rear seat forward or backward pull up on the bar under the seat cushion s front edge Move the seat to the desired position and release the bar Try to move the seat to make sure it is locked in position To change the seat back angle of the front seat pull up the lever on the outside of the seat bottom CONTINUED Seats Instruments and Controls Manual Seat Adjustments 189 Driver s seat is s...

Страница 195: ...ntre seating position adjust the left and right side of the rear seats to the same position Make sure all rear shoulder belts are positioned in front of the rear seat backs after you adjust the rear seats The height of your driver s seat is adjustable To raise the seat repeatedly pull up the lever on the outside of the seat cushion To lower the seat push the lever down repeatedly Seats Instruments...

Страница 196: ...vot it down to use it The rear centre seat back has an armrest To use it fold it down To use the luggage area pass through pull up the release on top of the centre seat back and fold it down A beverage holder is located in the armrest Seats Instruments and Controls Armrests Rear Armrest Luggage Pass through 191 REAR FRONT 06 09 13 17 18 43 32SWA600_196 ...

Страница 197: ... height You need both hands to adjust the restraint Do not attempt to adjust it while driving To raise it pull upward To lower the restraint push the release button sideways and push the restraint down If your vehicle is equipped with a dual deck luggage shelf do not use the shelf when any seat back is folded down Objects placed on this shelf can be thrown forward and occupants can be injured duri...

Страница 198: ...int locks in position when you reinstall it When carrying a passenger in the rear centre seating position make sure the rear centre head restraint is adjusted to its highest position Instruments and Controls Seats 193 Always replace the rear head restraints when the seat backs are returned to upright position Rear Centre Position RELEASE BUTTON RELEASE BUTTON Rear Outer Position 06 09 13 17 18 56 ...

Страница 199: ...pivot the seat back backward until it is level with the rear seat cushion The seat back of the power adjustable driver s seat cannot be level Do not push the seat back down forcibly Adjust the rear seat back to the desired position Reverse this procedure to return the front and rear seats to the upright position Make sure you install the head restraints and securely lock the seats before driving W...

Страница 200: ... fold up the left or right side of the rear seats separately to create further luggage space see page Remove any items from the seat before folding down the seat back Push the seat belt buckles into the seat cushion 1 197 Seats Instruments and Controls Folding the Rear Seats Down 195 Make sure the seat backs are latched securely before driving Always replace the rear head restraints when the seat ...

Страница 201: ...n it is folded down Pull up the release lever on the top of the seat back Fold the seat back forward When you are folding the rear centre seat back use the latch plate to release the centre seat belt from the detachable anchor see page Allow the seat belt to retract into the holder on the ceiling and store the buckles in it Lower the rear head restraint to its lowest position 2 3 4 199 199 Seats I...

Страница 202: ...seat forward Pull up the bar under the seat cushion and slide the rear seat backward The rear seat will not fold forward unless it is not as far back as it will go The left and right rear seats can be folded up separately to make room for luggage Lower the centre seat back before folding the right side seat forward Follow steps 1 through 4 on page for folding down the seat back 1 2 195 343 Seats I...

Страница 203: ...make sure the seat is secure Unlock the seat from the floor by pulling the lock release strap under the seat cushion s back edge then lift the rear of the seat Reverse this procedure to return the seat to the upright position Make sure the seat is securely latched before driving When you are not using the fastening strap store the strap into the slit on the seat back 3 4 5 Instruments and Controls...

Страница 204: ...are folded down or forward The seat belt in the rear centre seat is equipped with a detachable anchor This allows the centre seat belt to be unlatched when the rear centre seat back is folded down or the right side rear seat is folded forward 200 343 Seats Instruments and Controls Carrying Luggage Detachable Anchor 199 Make sure the seat backs are latched securely before driving Using a seat belt ...

Страница 205: ... the seat belt to verify that the detachable anchor is securely latched Make sure the seat belt is not twisted To unlatch the detachable anchor insert the latch plate into the slot on the side of the anchor buckle Store the detachable anchor and seat belt latch plates in the retractor housing Seats Instruments and Controls 200 TRIANGLE MARKS ANCHOR BUCKLE SMALL LATCH PLATE LATCH PLATE ANCHOR BUCKL...

Страница 206: ...HI setting only to heat the seats quickly because it draws large amounts of current from the battery If the engine is left idling for an extended period do not use the seat heaters even on the LO setting It can weaken the battery causing hard starting Both front seats are equipped with seat heaters The ignition switch must be in the ON II position to use the heaters In the LO setting the heater ru...

Страница 207: ... the rear cover slip the rods out of the hooks and guide the cover so it rolls back fully into its housing You can use the tonneau cover to conceal your parcels and protect them from direct sunlight The tonneau cover can be extended forward and rearward separately The left centre and right part of the front cover can be used separately Do not store parcels on the tonneau cover The tonneau cover ma...

Страница 208: ...he left end of the unit toward the right end and lifting it upward Lower the right end of the unit and insert it into the holder on the right side panel While pushing the right end of the housing unit to the right holder lower the left end through the opening on the left side panel 1 2 3 4 Tonneau Cover For some types Instruments and Controls Storing the Tonneau Cover Housing Unit 203 06 09 13 17 ...

Страница 209: ...g Reverse this procedure to install the tonneau cover housing unit in place To remove the tonneau cover housing unit from the vehicle follow the step 3 then take it out while pushing the right end of the housing Do not pull it out forcibly Do not put heavy weight on the tonneau cover housing unit This may damage it 5 Tonneau Cover For some types Instruments and Controls 204 06 09 13 17 20 30 32SWA...

Страница 210: ...ual deck luggage shelf fully opened and securely latched To remove the dual deck luggage shelf fold up the rear half of the shelf forward onto the front half push up on both sides then pull it toward you To store the dual deck luggage shelf lift up either side of it then move it as shown above Place the dual deck luggage shelf on the far side of the luggage floor then slide it forward while foldin...

Страница 211: ...load on the dual deck luggage shelf is 10kg This is shown on a label on the left side of the dual deck luggage shelf see next page To prevent damage to the dual deck luggage shelf do not exceed the maximum load Make sure all items in the luggage area are secured Loose items can fly forward and cause injury if you have to brake hard See on page 343 Instruments and Controls Dual Deck Luggage Shelf F...

Страница 212: ...e than 10 kg on this shelf To remind you of how to use the dual deck luggage shelf properly a label shown below is attached to the shelf Dual Deck Luggage Shelf For some types Instruments and Controls 207 06 09 13 17 20 48 32SWA600_212 ...

Страница 213: ...ion you want To open the driver s or the front passenger s window fully push the window switch firmly down then release it The window automatically goes down all the way To stop the window from going all the way down pull back on the window switch briefly To close the driver s or the front passenger s window fully pull back the window switch firmly then release it The window automatically goes all...

Страница 214: ...nition switch to the ON II position When you push the MAIN switch in the switch is off and the passengers windows cannot be raised or lowered To cancel this feature push on the switch again to get it to pop out Keep the MAIN switch pushed in when you have children in the vehicle so they do not injure themselves by operating the windows unintentionally To open or close the driver s or the front pas...

Страница 215: ...nd hold it To close them push the switch forward and hold it Release the switch when the sunshades reach the desired position or to stop the operation The front and rear sunshades can only be opened or closed together Always take the ignition key with you whenever you leave the vehicle alone with other occupants Sunshades For some types Instruments and Controls 210 Opening or closing the sunshade ...

Страница 216: ...rn off the ignition switch The key off delay cancels as soon as a you open either front door To open the sunshades fully push the switch backward firmly then release it The sunshades automatically open all the way To stop the sunshades from opening push the switch briefly To close the sunshade fully push the switch forward firmly then release it The sunshades automatically close all the way To sto...

Страница 217: ...t the day or night position Push the appropriate edge of the adjustment switch to move the mirror right left up or down Turn the ignition switch to the ON II position Move the selector switch to L left side or R right side When you finish move the selector switch to the centre off position This turns off the adjustment switch to keep your settings 1 2 3 4 Adjusting the Power Mirrors Mirrors Instru...

Страница 218: ...fog and frost With the ignition switch in the ON II position turn on the heaters by pressing the rear window demister button The indicator in the button comes on as a reminder Press the button again to turn the heaters and the demister off On some types this heated mirror function has a timer see page 172 CONTINUED Folding Door Mirrors For some types Power Mirror Heaters Instruments and Controls M...

Страница 219: ...on display To apply the parking brake pull the lever up fully To release it pull up slightly push the button and lower the lever The parking brake indicator on the instrument panel should go out when the parking brake is fully released see page Never drive your vehicle with the outside mirrors folded 86 On vehicles with multi information display Mirrors Parking Brake Instruments and Controls Parki...

Страница 220: ...U COVER COAT HOOK DOOR BEVERAGE HOLDERS UPPER GLOVE BOX LOWER GLOVE BOX DUAL DECK LUGGAGE SHELF CENTRE CONSOLE with BEVERAGE HOLDERS ASHTRAY BEVERAGE HOLDERS in REAR SEAT ARMREST CENTRE POCKETS ACCESSORY POWER SOCKET AUXILIARY INPUT JACK CIGARETTE LIGHTER SUNGLASSES HOLDER CONVERSATION MIRROR 06 09 13 17 21 44 32SWA600_220 ...

Страница 221: ...ox with the ignition key On some types the glove box light comes on only when the position lights are on Interior Convenience Items Instruments and Controls Lower Glove Box Upper Glove Box 216 An open glove box can cause serious injury to your passenger in a crash even if the passenger is wearing the seat belt Always keep the glove box closed while driving LOWER GLOVE BOX To lock EDGE LEVER 06 09 ...

Страница 222: ...rs in the door pockets Spilled liquids can damage the upholstery carpeting and electrical components in the interior The rear seat also has a beverage holder in the centre armrest To use it pivot the armrest down The front beverage holder is in the centre console compartment On vehicles with rear seat armrest Interior Convenience Items Instruments and Controls Beverage Holders 217 FRONT REAR BEVER...

Страница 223: ...l not power an automotive type cigarette lighter element Your vehicle has two accessory power sockets It is recommended that these accessory sockets are used for genuine Honda accessories Each socket is intended to supply power for 12 volt DC accessories that are rated 120 watts or less 10 amps Interior Convenience Items Instruments and Controls Accessory Power Sockets 218 FRONT REAR 06 09 13 17 2...

Страница 224: ...small enough to let the holder close and latch and that they are not heavy enough to cause the holder to pop open while driving To open or close the console compartment slide the lid rearward or forward There is a sunglasses holder in the console compartment Slide it forward or rearward to access the lower part of the compartment CONTINUED On some types Interior Convenience Items Instruments and C...

Страница 225: ...s holder fully push it to the first detent and release it To switch back to the sunglasses holder close the conversation mirror and then open the sunglasses holder The sunglasses holder is located in the centre console compartment Interior Convenience Items Instruments and Controls Conversation Mirror For some types 220 SUNGLASSES HOLDER 06 09 13 17 22 24 32SWA600_225 ...

Страница 226: ...r toward the side window Make sure you put the sun visor back in place when you are getting into or out of the vehicle Pull up the vanity mirror cover to use it The light comes on when you pull up the cover Make sure you close the cover when you are not using the vanity mirror The vanity mirror light will not come on if the sun visor is moved to the side window On some types Coat Hook Vanity Mirro...

Страница 227: ... beverage holders To open it pull up on the lid The ignition switch must be in the ACCESSORY I or the ON II position for the cigarette lighter to work To heat up the lighter push it in It will pop out when it is ready for use Do not hold the lighter in while it is heating up you could cause it to overheat Ashtray Cigarette Lighter For some types Interior Convenience Items Instruments and Controls ...

Страница 228: ...u Open any door After all doors are closed tightly the light dims slightly then fades out in about 30 seconds The light turns off before 30 seconds have elapsed if you insert the key to the ignition switch If you leave any door open without the key in the ignition switch the ceiling light will go off after 3 minutes Unlock the doors and the tailgate with the key or remote transmitter CONTINUED Cei...

Страница 229: ... remote transmitter and when you remove the key from the ignition switch The luggage area light has a three position switch In the OFF position the light does not come on In the centre position it comes on when you open the tailgate In the ON position it stays on continuously On vehicles with sunshades Interior Lights Instruments and Controls Luggage Area Light 224 On vehicles with sunshades Push ...

Страница 230: ... light between the spotlights comes on when you turn the position lights on To adjust its brightness turn the instrument panel brightness control knob on the dashboard with the ignition switch in the ON II position see page 170 Courtesy Light Ignition Switch Light Interior Lights Instruments and Controls 225 06 09 13 17 23 04 32SWA600_230 ...

Страница 231: ...226 06 09 13 17 23 06 32SWA600_231 ...

Страница 232: ...g and A C 228 Using the A C 233 Climate Control System 235 Sunlight and Temperature Sensors 243 Audio System 245 Playing the Radio 246 Playing a Disc 258 Protecting Your Discs 268 Disc Player Changer Error Messages 269 Optional Disc Changer Error Messages 270 Playing a Tape 271 Remote Audio Controls 274 Auxiliary Input Jack 275 Radio Theft Protection 276 Setting the Clock 277 Security System 279 C...

Страница 233: ...enerate hot and cold air Proper use of the heating and cooling system can make the interior dry and comfortable and keep the windows clear for the best visibility The vents in the corners of the dashboard can be opened and closed with the dials underneath them On vehicles with manual air conditioning system Vents Heating and A C Features Vent Controls 228 TAB CENTRE VENTS DRIVER S SIDE VENT Close ...

Страница 234: ...Vents Heating and A C Features 229 PASSENGER S SIDE VENT REAR HEATER DUCTS Open Close 06 09 13 17 23 26 32SWA600_234 ...

Страница 235: ...pposite location Vents Heating and A C Features 230 AIR CONDITIONING A C BUTTON REAR WINDOW DEMISTER HEATED MIRRORS BUTTON FAN CONTROL DIAL FRESH AIR BUTTON RECIRCULATION BUTTON TEMPERATURE CONTROL DIAL MODE CONTROL BUTTONS 06 09 13 17 23 30 32SWA600_235 ...

Страница 236: ...hrough the system The outside air intakes for the heating and cooling system are at the base of the windscreen Keep this area clear of leaves and other debris The system should be left in fresh air mode under almost all conditions Keeping the system in recirculation mode particularly with the A C off can cause the windows to fog up Switch to recirculation mode when driving through dusty or smoky c...

Страница 237: ...hrough ventilation system draws in outside air circulates it through the interior then discharges it through vents near the tailgate Set the temperature to the lower limit Make sure the A C is off Select and fresh air mode Set the fan to the desired speed When you select or the system automatically switches to fresh air mode and turns on the A C Use the mode control buttons to select the vents air...

Страница 238: ... select recirculation mode If the outside air is dry select fresh air mode Set the fan to the desired speed you can cool it down more rapidly by partially opening the windows turning on the A C and setting the fan to maximum speed in fresh air mode Your vehicle has the hot gas heater system It assists the heater to warm the air see page Air conditioning as it cools removes moisture from the air Wh...

Страница 239: ...se the side vents When you switch to another mode from the A C stays on Press the A C button to turn it off Select and fresh air mode On some types the system automatically switches to fresh air mode and turns on the A C Select Set the fan and temperature controls to maximum level To clear the windows faster you can close the dashboard corner vents by rotating the wheel next to each vent This send...

Страница 240: ... vehicle s interior temperature is independently regulated for the driver and passenger To activate the climate control system the engine must be running The direction of airflow from the vents in the centre and each corner of the dashboard is adjustable To adjust the airflow from each vent move the tab in the centre of each vent up and down and side to side The vents in the corners of the dashboa...

Страница 241: ...ing controls the climate control system in your vehicle can be operated using the voice control system See the navigation system manual for complete details Climate Control System Features Voice Control System 236 PASSENGER S SIDE VENT Open Close 06 09 13 17 24 34 32SWA600_241 ...

Страница 242: ...ures 237 RECIRCULATION BUTTON MODE BUTTON AUTO BUTTON OFF BUTTON AIR CONDITIONING BUTTON DUAL BUTTON FAN CONTROL BAR REAR WINDOW DEMISTER MIRRORS HEATER BUTTON DRIVER S SIDE TEMPERATURE CONTROL DIAL PASSENGER S SIDE TEMPERATURE CONTROL DIAL WINDSCREEN DEMISTER BUTTON 06 09 13 17 24 40 32SWA600_242 ...

Страница 243: ...e proper mix of conditioned and or heated air that will as quickly as possible raise or lower the interior temperature to your preference When you set the temperature to its lower limit or its upper limit the system runs at full cooling or heating only It does not regulate the interior temperature In cold weather the fan will not come on automatically until the heater starts to develop warm air Wh...

Страница 244: ...te dial to adjust the temperature on the driver s or passenger s side When the indicator is off both sides adjust to the same temperature When the recirculation indicator is on air from the vehicle s interior is sent throughout the system again When the indicator is off air is brought in from the outside of the vehicle fresh air mode The outside air intakes for the climate control system are at th...

Страница 245: ...he dashboard corner vents in all modes Each time you press the MODE button the display shows the mode selected Select the fan speed by pressing either side of the fan speed control bar or The fan speed is shown in vertical bars on the display Airflow is divided between the floor and corner vents and the demister vents at the base of the windscreen Air flows from the floor and corner vents Airflow ...

Страница 246: ...windscreen by closing the corner vents on the dashboard When you turn off by pressing the button again the system returns to its former settings For your safety make sure you have a clear view through all the windows before driving This button turns the rear window demister off and on see page When you turn on the rear window demister the heated door mirror is also turned on automatically 171 Wind...

Страница 247: ...te control panel To adjust the passenger s side turn the passenger s side temperature control dial Push AUTO or The selected temperatures appear in the display When the indicator in the DUAL button is off you can adjust both sides to the same temperature by adjusting the driver s temperature control dial Dual Temperature Control Climate Control System Features 242 Driver s Side Passenger s Side 06...

Страница 248: ... adjust the passenger s side without pressing the DUAL button first When you set the temperature to its lower limit or its upper limit it will be displayed as or The climate control system has two sensors A sunlight sensor is in the top of the dashboard and a temperature sensor is next to the steering column Do not cover the sensors or spill any liquid on them Climate Control System Features Sunli...

Страница 249: ...der 5 C The driver s side temperature control dial is set to any position except for the maximum cool The fan is set to the desired speed After the engine warms up or the outside temperature is high the hot gas heater system will stop automatically You may hear some noise from the engine compartment This is normal it is the hot gas heater activation The hot gas heater system will not activate if t...

Страница 250: ...feature may disable the system if it is disconnected from the vehicle s battery To get the system working again you must enter a code number see page In addition to the standard audio controls the audio system in your vehicle can be operated using the voice control system See the navigation system manual for complete details 276 On vehicles with navigation system Audio System Features Voice Contro...

Страница 251: ...BUTTON FM BUTTON AUTO SELECT BUTTON PRESET BUTTONS TUNE KNOB PRESET BUTTONS POWER VOLUME KNOB TUNE KNOB AM BUTTON FM BUTTON SEEK BAR SEEK BAR POWER VOLUME KNOB Audio System with In dash Disc Player Audio System with In dash Disc Changer 06 09 13 17 25 58 32SWA600_251 ...

Страница 252: ...t 10 seconds If you do nothing the system will then scan for the next strong station and play it for 10 seconds When it plays a station you want to listen to press the SCAN button again You can use any of five methods to find radio stations on the selected band tune seek scan the preset buttons and auto select The ignition switch must be in the ACCESSORY I or ON II position Turn the system on by p...

Страница 253: ...em goes into scan mode for several seconds The system stores the frequencies of 6 FM stations in the preset buttons You will see a 0 displayed after pressing a preset button if auto select cannot find a strong station for that preset button If you do not like the stations auto select has stored you can store other frequencies on the preset buttons as previously described press the A SEL auto selec...

Страница 254: ...PRESET BUTTONS TUNE KNOB PRESET BUTTONS POWER VOLUME KNOB TUNE KNOB SEEK BAR SEEK BAR POWER VOLUME KNOB Audio System with In dash Disc Player Audio System with In dash Disc Changer TA PTY BUTTON FM BUTTON AM BUTTON AM BUTTON TA PTY BUTTON 06 09 13 17 26 23 32SWA600_254 ...

Страница 255: ...s can save you the trouble of retuning to obtain the same station as long as you are in the same RDS network area You can turn on or off the RDS function and select the RDS programs To switch the function and select the program press the power volume knob for more than 2 seconds with the audio system on You will hear a beep Press any of the preset buttons 1 through 6 to select the function Each pr...

Страница 256: ... to the frequency In some countries you cannot utilize features provided by RDS as the RDS function is not provided for all stations This function keeps the regional program and does not change the frequency even if the signal becomes too weak This function shows the radio station name which you are listening to This function automatically tunes to the radio station which is broadcasting the traff...

Страница 257: ...y The system will return to the disc or tape mode when the traffic information is finished When you press and release the TA PTY button TA comes on in the display and the system stands by for traffic announcements When the automatic traffic information program AUTO TP ON is selected TP will come on in the display This indicates that the traffic reports can be received from the traffic information ...

Страница 258: ... accounts of facts events publicly expressed views reportage etc When the TA PTY button is pressed for more than 2 seconds until you hear a beep the PTY display function comes on This function shows you the program type of the selected RDS station For example if the station is broadcasting drama DRAMA is shown in the display If it is a station of scientific programs SCIENCE is shown The principal ...

Страница 259: ...grams for children FINANCE Programs concerned with economy WEATHER METR Weather information OTHER MUSIC Other types of music such as R B Reggae CULTURE Programs concerned with any aspect of national or regional culture RELIGION Programs concerned with religion NATION MUSIC National music OLDIES M Oldies music Golden age based programs FOLK MUSIC Folk music DOCUMENTARY Documentary programs SOCIAL A...

Страница 260: ...n within 5 seconds after selecting the desired PTY with the TUNE knob Some stations may broadcast the programs with different contents from their PTY code In the PTY search mode the tuning step is set to 50 kHz while searching on the FM band This step changes to 100 kHz when the AF or TA function is activated When you turn the TUNE knob the display will show different PTYs see the PTYs list on the...

Страница 261: ...s out To activate the other interrupt function turn off the current interrupt function PTY code ALARM is used for emergency announcements such as natural disasters When this code is received ALARM comes on the display and the volume is changed When the alarm is cancelled the system will return to the normal operation mode PTY Alarm Playing the Radio Features 256 06 09 13 17 27 29 32SWA600_261 ...

Страница 262: ...e speed The SVC mode controls the volume based on vehicle speed The faster you go the louder the audio volume becomes As you slow down the audio volume decreases The SVC has four modes SVC OFF SVC LOW SVC MID and SVC HIGH Turn the TUNE knob to adjust the setting to your liking If you feel the sound is too loud choose low If you feel the sound is too quiet choose high This function is set to MID as...

Страница 263: ...TTON LOAD BUTTON Audio System with In dash Disc Player Audio System with In dash Disc Changer LOAD INDICATOR SEEK SKIP BAR EJECT BUTTON DISPLAY BUTTON LOAD INDICATOR CD AUX BUTTON CD AUX BUTTON RANDOM BUTTON TUNE FOLDER KNOB POWER VOLUME KNOB SCAN BUTTON SEEK SKIP BAR RANDOM BUTTON TUNE FOLDER KNOB 06 09 13 17 27 51 32SWA600_263 ...

Страница 264: ... 44 1 48 kHz MPEG1 24 22 05 16 kHz MPEG2 Maximum layers including ROOT 8 layers Compatible with variable bit rate and multi session Maximum layers including ROOT 8 layers The specifications of the compatible WMA file are Sampling frequency 32 44 1 48 kHz NOTE If a file on an MP3 or WMA disc is protected by digital rights management DRM the audio unit displays FORMAT and then skips to the next file...

Страница 265: ...ressing the appropriate preset button The system stops playing the current disc and starts the loading sequence It then plays the disc just loaded You cannot load and play 8 cm 3 inch discs in this unit Press the LOAD button until you hear a beep and see LOAD in the display To load only one disc press and release the LOAD button Insert the disc into the disc slot when the green disc load indicator...

Страница 266: ...lder name file name etc If the text data has more than 16 characters you will see the first 15 characters and the indicator in the display Press and hold the DISP button until the next 16 characters are shown You will also see some text data under these conditions When a new folder file or track is selected When you change the audio mode to play a disc with text data or in MP3 or WMA When you inse...

Страница 267: ... skip to the beginning of the previous track To move rapidly within a track or file press and hold the or side of the SEEK SKIP bar To select a different disc use the appropriate preset buttons 1 through 6 If you select an empty position the system will go into the loading sequence see page To select a different folder turn the TUNE knob to move to the beginning of the next folder Turn the knob to...

Страница 268: ...at then to normal playing To continuously replay the current disc press and release the RPT button repeatedly until you see D RPT in the display Press and hold the RPT button for 2 seconds again to turn it off Each time you press and release the RPT button the mode changes from file repeat to folder repeat to disc repeat then to normal playing This feature plays the tracks within a disc the files ...

Страница 269: ...irst folder for about 10 seconds If you do nothing the system will then play the first files in the remaining folders for 10 seconds each After playing the first file of the last folder the system plays normally Each time you press and release the RDM button the mode changes from folder random play to random play within a disc random play then to normal playing The scan function samples all tracks...

Страница 270: ...utton repeatedly until you will see D SCAN in the display The system will then play the first track file of the first disc for approximately 10 seconds After playing the first track file of the last disc the system plays normally Each time you press and release the SCAN button the mode changes from scan to folder scan disc scan then to normal playing Press the eject button to remove the disc If yo...

Страница 271: ...s disc changer uses the same controls used for the in dash disc player changer or the radio Load the desired discs in the magazine and load the magazine in the changer according to the instructions that came with the unit To select the disc changer press the CD AUX button The disc and track numbers will be displayed To select a different disc use the preset 5 DISC button or the preset 6 DISC butto...

Страница 272: ...uipment This MD player changer uses the same controls used for the in dash disc player changer or the radio Follow the instructions that came with the unit Playing a Disc Features Operating the Optional MD Player Changer For some types 267 06 09 13 17 29 04 32SWA600_272 ...

Страница 273: ...at To clean a disc use a clean soft cloth Wipe across the disc from the centre to the outside edge A new disc may be rough on the inner and outer edges The small plastic pieces causing this roughness can flake off and fall on the recording surface of the disc causing skipping or other problems Remove these pieces by rubbing the inner and outer edges with the side of a pencil or pen Never try to in...

Страница 274: ...in The audio system will try to play the disc If there is still a problem the error message will reappear Press the eject button and pull out the disc The ejected disc will not be reloaded automatically Error Message Cause Solution Track File format not supported Mechanical Error Servo Error Current track will skipped The next supported track or file plays automatically Press the eject button and ...

Страница 275: ...new disc plays there is a problem with the first disc If the error message cycle repeats and you cannot clear it take your vehicle to a dealer Error Message Cause Solution FOCUS error Mechanical error Press the magazine eject button and pull it out If the message does not disappear or the magazine cannot be pulled out see your dealer Press the magazine eject button and pull it out Check for an err...

Страница 276: ...BUTTONS TUNE KNOB PRESET BUTTONS POWER VOLUME KNOB TUNE KNOB SEEK BAR SEEK BAR POWER VOLUME KNOB Audio System with In dash Disc Player Audio System with In dash Disc Changer REPEAT BUTTON REPEAT BUTTON CD AUX BUTTON CD AUX BUTTON 06 09 13 17 29 36 32SWA600_276 ...

Страница 277: ...reset 4 button again To remove the tape press the eject button on the tape player If you want to turn the player off press the power volume knob or turn off the ignition switch The tape will remain in the drive When you turn the system back on the tape player will be in pause mode Press the preset 2 button to resume play To switch to the radio or disc player while a tape is playing press the AM FM...

Страница 278: ... to direct sunlight high heat or high humidity If a tape is exposed to extreme heat or cold let it reach a moderate temperature before inserting it into the player Never try to insert a foreign object into the tape player Press the side of the SEEK SKIP bar to find the beginning of the current song or passage Press the side to find the beginning of the next song or passage When the system reaches ...

Страница 279: ...on press and hold the top or bottom of the CH button until you hear a beep The system searches up or down from the current frequency to find a station with a strong signal If you are playing a disc the system skips to the beginning of the next track file in MP3 or WMA format each time you press the top of the CH button Press the bottom to return to the beginning of the current track or file Press ...

Страница 280: ...andard audio accessories If you are playing a tape in the optional tape player press the top of the CH button to advance to the next selection Press the bottom to go back to the previous selection The system senses a silent period then resumes playing Auxiliary Input Jack For some types Remote Audio Controls Auxiliary Input Jack Features 275 AUXILIARY INPUT JACK 06 09 13 17 30 07 32SWA600_280 ...

Страница 281: ...s you must then leave the system on for 1 hour before trying again If you lose the card you must obtain the code number from a dealer To do this you will need the system s serial number You should have received a card that lists your audio system s code and serial numbers It is best to store this card in a safe place at home In addition you should write the audio system s serial number in this own...

Страница 282: ...time Change the minute by pressing the M preset 2 button until the numbers advance to the desired time Press the CLOCK button again to enter the set time On vehicles with audio system without navigation system Features Setting the Clock 277 CLOCK BUTTON AM RESET BUTTON PRESET 3 HOUR BUTTON PRESET 1 MINUTE BUTTON PRESET 2 Audio system with in dash disc changer is shown 06 09 13 17 30 20 32SWA600_28...

Страница 283: ...me is after the half hour the clock sets forward to the beginning of the next hour For example 1 06 will reset to 1 00 1 53 will reset to 2 00 The navigation system receives signals from the global positioning system GPS and the displayed time is updated automatically by the GPS Refer to the navigation system manual for how to adjust the time On vehicles with navigation system Setting the Clock Fe...

Страница 284: ...ansmitter The security system indicator on the instrument panel starts blinking immediately to show you the system is setting itself On vehicles with the ultrasonic sensor only the remote transmitter can turn off the security system Unlocking the driver s door with the key cannot turn off the security system and activates the alarm The security system helps to protect your vehicle and valuables fr...

Страница 285: ... and the tailgate are locked and the security system has set When you unlock them these lights flash once The security system also sets after you lock the doors and the tailgate with the lock tab or master door lock switch on the driver s door while pulling the outside door handle The security system will not set if the bonnet tailgate or any door is not fully closed If the system will not set che...

Страница 286: ...he alarm unexpectedly when the system senses strong vibrations on the vehicle or loud sound Whether the ultrasonic sensor is activated or not the security system can only be turned off by the remote transmitter not the key You can set the security system without activating the ultrasonic sensor Pull the driver s outside door handle and pull the lock tab rearward Release the handle then close the d...

Страница 287: ...instrument panel comes on to show the system is now activated Cruise control may not hold the set speed when you are going up and down hills If your vehicle speed increases going down a hill use the brakes to slow down This will cancel the cruise control To resume the set speed press the RES ACCEL button The CRUISE CONTROL indicator on the instrument panel will come back on When climbing a steep h...

Страница 288: ...d Resting your foot on the brake or clutch pedal causes cruise control to cancel Push on the accelerator pedal Accelerate to the desired cruising speed then press the SET DECEL button If you need to decrease your speed quickly use the brakes as you normally would Press and hold the SET DECEL button Release the button when you reach the desired speed To slow down in very small amounts tap the SET D...

Страница 289: ...mber the previously set cruising speed To return to that speed accelerate to above 40 km h 25 mph then press and release the RES ACCEL button The CRUISE CONTROL indicator comes on and the vehicle will accelerate to the same cruising speed as before Pressing the CRUISE button turns the system off and erases the previous cruising speed Cancelling Cruise Control Resuming the Set Speed Cruise Control ...

Страница 290: ...ol ACC consists of a radar sensor in the front grille the ACC buttons on the steering wheel and the ACC functions of the multi information display 369 368 ACC Components Adaptive Cruise Control For some types Features 285 MULTI INFORMATION DISPLAY DISTANCE BUTTON CANCEL BUTTON ACC INDICATOR Amber ACC INDICATOR Green ACC BUTTON RES ACCEL BUTTON SET DECEL BUTTON 06 09 13 17 31 17 32SWA600_290 ...

Страница 291: ...unding a beeper and displaying a symbol a BRAKE message depending on the customize setting on the multi information display The ACC radar sensor in the front grille can detect and monitor the distance of a vehicle up to 100 meters 328 feet ahead of your vehicle On steep downhills On winding roads When you must slow down and speed up repeatedly In heavy traffic In poor visibility When you enter a t...

Страница 292: ...ehicle will then follow at a constant distance until the vehicle ahead changes speed again Your vehicle will maintain a set cruising speed In bad weather rain fog snow etc On slippery roads for example roads covered with ice or snow CONTINUED Operating Characteristics Adaptive Cruise Control For some types Features 287 Improper use of ACC can lead to a crash Use ACC only when travelling on open mo...

Страница 293: ...lay to warn you Your vehicle follows the vehicle ahead of it keeping a constant distance ACC will not keep your vehicle at a constant distance if the vehicle ahead of you goes out of range of your set speed above 180 km h 112 mph or below 30 km h 20 mph In the case decelerate your vehicle by pressing the brake pedal and keep an appropriate distance from the vehicle ahead When the brakes are automa...

Страница 294: ...t 4 200 rpm on diesel models At 6 000 rpm on petrol models and 4 500 rpm on diesel models the ACC will be deactivated The ACC will be cancelled when the engine speed goes into the tachometer s red zone The shift down indication will be displayed appropriately according to the deceleration If the engine speed goes to below 1 000 rpm the ACC will also be cancelled To protect the engine from damage n...

Страница 295: ... to maintain a safe distance by using the brake pedal ACC may not recognize motorcycles or other small vehicles ahead of your vehicle ACC may react to vehicles beside you or even buildings beside you by momentarily applying the brakes or sounding a beeper under some conditions like the sudden curve the narrow lane the abrupt operation of the steering wheel or the position of your vehicle in the la...

Страница 296: ...nd the ACC will not work In this case the ACC indicator will come on amber and you will also see the symbol and or the symbol with a CHECK SYSTEM message on the multi information display If this happens the CMBS indicator will also comes on and the CMBS system warning symbol message will be displayed on the multi information display Always keep the emblem clean If it gets dirty clean it with water...

Страница 297: ...he steering wheel If you press the SET DECEL button when the vehicle speed is below approximately 30 km h 20 mph you will hear three beeps This means ACC is not activated and you cannot set your speed When your speed reaches 30 km h 20 mph ACC goes into wait mode and you will see a symbol as shown above or ACC STANDBY message on the multi information display 3 1 2 Using the ACC Adaptive Cruise Con...

Страница 298: ...nit measurement is shown under the current unit If you cancel ACC by pressing the CANCEL button or by tapping the brake pedal the previously set cruising speed is shown on the multi information display To store this speed as your new cruising speed press and release the RES ACCEL button 296 142 Adaptive Cruise Control For some types Features 293 SET VEHICLE DISTANCE PREVIOUSLY SET SPEED Left hand ...

Страница 299: ...increase the set speed with the RES ACCEL button do this Press and hold the RES ACCEL button The vehicle will accelerate When you reach the speed you want release the button To increase your speed in small amounts tap the RES ACCEL button repeatedly Each time you do this the setting speed increases by 5 km h 2 mph While the vehicle accelerates to the set speed the set speed on the multi informatio...

Страница 300: ... speed and then press the RES ACCEL button your vehicle will return to the previously set speed To slow down in small amounts tap the SET DECEL button repeatedly Each time you do this the setting speed decreases by 5 km h 2 mph The set cruising speed will be shown on the multi information display On a steep downhill the vehicle speed may exceed the set cruising speed When the ACC is activated shif...

Страница 301: ...ne of three ranges long middle or short You can customize the Pre Running Car Detect Beep setting see pages and To set the pre running detect beeper on when the system detects a vehicle see page On the default setting the pre running detect beeper is set to off 141 140 141 Changing Vehicle Distance Detecting a Vehicle Ahead of You Adaptive Cruise Control For some types Features 296 DISTANCE BUTTON...

Страница 302: ...t 1 2 sec 104 km h 65 mph 61 metres 200 feet 2 1 sec 42 metres 138 feet 1 5 sec 31 metres 101 feet 1 1 sec The driver must in all circumstances preserve a sufficient braking distance from the vehicle which precedes it and be aware that minimum distances or times of spacing can be provided by the provisions of the Motorway Code locally applicable and that it is the driver s responsibility to respec...

Страница 303: ... To return to that speed accelerate to over 30 km h 20 mph then press the RES ACCEL button ACC is cancelled whenever you do any of these actions Push the CANCEL button on the steering wheel Press the ACC button The ACC indicator green on the instrument panel goes off Tap the brake pedal If you cancel ACC by pressing the ACC button the previously set cruising speed is erased from memory Automatic A...

Страница 304: ...d for extended periods An abnormal tyre condition is detected or the tyres are skidding The vehicle ahead of you cannot be detected When the radar sensor in the front grille gets dirty Poor weather rain fog snow etc When the trailer stability assist function is activated When the ABS or VSA indicator comes on Shift into a higher or lower gear through shifting into neutral position temporarily Pres...

Страница 305: ...CC is on ACC is suspended A cruising speed can be set by pressing the SET DECEL button ACC is standby and the previously set cruising speed is in memory The previously set speed can be resumed by pressing the RES ACCEL button Adaptive Cruise Control For some types Features Symbols on the Multi information Display 300 Left hand drive type shown 06 09 13 17 33 28 32SWA600_305 ...

Страница 306: ... ACC has been automatically cancelled because of poor weather or other conditions see page 299 You will hear three beeps Apply the brakes immediately Your vehicle is too close to the vehicle ahead of it You will hear a continuous beep ACC needs to be checked Have your vehicle checked by a dealer Adaptive Cruise Control For some types Features 301 Left hand drive type shown Left hand drive type sho...

Страница 307: ...m complies with the R TTE Radio equipment and Telecommunications Terminal Equipment and the mutual recognition of their conformity Directives Adaptive Cruise Control For some types Features 302 On vehicle with manual transmission On vehicle with manual transmission 06 09 13 17 33 44 32SWA600_307 ...

Страница 308: ...position The indicator in the button comes on when the system is on You will hear a beep To turn the system off push the button again All obstacles may not always be sensed Even when the system is on you should look for obstacles near your vehicle to make sure it is safe to park The system has two front corner sensors two rear corner sensors and a rear centre sensor The rear centre sensors work wh...

Страница 309: ... obstacle the appropriate indicator comes on and a beeper sounds as shown in the following tables Distance Beeper Short beeps Continuous beep Very short beeps About 40 50 cm 16 20 in About 30 40 cm 12 16 in About 30 cm 12 in or less Upper left indicator stays on Indicator Parking Sensor System For some types Corner Sensor Operation Features Indicators and Beeper Operation on the Multi information ...

Страница 310: ...nuously Distance Beeper Short beeps Continuous beeps Indicator About 0 6 m 24 in or less About 1 1 8 m 40 70 in About 0 6 1 m 24 40 in Bottom indicator stays on Very short beeps On vehicles with multi information display Parking Sensor System For some types Features Rear Centre Sensor Operation 305 MULTI INFORMATION DISPLAY INFORMATION DISPLAY 06 09 13 17 34 09 32SWA600_310 ...

Страница 311: ...y your dealer Very often a sensor covered with mud ice snow etc is the cause of this display Check the sensors first If the indicators stay on or the beeper does not stop have the system checked by your dealer The range of the corner sensors and the rear centre sensor are limited Each corner sensor is capable of sensing an obstacle only when your vehicle is 50 cm 20 in or closer On vehicles with i...

Страница 312: ...n the vehicle is on a rough road on grass or on a hill The sensors are covered with snow ice mud etc When the system is affected by some electrical equipment or devices generating an ultrasonic wave When operating the vehicle in bad weather Do not put any accessories on or around the sensors The rear centre sensor senses an obstacle that is behind your vehicle 1 8 m 70 in or closer Parking Sensor ...

Страница 313: ... use a moist soft cloth When in reverse the touch screen and navigation system hard buttons are locked out except the ZOOM button Touching the or button allows you to adjust the brightness of the rearview camera image The camera brightness cannot be adjusted by voice control Since the rearview camera display area is limited you should always back up slowly and carefully and look behind you for obs...

Страница 314: ...ish as the default setting when your vehicle leaves the factory The voice of the HFT system is set to female Your vehicle is equipped with the Hands Free Telephone HFT system HFT system uses Bluetooth technology as a wireless link between it and your Bluetooth compatible mobile phone When you are in your vehicle and your phone is linked to the HFT system you ll enjoy hands free phone use The HFT s...

Страница 315: ...the audio system To change the volume level use the audio system volume knob To operate the HFT use the HFT Talk and Back buttons on the left side of the steering wheel Below the HFT buttons is another set of voice control buttons for the navigation climate control and audio systems Here is the function of each HFT button HFT Talk This button is used before you give a command to answer incoming ca...

Страница 316: ... displayed if your phone is linked to the Bluetooth compatible cell phone When you are operating the HFT dialing or receiving calls with the audio system in use you will see the symbol and TEL on the navigation display Information Display Hands Free Telephone HFT System For some types Features 311 06 09 13 17 34 56 32SWA600_316 ...

Страница 317: ... a command its response is Pardon If it doesn t recognize the command a second time its response is Please repeat If it doesn t recognize the command a third time it plays the Help prompt To hear a list of available options at any time press the Talk button wait for the beep and say Hands free link help Many commands can be spoken together For example you can say Dial 123 456 7891 To enter a strin...

Страница 318: ... and stop its voice recognition The next time you press the Talk button the HFT system begins listening from the point at which it timed out To end a command sequence at any time press and hold the Back button or press the Talk button wait for the beep and say Cancel The next time you press the Talk button the HFT system begins from its main menu When you finish a command sequence the HFT system g...

Страница 319: ... can set your password Refer to the setting procedure in the next column If you choose Ring tone you will hear a ring tone through the audio speakers to announce an incoming call If you choose Prompt you will hear this message to announce an incoming call You have an incoming call The HFT system response continues A security option is available to lock the hands free system Each time the vehicle i...

Страница 320: ...t you for your password each time the ignition switch is turned to the ON II position and you press the Talk button You will only be asked for the password once per ignition cycle If the password is set its response is The system is locked What is the four digit password The HFT system will accept a numeric four digit password that you can use for security purposes Follow the system setup procedur...

Страница 321: ...rocess turn off any previously paired phones before pairing a new phone With your phone on and the ignition switch in the ACCESSORY I or ON II position press and release the Talk button After the beep say Phone set up The HFT system response is Phone set up options are status pair edit delete and list Press and release the Talk button After the beep say Pair The HFT system response is The pairing ...

Страница 322: ...on your phone to get it into its Search mode The phone will search for the HFT system When it comes up select Hands Free Telephone System from the list of options displayed on your phone When asked by the phone enter the four digit code from step 3 into your phone The HFT system response is A new phone has been found What would you like to name this phone Press and release the Talk button After th...

Страница 323: ...ase the Talk button After the beep say Yes The HFT system response is Preparing to delete Eric s phone Say OK to continue Otherwise say Go back or Cancel Press and release the Talk button If you say OK after the beep the HFT system response is The phone has been deleted Returning to the main menu If you say Go back or Cancel the phone will not be deleted Press and release the Talk button After the...

Страница 324: ...Talk button After the beep say Phone setup The HFT system response is Phone setup options are status pair edit delete and list Press and release the Talk button After the beep say Status An example of the HFT system response is Eric s phone is linked Battery strength is three bars Signal strength is five bars and the phone is roaming Returning to the main menu Press and release the Talk button Aft...

Страница 325: ...II position press and release the Talk button After the beep say Call or Dial The HFT system response is What name or number would you like to call dial Press and release the Talk button After the beep say the name you want to call For example say Eric The HFT system response is Would you like to call Eric Press and release the Talk button After the beep say Yes The HFT system response is Calling ...

Страница 326: ...alk button After the beep say the number you want to send For example say 1 2 3 The HFT system response is 1 2 3 Say send or continue to add numbers Press and release the Talk button After the beep say Send The dial tones will be sent and the call will continue Press and release the Talk button After the beep say Send The HFT system response is What name or number would you like to send Press and ...

Страница 327: ...nswer the new call disregard it and continue with your original call If you want to hang up the original call and answer the new call press the Back button During a call you can transfer it from the HFT system to your phone or from your phone to the HFT system Press and release the Talk button After the beep say Transfer The audio switches from the HFT system to the phone Press and release the Tal...

Страница 328: ... Press and release the Talk button After the beep say Store The HFT system response is What name would you like to store Press and release the Talk button After the beep say the name you would like to store For example say Eric The HFT system response is What is the number for Eric Press and release the Talk button After the beep say the number For example say 123 456 7891 The HFT system response ...

Страница 329: ...response is 987 654 3219 Press and release the Talk button After the beep say Enter The HFT system response is The number has been changed Returning to the main menu Press and release the Talk button After the beep say Phonebook The HFT system response is Phonebook options are store edit delete and list Press and release the Talk button After the beep say Delete The HFT system response is What nam...

Страница 330: ...nd restore the defaults in the system setup Is this what you would like to do Press and release the Talk button After the beep say Phonebook The HFT system response is Phonebook options are store edit delete and list Press and release the Talk button After the beep say List The HFT system responds by listing the names in the phonebook When it says the name you want to call for example Eric press t...

Страница 331: ...e is English French Italian German or Spanish Press and release the Talk button After the beep say French The HFT system response in the new selecting language is You have selected French Name tags that were stored while in another language will not be accessible in French mode Would you like to continue then the system repeats the response in the currently selected language Press and release the ...

Страница 332: ...tem response in the new selecting language is You have selected English Name tags that were stored while in French mode will not be accessible in English mode Would you like to continue then the system repeats the response in the currently selected language Press and release the Talk button After the beep say Yes in the selected language If there are no paired phones without English name tags the ...

Страница 333: ...e from English to French Press and release the Talk button After the beep say French in the selecting language In this case say in French The HFT system response in the new selecting language is You have selected French Name tags that were stored while in another language will not be accessible in French mode Would you like to continue The system also repeats the response in the currently selected...

Страница 334: ...T system while receiving a PTY alarm Hereby declares that this is in compliance with the essential requirements and other relevant provisions of Directive 1999 5 EC www jciblueconnect com faq EU_ DoC pdf For additional conformance information www jciblueconnect com faq For information of DoC Declaration of Conformance Johnson Controls Automotive Hands Free Telephone System EU models Except EU mode...

Страница 335: ...330 06 09 13 17 44 57 32SWA600_335 ...

Страница 336: ... add any accessories to your vehicle please read the information in this section first Break in Period 332 Fuel Recommendation 332 Petrol models 332 Diesel models 332 Service Station Procedures 333 Refueling 333 Opening and Closing the Bonnet 335 Oil Check 336 Engine Coolant Check 338 Fuel Cutoff System 339 Fuel Economy 340 Accessories and Modifications 341 Carrying Luggage 343 Before Driving Befo...

Страница 337: ...mmended Research Octane Number RON may not be available in some areas In this case petrol of a lower octane may be used temporarily if it does not cause engine knocking This will result in decreased engine performance Using petrol containing lead will damage your vehicle s emissions con trols and engine This contributes to air pollution Your vehicle is designed to use only Diesel Fuel also known a...

Страница 338: ...e symbol PGM FI may appear on the display For proper fuel selection DIESEL is marked on the fuel fill cap Serious damage may occur if petrol is used in diesel engines Open the fuel fill door by pulling on the handle located under the lower corner of the dashboard 1 2 Fuel Recommendation Service Station Procedures Before Driving Refueling 333 Fuel is highly flammable and explosive You can be burned...

Страница 339: ...nce Push the fuel fill door closed until it latches Remove the fuel fill cap slowly You may hear a hissing sound as pressure inside the tank escapes Place the fuel fill cap in the holder on the fuel fill door To prevent the fuel fill cap from becoming lost it is attached to the fuel filler with a tether 4 5 6 3 Before Driving Service Station Procedures 334 TETHER Diesel models TETHER HOLDER 06 09 ...

Страница 340: ...hboard The bonnet will pop up slightly If the bonnet latch handle moves stiffly or if you can open the bonnet without lifting the handle the mechanism should be cleaned and lubricated Holding the grip pull the support rod out of its clip Insert the end into the designated hole pointed by an arrow in the bonnet 1 2 3 CONTINUED Opening and Closing the Bonnet Service Station Procedures Before Driving...

Страница 341: ...ly for example when refuelling Always check the oil before a long journey The amount of oil consumed depends on how the vehicle is driven and the climatic and road conditions encountered The rate of oil consumption can be up to 1 litre per 1 000 km 625 miles Consumption is likely to be higher when the engine is new Remove the dipstick orange handle Make sure the engine is warmed up and the vehicle...

Страница 342: ... back in its tube Remove the dipstick again and check the level It should be between the upper and lower marks If it is near or below the lower mark see on page on petrol models on diesel models 2 3 4 410 412 Service Station Procedures Before Driving Adding Engine Oil 337 Diesel models Petrol models UPPER MARK LOWER MARK DIPSTICK Diesel models UPPER MARK LOWER MARK 06 09 13 17 45 53 32SWA600_342 ...

Страница 343: ... at the coolant level in the radiator reserve tank Make sure it is between the MAX and MIN lines If it is below the MIN line see on page for information on adding the proper coolant 414 416 400 Adding Engine Coolant Owner s Maintenance Checks Engine Coolant Check Adding Engine Coolant On Diesel models On petrol models Service Station Procedures Before Driving 338 MAX MIN Diesel models EXPANSION TA...

Страница 344: ...m the underside In a collision or sudden impact this switch automatically cuts off the fuel supply to the engine After the switch has activated it must be reset by pressing the button before the engine can be restarted Fuel Cutoff Switch Before Driving 339 Leaking fuel can ignite or explode causing you to be seriously or fatally injured Always check for fuel leaks before resetting the switch HANDL...

Страница 345: ...cceleration abrupt cornering and hard braking use more fuel Always drive in the highest gear possible Try to maintain a constant speed Every time you slow down and speed up your vehicle uses extra fuel Use the cruise control on some types when appropriate The air conditioning puts an extra load on the engine which makes it use more fuel Use the fresh air ventilation when possible Combine several s...

Страница 346: ...ssories may fit on your vehicle they may not meet factory specifications and could adversely affect your vehicle s handling and stability Be sure electronic accessories do not overload electrical circuits see page or interfere with proper operation of your vehicle Before installing any electronic accessory have the installer contact your dealer for assistance If possible have your dealer inspect t...

Страница 347: ... or other raised objects which could cause the airbags to deploy Non Honda wheels because they are a universal design can cause excessive stress on suspension components Modifying your steering wheel or any other part of your vehicle s safety features can make the systems ineffective Some examples are Removing parts from your vehicle or replacing components with non Honda components could seriousl...

Страница 348: ... of luggage be sure to read the following pages Upper and lower luggage areas with the dual deck luggage shelf if equipped Centre pockets Console compartment Luggage area including the rear seats when folded up or down Door and seat back pockets Carrying Luggage Before Driving 343 LUGGAGE AREA If equipped LOWER GLOVE BOX SEAT BACK POCKETS P 216 P 216 P 219 CONSOLE COMPARTMENT DUAL DECK LUGGAGE SHE...

Страница 349: ...nd the front seats cannot roll under the seats and interfere with the driver s ability to operate the pedals and proper operation of the seats Do not stack items higher than the back of the front seats Keep the lower glove box closed while driving If it is open a passenger could injure their knees during a crash or sudden stop 527 Load Limits Carrying Items in the Passenger Compartment Carrying Lu...

Страница 350: ...oof rack be sure the total weight of the rack and the items does not exceed the maximum allowable weight Please contact your dealer for further information If you use an accessory roof rack the roof rack weight limit may be lower Refer to the information that came with your roof rack Concerning means of lashing and retaining devices offered on the accessory market please contact your dealer Distri...

Страница 351: ...he rear seats are folded down Do not exceed the dual deck luggage shelf load limit of 10 kg Your vehicle also has luggage hooks on side panel in the luggage area They are designed to hold light items Heavy objects may damage the hook Make sure any items put on each hook weigh less than 3 kg 6 5 lbs On some types On vehicles with dual deck luggage shelf Carrying Luggage Before Driving Luggage Hooks...

Страница 352: ...d in the luggage area Heavy items should be properly secured on the floor of the luggage area The net may not prevent heavy items from being thrown forward in a crash or a sudden stop Before Driving Carrying Luggage Optional Separation Net 347 06 09 13 17 47 11 32SWA600_352 ...

Страница 353: ...348 06 09 13 17 47 13 32SWA600_353 ...

Страница 354: ... you need if you are planning to tow a trailer Driving Guidelines 350 Preparing to Drive 351 Starting the Engine Petrol models 352 Starting the Engine Diesel models 353 Manual Transmission 354 Automatic Transmission 358 Parking 364 Braking System 365 Anti lock Brakes ABS 366 Collision Mitigation Brake System CMBS 368 Vehicle Stability Assist VSA System 378 Driving in Bad Weather 380 Towing a Trail...

Страница 355: ... speeds than you would with a passenger vehicle Avoid sharp turns and abrupt manoeuvres whenever possible Do not modify your vehicle in any way that would raise the centre of gravity Do not carry heavy luggage on the roof Your vehicle is equipped with a four wheel drive 4WD system When the system senses a loss of front wheel traction it automatically transfers some power to the rear wheels This gi...

Страница 356: ...he tailgate is fully closed Check the adjustment of the inside and outside mirrors see page Check the steering wheel adjustment see page Make sure the doors are securely closed When you start the engine check the gauges and indicators in the instrument panel see page Fasten your seat belt Check that your passengers have fastened their seat belts see page Check the symbol s on the multi information...

Страница 357: ...ngine does not start within 15 seconds or starts but stalls right away repeat step 5 with the accelerator pedal pressed halfway down If the engine starts release pressure on the accelerator pedal so the engine does not race If the engine fails to start press the accelerator pedal all the way down and hold it there while starting to clear flooding If the engine still does not start return to step 5...

Страница 358: ...erating temperature has been reached can damage the engine Without touching the accelerator pedal turn the ignition key to the START III position and release the key as soon as the engine is running If the engine does not start right away do not hold the key in START III for more than 15 seconds at a time 20 seconds in cold weather Pause for at least 20 seconds before trying again The engine must ...

Страница 359: ... vehicle moving Push down the clutch pedal and pause for a few seconds before shifting into reverse or shift into one of the forward gears for a moment This stops the gears so they won t grind When slowing down you can get extra braking from the engine by shifting to a lower gear This extra braking can help you maintain a safe speed and prevent your brakes from overheating while going down a steep...

Страница 360: ...The following shift points are recommended Shift up 1st to 2nd 2nd to 3rd 3rd to 4th 4th to 5th 5th to 6th Shift up 1st to 2nd 2nd to 3rd 3rd to 4th 4th to 5th 5th to 6th Normal acceleration 15 km h 9 mph 35 km h 22 mph 55 km h 34 mph 70 km h 43 mph 85 km h 53 mph Normal acceleration 15 km h 9 mph 35 km h 22 mph 50 km h 31 mph 75 km h 47 mph 100 km h 62 mph 2 0 engine model 2 2 engine model diesel...

Страница 361: ...the vehicle will not exceed the maximum allowable speed specified by the chart for the lower gear to avoid engine damage Gear 1st 2nd 3rd 4th 5th Maximum allowable speeds 40 km h 24 mph 77 km h 48 mph 119 km h 74 mph 161 km h 100 mph 202 km h 125 mph Gear 1st 2nd 3rd 4th 5th Maximum allowable speeds 45 km h 28 mph 88 km h 55 mph 136 km h 85 mph 170 km h 106 mph 190 km h 118 mph 4 4 The values show...

Страница 362: ... reverse With the clutch pedal still pressed start the engine If you need to use this procedure to shift to reverse your vehicle may be developing a problem Have it checked by your dealer The manual transmission has lockout so you cannot accidentally shift from any forward gear to reverse while the vehicle is moving at a certain speed If you cannot shift to reverse when the vehicle is stopped do t...

Страница 363: ...Avoid rapid acceleration and have the transmission checked by your dealer as soon as possible To shift from any position press firmly on the brake pedal and press the release button on the side of the shift lever You cannot shift out of Park when the ignition switch is in the LOCK 0 or ACCESSORY I position When the D indicator warns of a possible problem with the transmission you will see the symb...

Страница 364: ...e shift lever to move it If you have done all of the above and still cannot move the lever out of Park see on page To avoid transmission damage come to a complete stop before shifting into Park You must also press the release button to shift into Park The shift lever must be in Park before you can remove the key from the ignition switch 363 CONTINUED To shift from P to R R to P N to R D to 2 2 to ...

Страница 365: ...s cold This helps the engine warm up faster Press the D3 switch on the side of the shift lever to turn this mode on or off the D3 mode indicator comes on whenever the D3 mode is selected D3 mode can be turned on or off only when the ignition switch is in the ON II position and the shift lever is in the D position When the D3 mode is on the transmission selects only the first three gears Use D3 mod...

Страница 366: ...ear By upshifting and downshifting through 1 2 D and D you can operate the transmission much like a manual transmission without a clutch pedal If you shift into first position when the vehicle speed is above 50 km h 31 mph the transmission shifts into second gear first to avoid sudden engine braking To shift to second press the release button on the side of the shift lever This position locks the ...

Страница 367: ...these speeds the engine speed will enter into the tachometer s red zone If this occurs you will feel the engine cut in and out This is caused by a limiter in the engine s computer controls The engine will run normally when you reduce the rpm below the red zone Position 1 2 D Maximum allowable speeds 63 km h 39 mph 109 km h 68 mph 167 km h 104 mph 3 Maximum Allowable Speeds Automatic Transmission D...

Страница 368: ... in the shift lock release slot Push down on the key while you press the release button on the shift lever and move the shift lever out of Park to neutral Remove the key from the shift lock release slot then reinstall the cover Make sure the notch on the cover is on the passenger s side Press the brake pedal and restart the engine If you need to use the shift lock release it means your vehicle is ...

Страница 369: ...wnhill turn the front wheels toward the curb If you have a manual transmission put it in reverse gear Make sure the parking brake is fully released before driving away Driving with the parking brake partially set can overheat or damage the rear brakes Make sure the windows are closed Turn off the lights Place any packages valuables etc in the boot or take them with you Lock the doors Check the ind...

Страница 370: ...s the brakes applied lightly builds up heat increases wear and reduces their effectiveness It also keeps your brake lights on all the time confusing drivers behind you Constant application of the brakes when going down a long hill builds up heat and reduces their effectiveness Use the engine to assist the brakes by taking your foot off the accelerator and downshifting to a lower gear Check the bra...

Страница 371: ...on while driving test the brakes as instructed on page You will feel a pulsation in the brake pedal when the ABS activates and you may hear some noise This is normal it is the ABS rapidly pumping the brakes On dry road you will need to press on the brake pedal very hard before the ABS activates However you may feel the ABS activate immediately if you are trying to stop on snow or ice Let the ABS w...

Страница 372: ...as instructed on page If the brakes feel normal drive slowly and have your vehicle repaired by your dealer as soon as possible Avoid sudden hard braking which could cause the rear wheels to lock up and possibly lead to a loss of control The VSA indicator will come on along with the ABS indicator on loose or uneven surfaces such as gravel or snow than a vehicle without anti lock 512 Important Safet...

Страница 373: ...en your speed is above 15 km h 10 mph the CMBS radar sensor in the front grille can sense a vehicle ahead of you When your vehicle gets too close to the vehicle ahead of you the system may activate a warning beep causing automatic application of the brakes and causing the e pretensioners to tighten the front seat belts see page The CMBS does not activate if the speed difference between your vehicl...

Страница 374: ...adar sensor Do not tamper with these bolts or you may cause the system to malfunction You will also see the symbol above and the symbol or this symbol with a CHECK SYSTEM message on the multi information display Always keep the emblem clean If it gets dirty clean it with water or a mild detergent Never use chemical solvents or polishing powder 93 CONTINUED Radar Sensor Collision Mitigation Brake S...

Страница 375: ...ng impact turn off the system by pressing the CMBS off switch and have your vehicle checked by a dealer If the front grille ever needs to be repaired consult a dealer first If the front emblem or the radar sensor ever needs to be removed take your vehicle to a dealer When the CMBS is on the radar sensor constantly scans for vehicles ahead of you This means that driving on a road with a few or no v...

Страница 376: ...the appropriate action to prevent a collision apply the brakes change lanes etc To turn the CMBS off press and hold the CMBS off switch under the driver s side vent until you hear a beep The CMBS indicator on the instrument panel comes on to remind you and a CMBS OFF message appears on the multi information display To turn the system back on press and hold the switch again until you hear a beep CO...

Страница 377: ...s driving Driving your vehicle with the parking brake applied Driving your vehicle in bad weather rain fog snow etc A dirty emblem on the front grille When you turn the ignition switch to the ON II position the CMBS is turned on if it was on previously If you turn it off by pressing the CMBS off switch the CMBS indicator comes on and stays on to remind you that the CMBS is deactivated The CMBS wil...

Страница 378: ...comes on for several seconds when you turn the ignition switch to the ON II position It also comes on and stays on when you turn the CMBS off by pressing the CMBS OFF switch To turn the CMBS back on make sure the vehicle is stopped and the ignition switch is in the ON II position then press the CMBS OFF switch until you hear a beep When you manually turn off the system This condition will be kept ...

Страница 379: ... speed A vehicle cuts in front of you and brakes suddenly When you accelerate rapidly and approach the vehicle ahead of you at high speed Immediately after you drive off Driving in heavy stop and go traffic The vehicle ahead of you is a motorcycle or other small vehicle Limitations Driving Collision Mitigation Brake System CMBS 374 YOUR VEHICLE YOUR VEHICLE 06 09 13 17 50 45 32SWA600_379 ...

Страница 380: ...ion the CMBS may activate under these conditions When you change lanes quickly then overtake the vehicle ahead of you When you approach or pass a vehicle ahead of you that is turning left or right in an intersection CONTINUED Collision Mitigation Brake System CMBS Driving 375 YOUR VEHICLE YOUR VEHICLE 06 09 13 17 50 53 32SWA600_380 ...

Страница 381: ...ition curved winding etc or the state of your vehicle turning angle lane position etc CMBS can sometimes mistake a stationary object light pole traffic sign etc as a vehicle ahead of you and temporarily operate This is normal When you go over areas of construction on the road surface Collision Mitigation Brake System CMBS Driving 376 RAILS YOUR VEHICLE SIGN POLE etc LOW BRIDGE 06 09 13 17 51 01 32...

Страница 382: ...e the severity of a collision it may not activate in every dangerous situation Even with the CMBS it is still your responsibility to operate the brake pedal the clutch pedal and steering wheel appropriately according to the driving conditions Important Safety Reminders Collision Mitigation Brake System CMBS Driving 377 06 09 13 17 51 05 32SWA600_382 ...

Страница 383: ...VSA Activation indicator blink The VSA system indicator see page comes on and stays on when there is a problem with the VSA system The VSA activation indicator will also come on If the VSA system indicator comes on while driving pull to the side of the road when it is safe and turn off the engine Reset the system by restarting the engine If the VSA system indicator stays or comes back on while dri...

Страница 384: ...e with the VSA off if you are not able to free it when the VSA is on Immediately after freeing your vehicle be sure to switch the VSA on again We do not recommend driving your vehicle with the VSA and traction control systems switched off Driving with varying tyre or wheel sizes may cause the VSA to malfunction When replacing tyres make sure they are of the same size and type as your original tyre...

Страница 385: ...o all the controls Abrupt steering wheel movements or sudden hard appli cation of the brakes can cause loss of control in wet weather Be extra cautious for the first few kilometers miles of driving while you adjust to the change in driving conditions This is especially true in snow A person can forget some snow driving techniques during the summer months Practice is needed to relearn those skills ...

Страница 386: ...ave patches of ice Driving conditions can be very hazardous when the outside temperature is near freezing The road surface can become covered with areas of water puddles mixed with areas of ice so your traction can change without warning Be careful when downshifting If traction is low you can lock up the drive wheels for a moment and cause a skid Inspect your windscreen wipers and washers frequent...

Страница 387: ...ssist to help stabilize the vehicle trailer combination by reducing the vehicle speed For more information see page Be sure to read the section on page if you plan to tow off paved surfaces Avoid towing a trailer during your vehicle s first 1 000 km 625 miles see page 527 390 332 393 Off Road Guidelines Towing a Trailer Driving Load Limits Break In Period 382 Exceeding any load limit or improperly...

Страница 388: ...railer s luggage to change the trailer nose load Start by putting approximately 60 percent of the luggage toward the front and 40 percent toward the rear With a trailer package of more than 1 000 kg 2 200 lbs you may need to adjust the luggage weight toward the rear Never load the trailer so the back is heavier than the front This takes weight off your vehicle s rear axle and reduces traction This...

Страница 389: ... equipment is properly installed and maintained and that it meets the country s regulations where you are driving Please consider that the installation of optionals and trailer nose load when towing a trailer will reduce the loading capacity Towing a load that is too heavy can seriously affect your vehicle s handling and performance It can also damage the engine and drivetrain The best way to conf...

Страница 390: ... connector located behind the left side panel in the luggage area Refer to the drawing above for the wiring colour code and purpose of each pin If you use a non Honda trailer lighting harness and converter you can get the connector and pins that mate with the connector in your vehicle from your dealer You can get an optional trailer lighting connector for your vehicle from your dealer Since lighti...

Страница 391: ...All weights and loads are within limits The towbar safety chains and any other attachments are secure All items in or on the trailer are properly secured and cannot shift while you drive The lights and brakes on your vehicle and the trailer are working properly Your vehicle tyres and spare if equipped are properly inflated and the trailer tyres and spare are inflated as recommended by the trailer ...

Страница 392: ...owing a trailer on level roads D is the proper shift lever position to use when towing a trailer in hilly terrain Do not exceed the limited speed when towing a trailer At higher speeds the trailer may sway or affect vehicle handling see in the next page for additional gear information Make turns more slowly and wider than normal The trailer tracks a smaller arc than your vehicle and it can hit or ...

Страница 393: ...sion to overheat Make sure to set the parking brake when starting off on an incline Crosswinds and air turbulence caused by passing trucks can disrupt your steering and cause the trailer to sway When being passed by a large vehicle keep a constant speed and steer straight ahead Do not try to make quick steering or braking corrections When driving down hills reduce your speed and always apply engin...

Страница 394: ...turning off the ignition switch Idling the engine is prohibited in some countries Always follow the legal requirements of the countries in which you will drive Follow all normal precautions when parking including firmly setting the parking brake and putting the transmission in Park automatic or in first or reverse manual Also place wheel chocks at each of the trailer s tyres bottom Towing a Traile...

Страница 395: ... be turned on automatically by the system even if you do not keep the pressure on the brake pedal Trailer stability assist cannot prevent a loss of control Always reduce the vehicle speed and steer firmly Do not brake suddenly or make quick steering motion It could cause the trailer to jackknife or turn over and the system becomes ineffective Trailer stability assist will also be ineffective while...

Страница 396: ...tion If there is a problem with the VSA system the VSA system and trailer stability assist function shut off The VSA system and VSA activation indicators also come on see page The control unit monitors the VSA circuitry and the braking system If there is a problem with the brake lighting system the trailer stability assist function shuts down and the symbol TSA or this symbol with a CHECK SYSTEM m...

Страница 397: ...ctivation indicators also come on see page The ABS indicator and the brake system indicator may also come on along with the VSA system indicator If you see these warning indicators have your vehicle checked at your dealer as soon as possible If you turn off the VSA the trailer stability assist function also shuts off Press and hold the VSA off switch until you hear a beep see page The VSA activati...

Страница 398: ...s owner s manual pay special attention to the precautions and tips in this section and get acquainted with your vehicle before you leave the paved roads In many countries the law prohibits off road driving e g driving in forests trailblazing etc Please check your local laws and regulations before commencing any off road driving activity Driving Off Road Guidelines General Information 393 Improperl...

Страница 399: ...ully inspect your vehicle to make sure there is no damage that could make driving it unsafe Recheck the condition of the tyres and the tyre pressures The route presents limits too steep or bumpy roads You have limits driving skill and comfort And your vehicle has limits traction stability and power Driving off road can be hazardous if you fail to recognize limits and take the proper precautions To...

Страница 400: ...The water can get into the transmission and differential diluting the lubricant and causing an eventual failure It can also wash the grease out of the wheel bearings Debris in the road can damage your suspension or other components Because your vehicle has a high centre of gravity driving over a large obstacle or allowing a wheel to drop into a deep hole can cause your vehicle to tip or roll over ...

Страница 401: ...drive system shuts off and only the front wheels receive power If this happens stop and allow everything to cool down The 4 wheel drive system will work again after its temperature drops If you slip the clutch for a long time while trying to get unstuck you may overheat and damage it Driving Off Road Guidelines 396 06 09 13 17 53 40 32SWA600_401 ...

Страница 402: ...nance Record 407 Fluid Locations 408 Adding Engine Oil Petrol models 410 Adding Engine Oil Diesel models 412 Engine Coolant Petrol models 414 Engine Coolant Diesel models 416 Windscreen Washers 418 Automatic Transmission Fluid 419 Manual Transmission Fluid 420 Rear Differential Fluid 421 Brake and Clutch Fluid 421 Power Steering Fluid 423 Air Cleaner Element Petrol models 424 Air Cleaner Element D...

Страница 403: ...can arise in performing maintenance Only you can decide whether or not you should perform a given task All service items not detailed in this section should be performed by a certified technician or other qualified technician To clean parts use a commercially available degreaser or parts cleaner not fuel Maintenance Maintenance Safety Important Safety Precautions Potential Vehicle Hazards Carbon M...

Страница 404: ...hicle regularly over a distance of several kilometres miles We recommend the use of genuine Honda parts and fluids or their equivalent whenever you have maintenance done These are the same high quality items that went into your vehicle when it was new so you can be sure they fit and perform flawlessly There are two types of maintenance schedule in this owner s manual One is for petrol models see p...

Страница 405: ...he tyre pressure monthly Examine the tread for wear and foreign objects See page Parking brake Check the parking brake lever for smooth operation Brake pedal Check the brake pedal for smooth operation Brakes and clutch Check the fluid level monthly See page Automatic transmission Check the fluid level monthly See page Air conditioning system Check its operation weekly See page Windscreen demister ...

Страница 406: ... 125 miles or 6 months Every 10 000 km 6 250 miles or 6 months Every 10 000 km 6 250 miles or 1 year 20 12 5 12 Replace engine oil Replace engine oil filter Clean air cleaner element Dry type only Replace air cleaner element Wet and dry types Inspect valve clearance Replace fuel filter Replace spark plugs Inspect drive belt Inspect idle speed Replace engine coolant 40 25 0 24 80 50 0 48 100 62 5 6...

Страница 407: ... tyre inflation and condition at least once per month Tie rod ends steering gear box and boots Suspension components Driveshaft boots Brake hoses and lines including ABS All fluid levels and condition of fluids Exhaust system Fuel lines and connections Refer to page for replacement information under severe conditions Rotate tyres every 10 000 km 6 250 miles Every 10 000 km 6 250 miles or 6 months ...

Страница 408: ...g to the maintenance schedule indicated as Severe Extensive idling or long periods of stop and go driving Trailer towing driving with a loaded roof rack or driving in mountainous conditions Driving on muddy dusty or de iced roads Condition A B C D E B D Items Engine oil and oil filter Transmission fluid M T A T A B C D E Maintenance Schedule for Petrol Models Except EU NOTE Severe driving conditio...

Страница 409: ... 1 000 months Every 10 000 km 6 250 miles or 1 year Every 5 000 km 3 125 miles or 6 months 40 25 0 24 60 37 5 36 140 87 5 84 Refer to page for replacement information under severe conditions Replace engine oil and oil filter Replace air cleaner element Wet type Replace fuel filter Inspect drive belt Replace engine coolant Replace transmission fluid Replace rear differential fluid Inspect front and...

Страница 410: ...00 125 0 120 Rotate tyres every 10 000 km 6 250 miles Every 10 000 km 6 250 miles or 6 months Refer to page for replacement information under severe conditions Replace brake fluid Check parking brake adjustment Replace dust and pollen filter Check expiry date for TRK bottle if equipped Rotate tyres Check tyre inflation and condition at least once per month Tie rod ends steering gear box and boots ...

Страница 411: ...idling or long periods of stop and go driving Trailer towing driving with a loaded roof rack or driving in mountainous conditions Driving on muddy dusty or de iced roads Condition A B C D E D E B D Items Engine oil and oil filter Air cleaner element Manual transmission fluid Driving in extremely hot over 35 C conditions A B C D E Maintenance Maintenance Schedule for Diesel Models Except EU NOTE Se...

Страница 412: ...ate Km Mi or Month Date Km Mi or Month Date Km Mi or Month Date 75 000 Mi or 72 Mo 87 500 Mi or 84 Mo 100 000 Mi or 96 Mo 112 500 Mi or 108 Mo 125 000 Mi or 120 Mo Sign or Stamp Sign or Stamp Sign or Stamp Sign or Stamp Sign or Stamp Km Mi or Month Date Km Mi or Month Date Km Mi or Month Date Km Mi or Month Date Km Mi or Month Date 20 000 km 40 000 km 60 000 km 80 000 km 100 000 km 120 000 km 140 ...

Страница 413: ...8 WASHER FLUID Blue cap ENGINE OIL DIPSTICK Orange handle RADIATOR CAP ENGINE COOLANT RESERVOIR ENGINE OIL FILL CAP CLUTCH FLUID Light grey cap AUTOMATIC TRANSMISSION FLUID DIPSTICK Yellow loop BRAKE FLUID Black cap 06 09 13 17 55 46 32SWA600_413 ...

Страница 414: ...tions Diesel models 409 WASHER FLUID Blue cap EXPANSION TANK ENGINE OIL DIPSTICK Orange handle BRAKE FLUID Black cap POWER STEERING FLUID Red cap CLUTCH FLUID Light grey cap ENGINE OIL FILL CAP 06 09 13 17 55 49 32SWA600_414 ...

Страница 415: ...s then check the oil level on the engine oil dipstick Do not fill above the upper mark you could damage the engine Oil is a major contributor to your engine s performance and longevity Always use a premium grade detergent oil It is highly recommended that you use genuine Honda Motor Oil ACEA A1 B1 ACEA A3 B3 or ACEA A5 B5 in your vehicle for as long as you own it This oil is formulated to help you...

Страница 416: ... use an API service SL or higher grade fuel efficient oil This oil is formulated to help your engine use less fuel Your vehicle does not require any oil additives Additives may adversely affect your engine s or transmission s performance and durability You can select the proper SAE viscosity oil for your vehicle according to this chart CONTINUED Except for European models Engine Oil Additives Addi...

Страница 417: ...e intervals given in the maintenance schedule It is highly recommended that you use genuine Honda Motor Oil or 0W 30 synthetic motor oil meeting the minimum specification ACEA A1 B1 ACEA A3 B3 or ACEA A5 B5 Reinstall the engine oil fill cap and tighten it securely Let the engine warm up and turn off the engine let it sit for approximately 3 minutes then check the oil level on the engine oil dipsti...

Страница 418: ...se genuine Honda Motor Oil or 0W 30 synthetic motor oil meeting the minimum specification ACEA C2 or ACEA C3 You can select the proper SAE ACEA viscosity oil for your vehicle according to this chart NOTE 0W 30 oil is formulated to improve fuel economy NOTE 0W 30 is formulated to improve fuel economy Adding Engine Oil Diesel models Maintenance Engine Oil Additives On Vehicles with DPF 413 Ambient T...

Страница 419: ...IN line add coolant to bring it up to the MAX line Inspect the cooling system for leaks Always use genuine Honda All Season Antifreeze Coolant Type 2 This coolant is pre mixed with 50 percent antifreeze and 50 percent water Never add straight antifreeze or plain water Adding Engine Coolant Engine Coolant Petrol models Maintenance 414 Removing the radiator cap while the engine is hot can cause the ...

Страница 420: ...ressure in the cooling system by turning the radiator cap anticlockwise without pressing down Remove the radiator cap by pushing down and turning anticlockwise Pour coolant into the reserve tank Fill it to halfway between the MAX and MIN marks Put the cap back on the reserve tank Do not add any rust inhibitors or other additives to your vehicle s cooling system They may not be compatible with the ...

Страница 421: ...The cooling system contains many aluminium components that can corrode if an improper antifreeze is used Some antifreeze even though labelled as safe for aluminium parts may not provide adequate protection Adding Engine Coolant Engine Coolant Diesel models Maintenance 416 Removing the expansion tank cap while the engine is hot can cause the coolant to spray out seriously scalding you Always let th...

Страница 422: ...add any rust inhibitors or other additives to your vehicle s cooling system They may not be compatible with the coolant or engine components Remove the expansion tank cap by pushing down and turning anticlockwise Make sure the engine and radiator are cool Loosen the expansion tank cap by turning it 1 8 turn anticlockwise This will relieve any remaining pressure in the cooling system 2 3 4 5 1 Main...

Страница 423: ...ll the reservoir clean the edges of the windscreen wiper blades with windscreen washer fluid on a clean cloth This will help to condition them Do not use engine antifreeze or a vinegar water solution in the windscreen washer reservoir Antifreeze can damage your vehicle s paint while a vinegar water solution can damage the windscreen washer pump Use only commercially available windscreen washer flu...

Страница 424: ...k yellow loop from the transmission and wipe it with a clean cloth Insert the dipstick all the way back into the transmission securely as shown in the illustration Check the fluid level with the engine at normal operating temperature Park the vehicle on level ground Start the engine and let it run until the radiator fan comes on then shut off the engine For accurate results wait about 60 seconds b...

Страница 425: ...ll the way back into the transmission securely as shown in the illustration Make sure the rubber cap on the dipstick fits in the dipstick guide and that you push the dipstick in all the way If you are not sure how to add fluid contact your dealer Always use genuine Honda ATF Z1 Automatic Transmission Fluid If it is not available you may use a DEXRON III automatic transmission fluid as a temporary ...

Страница 426: ... pads Brake fluid reservoir all models Clutch fluid reservoir manual transmission only Always use genuine Honda Brake Fluid or an equivalent from a sealed container that is marked DOT3 or DOT4 only Brake fluid marked DOT5 is not compatible with your vehicle s braking system Replace the brake fluid according to the recommendation in the maintenance schedule You will also see the symbol or this symb...

Страница 427: ...it up to that level Use the same fluid specified for the brake system A low fluid level can indicate a leak in the clutch system Have this system inspected as soon as possible Brake and Clutch Fluid Maintenance Clutch System 422 MAX Diesel models MIN Petrol models MAX MIN MAX MIN Diesel models 06 09 13 17 57 30 32SWA600_427 ...

Страница 428: ...y and have the system inspected as soon as possible Turning the steering wheel to full left or right lock and holding it there can damage the power steering pump Pour the fluid slowly and carefully so you do not spill any Clean up any spills immediately it could damage components in the engine compartment Using automatic transmission fluid or another brand of power steering fluid will damage the s...

Страница 429: ...ocedure for removal and reinstallation The air cleaner element is inside the air cleaner housing in the engine compartment To replace it Remove the old air cleaner element Carefully clean the inside of the air cleaner housing with a damp rag Place the new air cleaner element in the air cleaner housing Reinstall the air cleaner housing cover and snap the three hold down clips back into place Unsnap...

Страница 430: ...three holding clips securely Place the new air cleaner element in the air cleaner housing Carefully clean the inside of the air cleaner housing with a damp rag The air cleaner element should be replaced according to the time and distance recommendations in the maintenance schedule Follow the replacement procedure for removal and reinstallation 1 2 3 4 5 Replacement Air Cleaner Element Diesel model...

Страница 431: ...ion This may also be caused by air in the fuel system In this case follow the procedure for see page The water in diesel filter indicator will come on to indicate that draining water is required see page It is recommended to replace the fuel filter every 40 000 km 25 000 miles or 2 years except EU if the fuel you are using is suspected to be contaminated In a high dust environment the filter may b...

Страница 432: ...unsafe reducing your vehicle s visibility and the ability to signal your intentions to other drivers If equipped Bulb replacement should be done by your dealer 1 2 CONTINUED Lights Maintenance 427 POSITION LIGHT FRONT TURN SIGNAL LOW BEAM HEADLIGHT HIGH BEAM HEADLIGHT FRONT FOG LIGHT SIDE TURN SIGNAL 1 2 06 09 13 17 58 14 32SWA600_432 ...

Страница 433: ...ke lights Turn signals Back up lights Hazard light function Licence plate lights High mount brake light Rear fog light Side turn signals Tail lights Front fog lights for some models Rear fog light is installed on the driver s side only 531 Lights Maintenance 428 HIGH MOUNT BRAKE LIGHT Left hand drive type is shown TAIL LIGHT STOP TAIL LIGHT BACK UP LIGHT REAR FOG LIGHT TURN SIGNAL LIGHT 06 09 13 1...

Страница 434: ... vehicle to your dealer to have it replaced Your vehicle is equipped with an automatic headlight adjusting system that adjusts the vertical angle of the headlights low beam automatically Refer to page for more information Your vehicle has halogen headlight bulbs When replacing a bulb handle it by its base and protect the glass from contact with your skin or hard objects If you touch the glass clea...

Страница 435: ...cal connector from the bulb by pulling the connector straight back To change a bulb on the left side remove the fuse box from its stay by pulling it out Open the bonnet To change a bulb on the left side remove the upper part of the air intake duct 3 4 2 1 On Petrol engine model On diesel engine model Lights Maintenance Low Beam Headlights 430 COVER AIR INTAKE DUCT 06 09 13 17 58 45 32SWA600_435 ...

Страница 436: ...le making sure the tabs are in their slots Pivot the hold down wire back in place and clip the end into the slot Push the electrical connector onto the new bulb Make sure it is connected securely Turn on the headlights to test the new bulb Reinstall the air intake duct securely Reinstall the fuse box in place securely 1 7 8 9 5 6 CONTINUED On the left side of diesel engine model On the left side o...

Страница 437: ...ve the cover on the back of the headlight assembly by turning it anticlockwise Remove the electrical connector from the bulb by pushing on the tab to unlock it then slide the connector off the bulb Remove the bulb by turning it approximately one quarter turn anticlockwise Reinstall the coolant reserve tank Reinstall the power steering reservoir tank 5 6 7 8 3 4 2 9 On the left side of petrol engin...

Страница 438: ...of its socket Push the new bulb straight into the socket until it bottoms To change a bulb on the left side remove the upper part of the air intake duct Remove the socket from the headlight assembly by turning it one quarter turn anticlockwise 4 5 6 1 2 3 On the left side of diesel engine model On diesel engine model Lights Maintenance Replacing a Front Turn Signal Light Bulb 433 AIR INTAKE DUCT 0...

Страница 439: ...straight into the socket until it bottoms Remove the socket from the headlight assembly by turning it one quarter turn anticlockwise To remove a bulb on the left side remove the engine coolant reserve tank see page To change a bulb on the right side remove the power steering fluid tank see page 2 1 3 4 431 431 On petrol engine model On diesel engine model Replacing a Front Position Light Bulb Ligh...

Страница 440: ... the covers by carefully prying on the edge with a small flat tip screwdriver Pull the tail light assembly out of the rear pillar Use a Phillips head screwdriver to remove the tail light assembly mounting screw under each cover Reinstall the coolant reserve tank Reinstall the power steering reservoir tank 5 6 7 1 2 3 8 CONTINUED On the left side of petrol engine model On the right side of diesel e...

Страница 441: ...bulb by turning it one quarter turn anticlockwise Reinstall the socket into the light assembly by turning it clockwise until it locks Align the clips on the tail light assembly with the holes in the body then push the tail light assembly into place Tighten the two mounting screws securely and reinstall the covers Remove the bulb from the socket by pushing it in and turning the bulb anticlockwise u...

Страница 442: ...ly by turning it one quarter turn anticlockwise Place a cloth on the side edge of the cover Remove the cover by carefully prying on the edge with a small flat tip screwdriver and pulling the cover off 1 2 3 Lights Maintenance Replacing a High mount Brake Light Bulb 437 Left hand drive type is shown 06 09 13 17 59 51 32SWA600_442 ...

Страница 443: ...sembly Push it in until it locks in place Remove the lens by pushing the tabs Pull the bulb straight out of its socket Push the new bulb in until it bottoms in the socket Open the tailgate Remove the licence light assembly by pushing the left edge of the lens toward the right and pulling the assembly out 6 7 4 5 3 1 2 Lights Maintenance Replacing a Rear Licence Plate Light Bulb 438 Vehicle with na...

Страница 444: ...en light bulbs get very hot when lit Oil perspiration or a scratch on the glass can cause the bulb to overheat and shatter The front fog lights were properly aimed when your vehicle was new If you regularly carry heavy items in the luggage area readjustment may be required Adjustment should be done by your dealer or other qualified technician Remove the mounting bolt with a wrench and remove the t...

Страница 445: ... the bulb by turning it approximately one quarter turn anticlockwise Remove the screw with a Phillips head screwdriver then remove the lower fin carefully from the air duct cover by pushing the fin outward 2 3 On diesel engine model Lights Maintenance 440 Petrol engine model Diesel engine model SCREW FIN 06 09 13 18 00 18 32SWA600_445 ...

Страница 446: ...e way but they do not use the same type of bulbs Reinstall the under cover and put the two fasteners back in place then tighten the mounting bolt securely Remove the light assembly by carefully prying on the edge of the lens in the middle with a fingernail file or a small flat tip screwdriver Reinstall the fin and tighten the screw securely 1 4 5 6 7 On petrol engine model On diesel engine model C...

Страница 447: ...ea light Pry on the side edge of the lens in the middle Spotlights Pry on the inner edge of both spotlights Vanity mirror light Pry on the bottom edge of the lens Push the new bulb into the holder Snap the lens back in place 3 2 Lights Maintenance 442 SPOTLIGHTS VANITY MIRROR LIGHT LUGGAGE AREA LIGHT 06 09 13 18 00 35 32SWA600_447 ...

Страница 448: ... to clean them Run the air conditioning at least once a week during the cold weather months Run it for at least 10 minutes while you are driving at a steady speed with the engine at normal operating temperature This circulates the lubricating oil con tained in the refrigerant If the air conditioning does not get as cold as before have your dealer check the system Recharge the system with Refrigera...

Страница 449: ...in urban areas that have high concentrations of soot in the air from industry and diesel powered vehicles Replace it more often if airflow from the heating and cooling system climate control system becomes less than usual The dust and pollen filter is located behind the glove box To replace it To access the filter open the front passenger s door Open the glove box Disengage the two tabs by pushing...

Страница 450: ...ter have it replaced by your dealer Install the new filter in the case Make sure the arrows of the AIR FLOW marks on the filter point to the airflow direction downward Remove the filter from the case Remove the dust and pollen filter case by pushing in on the lock tabs then pulling the case toward you 7 8 6 9 10 11 On some models Dust and Pollen Filter Maintenance 445 DUST AND POLLEN FILTER TAB 06...

Страница 451: ...ect the blade assembly from the wiper arm Press and hold the lock tab When replacing a wiper blade make sure not to drop the wiper blade or wiper arm down on the windscreen To replace a front wiper blade Raise each wiper arm off the windscreen lifting the driver s side first then the passenger s side Do not open the bonnet when the wiper arms are raised or you will damage the bonnet and the wiper ...

Страница 452: ...d install them in the slots along the edge of the new blade Make sure the three rubber tabs inside the blade fit to each notch of the reinforcement as shown Remove the blade from its holder by grasping the tabbed end of the blade Pull firmly until the tabs come out of the holder 4 3 Maintenance Wiper Blades 447 REINFORCEMENT TOP BLADE BLADE 06 09 13 18 01 18 32SWA600_452 ...

Страница 453: ...iper blade assembly onto the wiper arm Make sure it locks in place Lower the wiper arm down against the windscreen Lower the passenger s side first then the driver s side Raise the wiper arm off the rear window Disconnect the blade assembly from the wiper arm by pivoting the blade assembly upward To replace a rear wiper blade 5 6 7 1 2 Wiper Blades Maintenance 448 REAR 06 09 13 18 01 26 32SWA600_4...

Страница 454: ...per blade and install them in the slots along the edge of the new blade Slide the new blade into the holder Make sure it is engaged in the slot along its full length Insert both ends of the blade into the holder Make sure they are secure Install the wiper blade assembly onto the wiper arm Make sure it locks in place Lower the wiper arm against the windscreen 3 5 4 6 7 Maintenance Wiper Blades 449 ...

Страница 455: ...re at least once a month Even tyres that are in good condition may lose 10 to 20 kPa 0 1 to 0 2 kgf cm 1 to 2 psi per month Remember to check the spare tyre at the same time Check the air pressure when the tyres are cold This means the vehicle has been parked for at least three hours or driven less than 1 6 km 1 mile Add or release air if needed to match the recommended cold tyre pressures on a la...

Страница 456: ...for damage foreign objects and wear You should look for Bumps or bulges in the tread or side of the tyre Replace the tyre if you find either of these conditions Cuts splits or cracks in the side of the tyre Replace the tyre if you can see fabric or cord Excessive tread wear Your tyres have wear indicators molded into the tread When the tread wears down you will see a band 12 7 mm 1 2 inch wide acr...

Страница 457: ...age your vehicle s aluminium wheels Use only genuine Honda wheel weights for balancing If you purchase directional tyres rotate only front to back To help increase tyre life and distribute wear more evenly rotate the tyres every 10 000 km 6 250 miles Move the tyres to the positions shown in the chart each time they are rotated The above illustration shows how the tyres should be rotated on the veh...

Страница 458: ...nd may cause the system to work It is best to replace all four tyres at the same time If that is not possible or necessary replace the two front tyres or two rear tyres as a pair Replacing just one tyre can seriously affect your vehicle s handling If you ever replace a wheel make sure that the wheel s specifications match those of the original wheels Consult your dealer before replacing tyres Repl...

Страница 459: ...ith the same profile Pay attention to the tyre size load capacity and speed class when buying Install the winter tyres according to the remarks in the registration paper According to the EEC Directive for tyres when winter tyres are used it is necessary to affix a sticker with the allowable max speed of the winter tyres clearly in the field of view of the driver if the designed max speed of vehicl...

Страница 460: ... and body Choose only fine limbed chains which guarantee enough free space between the tyre and the other vehicle parts in the wheelhouse Pay attention to the sectional assembly view and other directions from the chain manufacturer Consult your dealer before purchasing any type of chains for your vehicle When you have installed tyre chains drive at less than 30 km h 19 mph on roads covered with sn...

Страница 461: ...our tyres as listed On 225 60R18 tyres you cannot install any type of tyre chains If you have to use tyre chains replace the original tyres with the optional 225 65R17 tyre Original Tyre Size Chain Type 1 2 1 For EU models Tyres Maintenance 456 225 65R17 225 60R18 RUD DISK 4715454 or equivalents Not Available 06 09 13 18 02 24 32SWA600_461 ...

Страница 462: ... water Dry off the battery with a cloth or paper towel Coat the terminals with grease to help prevent future corrosion If additional battery maintenance is needed see your dealer or a qualified technician If you need to connect the battery to a charger disconnect both cables to prevent damaging your vehicle s electrical system Always disconnect the negative cable first and reconnect it last CONTIN...

Страница 463: ...or open flame can cause the battery to explode with enough force to kill or seriously hurt you Keep all sparks open flames and smoking materials away from the battery Wear protective clothing and a face shield or have a skilled technician do the battery maintenance The battery contains sulfuric acid electrolyte which is highly corrosive and poisonous Getting electrolyte in your eyes or on your ski...

Страница 464: ...it easier to get your vehicle back on the road If possible store your vehicle indoors Leave the parking brake off Put the transmission in reverse manual or Park automatic If your vehicle s battery is disconnected or goes dead the audio system may disable itself The next time you turn on the radio you will see ENTER CODE in the frequency display Use the preset buttons to enter the code see page Sup...

Страница 465: ...e maintenance inspections called for in the 2 years 40 000 km 25 000 miles maintenance schedule as soon as you take it out of storage see page The replacements called for in the maintenance schedule are not needed unless the vehicle has actually reached that time or distance After you parked the vehicle for an extended period water stays in the fuel system and the engine will not start In this cas...

Страница 466: ...engine cover and component parts On vehicles with information display the PGM FI indicator will come on In this case air may have entered the fuel system The system requires priming to start the engine Prime the fuel system as follows Open the bonnet Refuel the fuel tank minimum 5 litre Squeeze the fuel hand primer until you feel a strong resistance 1 2 3 332 333 CONTINUED Priming the Fuel System ...

Страница 467: ...lamp will be turned off On vehicles with multi information the PGM FI warning will also go out On vehicles with information display the PGM FI indicator will also go out If you are not sure how to bleed the air contact your dealer If the engine fails to restart after priming the fuel system there is a problem in the fuel system You should have the vehicle inspected by your dealer If the engine fai...

Страница 468: ...nd interior Also included are several things you can do to help prevent corrosion Exterior Care 464 Washing 464 Waxing 465 Aluminium Wheels 465 Audio Antenna 466 Paint Touch up 466 Interior Care 467 Carpeting 467 Floor Mats 467 Fabric 468 Vinyl 468 Leather 468 Windows 468 Seat Belts 469 Air Fresheners 469 Corrosion Protection 470 Appearance Care Appearance Care 463 06 09 13 18 03 14 32SWA600_468 ...

Страница 469: ...in a product made especially for car washing Wash the vehicle using water and detergent solution and a soft bristle brush sponge or soft cloth Start at the top and work your way down Rinse frequently Check the body for road tar tree sap etc Remove these stains with tar remover or turpentine Rinse it off immediately so it does not harm the finish Remember to re wax these areas even if the rest of t...

Страница 470: ...tain mild abrasives and solvents that remove the top layer of the finish You should use a polish on your vehicle if the finish does not have its original shine after using a wax Cleaning tar insects etc with removers also takes off the wax Remember to re wax those areas even if the rest of the vehicle does not need waxing Clean your vehicle s aluminium alloy wheels as you do the rest of the exteri...

Страница 471: ...em right away to prevent corrosion of the metal underneath Use the touch up paint only on small chips and scratches More extensive paint damage should be repaired by a professional Your vehicle is equipped with an antenna at the rear of the roof Before using a drive through car wash remove the antenna by unscrewing it by hand This prevents the antenna from being damaged by the car wash brushes Ext...

Страница 472: ...ater to the foam The driver s floor mat that came with your vehicle hooks over the floor mat anchors This keeps the floor mat from sliding forward and possibly interfering with the pedals If you remove the driver s floor mat make sure to re anchor it when you put it back in your vehicle If you use non Honda floor mats make sure they fit properly and that they can be used with the floor mat anchors...

Страница 473: ...r cleaning is needed use a soap specifically for leather such as saddle soap Apply this soap with a damp soft cloth Wipe down and buff as described above If you use a leather cleaner wipe it off quickly with a soft and dry cloth Never leave a cloth soaked with leather cleaner on any part of the interior If left for a long time some leather cleaners may cause discolouration or cracking of interior ...

Страница 474: ...e liquid air fresheners contain chemicals that may cause parts of the interior trim and fabric to crack or discolour If you use a liquid air freshener make sure you fasten it securely so it does not spill as you drive Dirt build up in the loops of the seat belt anchors can cause the belts to retract slowly Wipe the insides of the loops with a clean cloth dampened in mild soap and warm water or iso...

Страница 475: ...u discover them Inspect and clean out the drain holes in the bottom of the doors and body Check the floor coverings for dampness Carpeting and floor mats may remain damp for a long time especially in winter This dampness can eventually cause the floor panels to corrode Use a high pressure spray to clean the underside of your vehicle This is especially important in areas that use road salt in winte...

Страница 476: ...494 Jump Starting 496 If the Engine Overheats Petrol models 499 If the Engine Overheats Diesel models 501 Low Oil Pressure Indicator Red 503 Oil Level Indicator Amber 504 Oil Level Indicator On the multi information display 505 Charging System Indicator 507 Malfunction Indicator Lamp Petrol models 508 Malfunction Indicator Lamp Diesel models 509 PGM FI Indicator Diesel models 510 PGM FI Warning Di...

Страница 477: ...0 mph This tyre gives a harsher ride and less traction on some road surfaces Use greater caution while driving Do not mount snow chains on the compact spare tyre Do not use the compact spare tyre if you are towing a trailer Replace the tyre when you can see the tread wear indicator bars The replacement should be the same size and design tyre mounted on the same wheel The spare tyre is not designed...

Страница 478: ...page Turn on the hazard warning indicators and turn the ignition switch to the LOCK 0 position Have all the passengers get out of the vehicle while you change the tyre Park the vehicle on firm level and non slippery ground Put the transmission in reverse Apply the parking brake If you are towing a trailer unhitch the trailer 1 2 479 On vehicles with spare tyre On vehicles with Honda TRK Taking Car...

Страница 479: ... wheel diagonally opposite the tyre you are changing Open the tailgate Raise the luggage area floor lid by lifting it up with the strap then remove the lid When you store the flat tyre in the spare tyre well do not reinstall the luggage area floor lid forcibly This will damage the tabs on the lid Take the tool kit out of the spare tyre well 3 4 5 6 7 Changing a Flat Tyre Taking Care of the Unexpec...

Страница 480: ... the top of the jack contacts the jacking point Make sure the jacking point tab is resting in the jack notch Use the extension and the wheel nut wrench as shown to raise the vehicle until the flat tyre is off the ground 9 8 10 Changing a Flat Tyre Taking Care of the Unexpected 475 WHEEL NUT WRENCH WHEEL NUT JACKING POINT WHEEL NUT WRENCH EXTENSION 06 09 13 18 04 44 32SWA600_480 ...

Страница 481: ...wheel and hub with a clean cloth Wipe the hub carefully it may be hot from driving Put on the spare tyre Put the wheel nuts back on finger tight then tighten them in a crisscross pattern with the wheel nut wrench until the wheel is firmly against the hub Do not try to tighten the wheel nuts fully Lower the vehicle to the ground and remove the jack 11 12 14 13 Changing a Flat Tyre Taking Care of th...

Страница 482: ... wing bolt turn it over and put it back on the bolt Secure the flat tyre by screwing the wing bolt back into its hole Store the centre cap in the spare tyre well Make sure it does not get scratched or damaged Remove the centre cap before storing the flat tyre in the spare tyre well 15 16 17 18 19 Changing a Flat Tyre Taking Care of the Unexpected 477 CENTRE CAP For spare tyre For normal tyre 108 N...

Страница 483: ...the cover on the flat tyre of the luggage area Close the tailgate 21 20 Changing a Flat Tyre Taking Care of the Unexpected 478 Loose items can fly around the interior in a crash and could seriously injure the occupants Store the wheel jack and tools securely before driving 06 09 13 18 05 03 32SWA600_483 ...

Страница 484: ...e tyre sealant kit Read the handling manual well and use it correctly Small punctures in the tyre tread caused by a nail or a screw can be sealed with the temporary repair kit On EU models refer to the Service Book that came with your vehicle The temporary repair kit cannot be used in the following cases Inform your dealer or a Roadside Assistance Service Expired best before date of the tyre seala...

Страница 485: ...g the nail or screw but only in unavoidable cases Open the tailgate Take the Honda TRK out of the luggage area 1 Instructions for Use Honda TRK For some types Taking Care of the Unexpected 480 If you drive a vehicle after repair without extracting a nail or a screw it may cause air leakage again or damage the inside and burst a tyre If you have to drive drive carefully especially around corners NA...

Страница 486: ...ul if swallowed Swallow plenty of water and seek medical advice immediately Irritating to eyes Rinse immediately with plenty of water and seek medical advice Keep locked up and out of the reach of children If you shake the bottle after connecting the hose with the bottle it may spill sealant Shake bottle well before connecting hose Contains ethylene glycol CAP A B A Aluminium Sealed 06 09 13 18 05...

Страница 487: ...alant kit Unscrew the valve cap D from the tyre valve C Deflate the tyre completely pushing the valve insert using the back of the valve remover E If sealant adheres to clothes it may not be possible to remove Be careful not to spill any If you have any questions about the tyre sealant kit please contact your dealer 3 Safety Label on the Sealant Bottle Honda TRK For some types Taking Care of the U...

Страница 488: ... insert F using the valve remover E Do not place the valve insert F in the sand or dirt 4 CONTINUED Honda TRK For some types Taking Care of the Unexpected 483 A valve insert can jump out if air remains in tyre Be careful in removing valve insert F PLUG FILLER HOSE C C E 06 09 13 18 05 43 32SWA600_488 ...

Страница 489: ...g valve remover E Affix a sticker of Tyre Sealant in the tyre G on the wheel Hold the filling bottle with the filler hose downwards and compress Squeeze the complete content into the tyre 5 Honda TRK For some types Taking Care of the Unexpected 484 F C G C E 06 09 13 18 05 50 32SWA600_489 ...

Страница 490: ...ower plug is not in use reverse this procedure to put the cover back in place This helps to protect the plug end Affix a sticker of Maximum Speed H within the driver s range of vision on the display 6 Honda TRK For some types Taking Care of the Unexpected 485 Do not affix a sticker on the steering wheel The SRS air bag may not function Do not affix it in the position where it prevents the driver f...

Страница 491: ...erate electric inflation pump for not longer than 15 minutes It can cause overheating Honda TRK For some types Taking Care of the Unexpected 486 If the required air pressure is not reached within 10 minutes the tyre may be severely damaged The Tyre Sealant Kit cannot provide the necessary seal Inform a Honda Dealer or Roadside Assistant Service POWER PLUG M K J L C AIR COMPRESSOR SWITCH AIR PRESSU...

Страница 492: ... the tyre pressure is kept the tyre puncture is sealed Continue to drive carefully to the nearest Honda dealer or a Roadside Assistance Service If you drive a vehicle at the speed of more than 80 km h 50 mph your vehicle may vibrate and will not drive safely If the required air pressure dropped inflate the tyre to the required air pressure and repeat from step 6 7 8 9 CONTINUED Honda TRK For some ...

Страница 493: ...but the valve must be replaced Dispose of the used bottle at a Honda dealer Have the tyre replaced at the nearest Honda dealer To repair the sealed tyre consult your dealer Honda TRK For some types Taking Care of the Unexpected 488 In the following cases do not drive on Inform a Honda dealer or a Roadside Assistance Service The tyre pressure has dropped below 130 kPa 1 3 bar 19 psi The tyre pressu...

Страница 494: ...ome types Taking Care of the Unexpected Instructions for Labels on the Air Compressor 489 Do not run the engine in enclosed areas or when the vehicle is supported by the jack Do not touch the air compressor with hands without protective clothing Because it may be extremely hot while operating Never use the air compressor for 15 minutes or longer When reusing make sure the compressor is cool to the...

Страница 495: ... and inflate the tyre to the specified air pressure Check the tyre pressure by using the air pressure gauge on the compressor Turn off the switch on the air compressor before checking the air pressure Connect the power plug of the air compressor to the socket of the accessory power socket When the tyre is inflated to specified air pressure disconnect the power plug from the accessory power socket ...

Страница 496: ...le Deflate tyre pressure Cut the valve off with a knife Be careful not to damage the tyre or the wheel 1 2 CONTINUED Honda TRK For some types Taking Care of the Unexpected Sealant Extraction For a Honda dealer 491 Be careful not to cut a hand or a finger 06 09 13 18 06 40 32SWA600_496 ...

Страница 497: ... 4 until the sealant cannot be drawn out Bend the hose and tie it with the strap or tape so that sealant does not leak Dispose of the bottle at your dealer when you replace it with a new bottle Recycling sealant is important for protecting environmental resources Please cooperate in collecting used sealant 3 4 5 6 Honda TRK For some types Taking Care of the Unexpected 492 06 09 13 18 06 47 32SWA60...

Страница 498: ...sed sealant Honda TRK For some types Taking Care of the Unexpected Sealant Label 493 The sealant contains ethylene glycol Swallowing the sealant can cause fatal poisoning Drink with large quantities of water Call a physician immediately Getting the sealant in your eyes or on your skin can cause serious injury Flush with large quantities of water thoroughly Call a physician immediately Keep out of ...

Страница 499: ...tery is discharged See on page Check these things Check the transmission interlock With an automatic transmission it must be in Park or neutral or the starter will not operate Turn the ignition switch to the START III position If the headlights do not dim check the condition of the fuses If the fuses are OK there is probably something wrong with the electrical circuit for the ignition switch or st...

Страница 500: ...r s speed sounds normal or even faster than normal when you turn the ignition switch to the START III position but the engine does not run Are you using the proper starting procedure Refer to on page on petrol models and page on diesel models Are you using a properly coded key An improperly coded key will cause the immobilizer system indicator in the instrument panel to blink rapidly see page If y...

Страница 501: ...To jump start your vehicle You cannot start your vehicle with an automatic transmission by pushing or pulling it Turn off all the electrical accessories heater A C climate control audio system lights etc Put the transmission in neutral M T or Park A T and set the parking brake Remove the four bolts then remove the engine cover 1 2 3 On diesel models Jump Starting Taking Care of the Unexpected 496 ...

Страница 502: ...erminal on the booster battery Connect the second jumper cable to the negative terminal on the booster battery Connect the other end to the stud bolt on the engine side as shown Do not connect this jumper cable to any other part of the engine 4 5 Jump Starting Taking Care of the Unexpected 497 2 2 engine model Diesel 2 0 engine model 2 0 engine model BOOSTER BATTERY 06 09 13 18 07 29 32SWA600_502 ...

Страница 503: ...lectrical short If the booster battery is in another vehicle have an assistant start that vehicle and run it at a fast idle Start the vehicle If the starter motor still operates slowly check that the jumper cables have good metal to metal contact Connect the second jumper cable to the negative terminal on the booster battery Connect the other end to the engine cover mounting stay as shown Do not c...

Страница 504: ...er the bonnet turn off the engine Wait until you see no more signs of steam or spray then open the bonnet If you do not see steam or spray leave the engine running and watch the temperature gauge If the high heat is due to overloading the engine should start to cool down almost immediately If it does wait until the temperature gauge reading comes down to the midpoint then continue driving If the t...

Страница 505: ...X mark Put the cap back on tightly Put the radiator cap back on tightly Run the engine and check the temperature gauge If it goes back to the red mark the engine needs repair see on page If you don t find an obvious leak check the coolant level in the radiator reserve tank Add coolant if the level is below the MIN mark If there was no coolant in the reserve tank you may need to add coolant to the ...

Страница 506: ...r conditioning system climate control system and all other accessories Turn on the hazard warning indicators If you do not see steam or spray leave the engine running and watch the temperature gauge If the high heat is due to overloading climbing a long steep hill on a hot day with the A C running for example the engine should start to cool down almost immediately If it does wait until the tempera...

Страница 507: ...ck to the red mark the engine needs repair see on page If the temperature stays normal check the coolant level in the expansion tank If it has gone down add coolant to the MAX mark Put the expansion tank cap back on tightly If you don t find an obvious leak check the coolant level in the expansion tank Add coolant if the level is below the MIN mark If the expansion tank needs coolant you will have...

Страница 508: ...d when the engine is running If it turns on red and starts flashing or stays on the oil pressure has dropped very low or lost pressure Serious engine damage is possible and you should take immediate action You will also see the symbol or this symbol with an OIL PRESSURE LOW message on the multi information display see page The same design indicator may come on amber while you are driving This indi...

Страница 509: ...e driving again if the oil level indicator comes on If you ignore the oil level indicator and keep driving with this indicator on you can seriously damage the engine If the amber indicator blinks while driving there is a system problem in the engine oil level sensor Have your dealer inspect your vehicle as soon as possible This system activates after the engine warms up If the outside temperature ...

Страница 510: ...e oil level If the engine oil level is near or below the lower mark on the dipstick you should add the engine oil see page on petrol models and page on diesel models If this symbol comes on safely pull off the road park the vehicle on level ground turn off the engine and let the vehicle sit for approximately 3 minutes The oil level symbol message display can be reset each time you turn off the eng...

Страница 511: ... a long time until the system senses the engine oil level If the symbol or this symbol with a CHECK SYSTEM message appears on the multi information display when the engine is running there is a system problem in the engine oil level sensor You will also hear a beep Have your dealer inspect your vehicle as soon as possible Oil Level Indicator Taking Care of the Unexpected Oil Level Sensor Failure 5...

Страница 512: ...essage on the multi information display see page Immediately turn off all electrical accessories Try not to use other electrically operated controls such as the power windows Keep the engine running starting the engine will discharge the battery rapidly Go to a dealer or a service station where you can get technical assistance 125 On vehicles with multi information display Taking Care of the Unexp...

Страница 513: ...mes on frequently even though it goes off when you follow the above procedure This indicator comes on then goes out when you turn the ignition switch to the ON II position If the indicator comes on while driving it means one of the engine s emissions control systems may have a problem Even though you may feel no difference in your vehicle s performance it can reduce your fuel economy and cause inc...

Страница 514: ... comes on then goes out when you turn the ignition switch to the ON II position If it comes on at any other time it indicates one of the emissions control systems may have a problem Even though you may feel no difference in your vehicle s performance it can reduce your fuel economy and cause your vehicle to put out excessive emissions Continued operation may cause serious damage This indicator wil...

Страница 515: ...y cause the engine power to reduce see page If this indicator remains on safely pull off the road and turn off the engine Restart and turn off the engine at least three times at intervals of approximately 30 seconds then watch the indicator If it comes on and stays on again have your vehicle checked by your dealer as soon as possible Drive moderately until the dealer has inspected the problem Avoi...

Страница 516: ... symbol PGM FI appears on the multi information display frequently even though it goes off when you follow the above procedure If you keep driving with the symbol PGM FI on you can damage your vehicle s emissions controls and engine Those repairs may not be covered by your vehicle s warranties This symbol or the symbol with a message will also appear on the multi information display and you cannot...

Страница 517: ...of the long distance needed to stop it is hazardous to drive the vehicle You should have it towed and repaired as soon as possible see on page The brake system indicator normally comes on when you turn the ignition switch to the ON II position and as a reminder to check the parking brake It will stay on if you do not fully release the parking brake You will also see the symbol or this symbol with ...

Страница 518: ...e fuse boxes The interior fuse box is located under the dashboard on the driver s side The fuse label is attached under the steering column Fuses Taking Care of the Unexpected 513 INTERIOR Diesel models UNDER BONNET FUSE BOX TAB TAB FUSE LABEL FUSE Petrol models UNDER BONNET PRIMARY FUSE BOX TAB Petrol models UNDER BONNET SECONDARY FUSE BOX 06 09 13 18 09 36 32SWA600_518 ...

Страница 519: ... electrical in your vehicle stops working the first thing you should check for is a blown fuse Determine from the chart on pages and on petrol models and pages and on diesel models or the diagram on the fuse box lid which fuse or fuses control that device Check those fuses first but check all the fuses before deciding that a blown fuse is the cause Replace any blown fuses and check if the device w...

Страница 520: ... or radio If you replace the blown fuse with a spare fuse that has a lower rating it might blow out again This does not indicate anything wrong Replace the fuse with one of the correct rating as soon as you can Check the smaller fuses in the under bonnet fuse box and all the fuses in the interior fuse box by pulling out each one with the fuse puller provided in the under bonnet fuse box On petrol ...

Страница 521: ... is disabled the clock setting in the audio system will be cancelled You will need to reset the clock according to the instructions in the audio system section in this owner s manual If the radio fuse is removed the audio system may disable itself The next time you turn on the radio you may see ENTER CODE in the frequency display Use the preset buttons to enter the digit code see page On vehicles ...

Страница 522: ...b Fan Motor Main Fan Motor Rear Demister Blower Hazard LAF Stop Horn Driver s Power Seat Reclining Driver s Power Seat Sliding IGPS OIL LEVEL EPT L High Power Sound IG Coil FI Main MG Clutch DBW Interior Light Back Up 1 2 3 4 5 6 7 8 9 10 11 12 13 14 15 16 17 18 19 20 21 22 23 1 2 Headlight Washer Not Used Circuits Protected Circuits Protected No No No Circuits Protected Fuse Locations Petrol mode...

Страница 523: ...ight High Beam Left Headlight High Beam Small Lights Interior Small Lights Exterior Right Headlight Low Beam Left Headlight Low Beam Headlight High Beam Main Small Lights Main Rear Fog Light Headlight Low Beam Main ACC EPT Trailer Stability Assist AFS Not Used Sunshades Door Lock Driver s Power Window HAC Option Rear Accessory Socket Accessory Front Passenger s Power Window Headlight Washer Rear R...

Страница 524: ...Interior Light Fuel Heater Main Fan Motor Fuel Heater Stop Horn Hazard Sub Fan Motor IGP Not Used Driver s Power Seat Reclining Driver s Power Seat Sliding Headlight Washer For some types Main Fuse Battery ABS Motor Headlight Main Ignition Switch Main Right Side e pretensioner Left Side e pretensioner Option Main Glow Power Window Main MG Clutch IGP2 ISV IGP2 Not Used Blower ABS F S High Power Sou...

Страница 525: ...ight Low Beam Left Headlight Low Beam Headlight High Beam Main Small Lights Main Rear Fog Light 1 2 3 4 5 6 7 8 9 10 11 12 13 14 15 16 17 18 19 20 Headlight Low Beam Main ACC EPT Trailer Stability Assist AFS Not Used Sunshades Door Lock Driver s Power Window HAC Option Rear Accessory Socket Accessory Front Passenger s Power Window Headlight Washer Rear Right Power Window Rear Left Power Window Acc...

Страница 526: ...k Any other method of towing will damage the drive system When you contact the towing agency inform them a flat bed is required Towing with only two tyres on the ground will damage parts of the 4WD system It should be transported on a flat bed truck or trailer Emergency Towing Taking Care of the Unexpected The only way you can safely tow your vehicle is with flat bed equipment 521 06 09 13 18 10 3...

Страница 527: ...522 06 09 13 18 10 37 32SWA600_527 ...

Страница 528: ...d the locations of the identification numbers Identification Numbers 524 Specifications 526 Catalytic Converter Petrol models 532 Catalytic Converter Diesel models 533 Diesel Particulate Filter DPF System 534 Technical Information Technical Information 523 06 09 13 18 10 41 32SWA600_528 ...

Страница 529: ...transmission number is on a label on top of the transmission Do not mistake the transmission number for the engine number 1 2 3 Identification Numbers Technical Information 524 2 0 engine model Petrol 2 2 engine model Diesel ENGINE NUMBER ENGINE NUMBER MANUAL TRANSMISSION NUMBER AUTOMATIC TRANSMISSION NUMBER MANUAL TRANSMISSION NUMBER 06 09 13 18 10 48 32SWA600_529 ...

Страница 530: ...install the lid before closing the bonnet The Vehicle Identification Number VIN chassis number also appears on a plate fastened to the top of the dashboard The chassis and engine numbers also appear on the plate attached to the front doorjamb on the left side Identification Numbers Technical Information 525 VEHICLE IDENTIFICATION NUMBER CHASSIS AND ENGINE NUMBER PLATE 06 09 13 18 10 53 32SWA600_53...

Страница 531: ...75 mm 65 9 in 1 820 mm 71 7 in 410 mm 16 1 in 307 mm 12 1 in 995 mm 39 2 in 1 080 mm 42 5 in marks show towbar fixing points mark shows towbar coupling point Dimensions No 1 2 3 4 5 6 7 Length Width Height Wheelbase Track 1 575 mm 62 0 in 1 570 mm 61 8 in 2 630 mm 103 5 in 1 805 mm 71 1 in NOTE 1 2 Front Rear 7 With roof antenna 6 4 2 3 5 1 06 09 13 18 11 06 32SWA600_531 ...

Страница 532: ...6 lbs 2 160 kg 4 762 lbs 1 050 kg 2 315 lbs 1 020 kg 2 249 lbs 1 140 kg 2 513 lbs 1 040 kg 2 293 lbs 1 040 kg 2 293 lbs 1 500 kg 3 307 lbs 1 600 kg 3 527 lbs 2 000 kg 4 409 lbs 600 kg 1 323 lbs 100 kg 220 lbs The maximum towing weight should be reduced if you tow a trailer over 1 000 meters of elevation For more information see page Diesel models 3 1 2 The following is for Germany only 2 0 engine ...

Страница 533: ...ne engine 10 5 1 IZFR6K11S SKJ20DR M11S 16 7 1 85 x 97 1 mm 3 35 x 3 82 in 2 204 cm 134 cu in Type Bore x Stroke Displacement Compression ratio Spark plugs Type Bore x Stroke Displacement Compression ratio Water cooled 4 stroke DOHC intercooler turbo diesel engine 81 x 96 9 mm 3 19 x 3 81 in 1 997 cm 122 cu in 06 09 13 18 11 25 32SWA600_533 ...

Страница 534: ... 0 6 0 16 US gal 0 13 Imp gal Including the coolant in the expansion tank and that remaining in the engine Expansion tank capacity 0 6 0 16 US gal 0 13 Imp gal Including the coolant in the reserve tank and that remaining in the engine Reserve tank capacity Manual transmission fluid Automatic transmission fluid Rear differential fluid Windscreen washer reservoir 1 2 1 3 US qt 1 1 Imp qt 4 5 4 8 US ...

Страница 535: ...inion with electrical power assistance Rack and pinion with hydraulic power assistance Type Front Rear Parking Mechanical Solid disc Ventilated disc Power assisted Type Dry single plate diaphragm spring Size Pressure See tyre information label on driver s doorjamb or ask dealer for information in Front Rear Front Rear Front Rear Front Petrol models Diesel models 06 09 13 18 11 56 32SWA600_535 ...

Страница 536: ... the outside mirrors should be done by your dealer For some types On vehicles with high voltage discharge type low beam headlights replacement of a low beam headlight bulb should be performed by your dealer Headlights Front turn signal lights Front position lights Side turn signal lights Rear turn signal lights Stop taillights Back up lights Tail lights Rear fog light Front fog lights Licence plat...

Страница 537: ...come near it Park your vehicle away from high grass dry leaves or other flammables Keep the engine well maintained Have your vehicle diagnosed and repaired if it is misfiring backfiring stalling or otherwise not running properly A defective three way catalytic converter contributes to air pollution and can impair your engine s performance Follow these guidelines to protect your vehicle s three way...

Страница 538: ...reactions to convert the exhaust gasses without affecting the metals The catalytic converter is equipped with your vehicle to reduce HC CO NOx and PM A replacement unit must be an original Honda part or its equivalent 295 Catalytic Converters Diesel models Technical Information 533 CATALYTIC CONVERTER CATALYTIC CONVERTER without DPF 06 09 13 18 12 33 32SWA600_538 ...

Страница 539: ...the catalytic converter in normal high speed driving While the PM is burnt you may notice some changes on the instrument panel and the exhaust gas The average fuel consumption on the multi information display or the information display depending on models will be increased temporarily and some exhausted smoke from your vehicle may be visible The DPF system requires no regular maintenance If you dr...

Страница 540: ...mation display while the engine is running it means the diesel particulate filter DPF should be regenerated to remove the accumulated particulate matter PM To regenerate the DPF when traffic allows maintain a vehicle speed of at least 60 km h 37 mph and continue to drive until the symbol message goes out it may take up to about 10 minutes depending on driving conditions This will increase the exha...

Страница 541: ...away from high grass dry leaves or other flammables If you see this symbol or this symbol with a CHECK SYSTEM message on the multi information display while the engine is running it means the diesel particulate filter DPF is clogged with accumulated particulate matter PM and it should be checked then repaired or replaced Take your vehicle to a Honda dealer as soon as possible Catalytic Converters ...

Страница 542: ...ting System AFS 168 Indicator 92 Off Switch 169 Adding Engine Coolant 414 416 Additives Engine Oil 411 413 Airbag SRS 14 31 Air Bleeding 461 Air Cleaner Element 424 425 Air Conditioning System 228 235 Maintenance 443 Usage 233 238 Air Outlets Vents 228 235 Air Pressure Tyres 450 Aluminium Wheels Cleaning 465 Antifreeze 414 416 Anti lock Brakes ABS Indicator 86 366 Operation 366 Anti theft Steering...

Страница 543: ...ldren 67 Lower Anchorages 54 Risks with Airbags 40 43 Small Children 48 Tethers 64 Where Should a Child Sit 40 Childproof Door Locks 181 Cigarette Lighter 222 Cleaner Element Air 424 425 Cleaning Aluminium Wheels 465 Exterior 464 Interior 467 Seat Belts 469 Vinyl 468 Windows 468 Climate Control System 235 Clock 277 Clutch Fluid 421 422 Coat Hook 221 Cold Weather Starting in 352 353 Collision Mitig...

Страница 544: ...eated Engine 499 501 PGM FI Indicator 510 PGM FI Warning 511 Towing 521 Tyre Sealant Kit 479 DANGER Explanation of ii Dashboard 2 76 Daytime Running Lights 165 Dead Battery 496 Default Settings 129 155 Defrosting the Windows 234 241 Demister Rear Window 171 Detachable Anchor 199 Diesel Fuel 332 Diesel Particulate Filter DPF 534 Indicator 88 Symbol 124 Dimensions 526 Dimming the Headlights 164 Dips...

Страница 545: ... 426 Gauge 99 Low Fuel Indicator 96 Octane Requirement 332 Tank Refueling 333 Fuses Checking the 513 Gauges Engine Coolant Temperature 99 Fuel 99 Speedometer 99 Tachometer 99 Gearshift Lever Positions Automatic Transmission 359 Manual Transmission 355 Emergency Brake 214 Emergency Flashers 171 Emergency Towing 521 Engine Coolant Temperature Gauge 99 If It Won t Start 494 Malfunction Indicator Lamp...

Страница 546: ...Identification Number Vehicle 524 525 Ignition Keys 175 Switch 177 Immobilizer System 176 Important Safety Precautions 10 Indicators Symbols 82 111 ABS Anti lock Brake 86 125 ACC 91 128 AFS 92 127 Brake Parking and Brake System 86 122 512 Charging System 84 125 507 CMBS 93 128 Cruise Control 91 EPS 89 126 Glow Plugs 85 High Beam 94 Key Immobilizer System 88 Light Control 94 Low Fuel 96 Low Oil Pre...

Страница 547: ...7 Fuel Fill Door 333 Glove Box 216 Power Door 178 Tailgate 186 Low Coolant Level 338 Low Fuel Indicator 96 Low Oil Pressure Indicator 84 503 Lower Anchorages 54 Lower Gear Downshifting to a 354 Lubricant Specifications Chart 529 Luggage Area Light 224 Luggage Hooks 346 Luggage How to Carry 344 Luggage Shelf 205 Luggage Storing 343 Maintenance 397 Owner s Maintenance Checks 400 Record 407 Safety 39...

Страница 548: ...g Brake and Brake System Indicator 86 512 Parking Over Things That Burn 364 Parking Sensor System 303 Indicators 95 128 Park P Position 359 Petrol 332 Filling the Fuel Tank 333 Filter 426 Fuel Economy 340 Gauge 99 Low Fuel Indicator 96 Octane Requirement 332 Refueling 333 PGM FI Indicator 85 510 PGM FI Warning 123 511 Polishing and Waxing 465 Pollen Filter 444 Position Lights 164 Power Door Locks ...

Страница 549: ...olant 338 414 Restraint Child 39 Reverse Lockout 357 Reverse R Position 359 Roof Rack 345 Rotation Tyre 452 Safety Belts 12 24 Safety Features 11 Airbags 14 Seat Belts 12 Safety Labels Location of 73 Safety Messages ii Seat Belts 12 24 Additional Information 24 Automatic Seat Belt Tensioners 27 Cleaning 469 Detachable Anchor 199 e Pretensioners 28 Lap Shoulder Belt 19 25 Maintenance 29 Reminder In...

Страница 550: ... Vehicle 459 Sunshades 210 Super Locking 180 Supplemental Restraint System 14 31 Servicing 37 SRS Indicator 35 87 System Components 31 System Message Indicator 110 System Warning Symbols Multi Information Display 110 Tachometer 99 Tailgate 186 Open Monitor 95 116 Opening 186 Tail lights Changing Bulbs in 435 Taking Care of the Unexpected 471 Tape Player 271 Technical Descriptions Catalytic Convert...

Страница 551: ...irror 221 Vehicle Capacity Load 344 Vehicle Dimensions 526 Vehicle Identification Number 524 525 Vehicle Stability Assist VSA System 378 Vehicle Storage 459 Ventilation 232 235 VIN 524 525 Vinyl Cleaning 468 Viscosity Oil 411 413 WARNING Explanation of ii Warning Labels Location of 73 Washer Windscreen Checking the Fluid Level 418 Operation 160 Washing 464 Water Draining 426 Indicator 85 127 Waxin...

Страница 552: ... Winter Tyres 454 Wiper Blades Changing 446 Operation 160 WMA 259 Worn Tyres 451 Wrecker Emergency Towing 521 Index 547 06 09 13 18 13 46 32SWA600_552 ...

Отзывы: