background image

Setting and Using The Alarm

Setting and using Alarm 1 or Alarm 2 (Individually)

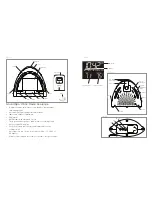
1.  Press and hold the Alarm 1 button. The hour will flash (Fig. 1)
2.  Using the +/- buttons on the back (Fig. 3), set the hour.
3.  Press the Alarm 1 button again and the minutes will flash. Use the +/- keys to set 

the minutes.

4.  The Alarm 1 time will show under the main clock display.

5.  To activate the alarm and choose a wake tone, press the Alarm 1 button to scroll 

through the wake tone options: Beep, Radio or Sound. (Fig. 1)


NOTE: When using the sound mode, the unit will set to the last sound you 
listened to. If you wish to change it press the sound you wish to wake to 
and then press the POWER button (Fig 1).

6.  Once your choice is made, a (

%

) will appear next to the Alarm 1 time. Your alarm 

is set.

7.  To set a second alarm, repeat steps 1-6 above, using the Alarm 2 button.

8.  When the alarm sounds you may:


a.  Press the SNOOZE button (Fig. 1). Your sleep time will be extended by 9 

minutes. You may use this feature until you turn the alarm off.


b.  Turn OFF: Press the POWER button to turn off the alarm. Your alarm will turn 
off but remain set for the next day. If you wish to turn the alarm off completely or 

choose a different wake tone, repeat steps 1-6 in “SETTING AND USING THE 
ALARM”


NOTE: If the alarm sounds for 30 minutes continuously it will automatically 
turn off.

Using the “Nap” Feature

1. Press the snooze button to toggle through your choice of nap length (15, 30, 45 or 

60 minutes). (Fig. 1)

2. Once set, the clock will display the time and indicate “nap” on the LCD screen.
3. When nap alarm sounds, press the power button to turn off. (Fig. 1)

8

9

Using the Projection Feature

1.  To turn the projection feature on, press the projector ON/OFF button (Fig. 3) on 

the back of the unit. The time & outdoor temperature is now projected on the wall 
or ceiling. 

NOTE: If the projection feature is OFF, you may hit the SNOOZE button  
(Fig. 1) to trigger 5 seconds of projection.

2.  The angle of the projector can be adjusted to angle on the ceiling or wall  

by moving the PROJECTOR TUBE (Fig. 3) forward or backward.

3.  To turn the angle of the time & temperature that appears on the wall or 


ceiling, rotate the TIME ROTATION KNOB (Fig. 3) until you have reached 


your desired result. 

NOTE: The TIME ROTATION KNOB will rotate up to 350 degrees.

4.  To focus the time & temperature on the wall or ceiling rotate the FOCUS 


KNOB (Fig. 3) until you have reached your desired result.

Using Indoor Temperature

The unit will begin reading indoor temperature when it is plugged in. Allow a  

few minutes for the correct temperature to register on the LCD display. (Fig. 2) 

Using Outdoor Temperature 

Be sure the SoundSpa unit is plugged in prior to the remote sensor  
battery installation.

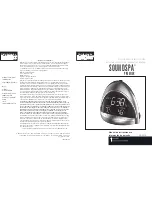
Содержание SS-5010

Страница 1: ...ones o adaptación para habilitar su funcionamiento en cualquier país que no sea aquél para el que fue diseñado fabricado aprobado y o autorizado o la reparación de productos dañados por estas modificaciones no están cubiertos bajo esta garantía LA GARANTÍA AQUÍ ESTABLECIDA SERÁ LA ÚNICA Y EXCLUSIVA GARANTÍA NO HABRÁ NINGUNA OTRA GARANTÍA EXPRESA NI IMPLÍCITA INCLUYENDO NINGUNA GARANTÍA DE COMERCIA...

Страница 2: ... for its intended use as described in this manual Do not use attachments not recommended by HoMedics specifically any attachments not provided with the unit Never operate this appliance if it has a damaged cord plug cable or housing If it is not working properly if it has been dropped or damaged return it to Homedics Service Center for examination and repair Keep cord away from heated surfaces Nev...

Страница 3: ...s time and temperature on the ceiling or wall Auto timer lets you choose how long you listen 15 30 45 or 60 minutes Volume control adjusts the volume of the radio beep or sounds Figure 1 Figure 3 Figure 4 Figure 2 Projection Alarm Set Timer AM Indicator Indoor Temperature Outdoor Temperature Alarm Bell Tuner LCD Display Power Radio Sounds Volume Focus Knob Time Rotation Knob C F Button Projector O...

Страница 4: ...r Use 1 Unpack the product and check to make sure everything is included Fig 1 2 This unit is powered by a DC adaptor 3 The battery power is designed only to provide MEMORY BACK UP for the clock and alarm settings One CR2032 battery included is inserted into the battery compartment if memory back up is desired in the event of power outages or if the unit is unplugged The memory back up will keep t...

Страница 5: ...E If the alarm sounds for 30 minutes continuously it will automatically turn off Using the Nap Feature 1 Press the snooze button to toggle through your choice of nap length 15 30 45 or 60 minutes Fig 1 2 Once set the clock will display the time and indicate nap on the LCD screen 3 When nap alarm sounds press the power button to turn off Fig 1 8 9 Using the Projection Feature 1 To turn the projecti...

Страница 6: ... main unit and the remote sensor A battery life icon will display on both Replace the batteries as necessary and follow the setup procedure MAINTENANCE AND CARE INSTRUCTIONS Extreme temperatures shock or areas of unusual vibration should be avoided to prevent damage to the units Clean the units using only a soft damp cloth to wipe Do not use solvents abrasives detergents or other strong cleaning a...

Страница 7: ...0TX Transmitter Modifications not authorized by the manufacturer may void users authority to operate this device Note This equipment has been tested and found to comply with the limits for a Class B digital device pursuant to Part 15 of the FCC Rules These limits are designed to provide reasonable protection against harmful interference in a residential installation This equipment generates uses a...

Страница 8: ...doption to enable it to operate in any other country than the country for which it was designed manufactured approved and or authorized or repair of products damaged by these modifications is not covered under this warranty THE WARRANTY PROVIDED HEREIN SHALL BE THE SOLE AND EXCLUSIVE WARRANTY THERE SHALL BE NO OTHER WARRANTIES EXPRESS OR IMPLIED INCLUDING ANY IMPLIED WARRANTY OF MERCHANTABILITY OR...

Страница 9: ... use accesorios no recomendados por HoMedics específicamente ningún accesorio no proporcionado con la unidad Nunca haga funcionar este aparato si tiene el cordón el enchufe el cable o el armazón dañado Si no está funcionando adecuadamente si se ha caído o dañado envíelo al Centro de servicio de HoMedics para que sea examinado y reparado Mantenga el cable alejado de superficies calientes Nunca lo d...

Страница 10: ... temporizador permite seleccionar la duración de la escucha 15 30 45 ó 60 minutos El volumen controla el ajuste del volumen del radio de la señal o del sonido Figura 1 Figura 3 Figura 4 Figura 2 Proyección Ajuste de alarma Indicador AM Temperatura Interior Temperatura exterior Timbre de Alarma Sintonía Sintonía Antena 12 24 DST Zona Horaria Snooze alarma de repetición Pantalla LCD Encendido Radio ...

Страница 11: ...ontaje 1 Desempaque el producto y asegúrese de que no falte nada Fig 1 2 Esta unidad se alimenta con un adaptador de CC 3 La corriente de la batería sirve sólo para proporcionar MEMORIA DE RESPALDO para los ajustes del reloj y alarma En el compartimiento para la batería se deben colocar una pila CR2032 incluida si se desea el respaldo de la memoria en el caso de un apagón de corriente o si se dese...

Страница 12: ...E alarma de repetición Fig 1 La alarma volverá a sonar a los 9 minutos Puede continuar utilizando esta característica hasta apagar la alarma b Apagar la alarma Presionar el botón POWER para apagar la alarma La alarma se apagará pero permanecerá configurada para el día siguiente Si desea desactivar la alarma totalmente o elegir un tono de alarma diferente repita los pasos del 1 al 6 de CÓMO CONFIGU...

Страница 13: ...tancia entre ellas para asegurar que tanto el sensor remoto como el receptor doméstico estén propiamente sincronizados Instrucciones de Montaje del Sensor Remoto El Sensor Remoto viene con un soporte de mesa o puede montarse en la pared Colocación en la mesa Simplemente abra el soporte sujetado a la repisa de montaje Montaje de pared Coloque un tornillo en el lugar deseado de la pared y monte la u...

Страница 14: ...22º F desde 0º C hasta 50º C Sensor Remoto desde 4º F hasta 140º F desde 20º C hasta 60º C Transmisión máx 100 pies 30 m en espacios abiertos RF434 MHz DESCARGO DE RESPONSABILIDAD de la FCC Este artefacto cumple con la sección 15 de las reglas de la FCC Comisión Federal de Comunicaciones El funcionamiento está sujeto a las siguientes dos condiciones 1 Este artefacto no puede causar interferencias ...

Отзывы: