background image

Flying the Drone

All of the following operations on this manual are taking mode 2 for example.

1. Preparing:

a. Fly the drone in a spacious indoors area, or an outdoors area free of obstacles, rain, snow, 
 animals, and people. When flying outdoors, please choose a windless environment.
b. Install the battery into the battery compartment on the drone and connect it.

2. Pair the drone:

a. Power on the drone and the transmitter, then, place the drone on a level surface.
b. Push the throttle joystick up then down. If done correctly, the transmitter sound will beep , 
and the LED indicators will turn solid, indicating that the transmitter is connected to the drone.

3. Calibrate  the gyro:


a. After pairing the transmitter, hold the flip button on the upper right shoulder of the transmitter.
b. Push both left and right sticks to the bottom left  until the LED lights of the drone start
flashing and then turn solid.

 (Note: This operations is to ensure a stable flight, we suggest the pilot calibrate the gyro before 
each flight and after a crash.)

4. Start to fly:

a. Press the Engine Start / Stop button, the propellers begin to spin, and the drone is ready to 
take off.
b. Throttle up carefully and the drone will take off and will hover in the sky if you release left 
and right joysticks at the same time.


c. When flying, press the Engine Start / Stop button and the drone will land.
d. If you need to urgently stop the motors, push the left stick to the bottom left, and push the 
right stick to the bottom right at the same time for about 1 second.(Shown as picture below)
(Note: Only stop motors mid-flight in emergency situation when doing so can reduce the risk of 
damage or injury.)

-9-

Emergency Landing

Содержание F181W

Страница 1: ...Instructions for use F181W usa holystone com America ca holystone com Canada eu holystone com Europe jp holystone com Japan 1 855 888 6699...

Страница 2: ...e Transmitter 7 Charging the Battery 8 Assemble the Camera 9 Mode 2 10 Mode 1 11 Flying the Drone Pair the Drone Calibrate the Gyro 12 Flip Mode 13 Headless Mode One Key Return 14 APP Instructions 15...

Страница 3: ...of the vehicle at all times 1 Keep Your Distance a Always fly in locations that are clear of any obstructions such as buildings poles electrical wires trees and so on b Never fly above or near other p...

Страница 4: ...either rechargeable or nonrechargeable AA batteries in the transmitter Do not mix battery types 17 Use only recommended batteries in the transmitter please remember that non rechargeable batteries mu...

Страница 5: ...guards 2 Insert the two landing gears into the bracket holes at the bottom of the drone then secure with the four screws tightly 3 Insert all four propeller guards into the holes located on the motor...

Страница 6: ...und then push the right control lever to any direction and release The drone will roll over in the corresponding direction Repeat the movement to roll again Direction Stick Forward Backward Left Right...

Страница 7: ...battery Note Always pay close attention to battery polarity when inserting any batteries to make sure they are fitted correctly 1 Open the battery cover on the back of the transmitter install 4 AA bat...

Страница 8: ...to fully charge the battery Note Disconnect the charger once the battery has been fully charged Insert the USB charger cable into the battery plug Insert the USB charger cable into the charging plug w...

Страница 9: ...eft Right MODE 2 Left Stick Right Stick Direction Leftleaning Rightleaning 1 Power on the transmitter Left hand throttle MODE 2 will be default setting Recoomended Mode 7 In order to meet the needs an...

Страница 10: ...Right Stick Right Stick Throttle Ascending Descending Rotate to Left Right Direction Leftleaning Rightleaning 8 2 To enter MODE 1 turn on the transmitter while holding the upleft button Please do not...

Страница 11: ...er right shoulder of the transmitter b Push both left and right sticks to the bottom left until the LED lights of the drone start flashing and then turn solid Note This operations is to ensure a stabl...

Страница 12: ...e faces in the same direction as the pilot and the tail faces towards the pilot 2 Push the left joystick up then down to bind the transmitter to the drone 3 Press the Headless Mode button on the trans...

Страница 13: ...d This is because the drone will fly relative to the point where it was paired to the transmitter not relative to where the transmitter is 3 When using Headless Mode it is important to stay stationary...

Страница 14: ...mage or video will be shown on the mobile screen 1 Take Photo Click the Take Photo icon to take photos 2 Record Video Click the Record Video icon to record videos 3 All the images and videos are saved...

Страница 15: ...ntrolled with the APP without using a transmitter Hold the mobile phone horizontally when using the Gravity Sensor Mode There may be a slight delay in the response of the drone when using this control...

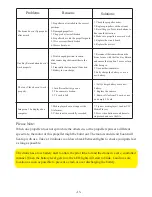
Страница 16: ...ter then turn them on again to pairing The propellers spin but the drone doesn t fly 1 Insufficient battery power 2 Propellers not installed in the correct orientation 3 Damaged propellers 4 Something...

Страница 17: ...e propeller order 2 Replace propellers with new ones 3 Reset the gyro Press trim buttons to fine tune the direction 4 Make sure propellers are work well 5 Replace the circuit board 6 Replace the motor...

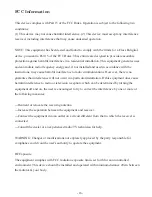
Страница 18: ...tee that interference will not occur in a particular installation If this equipment does cause harmful interference to radio or television reception which can be determined by turning the equipment of...

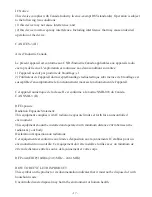
Страница 19: ...ent mauvais fonctionnement de I appareil Cet appareil num riquie de la classe B est conforme la norme NMB 003 du Canada CAN NMB 3 B RF Exposure Radiation Exposure Statement This equipment complies wit...

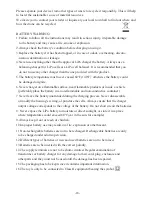
Страница 20: ...hicle perferably place the battery in a non flammable and non conductive container 7 Never leave the battery unattended during the charging process Never disassemble or modify the housing s wiring or...

Страница 21: ...filled on our product with indication below Product Name REMOTE CONTROL MODEL RADIO CONTROLLED HELICOPTER Model Mark F181 HOLYSTONE http www holystone com Download CE F181C_EU_DOC pdf MAILLING ADDRESS...

Отзывы: