1. Planning the Installation
This manual was written to provide straight forward procedures for the installation of
HoloTech
tm
solar hot water systems manufactured by Holocene Technologies. As with
any project, a few minutes of planning will save hours of fixing. The installer is
responsible for knowing local regulatory codes and how they apply to the equipment. If
in doubt, a visit with local code officials can prevent on-site inspection problems.
1.1
Site Analysis
Measure the angle of the collector mounting surface from south with a compass. This is
called the South Azimuth. Correct for the magnetic compass error in your region. Note
that "true south" and "solar noon" refer to the same direction, which does not match
local noon during daylight savings time. It is preferable that the collector South Azimuth
be within 20 degrees of south for installations in the northern hemisphere. The greater
the angle is away from south, the less solar energy will be collected.
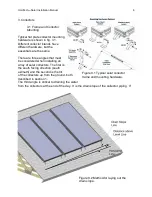
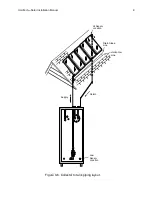
The placement of the collectors and the tank should be determined, including the
routing for piping between the components.
Shading considerations can be included in the analysis by the use of sky imaging
products.
1.2
Collector Tilt
The collector tilt angle varies according to the application and latitude. For year round
applications such as domestic hot water, or combined space heating and domestic hot
water, the tilt should be the la 10 degrees, which is approximately half way
between the highest summer sun and the lowest winter sun at (solar) noon. For special
applications, such as vacation retreats used only in the summer, a tilt equal to the
latitude is best. For retreats used only in the winter, a tilt of la 20 degrees is
best. The tilts are not critical and variations of +/- 5 degrees probably cannot be
detected.
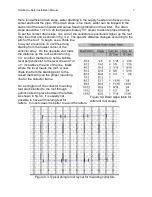
Measure the roof slope and use Table 1.1 to select the leg length needed for the
appropriate collector tilt.
Table 1.1 Collector Leg Length Selection
Roof Slope
Angle
Flat
0º
3/12
14º
6/12
26.5º
9/12
36.9º
12/12
45º
HoloTech
tm
Solar Installation Manual
3


