BA_PH_546-100_EN_06-22.docx
40
11.5
Calibrating the Table Height (
“
Setup
”
Menu)
The position controller makes it easy to calibrate the height of the thicknessing table.
For this purpose, you must first switch from normal positioning mode to the setup menu.
•
Press the
“
Home
”
button to switch to the main menu.
•
Then press the
“
Setup
”
button to enter the setup menu:
→
An alphanumeric keyboard appears with a password request.
Enter the password
7550
and confirm with
“
ENT
“ (Enter).
→
If the password has been entered correctly, the button
“
Calibrate
“
appears on the screen.
•
Now press the
“
Calibrate
“ button to enter the calibration menu
:
→
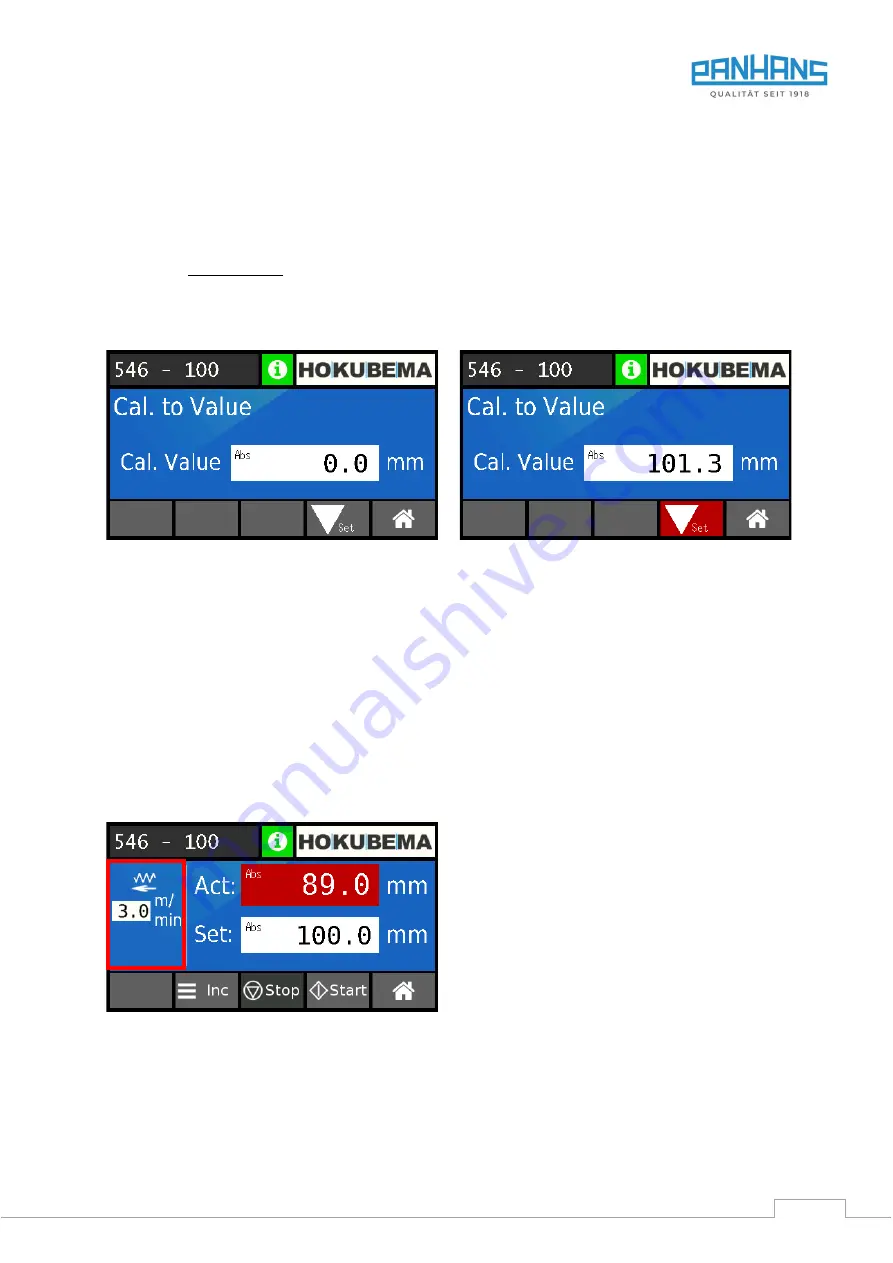
The calibration screen appears (see
Figure 42: Calibrate table height
Figure 43: Input of the reference value
•
Now use a test workpiece that has already been dressed and set the table to any height that is suitable for a
thickness planing test run with the selected test workpiece.
•
Start the thickness planing test run.
•
Measure the machined test workpiece with a suitable measuring device (vernier caliper recommended!)
•
Enter the measured value (z. B.
101.3
mm) into the
“
Cal. Value
”
field (see
→
The "Set" button in the bottom line of the screen is highlighted in red.
•
Then press the
“
Set
”
button:
→
The table is automatically calibrated to the reference dimension
•
Finally, press “
Home
” to return to the main menu
.
11.6
Feed Rate Visualisation (Option)
Figure 44: Feed rate visualisation
On machines with infinitely variable feed rate (option
see section
16.1.3), the current feed rate is visual-
ised on the left-hand side of the screen, as shown in
the figure on the left.
Note:
This function is unavailable on machines with
two-stage standard feed.


