


2
7
step
5
to step
6:
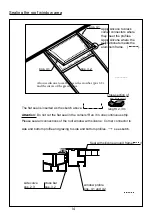
step
6
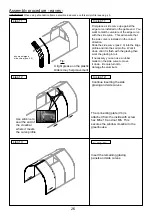
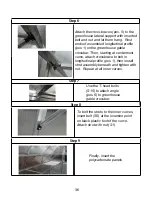
step
4
to step
4:
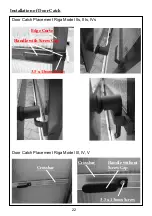
Attach the preassembled door
gable.
Refer to steps 8-9 for attachment
procedures.
For added stability install the
inside
corner (V).
Use the
screw
pan head 4,2 x 3 (S9).
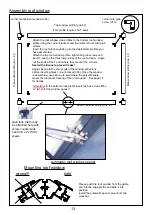
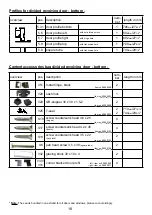
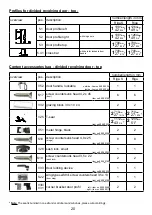
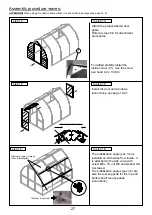
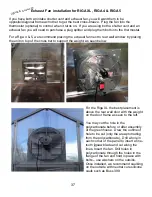
to step 5:
Install the door and windows.
Instructions, see page 2-2.
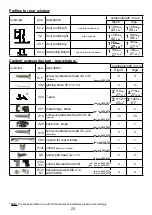
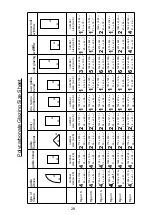
Mounting roof window
wrong!!!
right
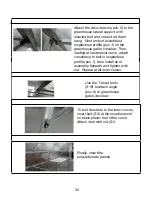
The stabilization angle (pos 3.4) is
installed on both sides from inside. It
is attached to the side curve with
screw M6 x 16, nut M6 and washer A6,
4 screwed.
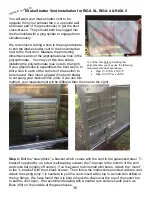
The stabilization angles (pos 3.4) are
also the rear supports for the top and
bottom shelf (see separate
instructions).
Glazing cut away in image
to show installation.
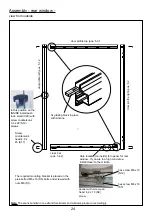
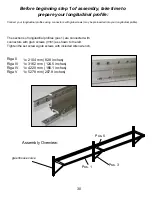
Assembly procedure
-eaves-
ATTENTION!
When using a foundation frame
attach
it
to soil profile in advance
(see page
s
5, 6)
*Washer is optional


