Hobbico Midi EDGE 540 FLWA4001 Скачать руководство пользователя страница 10

10

The propeller, not included in the kit should be balanced as 
good as possible. Assemble prop and spinner. The best result 
for balancing you can get, if you have the possibility to balance 
the propeller together with the spinner.

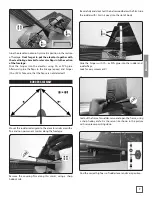
Mount the propeller unit to the motor shaft with the 2 M3 
setscrews. Lock with blue locking agent. You can make a little 
flat spot onto the motor shaft at the position of one setscrew. 
So you can get more stability.

During mounting the spinner cap do not tighten the screws to 
strong, because the thread could be damaged.

Screw the motor to the motor dome, using M3x8 countersunk 
screws.

Find the correct position of the cowling and fix it with adhesive 
tape. Drill two or three 1.2 mm holes through the cowling and 
the wood below.

Mount the canopy with the attached 2 mm woodscrews. You 
can reinforce the thread in the wood with super liquid CA glue.

ENGLISH

Содержание Midi EDGE 540 FLWA4001

Страница 1: ...ways include this instruction manual to the model 78149 Distributed by www hobbico de Technical data Midi Edge 540 Wingspan 1060 mm Length 933 mm Take off weight 750 g Wing area 18 dm Wing load 33 g d...

Страница 2: ...onment protection infos 2 Introduction 2 Safety precautions 3 Recommended accessories 4 Adhesives and Building Supplies 4 Kit check 4 Spare parts for the Midi Edge 540 4 Choosing the motor set 5 Wings...

Страница 3: ...ts fuel tank wheels etc throughout the building process 5 You must correctly install all R C and other components so that the model operates correctly on the ground and in the air 6 You must check the...

Страница 4: ...any parts are missing or are not of acceptable quality or if you need assis tance with assembly contact Revell Product Support Service Abteilung Revell GmbH Henschelstr 20 30 32257 B nde Germany Tel...

Страница 5: ...to the aileron During assembly look for correct angles and position of the aileron If the aileron is in neutral position the servo lever and the linkage should include an angel of 90 degrees CHOOSING...

Страница 6: ...better gluing results Remove this film along the marks Be careful and do not hurt the balsa wood below the film Before glueing the flap lever to the flap renove the film carefully from the balsa wood...

Страница 7: ...r lever and mark position Glue the elevator in absolut symmetric position in the section of fuselage Dont forget to put the elevator together with the steel linkage bracket for elevator flaps into the...

Страница 8: ...landing gear Mount the levers for flaps and rudder using the attached screws which were drilled through the wood into the opposite plate on the other side of the flap Additional you can lock the lever...

Страница 9: ...or dome Countersink the four 3 mm holes with a 5 mm drill Assemble the landing gear as shown in the picture Mount the wheel pant in a position parallel to the fuselage Fix the pant with the attached s...

Страница 10: ...a little flat spot onto the motor shaft at the position of one setscrew So you can get more stability During mounting the spinner cap do not tighten the screws to strong because the thread could be da...

Страница 11: ...ELEVATOR MOVES DOWN RIGHT AILERON MOVES UP LEFT AILERON MOVES DOWN CARBURETOR WIDE OPEN RUDDER MOVES RIGHT 4 CHANNEL RADIO SETUP MODE 2 3 Make certain that the control surfaces and the carburetor res...

Страница 12: ...weight If spinner weight is not practical or is not enough use Great Planes GPMQ4485 stick on lead A good place to add stick on nose weight is to the firewall don t attach weight to the cowl it is no...

Страница 13: ...e propellers before you fly An unbalanced prop can be the single most signifi cant cause of vibration that can damage your model Not only will engine mounting screws and bolts loosen possibly with dis...

Страница 14: ...e carburetor arm if applicable screw lock pushrod connectors etc 6 Add a drop of oil to the axles so the wheels will turn freely 7 Make sure all hinges are securely glued in place 8 Reinforce holes fo...

Страница 15: ...15 PERSONAL NOTES ENGLISH...

Страница 16: ...Distributed by www hobbico de...

Отзывы: