Manual
COHEDRA
®
& COHEDRA
®
Compact
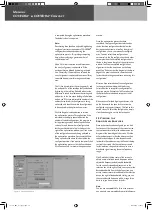
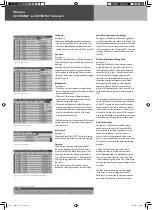
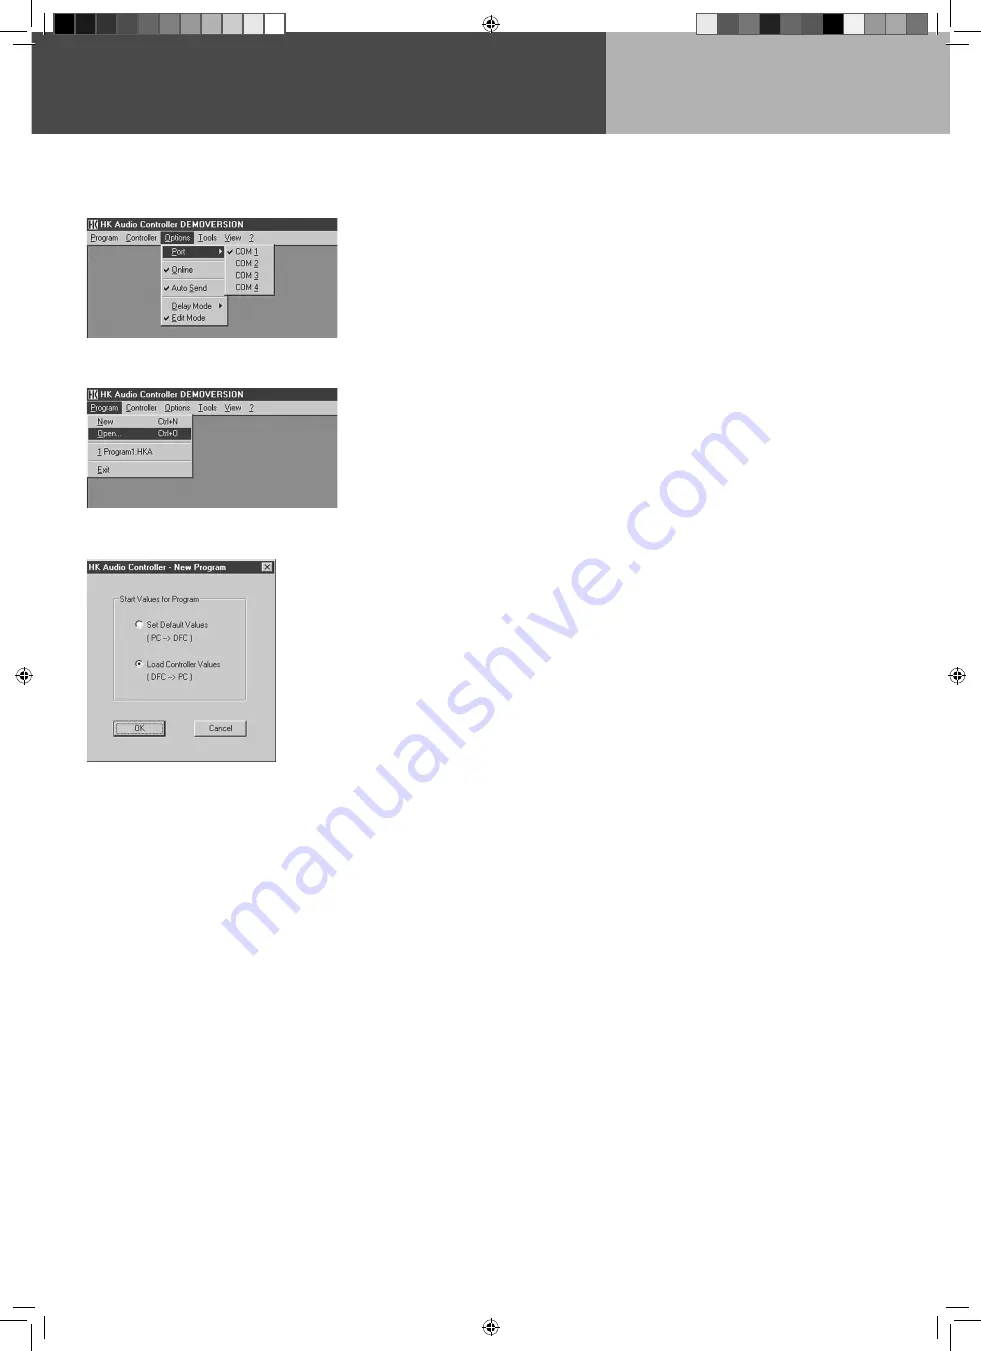
Figure 3: Selecting the serial interface
Figure 5: Loading and setting controller values
Figure 4: Loading stored programs
Connect the PC interface to the serial port of the
PC (COM port) using the included serial connector
cable (9-pin Sub-D male/female). If your computer
lacks a COM interface, use a COM-port-to-USB-
adapter. Please consult your computer to learn
how to configure this connection.
DFCs are connected in a loop starting at the PC
interface's Midi Out port (from the PC interface's
Midi Out to the first DFC's Midi In, from the first
DFC's Midi Out to the second DFC's Midi In and
so forth until the final DFC's Midi Out is connected
to the PC interface's Midi In). Use balanced
microphone cables (XLR male / XLR female) to
connect the components. The distance between
the PC interface and the first DFC may range up to
300 meters. Every DFC amplifies the data signal
before routing it out. The DFCs must be looped
because they not only receive data, but also send
acknowledging messages and data back to the PC.
Important note: The Midi In and Midi Out ports
of the DFCs and the DFC interfaces do not comply
with the MIDI standard and are incompatible with
other devices!
2.4 Launching DFC Software
Launch the DFC Software by double-clicking the
Audio Controller 3_01 icon using the left mouse
button. If the PC and PC interface are connected
properly, a window will pop up; it reads Please
wait...Updating current configuration. Once this
is done, the software is ready to run.
The user interface consists of the Menu bar
containing the individual menus, the Status bar, the
Peak Limiter window, and the Editing Panel.
Note: If there is a problem with the Midi loop or
the loop has not been closed, a window pops up
indicating the following message: Midi-Loop open!
No data transfer possible. Change to offline mode?
If you opt to switch to offline mode, the display
reads: Warning! While working in offline mode the
display shows wrong controller values. The reason
for this is that the PC and DFCs are not connected.
Check the Midi loop and re-launch the DFC Software.
If there is a problem with the serial link between
the PC and PC interface or the wrong COM port
has been entered to the DFC Software, the following
window pops up: No dongle connected to the serial
port. Only Edit Mode will be possible. If the cable is
defective, replace it.
Selecting the serial interface
See figure 3. The option Port in the Options menu
lets you define the correct PC serial interface for the
PC interface (for example, COM 1). Once you have
selected the correct interface, DFC Software ready
to run. To load the current looped DFC configuration
to the software, first activate the option Online
in the Options menu (see section 2.5) by clicking
it using the left mouse button, and then select
the option Update current configuration in the
Controller menu (see section 2.5).
Loading stored programs
See figure 4. To load DFC programs created
and stored in previous sessions, select the option
Open in the Program menu. A window pops up
with a prompt asking you for the program name
and possibly the program file. Select the desired
program and click the Open button. The program
is loaded to the DFC Software.
Note: Programs generated in an earlier DFC
Software version (Version 2.1 or lower) cannot be
loaded to DFC Software 3.01.
Creating new programs
See figure 5. To create new DFC programs, select
the option New in the Program menu. A window
pops up suggesting that you load the settings on
the currently connected DFCs as the basis for the
new program (Load Controller Values).
In this window, you also have the option of starting
the new program with preset defaults (zero values)
that are loaded to the DFCs when the DFC Software
is launched (Set Default Values). The actual user
panel appears once you have selected an option
and confirmed it with OK.
co_coco_BDA_de_engl_2.indd 72
18.09.2006 17:09:22

