background image

31

Italiano

ACCESSORI STANDARD

(1) Dispositivo di avanzamento viti ............................ 1

(montate nell’unità principale)

(2) Punta a croce del n.2 ............................................ 1

(montata nell’unità principale)

(3) Gancio ........................................................................ 1
(4) Caricatore (UC14YF o UC14YF2) .......................... 1
(5) Custodia in plastica ................................................ 1
Gli accessori standard sono soggetti a cambiamento
senza preavviso.

IMPIEGHI

Avvitamento su intonaco per interni

Avvitamento o estrazione di viti piccoli, bulloni
piccoli, ecc.

RIMOZIONE E INSTALLAZIONE DELLA
BATTERA

1. Rimozione della batteria

Tenere saldamente l’impugnatura e spingere il fermo
della batteria, in modo da estrarre la batteria. (Ved.

Fig. 1

).

2. Installazione della batteria

Inserite la batteria ricaricabile, controllando che il
fermo sia sul lato dell’interruttore a grilletto
dell’impugnatura. (

Fig. 1

).

Batteria ricaricabile

Fermo

Inserire

Estrarre

Impugnatura

Fig. 1

RICARICA

Prima di usare l’avvitatore automatico, caricare la
batteria come indicato di seguito.
1. Collegare il cavo di alimentazione del caricatore a

una presa CA.
Quando si collega la spina del caricatore ad una
presa a muro, la spia lampeggia in rosso. (A intervalli
di un secondo.)

2. Inserire la batteria nel caricatore.

Collocare la batteria in modo che l’etichetta sia
rivolta verso l’etichetta del caricatore e spingerla
dentro fino a che viene in contatto con la lastra sul
fondo. (Vedere le 

Fig. 2

  e 

3

.)

ATTENZIONE

Se le pile sono inserite in direzione contraria non
solo la carica diviene impossibile ma é possibile che
il fusibile salti o che si verifichino problemi nel
caricabatterie come la deformazione del terminale
di carica.

CARATTERISTICHE

UTENSILE ELETTRICO

Modello

WF4DY

Velocità a vuoto

0 – 2000/min. (a 20°C, e con batteria a pieno carico)

Capacità

Dimensioni delle viti

4 mm

Lunghezza delle viti

25 – 41 mm

Forza di torsione

Massimo 900 kg-cm

Quando completamente caricata a temp. di 20°C, la torsione è pari
a un bullone a trazione di alt. M12 (a divisione di durezza 12,9).
Durata del fissaggio: 3 sec. Usate la chiave ad incavo esagonale.

Batteria ricaricabile

Ni-Cd, batteria, 12V

Misure gambo della vite

6,35 mm Hex.

Peso

2,0 kg

CARICATORE

Modello

UC14YF / UC14YF2

Voltaggio di carica

7,2V – 14,4V

Peso

1,3kg

04Ita_WF4DY_WE

12/24/08, 18:35

31

Содержание WF 4DY

Страница 1: ...tung vor Benutzung des Werkzeugs sorgfältig durchlesen und verstehen Lire soigneusement et bien assimiler ces instructions avant usage Prima dell uso leggere attentamente e comprendere queste instruzioni Deze gebruiksaanwijzing s v p voor gebruik zorgvuldig doorlezen Leer cuidadosamente y comprender estas instrucciones antes del uso Handling instructions Bedienungsanleitung Mode d emploi Istruzion...

Страница 2: ...nder Werfen Sie Elektrowerkzeuge nicht in den Hausmüll Gemäss Europäischer Richtlinie 2002 96 EG über Elektro und Elektronik Altgeräte und Umsetzung in nationales Recht müssen verbrauchte Elektrowerkzeuge getrennt gesammelt und einer umweltgerechten Wiederververtung zugeführt werden Pour les pays européens uniquement Ne pas jeter les appareils électriques dans les ordures ménagères Conformément à ...

Страница 3: ...y pack picking up or carrying the tool Carrying power tools with your finger on the switch or energising power tools that have the switch on invites accidents d Remove any adjusting key or wrench before turning the power tool on A wrench or a key left attached to a rotating part of the power tool may result in personal injury e Do not overreach Keep proper footing and balance at all times This ena...

Страница 4: ... the tightening screw the head of the screw may be damaged or the fixed tightening force will not transfer to the screw Always position the tight ening screw and the screwdriver at a straight angle and then tighten the screw 12 Always charge the battery at a temperature of 5 40 C A temperature of less than 5 C will result in over charging which is dangerous The battery cannot be charged at a tempe...

Страница 5: ...vals 2 Insert the battery into the charger Position the battery so that the nameplate faces toward the nameplate of the charger and push in the battery until it contacts the bottom plate See Figs 2 and 3 CAUTION 䡬 If the batteries are inserted in the reverse direction not only recharging will become impossible but it may also cause the fuse to blow or problems in the charger such as a deformed rec...

Страница 6: ...hat the power of the tool becomes weaker stop using the tool and recharge its battery If you continue to use the tool and exhaust the electric current the battery may be damaged and its life will become shorter Charger UC14YF UC14YF2 Battery EB12 Approx 45 min EB12G Approx 55 min EB12B Approx 60 min EB12M Approx 60 min 2 Avoid recharging at high temperatures A rechargeable battery will be hot imme...

Страница 7: ... genuine driver bits for Model WF4DY Install the bit securely by the following procedures Move the guide sleeve to the top edge insert the bit into the hexagonal hole of the anvil and then release the guide sleeve Fig 7 When removing the bit perform the installation procedures in the reverse order CAUTION If the guide sleeve does not return to its original position then the driver bit is not insta...

Страница 8: ...l driving Rotate the knob in direction when the screw head is too high Rotate the knob in direction when the screw head is too low Refer to Fig 11 COLLATED SCREW STRIPS INSTALLATION AND REMOVAL 1 Installation 1 Insert the tape tip of collated screw strips into the belt guide groove A section 2 Next insert the tape tip into the slider groove B section and feed to push in the direction Fig 12 Fig 13...

Страница 9: ...e push button cannot be switched To switch it turn off the screwdriver first NOTE If the tape is not set as shown in the figure the bit can damage the board surface inadequate feed and screws can be wasted excess feed 2 Removal When the screws on the tape run out or to remove a half used belt of screws pull the tape out in the direction as shown in Fig 16 HOW TO USE THE AUTOMATIC SCREWDRIVER 1 Ope...

Страница 10: ...u drop them screws can come out of the collated tape and cause screw feed malfunctions Do not expose the screws to prolonged periods of direct sunlight or outside air They can cause rust and collated tape problems so when you will not be using the screws for awhile put them in the screw packing box or the like MAINTENANCE AND INSPECTION 1 Inspecting the driver bit Using a broken bit or one with a ...

Страница 11: ...sured values were determined according to EN50144 The typical A weighted sound pressure level 93 dB A The typical A weighted sound power level 106 dB A Wear ear protection The typical weighted root mean square acceleration value 10 5 m s2 01Eng_WF4DY_WE 12 24 08 18 34 10 ...

Страница 12: ...ten Benutzen Sie keine Elektrowerkzeuge wenn Sie müde sind oder unter Einfluss von Drogen Alkohol oder Medikamenten stehen Bei der Arbeit mit Elektrowerkzeugen können bereits kurze Phasen der Unaufmerksamkeit zu schweren Verletzungen führen b Benutzen Sie eine persönliche Schutzausrüstung Tragen Sie immer einen Augenschutz Schutzausrüstung wie Staubmaske rutschsichere Sicherheitsschuhe Schutzhelm ...

Страница 13: ...aube drücken 7 Nur geeignete Schrauben verwenden Keine anderen Schrauben verwenden Durch Verwendung von ungeeigneten Schrauben können schlechte Arbeitsergebnisse herausfallende oder herausragende Schrauben sowie Betriebs störungen Blockieren von Schrauben und Verschleiß der Bits hervorgerufen werden 8 Für richtigen Augenschutz sorgen Bei der Arbeit immer eine Schutzbrille tragen Durch Bohren werde...

Страница 14: ...eräts an eine Netzsteckdose blinkt die Kontrollampe in Rot auf in Sekundenabständen 2 Eine Batterie in das Ladegerät einlegen Die Batterie so positionieren daß das Etikett zum Typenschild des Ladegeräts hin weist und die Batterie so weit eindrücken daß sie die Bodenplatte berührt siehe Abb 2 und 3 VORSICHT 䡬 Die Batterien müssen richtig herum eingelegt werden andernfalls ist das Wiederaufladen der...

Страница 15: ...scht für 0 1 Sekunden Leuchtet kontinuierlich Vor dem Laden Beim Laden Laden durchgeführt Laden unmöglich Laden unmöglich Blinkt ROT Leuchtet ROT Blinkt ROT Flackert ROT Leuchtet GRÜN Betriebsstörung in der batterie oder im Ladegerät Die Temperatur der Batterie ist hoch wodurch das Aufladen unmöglich wird 2 Über die Aufladezeit Je nach Kombination von Ladegerät und Batterien wird die Aufladezeit w...

Страница 16: ...nn keine Fremdkörper im Batteriefach sind liegt wahrscheinlich eine Fehlfunktion bei der Batterie oder beim Ladegerät vor Die Teile beim autorisierten Kundendienst prüfen lassen 䡬 Da der eingebaute Microcomputer etwa 3 Sekunden braucht um zu bastätigen daß die im UC14YF UC14YF2 zum Laden eingelegte Batterie harausgenommen worden ist warten Sie mindestens 3 Sekunden bevor Sie die Batterie zum Forts...

Страница 17: ... Prüfen und Austauschen des Bits Ein Plusschrauber Nr 2 ist als Basisausstattung an dieser Maschine angebracht Immer das Bit prüfen um sicherzustellen daß es nicht beschädigt ist Beschädigte Bits können Fehlfunktionen beim Einschrauben verursachen Das Bit vor der Arbeit prüfen und sofort austauschen wenn sich Verschleißerscheinungen zeigen Wenn ein Bit aufgrund von Schäden oder anderen Gründen aus...

Страница 18: ...Den Gürtel so einsetzen daß die erste Schraube mit der Gleitschraubenmarkierung ausgerichtet ist Abb 14 und Abb 15 VORSICHT Wenn der Gürtel nicht so eingesetzt wird wie in der Abbildung gezeigt kann das Bit die Plattenoberfläche beschädigen unzureichender Vorschub oder Schrauben können verschwendet werden zu großer Vorschub 2 Entnehmen Wenn die Schrauben auf dem Gürtel verbraucht sind oder um eine...

Страница 19: ... vorgeschriebene Drehmoment nicht auf die Schraube übertragen wird so daß der Schraubenkopf herausragt 3 Beim Einschrauben den Schrauber immer fest andrücken bis die Schraube vollständig eingeschraubt ist Wenn der Druck auf den Schrauber beim Einschraubvorgang weggenommen wird wird die Schraube nicht vollständig eingeschraubt so daß der Schraubenkopf herausragt VERWENDUNG DES AUTOMATISCHEN SCHRAUB...

Страница 20: ...der Schrauben lockert muß sie sofort wieder angezogen werden Geschieht dies nicht kann das zu erheblicher Gefahr führen 3 Außenreinigung Wenn der Schraubenzieher schmutzig ist ihn mit einem weichen und trockenen Tuch abwischen oder mit einem mit Seifenwasser benetzten Tuch Kein Chlorsolvent Benzin oder Farbsolvent verwenden da sie plastisches Material schmelzen 4 Lagern Den Schraubenzieher an eine...

Страница 21: ...eut entraîner des blessures graves b Utiliser un équipement de protection individuelle Toujours porter des verres de protection L utilisation d équipements de protection tels que les masques anti poussière les chaussures de sécurité anti dérapantes les casques ou les protections auditives dans des conditions appropriées réduisent les risques de blessures c Empêcher les démarrages intempestifs Veil...

Страница 22: ...is ou une usure de la pointe 8 Protégez vos yeux avec des lunettes prévues à cet effet Portez toujours des lunettes de protection quand vous utilisez la visseuse Le perçage projette de la poussière de plâtre et des débris de ruban ce qui serait dangereux en cas de pénétration dans les yeux 9 Faites attention aux câbles et conduites se trouvant dans les murs et les plafonds Quand vous travaillez su...

Страница 23: ...ulons etc RETRAIT ET INSTALLATION DE LA BATTERIE 1 Retrait de la batterie Maintenir fermement la poignée et pousser le taquet de la batterie pour l enlever Voir Fig 1 2 Mise en place de la batterie Insérer la batterie rechargeable en s assurant que le loquet est placé sur le côté de l interrupteur à gâchette sur la poignée Fig 1 Taquet Tirer vers l extérieur Insérer Batterie rechargeable Poignée F...

Страница 24: ... 0 5 seconde Eteint pendant 0 5 seconde S allume sans interruption S allume pendant 0 5 seconde Ne s allume pas pendant 0 5 seconde Eteint pendant 0 5 seconde S allume pendant 0 1 seconde Ne s allume pas pendant 0 1 seconde Eteint pendant 0 1 seconde S allume sans interruption Avant la recharge Clignote ROUGE Pendant la recharge Recharge terminée S allume ROUGE Clignote ROUGE Recharge impossible S...

Страница 25: ... il se peut que la lampe témoin ne s allume pas en rouge Dans une telle éventualité laisser la batterie refroidir puis procéder à la recharge 䡬 Quand la lampe témoin scintille rapidement en rouge à intervalles de 0 2 seconde vériffier le chargeur et retirer tout objet étranger qui serait tombé dans l ouverture lors de la mise en place S il n y a rien d amormal il est alors probable que la batterie...

Страница 26: ...nez des vis appropriées au travail à affectuer 4 Vérification et remplacement de la pointe Une mèche plus No 2 est installée sur cet outil comme accessoire standard Vérifiez toujours que la pointe n est pas endommagée L utilisation de pointes endommagées peut provoquer des erreurs de fonctionnement Contrôlez la pointe avant de commencer à travailler et remplacez la immédiatement dès qu elle commen...

Страница 27: ...et Fig 15 3 Arrangez le ruban de sorte que la première vis soit alignée sur la marque de vis de la glissière Fig 14 et Fig 15 PRÉCAUTIONS Si le ruban n est pas installé comme indiqué sur la figure la surface de travail peut être endommagée par la pointe alimentation inapropriée ou bien les vis risquent d être gaspillées excès de vis 2 Retrait Quand il manque des vis ou lors du retrait d un ruban d...

Страница 28: ...s du vissage appuyez fermement sur la visseuse jusqu à ce que la vis soit complètement enfoncée Si vous relâchez la pression pendant le vissage la vis risque de dépasser 4 Ne pas poser une vis sur une autre car la vis tomberait et la vis suivante ne serait pas alimentée Fig 17 Vis utilisé Nombre de serrages Vis de plaque r25 Environ 450 Vis de plaque r41 Environ 220 Fig 18 UTILISATION DE LA VISSEU...

Страница 29: ... visseuse automatique est sale essuyez la avec un chiffon sec et doux ou un chiffon imbibé d eau savoneuse N utilisez pas de solvant au chlore d essence ou de diluant car ils font fondre les matières plastiques 4 Rangement Rangez la visseuse automatique dans un endroit où la température est inférieure à 40 C et hors de portée des enfants 5 Liste des pièces de rechange ATTENTION Les réparations mod...

Страница 30: ... Indossate sempre le protezioni oculari L attrezzatura protettiva quali maschera facciale calzature antiscivolo caschi o protezioni oculari ridurrà il rischio di lesioni personali c Impedite le accensioni involontarie Prima del collegamento a una sorgente di alimentazione e o pacco batteria e prima di raccogliere o trasportare l utensile verificate che l interruttore sia posizionato su OFF Il tras...

Страница 31: ...e potrebbero causare anormalità le viti potrebbero cadere o rimanere sporgenti e guasti inceppamento delle viti e usura della punta 8 Proteggere gli occhi con occhiali protettivi Portare sempre gli occhiali protettivi mentre si lavora La perforazione può causare lo spargimento intorno di polvere di intonaco e di polvere del nastro che sono pericolose se penetrano negli occhi 9 Fare attenzione ai f...

Страница 32: ...si collega la spina del caricatore ad una presa a muro la spia lampeggia in rosso A intervalli di un secondo 2 Inserire la batteria nel caricatore Collocare la batteria in modo che l etichetta sia rivolta verso l etichetta del caricatore e spingerla dentro fino a che viene in contatto con la lastra sul fondo Vedere le Fig 2 e 3 ATTENZIONE 䡬 Se le pile sono inserite in direzione contraria non solo ...

Страница 33: ...ndi Spento per 0 5 secondi Si illumina stabilmente Si illumina per 0 5 secondi Non si illumina per 0 5 secondi Spento per 0 5 secondi Si illumina per 0 1 secondi Non si illumina per 0 1 secondi Spento per 0 1 secondi Si illumina stabilmente Lampeggia ROSSO Durante la carica Carica completa Si illumina ROSSO Lampeggia ROSSO Prima della carica Carica impossibile Si illumina VERDE Carica inpossibile ...

Страница 34: ... lasciar raffreddare la batteria e poi eseguire l operazione di carica 䡬 Quando la spia lampeggia velocemente in rosso a intervalli di 0 2 secondi controllare che non siano presenti oggetti estranei nel foro di installazione della batteria Se non sono presenti oggetti estranei è probabile che la batteria od il caricatore non funzioni bene Farla vedere a un Agente di manutenzione autorizzato 䡬 Poic...

Страница 35: ...ti Selezionare le viti appropriate all applicazione 4 Controllo e sostituzione della punta Una punta a croce del n 2 è installata su questo attrezzo come accessorio di serie Esaminare sempre la punta per accertarsi che non sia danneggiata L uso di punte consumante può causare problemi di funzionamento di avvitamento Controllare la punta prima di eseguire il lavoro e sostituirla subito con una nuov...

Страница 36: ...re nella direzione Fig 12 Fig 13 e Fig 15 3 Disporre il nastro in modo che la prima vite sia allineata con il segno della vite sul corsoio Fig 14 e Fig 15 PRECAUZIONE Se il nastro non viene disposto come mostrato nella figura la punta può danneggiare la superficie dell intonaco avanzamento inadeguato e le viti vanno sprecate avanzamento eccessivo 2 Rimozione Quando le viti sul nastro si esauriscon...

Страница 37: ...evetta di scatto dell interruttore la velocità di rotazione varia continuamente da 0 a 2000 giri al minuto NOTA Quando la levetta di scatto dell interruttore viene tirata solo leggermente è udibile un bip Questo è il rumore del motore e non è indice di alcuna anormalità AVVERTENZA Mentre l avvitatore gira il pulsante non può essere attivato Per attivarlo spegnere prima l avvitatore PRECAUZIONI NEL...

Страница 38: ...o debitamente serrate Nel caso che una di queste viti dovesse allentarsi riserrarla immediatamente Se si omette di farlo si può causare un grave incidente 3 Pulizia dell esterno dell utensile Se l avvitatore automatico è sporco pulirlo con uno straccio soffice inumidito di acqua e sapone Non usare solventi cloridrici benzina o diluenti per benzina in quanto potrebbero deformare la plastica 4 Conse...

Страница 39: ...endheid kan in ernstig lichamelijk letsel resulteren b Gebruik persoonlijke beschermingsmiddelen Draag altijd oogbescherming Beschermingsmiddelen zoals stofmaskers niet glijdende veiligheidsschoenen een helm of oorbescherming vermindert het risico op lichamelijk letsel c Voorkom dat het gereedschap per ongeluk kan starten Controleer of de schakelaar in de uit stand staat voordat u de voeding en of...

Страница 40: ...en Gebruik deze snelschroefautomaat niet voor het indraaien van andere typen schroeven Dit kan leiden tot schade aan het werkstuk uitstekende of scheef ingedraaide schroeven en storing in de werking van de snelschroefautomaat klem rakende schroeven en slijtage aan het schroefstuk 8 Draag tijdens het werk een veiligheidsbril Bij het werken met deze snelschroefautomaat is het van belang uw ogen te b...

Страница 41: ...e acculader in het stop kontakt wordt gestoken zal het controlelampje in rood knipperen met tussenpozen van 1 sekonde 2 Steek de batterij in het acculader Plaats de batterij zodanig dat het naamplaatje naar het naamplaatje op de lader wijst Druk de batterij goed tegen de bodemplaat Zie afb 2 en 3 OPGELET 䡬 Zorg dat de batterij in de juiste richting van plus en min worden geplaatst anders wordt nie...

Страница 42: ...de Brandt ongeveer 0 5 sekonde niet Uit voor 0 5 seconde Blift branden Brandt ongeveer 0 5 sekonde Brandt ongeveer 0 5 sekonde niet Uit voor 0 5 sekonde Brandt ongeveer 0 1 sekonde Brandt ongeveer 0 1 sekonde niet Uit voor 0 1 sekonde Blijft branden Knippert ROOD Tijdens opladen Na opladen Brandt ROOD Knippert ROOD Voor het laden Opladen onmogelijk Brandt GROEN Opladen onmogelijk Knippert ROOD Er ...

Страница 43: ...ekonde neem de batterij dan uit het oplaadapparaat en controleer de opening van de laatste dan op de aanwezigheid van een voorwerp dat er niet hoort Is er geen voorwerp in de opening aanwezig dan is de storing waarschijnlijk te wijten aan de oplaadbare batterij of het oplaadapparaat Laat deze dan controleren door een bevoegde onderhoudsinstantie 䡬 Aangzien de ingebouwde micoprocessor van de UC14YF...

Страница 44: ...Kontroleren en zonodig vervangen van het schroefstuk Bij aflevering is er op dit apparaat als standaard toebehoren een schroevedraaier nr 2 aangebracht Kontroleer dit schroefstuk op beschadiging Gebruik van een beschadigd of versleten schroefstuk kan gevaar opleveren en schade aan uw werkstuk veroorzaken Kontroleer voor het werk altijd even het schroefstuk en vervang het door een nieuw als het tek...

Страница 45: ... de eerste schroef tegenover de markering van het schuifmechanisme Zie Afb 14 en Afb 15 VOORZICHTIG Als de schroevenband niet precies staat ingesteld zoals aangegeven in de afbeeldingen kan dit leiden tot beschadiging van het oppervlak van uw werkstuk door onvoldoende doorvoer of verspilling van schroeven door overmatige doorvoer 2 Verwijderen Wanneer de schroevenband is opgebruikt of wanneer u ee...

Страница 46: ... om de boor linksom te laten draaien Zie Afb 19 De en merktekens zijn op de buitenkant van het frame aangebracht 䡬 Door de trekschakelaar over te halen zal het toerental traploos variëren tussen de 0 en 2000 omwentelingen per minuut OPMERKING Wanneer de trekschakelaar slechts een beetje wordt overgehaald zult u een pieptoon horen Dit is het geluid van de motor en duidt niet op een storing OPGELET ...

Страница 47: ...arlijk omdat het schroefstuk dan kan slippen Vervang het schroefstuk door een nieuwe 2 Inspectie van de bevestigingsschroef Alle bevestigingsschroeven moeten regelmatig geïnspecteerd en gecontroleerd worden of zij juist aangedraaid zijn Wanneer één van de schroeven losraakt dan moet deze onmiddellijk opnieuw aangedraaid worden Gebeurt dat niet dan kan dat tot aanzienlijke gevaren leiden 3 Reininge...

Страница 48: ...e gemeten waarden zijn verkregen overeenkomstig EN50144 Het doorsnee A gewogen geluiddruknivo is 93 dB A Het standaard A gewogen geluiddruknivo 106 dB A Draag gehoorbescherming Typische gewogen effektieve versnellingswaarde 10 5 m s2 05Ned_WF4DY_WE 12 24 08 18 35 47 ...

Страница 49: ...ción momentánea cuando utiliza herramientas eléctricas puede dar lugar a importantes daños personales b Utilice un equipo de protección Utilice siempre una protección ocular El equipo de protección como máscara para el polvo zapatos de seguridad antideslizantes casco o protección para oídos utilizado para condiciones adecuadas reducirá los daños personales c Evite un inicio involuntario Asegúrese ...

Страница 50: ...llos sobresalientes Coloque el atornillador en línea recta con el tornillo y atornille 7 Utilice los tornillos prescritos No utilice ningún otro tornillo Si utilizase otros tornillos el trabajo resultaría anormal tornillos caídos o sobresalientes y problemas atascamiento de los tornillos y desgaste de las brocas 8 Proteja sus ojos con gafas protectoras Cuando trabaje utilice siempre gafas protecto...

Страница 51: ...o A intervalos de 1 segundo 2 Inserte la batería en el cargador Coloque la batería de modo que la placa de características quede encarada hacia la placa de características del cargador y empuje la batería hasta que haga contacto con la placa inferior Vea las Figs 2 y 3 PRECAUCIÓN 䡬 Si inserta las baterías al revés no sólo será imposible cargarlas sino que también es posible que el fusible se qyeme...

Страница 52: ...nderá durante 0 5 segundos Apagada durante 0 5 segundos Iluminación permanente Se encenderá durante 0 5 segundos No se encenderá durante 0 5 segundos Apagada durante 0 5 segundos Se encenderá durante 0 1 segundos No se encenderá durante 0 1 segundos Apagada durante 0 1 segundos Illuminación permanente Parpadeo ROJA Durante la carga Carga completa Iluminación ROJA Parpadeo ROJA Antes de la carga Ca...

Страница 53: ... puede no encenderse en rojo En tales casos deje primero que se enfríe la batería e inicie luego la carga 䡬 Cuando la lámpara piloto destelle rápidamente en rojo a intervalos de 0 2 segundos realice una comprobación y extraiga los objetos extraños del orificio de instalación de batería del cargador Si no hay ningún objeto extraño es posible que la batería o el cargador funcione mal Llévelos a un a...

Страница 54: ... brocas Como accesorio estándar esta máquina tiene instalada una broca n 2 plus Inspeccione siempre la broca para asegurarse de que no esté dañada La utilización de brocas desgastadas podría causar el mal funcionamiento al atornillar Inspeccione la broca antes de trabajar y reemplácela rápidamente por otra nueva cuando comience a desgastarse Cuando haya que reemplazar la broca debido a daños o a c...

Страница 55: ...ta de correa de forma que el primer tornillo quede alineado con la marca de tornillo de la guía de deslizamiento Fig 14 y Fig 15 PRECAUCIÓN Si la cinta no estuviese colocada como se muestra en la figura la broca podría dañar la superficie el panel avance inadecuado y se desperdiciarían tornillos avance excesivo 2 Extracción Cuando se hayan acabado los tornillos de la cinta o para quítar una correa...

Страница 56: ...Cuando atornille presione la unidad pricipal firmemente hasta que el tornillo quede completa mente atornillado Si aflojase la presión sobre el atornillador durante el atornillad el tornillo podría quedar sobresaliendo 4 No atornille un tornillo sobre otro Si lo hiciese el tornillo se caería y el siguiene no avanzaría Fig 17 Tornillos utilizados No de aprietes Tornillo para paneles r25 Aprox 450 To...

Страница 57: ... apretarlo inmediatamente El no hacer esto provocaría un riesgo serio 3 Limpieza en el exterior Cuando el aprietatuercas esté sucio limpiarlo con un paño suave y seco o con un paño mojado en agua jabonosa No utilizar disolventes clóricos gasolina o disolventes parapinturas ya que éstos funden los materiales plásticos 4 Almacenamiento Guarde el aprietatuercas en un lugar en el cual la temperatura s...

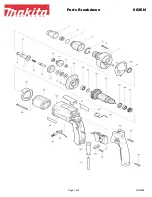
Страница 58: ...her F 26 Steel Ball D3 175 27 Anvil H 28 Steel Ball D5 556 29 Hammer 30 Steel Ball D3 97 31 Washer G 32 Spring Item No Part Name 33 Stopper A 34 Washer A 35 Final Gear 36 Spindle 37 Ball Bearing 608VVMC2EPS2L 38 Washer A 39 Housing A B Set 40 Name Plate 41 Second Pinion 42 Metal 43 Thermal Protector 44 Motor Ass y 45 Internal Wire 46 Machine Screw W Sp Washer M3 5 47 Switch Ass y 48 Pushg Button 4...

Страница 59: ...und Anschrift des Händlers Bitte mit Namen und Anschrift des Handlers abstempeln CERTIFICADO DE GARANTIA 1 Número de modelo 2 Número de serie 3 Fecha de adquisición 4 Nombre y dirección del cliente 5 Nombre y dirección del distribudor Se ruega poner el sellú del distribudor con su nombre y dirección CERTIFICAT DE GARANTIE 1 No de modèle 2 No de série 3 Date d achat 4 Nom et adresse du client 5 Nom...

Страница 60: ...59 Español 1 2 3 4 5 07Back_WF4DY_WE 12 24 08 18 36 59 ...

Страница 61: ...60 Español 07Back_WF4DY_WE 12 24 08 18 36 60 ...

Страница 62: ...61 Español 07Back_WF4DY_WE 12 24 08 18 36 61 ...

Страница 63: ...es C E 1541 91015 EVRY CEDEX France Tel 33 1 69474949 Fax 33 1 60861416 URL http www hitachi powertools fr Hitachi Power Tools Belgium N V S A Koningin Astridlaan 51 1780 Wemmel Belgium Tel 32 2 460 1720 Fax 32 2 460 2542 URL http www hitachi powertools be Hitachi Fercad Power Tools Italia S p A Via Retrone 49 36077 Altavilla Vicentina VI Italy Tel 39 0444 548111 Fax 39 0444 548110 URL http www hi...
Страница 64: ...onsabilidad que este producto está de acuerdo con las normas o con los documentos de normalización EN60745 EN55014 y EN61000 según indican las Directrices del Consejo 2004 108 CE y 98 37 CE Esta declaración se aplica a los productos con marcas de la CE English EC DECLARATION OF CONFORMITY We declare under our sole responsibility that this product is in conformity with standards or standardized doc...
Отзывы: