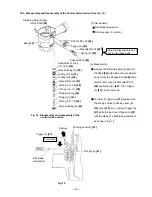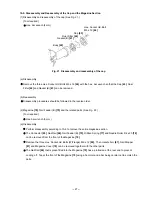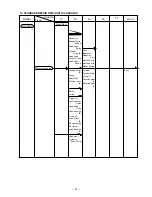
--- 30 ---
Check that Nail Feeder (B) [75] slides in the Magazine [79] smoothly.
Check that Plunger (A) [61] moves smoothly.
Check that Adjuster (A) [34] turns smoothly by hand.
Check that there is no air leakage from each part.
Set the Change Knob [50] to "contact actuation" (see 5-2). While driving nails with an air pressure of
4.5 kgf/cm
2
(63 psi), check that there is no misfiring and bending of nails.
Note: Before conducting the driving test, turn Adjuster (A) [34] to the deepest position.
Set the Change Knob [50] to "single actuation (single sequential actuation)" (see 5-2). Check that the Model
NR 90AC3 operates by pressing the Pushing Lever (A) [37] against a test piece first then pulling Trigger (A)
[47]. Check that the Piston [19] is still showing from the Nose [30] tip (outlet of nails) after the Pushing Lever
(A) [37] is released from the test piece with the Trigger (A) [47] pulled.
Recheck the tightening torque of each screw.
Check that the pushing lever ass'y slides smoothly.
Check that the machine will not operate only by pulling Trigger (A) [47]. Also check that the machine will not
operate only by depressing Pushing Lever (A) [37].
11. INSPECTION AND CONFIRMATION AFTER REASSEMBLY
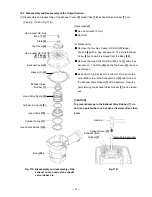
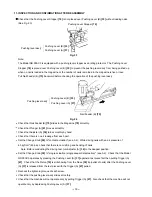
Check that the Pushing Lever Stopper [74] is not placed over Pushing Lever (B) [33] without loading nails.
(See Fig. 23.)
Pushing lever ass'y
Pushing Lever Stopper [74]
Fig. 23
Note:
The Model NR 90AC3 is equipped with a pushing lever stopper as an idling protector. The Pushing Lever
Stopper [74] is placed over Pushing Lever (B) [33] to prevent the pushing lever ass'y from being pushed up
when no nail is loaded in the magazine or the number of nails remained in the magazine is five or less.
Pull Nail Feeder (B) [75] backward before checking the operation of the pushing lever ass'y.
Pushing Lever (B) [33]
Pushing Lever (A) [37]
Nail Feeder (B) [75]
Fig. 24
Pushing Lever (B) [33]
Pushing Lever (A) [37]
Pushing lever ass'y
Содержание NR 90AC3
Страница 39: ......

