


-1-
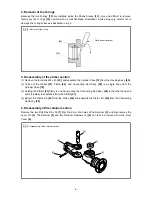
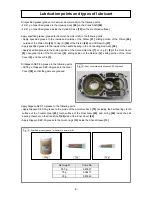
Fig. 1 • Disassembly of the armature ass’y
WARNING: Be sure to disconnect the power cord plug from the power supply before conducting
repair. Otherwise, the motor may suddenly turn on, posing a very dangerous situation.
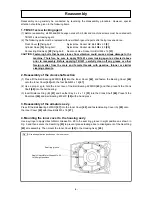
1. Precautions on disassembly and reassembly
[Bold]
numbers in the description below correspond to the item numbers in the parts list and exploded
assembly diagram for the Model H 65SD3.
NOTE: If it is difficult to loosen and remove the fixing bolts, use an appropriate heating device to
heat the bolts to approximately 80°C (176°F).
1. Disassembly of the armature ass’y
(1) Loosen the four Bolts M4 x 8
[81]
, remove the Cap Cover
[82]
, Cap Rubber
[83]
, Brush Cap
[84]
and
Carbon Brush
[85]
. Be careful not to lose any removed parts.
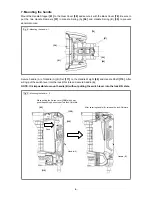
(2) Loosen the four Bolts M8 x 40
[23]
, and remove the Cylinder Case
[19]
. Next, loosen the Bolt M8 x 16
[31]
and then remove the Connecting Rod Ass’y
[28]
and the Crank Washer
[30]
. Leave the Striker
[21]
and the Piston
[26]
as they are.
Disassembly
REPAIR GUIDE
100 mm in dia.
Press the end surface of the
armature with a hand press.
Armature shaft
Tubular jig
[42]
[48]
[70]