background image

46

trouble shooting guide

- digital sound

information

remedy

possible cause

problem identification

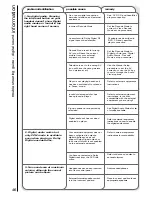
1. No digital audio. Pressing

the info/recall button on your

handset doesn’t show Digital

audio modes or format in top

right hand corner of screen.

No or poor digital connection
between television and external
equipment

See ‘DVD, CD and LaserDisc
player connection’

Incorrect Decode Mode

Set the Decode Mode to
correct AV (see Decode
Mode set up procedure)

Decode Mode is set for wrong
AV (you will have the correct
picture from your external
equipment but no sound)

Set the Decode Mode to
Digital or Auto (see ‘Digital
Audio Status - Decode
Mode’ set up procedure)

Television is set to the wrong AV
(you will have the wrong picture
or no picture at all)

Use the Manual Setup
procedure to set the AV
correctly, or use the AV key
to cycle through the Audio
Visual options.

Player is not playing because it
has been switched off or placed
in ‘Pause’ mode.

Refer to external equipment's
instructions

Invalid or damaged disc has
been placed in player.

Refer to external equipment
instructions. Is the disc
compatible with the external
equipment you are using?

Signal options not supported by
television.

See Digital Audio Status for list
of modes available.

Digital audio out has not been
enabled on player.

Refer to external equipment
instructions on how to enable
the digital audio output.

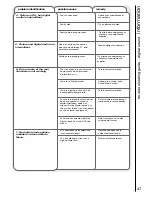
2. Digital audio works but

only PCM mode is available

even when playing a  Dolby

Digital encoded disc.

Your external equipment has not
been configured to output a
digital bitstream, does not
support Dolby Digital output, or
the correct format is not enabled
on the external equipment.

3. No sound even at maximum

volume, although the correct

picture can be seen.

Headphones have been inserted
into front control panel.

Remove headphones.

External/internal speaker switch
is in the incorrect position.

Place in correct position to use
appropriate speakers.

You have not selected a Dolby
Digital track from the DVD title
menu

Refer to title menu on disc to
set audio format

Laserdisc with Dolby Digital RF
signal cannot be detected

Fit adaptor as described in
‘DVD, CD and LaserDisc
player connection’

Refer to external equipment
instructions for compatibility.

Содержание C28WF535N

Страница 1: ...Users Guide C28WF535N C32WF535N S C R E E N ...

Страница 2: ... sound works by delivering at maximum 5 separate audio channels left right centre left surround right surround and also a LFE Low Frequency Effects channel These independent channels allow for a more precise localisation of sounds and a more convincing realistic ambiance Important Dear HITACHI customer Congratulations on your purchase of the very latest state of the art television from HITACHI At ...

Страница 3: ...1 programme sound and vision adjustment picture controls 22 NICAM and stereo sound controls 23 audio and equaliser controls 24 sound mode 26 digital audio setup 28 digital audio status decode mode 29 digital audio status display format 30 speaker setup 31 surround setup 33 television features sleep timer and on screen display 36 wide screen viewing 37 Teletext operation 39 other equipment other eq...

Страница 4: ...s or take chances with electrical equipment of any kind it is better to be safe than sorry DO be careful with any glass panels or doors on equipment DO consult your dealer if you are in any doubt about installation operation or safety of your equipment DO place your TV on a flat surface or if supplied the stand accessory DO NOT remove any fixed cover as this may expose dangerous voltages DO ensure...

Страница 5: ...new batteries of different types since this can result in leakage or in extreme cases fire or explosion always Store unused batteries in their packaging and away from metal objects which may cause a short circuit resulting in leakage or in extreme cases fire or explosion always Remove dead batteries from equipment and all batteries from equipment that is to be left for long periods of time without...

Страница 6: ...ith external equipment This socket is for use with external equipment Used with headphones 3 5mm stereo jack plug required Used to access your on screen MAIN MENU for TV features adjustment Used to change the TV channel up or down or cursor up and down when using the On Screen Display menus Used to increase or decrease your TV s sound or cursor right and left when in On Screen Display menus on off...

Страница 7: ...inet or wall alcove please ensure there is at least a 100mm 10cm gap to the sides rear and top of the television This is to allow for adequate ventilation Do not allow soft furnishings such as curtains to be draped over the TV whilst in operation Never place the TV onto a carpet during normal operation this could obstruct ventilation slots on the base of the TV Always place the TV on a flat surfac...

Страница 8: ...V1 scart socket located at the rear of your TV A dedicated programme number may be assigned to AV1 allowing you easier access to external equipment viewing How to assign an AV signal to dedicated programme numbers is explained in signal source entry section Scart leads should be fitted between your TV and other equipment to enhance your picture and sound quality Scart leads are essential if you ha...

Страница 9: ... features cursor left Use this button to move the menu selection box up This button is used to confirm a highlighted selection programme tuning handset controls This button is used to return to the previous on screen menu you were viewing or to cancel a selection number letter buttons These number buttons can also be used to enter letters which are required for some features e g programme name cha...

Страница 10: ... controls Press both buttons simultaneously to stop recording only available if VCR is Viewlink compatible see viewlink section VCR stop This button allows you to switch between the various wide screen features of your TV see wide screen viewing section 16 9 button This allows you to directly input known broadcasting CH or frequency numbers frequency VCR Operation Your handset incorporates control...

Страница 11: ...s button to return to normal TV operations when in the Teletext mode Used in Teletext mode to show hidden information eg quiz pages answers reveal television expand subtitles Pressing this button will take you to the index index In Teletext mode views the previous page In TV mode returns from your current viewing channel to the previous one swap Use this to freeze the Teletext page on display to p...

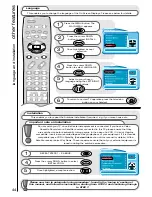
Страница 12: ...h a Satellite receiver select Sky News These measures ensure that all your external equipment is tuned in during the autotune procedure The first screen viewed will ask you to choose the language of your TV s display Use the LEFT RIGHT cursor buttons to choose your language To make your programme tuning easier HITACHI have installed an automatic tuning procedure to find the programmes Switch your ...

Страница 13: ...d AUTOTUNE will begin 4 Once highlighted accept selection 3 Once the country of choice is viewed press the OK button to continue 6 TV set up and automatic tuning procedure tuning in PLEASE NOTE If your VCR is Viewlink compatible your TV will now download the programme information see viewlink section of this manual Next the country screen requires you to select the country in which you will be wat...

Страница 14: ...s through a number of different entry methods Follow the steps below and choose one of the 4 entry methods to input broadcast frequencies VCR should be tuned into Programme 0 Follow the steps below to tune in your VCR if it was not found during Autotune See programme sort section to move to channel 0 manual tuning procedure tuning in Use the cursor keys to move the selection bar over the programme...

Страница 15: ...ey is pressed again you can enter a two digit S band number using buttons 0 9 on your handset entry method 4 If the CH key is pressed again you can manually input a five digit frequency if known using buttons 0 9 on your handset To return to normal TV operation press the TV button on your handset 9 Once the method of entry has been decided upon and the new frequency or channel entered this can the...

Страница 16: ... operation press the TV button on your handset Use the UP DOWN cursor keys to select the programme you wish to move 1 2 3 4 5 6 8 9 10 When a channel has been selected you also have the option to hide a programme this makes your TV skip the hidden channel when the UP DOWN program controls are used to change channels Press the 0 digit on your handset and you will see the text within your chosen sel...

Страница 17: ... 3 4 5 6 Press the UP DOWN cursor keys or 0 9 number keys to edit the name 7 The number buttons on your handset can also be used to enter letters To enter letters Press the number key twice for the first corresponding letter written above the key three times for the second etc e g Press number key 2 twice for A three times for B and four times for C Press OK key to confirm change or X key to cance...

Страница 18: ...unction can also be started from the VCR refer to VCR instruction manual 1 A Viewlink compatible VCR is necessary 2 The VCR must be connected to the AV1 socket on the TV by a fully wired scart cable Viewlink features PLEASE NOTE If No Viewlink compatible VCR found is displayed the download was not performed correctly Before trying to download again ensure the following The VCR is turned ON The VCR...

Страница 19: ...d the images from AV1 terminal will be displayed on screen VCR Is Already Recording The VCR cannot record because it is already recording The VCR is recording from the televisions tuner If the channel is changed on the television it will affect the recording However menus and OSDs will not affect the recording The VCR is recording from one of its AV connections The television can be switched off a...

Страница 20: ...ER PASSWORD is highlighted 4 PLEASE NOTE No other selection is available at this point Enter 1234 on handset this password is preset at the factory 6 Press the cursor DOWN button to select NAME Once highlighted accept selection 8 The number buttons on your handset can also be used to enter letters To enter letters Press the number key twice for the first corresponding letter written above the key ...

Страница 21: ...he cursor down button to select CHANGE PASSWORD Once highlighted accept selection 1 ENTER PASSWORD will be highlighted 2 IMPORTANT For future reference write your password in the box provided and keep in a safe place PASSWORD Press O K to accept selection 3 The number buttons on your handset can also be used to enter letters To enter letters Press the number key twice for the first corresponding l...

Страница 22: ... WARM tones of your picture slide to the LEFT to exaggerate the BLUE COOL tones of your picture Equal balance is at the centre of the scale CTI Colour Transient Improvement This control lets you improve the clarity of your television s colour edges VM Velocity Modulator this increases or decreases the sharpness of your television s picture so it appears less blurred especially in left and right ed...

Страница 23: ...uage broadcast is being received Use the button to access the mode while receiving a dual language broadcast channel 2 When this symbol is displayed channel 2 of a dual language broadcast is being received Use the button to access the mode while receiving a dual language broadcast notes on dual language transmissions A dual language transmission is where channel 1 and channel 2 of the NICAM stereo...

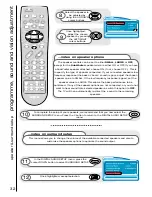
Страница 24: ...on to obtain MAIN MENU Press the cursor DOWN button to select AUDIO Once highlighted accept selection 1 2 3 4 5 6 7 volume control This control is used to increase or decrease the sound from your TV s speakers This also sets the volume at switch on loudness on off control When listening to your TV at a low volume switch this control ON to compensate for the lack of low and high frequencies mute TV...

Страница 25: ...it emphasizes the flute and string instruments of your TV s sound when decreased it has a soothing effect on the sound 10kHz high range The sharp sound of triangles and cymbals are emphasised if this control is increased To return to normal TV operation press the TV button on your handset 8 9 10 audio and equaliser controls programme sound and vision adjustment equaliser The EQUALISER menu is used...

Страница 26: ...sion the sound mode gives you two options to choose from Dolby Pro logic or stereo Dolby Pro Logic Digital 3DS This mode is particularly suitable for films and programmes that display the Dolby Pro Logic caption Dolby Pro Logic Dolby Digital can only be achieved by the addition of an external surround sound amplifier and speaker system Sockets have been provided to enable you to do so if you wish ...

Страница 27: ...digital audio capabilities increasing the precise localisation of sounds improving the ambience experienced Dolby ProLogic In this mode surround sound can be created Stereo Stereo downmix mode which inputs the Dolby Digital x y z information through your televisions internal left and right speakers 44 1 48kHz PCM signal options Dolby Pro Logic In this mode surround sound can be created Stereo Ster...

Страница 28: ... are present the digital source takes priority Analogue The television ignores the digital input in either the optical or coaxial connector and instead uses the analogue information on the selected AV as its source digital input source The digital audio setup menu allows the digital audio decoder in your television to be assigned to the AV scart input that your DVD CD player is connected to listen...

Страница 29: ...und left surround right and centre and a Low Frequency Effects LFE channel Your television takes advantage of data on the disc to tell you the number of different channels available on the decoded track notes on Laserdisc connection A Laserdisc source with a Dolby Digital RF output cannot be connected to this TV directly Please obtain an adaptor from an electrical retailer Also note that when usin...

Страница 30: ...ailable Main channels but no LFE channel Surround mono in this case no LFE channel No surround or LFE channels available All channels except centre Left Right mono surround and LFE Left right and LFE only Centre and LFE only All channels except centre and LFE Left right and mono surround only Left and right channels only may be encoded in ProLogic Centre channel only mono This chart explains what ...

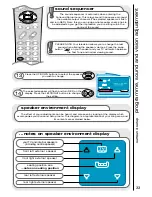
Страница 31: ...r large small or no speaker at all has been connected Whatever your choice this menu allows for greater flexibility and ultimately an improved sound performance 31 speaker setup programme sound and vision adjustment Press the cursor DOWN button to select SPEAKER SETUP Once highlighted accept selection 6 7 Press the cursor DOWN button to select DIGITAL AUDIO SETUP Once highlighted accept selection ...

Страница 32: ... the type of speaker connected If your connected speakers low frequency response the bass or boom sound is poor adjust the chosen speaker value to SMALL If the low frequency response is good set the speaker value to LARGE This allows the bass performance to be optimised If any of the speaker options are not connected or you do not want to hear sound from selected speakers switch this option to OFF...

Страница 33: ...tup menu This diagram is a representation of your living area and its contents are explained below Press the UP DOWN buttons to select the speaker you wish to change 13 The selected speaker will flash and turn RED on the display Press the LEFT RIGHT buttons to change the setting 14 notes on speaker environment display your TV and internal speakers including centre speaker front right external spea...

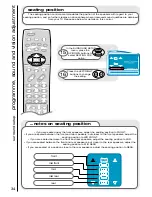
Страница 34: ...speakers adjust the seating position to MID If you are seated between the front and rear speakers but closer to the rear speakers adjust the seating position to MID REAR If you are seated at a position close to the rear speakers adjust the seating position to REAR front mid front mid rear rear mid surround setup programme sound and vision adjustment 34 seating position The seating position control...

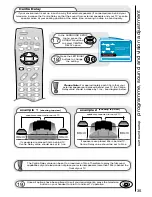
Страница 35: ...more than 150cm behind the front of your TV speakers connected to rear of TV speakers connected to rear of TV Once all options have been altered to suit your requirements press the television button on your handset to return to normal TV operation 19 surround setup programme sound and vision adjustment 35 In the SURROUND SETUP menu press the UP DOWN buttons to select CENTRE DELAY option 17 Press t...

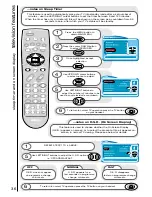
Страница 36: ... left this will be shown on the screen as a countdown from 59 seconds to zero after which your TV s status will be standby notes on O S D On Screen Display This feature is used to choose whether the On Screen Display O S D appears on screen or to select the amount of time it appears on screen in normal TV viewing Please see below for details REPEAT STEPS 1 TO 4 ABOVE 1 Use LEFT RIGHT buttons to ad...

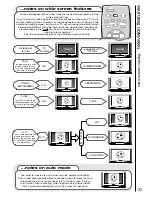
Страница 37: ...atures notes on auto mode The Auto format is also one which can be selected manually Auto mode automatically detects various screen formats that are transmitted in either conventional 4 3 or wide screen 16 9 or 14 9 format After detecting which signal is being transmitted the TV will automatically switch to the correct screen ratio 4 3 4 3 PANORAMIC 14 9L 4 3 14 9L 14 9 ZOOM 4 3 A U T O The 4 3 br...

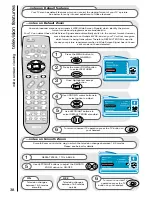
Страница 38: ...tton to obtain MAIN MENU Press the cursor DOWN button to select FEATURES Once highlighted accept selection 1 2 3 4 Use LEFT RIGHT buttons to select DEFAULT ZOOM standard 5 notes on Default features Your TV also has default features which can control the viewing format of your TV s picture See below for entry into and adjustment of these features notes on Smooth Zoom Smooth Zoom controls the way in...

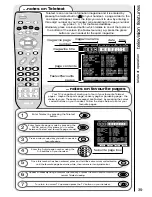
Страница 39: ... number using the 0 9 buttons on your handset time date magazine name magazine page number page contents Fastext favourite pages Once this number has been entered press and hold the same colour coded button until the favourite page box turns white then returns to its original colour favourite page box 3 4 5 6 teletext operation television features magazine title To return to normal TV operation pr...

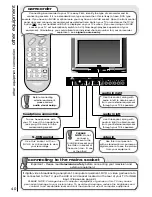
Страница 40: ...your TV screen If you are using an S VHS socket your TV will automatically switch to AV3 Now begin playback operation of your equipment Alternatively you could allocate an individual channel number for your camcorder equipment see signal source entry connecting to the mains socket Important Please read television safety before connecting your television and external equipment headphone connection ...

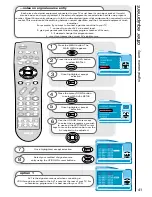
Страница 41: ...amme 0 is best used for your VCR 1 2 3 4 5 6 8 notes on signal source entry Each piece of external equipment connected to your TV must have its own input socket It would also be easier and more organized if the external equipment connected also had its own program number Signal Source entry allows you to tell the allocated program what equipment is connected to which socket This would make the swi...

Страница 42: ...rough a scart lead to the AV4 socket at the rear of your TV Once the signal source for each relevant program number has been decided this can be stored in your TV s memory by pressing the OK button To return to normal TV operation press the TV button on your handset 9 10 notes on RF signal source RF is the signal source used for standard television broadcasting and this should be used as the setti...

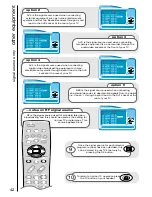
Страница 43: ...justed correctly when connecting external equipment to your TV an incorrect setting may lead to poor picture performance audio visual setup other equipment To return to normal TV operation press the television button on your handset 8 AV1 NORM Use this setting for VHS video recorders decoders etc SVHS Use this setting for SVHS equipment e g video recorders DVD players AV2 4 NORM Use this setting f...

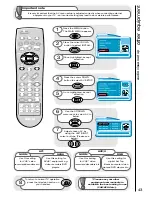
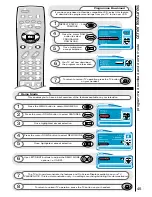
Страница 44: ...utotune installation if required e g if you move house etc Please now turn to automatic tuning procedure found in the tuning in section of this manual and follow the instructions starting from STEP 4 and continuing through to STEP 7 important note on Installation Do not switch your TV on until all external equipment is connected If you have a Video Cassette Recorder or a Satellite receiver connect...

Страница 45: ...ief overview of the features available on your television To return to normal TV operation press the TV button on your handset 8 The TV will now demonstrate the features and On Screen Displays available on your TV PLEASE NOTE This is a demonstration only no settings are changed during this demonstration 7 45 Press the MENU button to obtain MAIN MENU Press the cursor DOWN button to select FEATURES ...

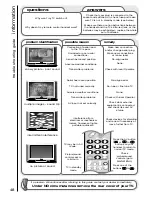
Страница 46: ... been placed in player Refer to external equipment instructions Is the disc compatible with the external equipment you are using Signal options not supported by television See Digital Audio Status for list of modes available Digital audio out has not been enabled on player Refer to external equipment instructions on how to enable the digital audio output 2 Digital audio works but only PCM mode is ...

Страница 47: ... have not selected a Dolby Digital track from the DVD title menu Refer to title menu on disc to set audio format Your external equipment has not been configured to output a digital bitstream does not support Dolby Digital output or the correct format is not enabled on the external equipment Refer to external equipment instructions for compatibility 5 Picture and digital audio are intermittent Has ...

Страница 48: ...ndby mode Press the AV button or to buttons on your handset to return to normal TV mode Check picture sound controls go to MAIN MENU Press one of the buttons to Why doesn t my remote control handset work Why won t my TV switch on Check that your plug is connected to the socket and switched on check fuse and make sure TV is not in standby mode see below Make sure there are no obstructions between t...

Страница 49: ...rcial or communal use this guarantee does not cover the replacement of exhausted batteries the adjustment of user controls or aerial alignment any parts replaced under this guarantee shall become the property of Hitachi Home Electronics Europe Ltd please note that evidence of the date of purchase will be required before any service under this guarantee is carried out Use the boxes provided below t...

Страница 50: ...educing volume settings to sensible levels can reduce power consumption as well as reducing noise pollution and reducing contrast can provide a more pleasing picture as well as reducing power consumption Hitachi Home Electronics Europe Ltd manufacturing site in Wales is a BSI Registered Company and has been assessed to ISO 9001 Quality Management Standard certificate FM32366 Your television has be...

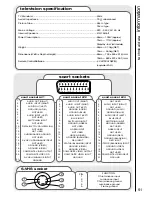
Страница 51: ...GREEN NOT USED GREEN INPUT NOT USED GROUND RED GROUND BLANKING RED INPUT STATUS BLANKING INPUT GROUND VIDEO GROUND VIDEO NOT USED COMPOSITE VIDEO INPUT GROUND scart socket AV2 AUDIO OUT RIGHT AUDIO INPUT RIGHT AUDIO OUT LEFT GROUND AUDIO GROUND BLUE AUDIO INPUT LEFT BLUE INPUT SWITCHING INPUT GROUND GREEN NOT USED GREEN INPUT NOT USED GROUND RED GROUND BLANKING RED INPUT STATUS BLANKING INPUT GROU...

Страница 52: ... ITALY Tel 39 02 487861 Tel 39 02 38073415 Servizio Clienti Fax 39 02 48786381 2 Email customerservice italy hitachi eu com HITACHI Europe AB Box 77 S 164 94 Kista SWEDEN Tel 46 0 8 562 711 00 Fax 46 0 8 562 711 13 Email csgswe hitachi eu com HITACHI EUROPE S A S Lyon Office B P 45 69671 BRON CEDEX FRANCE Tel 04 72 14 29 70 Fax 04 72 14 29 99 Email france consommateur hitachi eu com HITACHI EUROPE...

Отзывы: