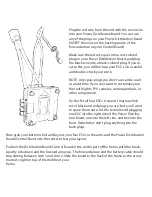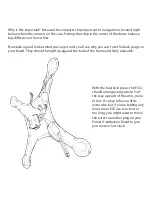
Having trouble putting your cap screws on Motors 2 and 4? That’s okay. Motors 1 and 3
are normal thread and adhere to the old “righty-tighty, lefty-loosy” rule. The threads are
REVERSED on Motors 2 and 4, so they’re “lefty-tighty, righty-loosey.” This keeps your cap
screws from coming off when your motors spin! Tighten up your cap nuts with a pair of
pliers (or a small rachet, if you have one), but don’t overtighten or you may snap your shaft.
A firm tightening is all it needs.
Take your Hiro outside in a clear, flat area where there are no pets or people who may be hit
by it. Place it on the flat ground, turn on your transmitter first, and then plug in the battery
and tuck it inside your drone. Arm the drone and VERY SLOWLY increase the throttle until it
lifts off the ground and hovers.
If if does, you’re ready to close it up for good.
If it doesn’t, check your propeller rotations and make sure you have the right propellers on
the right motors. Fix those issues and repeat the hover test until it lifts off the ground and
hovers.
Land, disarm, disconnect your battery, and take it back inside for the final finishing touches.
used again. You’ll need one flat per motor. Repeat until all four motors are wearing adapters.
Then get out a 10x4.5R prop and, with the numbers on the propeller facing up, slide it down
the shaft of Motor 1, fitting it over the adapter and firmly onto the motor. Secure it with the
cap screw and tighten it with pliers or a small ½-inch rachet. Make sure it’s tight, but don’t
overtighten or you may break the shaft.
Repeat this process with a 10x4.5R prop on Motor 3.
Then get out your 10x4.5 props and attach them to Motors 2 and 4.

